
 100% Security Verified | No Subscription Required | No Malware


 ChatGPT
 Perplexity
 Gemini
 Claude
 Grok
Grok
This collection of short film video LUT-style filters in Filmora is designed for content creators who want cinematic color, depth, and emotion without a complicated grading workflow.
Use these presets to quickly match your short film's tone, from moody character dramas to sunlit coming-of-age stories, while keeping skin tones natural and your story front and center.
In this article
Dusk Street Drama and Gritty Character Moments
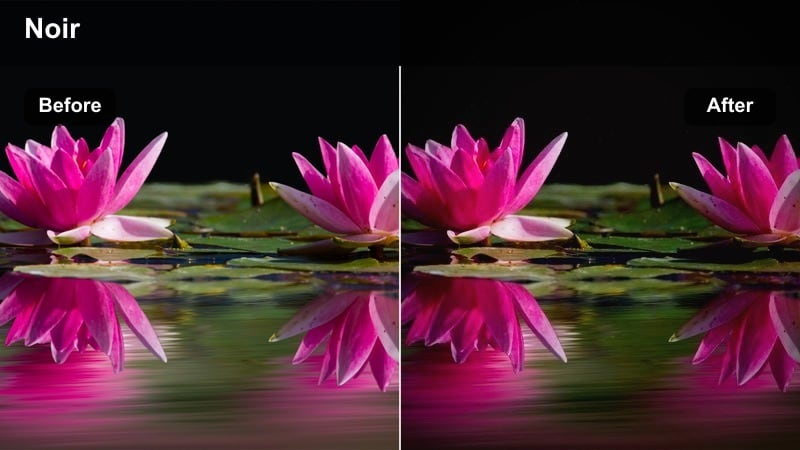
Urban Noir Contrast
- Effect look: High-contrast, slightly desaturated streets with deep shadows and crisp highlights for tense dialog scenes.
- Best for: Nighttime alley conversations, rooftop arguments, and handheld chase scenes in the city.
- Editing tip: Lower overall exposure slightly, then add a soft vignette to keep focus on your subject's face in crowded frames.
Urban Noir Contrast gives your short film a punchy, hard-edged look that immediately suggests tension and danger. In Filmora, it deepens shadows around alleys, stairwells, and rooftop railings while keeping key details like eyes and facial lines readable. Use it on dialog-heavy scenes where the city feels like a looming presence, and let the reduced saturation strip away distractions so performances and blocking carry the weight.
Apply this filter to your base-corrected footage, then fine-tune exposure and contrast so important story beats do not disappear into crushed blacks. Combine it with Filmora vignette and a touch of sharpen to sculpt attention to the center of frame, especially in wide city shots. When cutting between close-ups and mediums, keep the filter intensity consistent so the noir look feels unified across your entire sequence.
Let AI Suggest Cinematic Color Matches
Filmora's AI-driven color tools can quickly scan your short film clips and suggest LUT-style filter combinations that complement the mood you are building. Instead of guessing which look will fit, you can preview intelligently matched options tuned for contrast, warmth, and saturation.
Once AI proposes a palette, adjust the strength of each suggested filter and refine exposure or saturation until the scene supports your narrative beats. This helps you maintain continuity across locations while still giving each key moment a distinct cinematic touch.
 secure download

Preview Filters in Real Time on Your Short Film
With Filmora, you can hover over each filter in the Effects panel and instantly preview how Urban Noir Contrast or any other look will reshape your scene. This real-time auditioning makes it easy to compare gritty, cool, and warm aesthetics without committing or rendering first.
Drop your key dialog or action clip onto the timeline, duplicate it on a second track, and try different filters on each layer. Toggling visibility between tracks lets you see which color treatment best matches the emotional intensity of your story beat.
secure download1000+ Video Filters and 3D LUTs
Beyond these short film video LUT-style presets, Filmora includes a large library of filters and 3D LUTs inspired by popular films, camera profiles, and genre looks. You can stack several effects together, save them as custom presets, and quickly reuse your signature grade across scenes and projects.
Start with a 3D LUT for your base tone, then layer stylistic filters like Urban Noir Contrast, Sunset Soft Haze, or Fluorescent Office Unease for scene-specific character. Adjust HSL, curves, and exposure after the stack to keep skin tones natural while your environments stay bold and cinematic.
secure downloadSodium Vapor Glow

- Effect look: Warm, amber-tinted streetlights with soft halation around highlights for a nostalgic city-night feel.
- Best for: Late-night bus stops, parking lot monologues, and reflective walk-and-talk shots.
- Editing tip: Add gentle blur or Filmora's glow effect at low opacity to extend the halo around streetlights and car headlights.
Sodium Vapor Glow simulates the classic amber wash of old city streetlights, wrapping your characters in soft, nostalgic warmth. In Filmora, it pushes highlights toward orange-yellow while preserving subtle detail in skin tones, making late-night reflections and quiet conversations feel intimate and safe.
Use this filter on exterior night scenes where the story leans reflective rather than purely tense. After applying it, lightly blend Filmora's glow or blur effects to bloom the brightest bulbs and car lights, then trim intensity so faces stay readable. Cross-cutting between wide city frames and close-ups with the same filter reinforces emotional continuity through color.
Subway Teal Steel
- Effect look: Cool teal midtones with steel-blue shadows, creating a controlled, cinematic urban underground vibe.
- Best for: Subway platforms, underpasses, and interior train scenes with fluorescent lighting.
- Editing tip: Dial back saturation on green channels if your fluorescent lights look too harsh or unnatural.
Subway Teal Steel shifts your underground locations into a stylized cool palette that feels modern and tense. Filmora uses teal midtones and steel-blue shadows to turn bland fluorescent-lit spaces into cinematic environments, giving your characters a sense of isolation within the crowd.
Apply this filter to shots captured in subways, tunnels, and overpasses, then refine HSL settings to tame excessive greens from practical lights. Keep skin tones slightly warmer with secondary color adjustments so your actors stand out against the cold environment. When cutting a chase or confrontation, match this look across multiple angles to unify the underground world your story inhabits.
Golden Hour Romance and Soft Coming-of-Age Moments
Sunset Soft Haze
- Effect look: Warm, pastel highlights and lowered contrast with a light haze over bright areas for dreamy exteriors.
- Best for: Park benches, city overlook scenes, and quiet rooftop conversations at sunset.
- Editing tip: Underexpose your footage slightly in-camera, then let this filter lift the highlights for a glowing yet controlled look.
Sunset Soft Haze wraps your exteriors in gentle warmth, making golden-hour skies and backlit hair glow. Filmora lowers overall contrast while lifting highlights into soft pastels, giving romantic scenes and coming-of-age moments a dreamy, nostalgic finish without losing important details.
Use this filter on shots captured near real sunset or sunrise, especially where the sun sits just out of frame or behind your characters. After applying it, fine-tune exposure and white balance to keep skin tones natural while the background leans warm and hazy. Pair it with slower cuts and gentle camera moves to let the soft look breathe across your sequence.
Campus Film Warmth
- Effect look: Slight film-like grain, gentle warm midtones, and softened highlights that feel nostalgic yet clean.
- Best for: Student short films on campus walks, dorm exteriors, and first-date montages.
- Editing tip: Pair with a subtle Filmora grain effect and a slower cross-dissolve to emphasize the nostalgic pacing.
Campus Film Warmth gives everyday campus locations a subtle, film-inspired glow. In Filmora it nudges midtones warmer, softens bright areas, and pairs beautifully with an added grain effect to suggest memories, personal essays, and formative experiences without pushing into heavy stylization.
Apply this filter to walking-and-talking scenes, classroom exteriors, and lighthearted montages. Layer in Filmora's grain and modest cross-dissolves between shots to create a cohesive nostalgic rhythm. Keep the intensity moderate so that wardrobe colors and skin tones remain believable, allowing audience focus to stay on character relationships and growth.
Window Light Poetry
- Effect look: Soft, creamy highlights near windows, gentle skin smoothing, and slightly raised blacks for a tender mood.
- Best for: Bedroom day scenes, journal writing moments, and quiet introspective character beats.
- Editing tip: Position your subject side-on to the window and let the filter lift the bright side while keeping the shadow side soft.
Window Light Poetry emphasizes natural daylight streaming through windows, turning simple interiors into intimate, emotionally charged spaces. Filmora lifts highlights into a creamy texture, slightly raises blacks, and subtly smooths skin, which draws attention to eyes and expressions in close or medium shots.
Use this filter on contemplative scenes where characters read, write, or simply sit with their thoughts beside soft daylight. After applying it, balance exposure so the window side of the face glows while the shadow side stays gentle rather than harsh. Reduce clutter in the background with selective darkening or blur so the filter's soft, raised blacks frame your subject as the center of emotional focus.
Interior Tension, Thriller, and Confined Spaces
Apartment Shadow Split

- Effect look: Strong contrast with a clear split between light and shadow, emphasizing blinds, door cracks, and harsh lamps.
- Best for: Suspenseful living room scenes, interrogation-style kitchens, and tense phone calls in small apartments.
- Editing tip: Frame characters near edges of light sources and let this filter deepen the opposing side of their face for mystery.
Apartment Shadow Split heightens suspense by carving sharp lines between light and darkness across your frame. In Filmora it increases contrast and deepens shadows, making slats from blinds, door frames, and narrow windows feel like visual bars that trap your characters in their space.
Apply this filter to interior thriller sequences, especially when characters hover near a single lamp or window. After adding it, adjust brightness and contrast to preserve crucial facial detail on the lit side while allowing the other side to fall nearly into black. Hold your shots a bit longer and avoid over-cutting so the uneasy separation of light and shadow has time to work on your audience.
Fluorescent Office Unease
- Effect look: Pale, slightly green-shifted highlights with flattened contrast to mimic harsh office and hallway lighting.
- Best for: Corporate thriller scenes, late-night office confrontations, and eerie empty hallways.
- Editing tip: Pull down saturation slightly after applying to avoid cartoonish greens while keeping the sickly atmosphere.
Fluorescent Office Unease recreates the cold, institutional feel of overhead office lighting. Filmora flattens contrast, nudges highlights toward a faint green tint, and drains some warmth from skin tones, transforming ordinary corridors and cubicles into unsettling spaces perfect for corporate thrillers and psychological dramas.
Use this filter on scenes where characters roam empty offices, confront supervisors, or uncover secrets late at night. After applying it, gently reduce global saturation so the green cast stays believable rather than exaggerated. Combine the look with slow tracking shots, repeating patterns of desks or doors, and minimal music to intensify the atmosphere of monotony and dread.
Elevator Claustrophobia
- Effect look: Muted colors with crushed corners and slight vignette to emphasize tight, metallic interiors.
- Best for: Elevator confrontations, tense elevator stops, and tight corridor transitions.
- Editing tip: Combine with tighter focal lengths and minimal headroom to increase the feeling of no escape.
Elevator Claustrophobia compresses your image visually, muting colors and darkening frame edges so small spaces feel even tighter. Filmora adds a subtle vignette and desaturates metallic surfaces, focusing attention on nervous glances, hands, and body language inside lifts and narrow hallways.
Apply this filter to elevator scenes, cramped stairwells, and short corridor transitions between key story beats. Pair it with close framing, shallow depth of field, and minimal establishing shots to deny viewers a clear sense of scale. Adjust vignette strength to the edge of comfort so your audience feels the same lack of breathing room your characters experience.
City Night Montages and Reflective Transitions
Neon Reflection Pass
- Effect look: Vibrant neon magentas and cyans that pop in reflections on glass, puddles, and car windows.
- Best for: Night driving shots, storefront reflections, and city B-roll between story beats.
- Editing tip: Expose slightly darker so neon signs keep detail, letting the filter saturate color without blowing highlights.
Neon Reflection Pass intensifies city nightlife by boosting magenta and cyan tones, especially where light bounces off glass and wet surfaces. Filmora uses this filter to convert ordinary street signage and car lights into eye-catching reflections that add movement and energy to your montages.
Apply it to B-roll, driving shots, and transitional moments between major scenes. Before grading, expose your footage a bit darker so signs and screens retain detail once the saturation increases. In the edit, intercut close-ups of reflections with wider architecture shots using the same filter to create a cohesive visual rhythm that suggests the city is alive around your characters.
Lonely Taxi Ride
- Effect look: Cool, low-saturation city exteriors with warmer cabin skin tones for introspective late-night rides.
- Best for: Taxi backseat monologues, rideshare POVs, and reflective travel montages through downtown streets.
- Editing tip: Lock exposure for the character's face and let the city outside go slightly underexposed to emphasize isolation.
Lonely Taxi Ride separates the interior of a vehicle from the world outside by cooling and desaturating the city while keeping faces inside the cabin warm. In Filmora, this creates an immediate emotional contrast that highlights introspection, heartbreak, or quiet relief during late-night rides.
Use this filter for backseat monologues, rideshare POVs, and transitional travel sequences. Set your exposure priority on your character's face, then let exterior lights drift into softer, darker tones that feel distant. When cutting, alternate between profile views, straight-on shots, and window reflections with the same grade so viewers sense both the character's inner world and the passing city they feel disconnected from.
Time-Lapse City Breath
- Effect look: Punchy contrast, saturated traffic trails, and crisp building edges tuned for speed-ramped city time-lapses.
- Best for: Intercut time-lapse bridges, skyline shifts, and traffic flows in between dramatic story scenes.
- Editing tip: Stabilize your shots first, then apply the filter so fast motion lines stay clean and not overly noisy.
Time-Lapse City Breath is tuned for fast motion, sharpening edges and deepening contrast so traffic trails and skyline lights feel bold and graphic. Filmora enhances saturated streaks of color from cars and signs while keeping buildings crisp, turning short inserts into powerful punctuation marks between narrative scenes.
Apply this filter to stabilized time-lapses of streets, bridges, and skylines. Speed-ramp or adjust clip duration in Filmora to sync the motion with your soundtrack or emotional beats. Use these graded shots after major decisions or transitions in your story to signal the passage of time and the relentless movement of the city around your characters.
Tips for Using Short Film Video Lut Filters in Filmora
- Shoot with a slightly flatter picture profile so these filters have more highlight and shadow detail to work with.
- Build a simple look bible for your short film that assigns one or two filters to each recurring location.
- Always balance skin tones after applying strong color shifts so your characters still look natural and relatable.
- Save your favorite filter intensity as a custom preset to keep continuity across reshoots or pickups.
- Test each filter on both wide shots and close-ups, since heavy contrast can feel different at varying framings.
- Combine LUT-style filters with Filmora's exposure, curves, and HSL tools to fine-tune the look for your specific camera and lighting.
- Check your grades on multiple screens or export previews to ensure contrast and saturation remain consistent across devices.
- Use adjustment layers or copy-and-paste attributes in Filmora to quickly apply the same filter stack across an entire scene.
These short film video LUT-style filters in Filmora give content creators fast, cinematic results while staying flexible enough to match different story moods and locations.
Start by pairing one or two looks with your key scenes, adjust intensity until it supports your actors and lighting, and then build the rest of your visual language around those anchors.
secure download