
 100% Security Verified | No Subscription Required | No Malware


 ChatGPT
 Perplexity
 Gemini
 Claude
 Grok
Grok
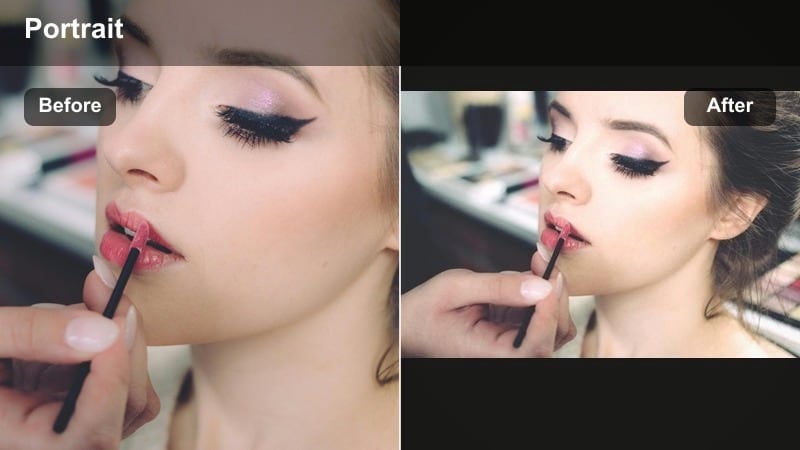
If your channel lives on the sidewalk, you need more than a sharp lens to make your subjects stand out. The right street portrait filters for YouTube can cut through harsh city light, balance neon signs, and keep skin tones natural while the urban background stays gritty and cinematic.
Below are curated street portrait filters designed for urban vloggers, street interviewers, and documentary filmmakers. Each look includes where it works best and a quick editing tip so you can lock in a consistent, professional YouTube style fast.
In this article
Soft City Portraits for Natural Street Interviews
Soft Amber Glow

- Effect look: Warm, soft contrast that adds a gentle amber tone to skin while keeping the background slightly muted.
- Best for: Street interview videos filmed at golden hour or under warm storefront lights where you want subjects to feel friendly and inviting.
- Editing tip: Slightly reduce saturation on yellows and oranges after applying to avoid overly warm skin, then add a subtle vignette to keep focus on the face.
Soft Amber Glow is ideal when you are shooting on busy sidewalks but still want portraits to feel approachable and flattering. It smooths harsh edges in high-contrast city lighting, warming skin and gently muting the background so faces stand out without looking overprocessed.
In Filmora, apply this filter to your A-roll interviews first, then fine-tune with basic color controls to keep whites looking neutral. Add a slight vignette in the Effects or Color panel to pull attention into the eyes, and you will have a cozy, professional street portrait look that works across multiple locations in the same video.
Let Filmora’s AI Match Your Street Portrait Style
Once you pick your favorite street portrait filters for YouTube, Filmora’s AI tools can help you keep that look consistent across clips shot in totally different lighting and locations. Instead of manually tweaking every scene, you can let AI read your reference shot and match its tones automatically.
Use AI color matching to take one perfectly graded street interview and apply its tone to B-roll, cutaways, and extra portrait shots so your full video feels like a single, cohesive story. This is especially useful when you film over several days or in mixed lighting, but want your portraits to look like they belong in the same episode.
 secure download

Preview Street Portrait Filters in Real Time
Filmora’s filter previews let you hover through multiple street looks and instantly see how they affect skin tones, background texture, and neon signs before you commit. This speeds up your workflow, because you can try several ideas on the same clip in seconds.
Stack subtle filters with basic exposure tweaks, then save the combo as a preset so your next urban vlog or street interview loads with your signature look ready to go. Over time, you will build a small library of go to city portrait styles that you can switch between depending on mood and location.
secure downloadCombine Filters and LUTs for Cinematic Street Portraits
If you shoot flat or log, you can correct with a LUT first, then layer Filmora street portrait filters on top to dial in mood without destroying skin tone. This two step approach lets you get accurate base color from your camera profile while still enjoying creative control in your final grade.
Keep LUTs subtle and let filters handle the final polish, so your portraits stay natural while the city background gets all the character. In Filmora, you can easily lower LUT intensity, then add your chosen street portrait filter as the creative finishing layer on your YouTube videos.
secure downloadHazy Sidewalk Soft
- Effect look: Low-contrast, slightly lifted blacks with a soft haze over highlights for dreamy street portraits.
- Best for: Urban vlogs and B-roll cutaways where you want the city to feel gentle, cinematic, and less harsh on faces.
- Editing tip: After applying, add a touch of clarity around the eyes using local adjustments so the subject stays sharp inside the soft overall look.
Hazy Sidewalk Soft turns hard city edges into a more cinematic, dreamy environment. Lifted blacks and softened highlights reduce the harshness of reflective windows, cars, and metal, while still keeping enough detail to feel real and grounded.
In Filmora, combine this filter with a slight clarity boost or sharpening mask around your subject’s eyes so the face remains the point of focus. It works especially well for B-roll portraits, walking shots, or slow motion clips that you cut between sharper, interview driven segments.
Neutral Street Portrait

- Effect look: Clean, balanced color with gentle contrast and accurate skin tones designed for mixed city lighting.
- Best for: Documentary filmmakers who shoot in unpredictable locations like subway entrances, markets, and alleys.
- Editing tip: Use this as a base correction filter, then add Filmora’s additional creative filters only on B-roll clips so interviews stay clean and timeless.
Neutral Street Portrait is built for reliability when you are moving between different street environments in a single shoot. It stabilizes color so skin looks right even when storefronts, street lamps, and reflections all compete in the frame.
Inside Filmora, drop this filter on your main talking clips first and treat it like a base grade. Once your A-roll is cohesive, you can experiment with stronger creative filters on B-roll only, keeping your core interviews professional and timeless for long term YouTube viewing.
Moody Urban Portrait Filters for Night Streets
Neon Face Pop
- Effect look: Punchy contrast with vibrant neon colors while skin tones stay slightly desaturated for a modern nightlife vibe.
- Best for: Street video filter YouTube creators who film under neon signs, storefronts, and LED panels at night.
- Editing tip: Boost saturation only in magentas and cyans after applying to make neon signs pop while keeping faces realistic and not oversaturated.
Neon Face Pop is designed to handle heavy color from signs and LED screens without turning skin into unnatural hues. It leans into magentas and cyans in the background while subtly desaturating faces so your subject still looks grounded in reality.
Use Filmora’s HSL or color tuning after applying this filter to selectively push the neon channels, leaving skin tones controlled. This makes your night vlogs and street portraits feel modern and stylish, while staying watchable for long YouTube sessions.
Gritty Alley Contrast

- Effect look: Deep shadows, crisp micro-contrast, and slightly cool midtones for a gritty, documentary street feel.
- Best for: City documentary content in alleys, underpasses, and backstreets where texture and mood matter more than perfect beauty lighting.
- Editing tip: After applying, lift shadows just enough so faces are readable on mobile screens, especially for darker complexions and low light.
Gritty Alley Contrast pushes texture and shadow detail to amplify the raw mood of backstreets and underpasses. It is great when you want walls, pavement, and street fixtures to feel more intense and story driven.
In Filmora, pair this filter with careful exposure adjustments so you do not lose eyes and expressions in darkness. Check your grade on a smaller preview or export a test clip for your phone to confirm that important facial features stay visible for YouTube’s mobile audience.
Cool Subway Portrait

- Effect look: Cool, bluish cast with gentle film-style grain and controlled highlights for underground transit scenes.
- Best for: Street interview videos shot in subways, stations, or bus stops with fluorescent or mixed lighting.
- Editing tip: Dial back grain for YouTube Shorts and mobile-heavy content to keep compression clean, but keep the cool tone to separate it from daytime clips.
Cool Subway Portrait cools down fluorescent and mixed lighting, turning chaotic station colors into a calmer, more cinematic palette. The controlled highlights keep shiny tiles and metal from blowing out while subtle grain adds a film inspired texture.
When editing in Filmora, use this filter on all your underground segments so viewers instantly recognize a change of place and mood. If you are cutting vertical Shorts, reduce grain intensity to avoid extra noise in compressed uploads, but keep the blue leaning tones as a storytelling cue.
Daytime Urban Vlog Filters for Walking Portraits
CityWalk Clarity

- Effect look: Medium contrast with added clarity and slight saturation boost for a crisp, energetic daytime city look.
- Best for: Urban YouTube filter lovers shooting walk-and-talk vlogs through busy downtown streets and plazas.
- Editing tip: After applying, use a light face-smoothing or skin-detail slider to counteract the extra clarity so your portrait still looks flattering.
CityWalk Clarity makes glass, signage, and street textures snap while keeping your subject bright and energetic. It works particularly well when you are moving through high detail environments like shopping districts or landmark areas.
Inside Filmora, combine this filter with a small amount of skin smoothing or reduced sharpness on faces so the extra clarity does not exaggerate pores or minor imperfections. This balance keeps your walking portraits looking polished while the city around you feels alive and detailed.
Soft Overcast Portraits

- Effect look: Low contrast, slightly warm midtones that turn gray skies into a soft, flattering overhead light for faces.
- Best for: City documentary content and interviews on cloudy days where you want gentle, even light across the face.
- Editing tip: Gently increase midtone contrast to keep YouTube thumbnails from looking flat while preserving the soft feeling in motion.
Soft Overcast Portraits takes advantage of cloudy weather by warming midtones just enough to make skin feel inviting. It smooths out harsh shadows under eyes and noses, giving you surprisingly flattering portraits even when the sky is flat and dull.
Use this filter in Filmora on all your cloudy sequences, then add a bit of midtone contrast so your thumbnails stay eye catching. The result is a consistent, soft look that makes gray days feel like part of your channel style instead of a compromise.
Sun Split Portrait
- Effect look: Balanced highlights with gentle roll-off, designed to control harsh sunlight and shadow splits across the face.
- Best for: Street interview videos and candid portraits filmed at midday when buildings cast strong, uneven shadows.
- Editing tip: Use the highlight recovery slider after applying to bring back detail on the bright side of the face and keep the eye area readable.
Sun Split Portrait is built for high noon and hard edges, when one side of a face may be blown out while the other falls into deep shade. It smooths highlight roll off and lifts important details so your subject stays readable in extreme conditions.
In Filmora, start by applying this filter, then adjust highlight recovery and shadows to fine tune each clip. It is especially helpful for street interviews where you cannot control where people stand, but still need their expressions clear on any screen.
Stylized Street Portrait Filters for Signature Looks
Teal Brick Pop
- Effect look: Classic teal-and-warm-skin combo with extra vibrance in bricks, murals, and painted city textures.
- Best for: Urban YouTube filter styles built around colorful walls, murals, and graffiti-heavy streets.
- Editing tip: Use a mask to reduce teal in clothing if it clashes with your subject’s outfit while leaving the background stylized.
Teal Brick Pop leans into the popular teal and warm skin look, making brick walls, murals, and graffiti surfaces stand out behind your subject. It turns any textured urban corner into a striking YouTube backdrop.
Apply this filter in Filmora on clips where you want a strong, branded look, then use masking or adjustment layers to keep clothing and skin from being overwhelmed by teal. Over time, using this filter on recurring locations can help define the visual identity of your channel.
Muted Film Street

- Effect look: Desaturated, film-inspired color with soft grain and slightly lifted blacks for a quiet, reflective portrait mood.
- Best for: City documentary content that focuses on sensitive topics, reflective monologues, or character-driven street stories.
- Editing tip: Lower saturation a bit more on greens to avoid muddy foliage and let skin and concrete stay the main visual elements.
Muted Film Street dials back color intensity so viewers focus more on expressions and story. Lifted blacks and soft grain create a subtle, analog inspired feeling that suits introspective or serious street segments.
In Filmora, add this filter to your reflective monologues and heavier documentary scenes, then gently pull down greens and saturated signage. When used sparingly alongside brighter looks, it gives your YouTube episodes a clear emotional contrast without distracting from your subject.
Creator Channel Signature

- Effect look: Balanced cinematic contrast, slightly warm skin, and subtle background blur simulation for a polished creator-brand style.
- Best for: YouTube portrait filter setups for intros, outros, and recurring segments where you want a recognizable signature look.
- Editing tip: Save this filter as a custom preset with matching exposure and white balance so every recurring segment looks identical across episodes.
Creator Channel Signature is meant to become the main face of your channel, giving intros, outros, and recurring bits a consistent, cinematic finish. Slightly warm skin and controlled contrast help your on camera presence feel polished but still natural.
In Filmora, lock this filter into a preset that includes your usual exposure, temperature, and maybe a tiny bit of background blur simulation. Use it on the same framing each episode so returning viewers instantly recognize your show the moment the video starts.
Tips for Using Street Portrait Youtube Filters in Filmora
- Shoot a quick gray card or white sign at each new location so it is easier to balance your portrait filters during editing.
- Check your portraits on a phone screen before publishing; YouTube viewers often watch on mobile, and shadows can look darker there.
- Use one primary portrait filter for all A-roll and experiment with bolder looks only on B-roll to avoid visual chaos.
- Always protect skin tones first; if a filter makes faces look strange, adjust temperature and tint before changing anything else.
- Save custom presets in Filmora that bundle filter choice, exposure tweaks, and light sharpening so you can grade whole episodes quickly.
- Organize your favorite street portrait filters into themed presets such as day, night, and overcast so you can match clips faster.
- Compare before and after on a few key frames per video to make sure your chosen filter still fits the story and mood.
- Keep filter intensity moderate; subtle grading usually survives YouTube compression better than heavy, extreme looks.
The right street portrait filters for YouTube help you balance real city grit with flattering, watchable faces so your channel looks professional without losing authenticity.
Pick one or two base looks from this list, turn them into presets inside Filmora, and build a consistent visual identity that your audience recognizes every time your video appears in their feed.
secure downloadNext: Street Portrait Filters for TikTok: Vertical Urban Looks That Stand Out
