
 100% Security Verified | No Subscription Required | No Malware


 ChatGPT
 Perplexity
 Gemini
 Claude
 Grok
Grok
Cinematic sunset video filters help filmmakers and photographers turn ordinary dusk shots into rich, dramatic visuals with bold colors, deep contrast, and a true film look sunset atmosphere.
This guide focuses on the Cinematic Sunset Filter. Epic Horizon preset and a full set of supporting filters you can use to shape mood, guide exposure, and build cohesive cinematic sunset films from golden hour through blue hour.
In this article
Golden Hour Cinematic Sunset Filters
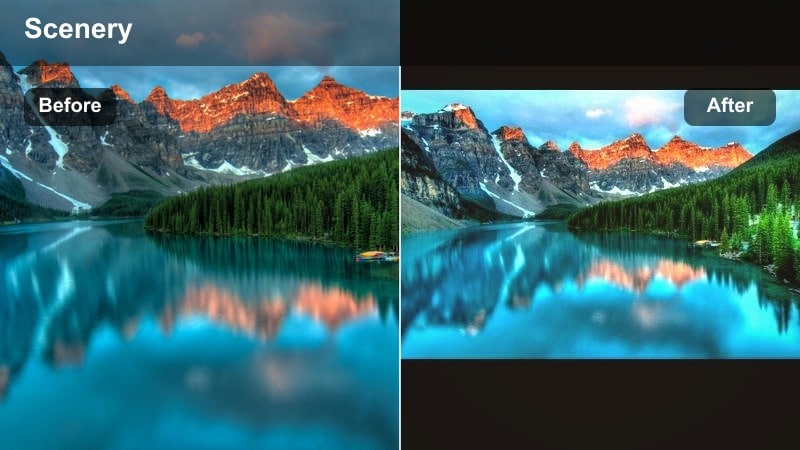
Cinematic Sunset Filter. Epic Horizon

- Effect look: Warm cinematic contrast with deep oranges, soft halation, and subtle teal shadows for a filmic dusk aesthetic.
- Best for: Wide establishing shots of the sun near the horizon, narrative sunset sequences, and travel films needing a dramatic dusk mood.
- Editing tip: Slightly underexpose in-camera, then lower highlights and gently lift shadows to keep detail in the sky while preserving rich midtones.
Signature sunset cinematic filter that pushes warm tones and contrast for bold, epic horizon silhouettes. In Filmora, it is ideal as your hero look: apply it to your main sunset shot, then fine-tune exposure and white balance so the oranges feel rich without clipping the brightest parts of the sky.
Use the color and HSL controls in Filmora to nudge teal into the shadows while keeping midtones neutral on faces. Combine this with subtle vignetting and highlight roll-off so the sun glow feels filmic, not video-like, and save the final look as a custom preset you can reuse across your dusk projects.
Balance Sky Detail and Subject Silhouettes
Expose for the brightest part of the sky, then let foreground elements fall into clean silhouettes enhanced by the filter s contrast.
If faces are important, add a subtle exposure or radial mask on the subject so the cinematic sunset video filter keeps the sky dramatic without losing skin tone detail.
AI-Assisted Sunset Color Matching
Filmora s AI-driven color tools can analyze your cinematic sunset video filters and help you match the look across multiple cameras and locations. This is especially useful when you shoot one sunset on different lenses or bodies and need them all to share the same epic horizon feel.
By referencing a hero shot graded with the Cinematic Sunset Filter. Epic Horizon preset, the AI can automatically align exposure, contrast, and color balance on other clips so your entire dusk sequence feels cohesive.
Use AI color matching on your best-graded sunset clip, then apply the adjustments across the rest of your timeline for instant consistency.
 secure download

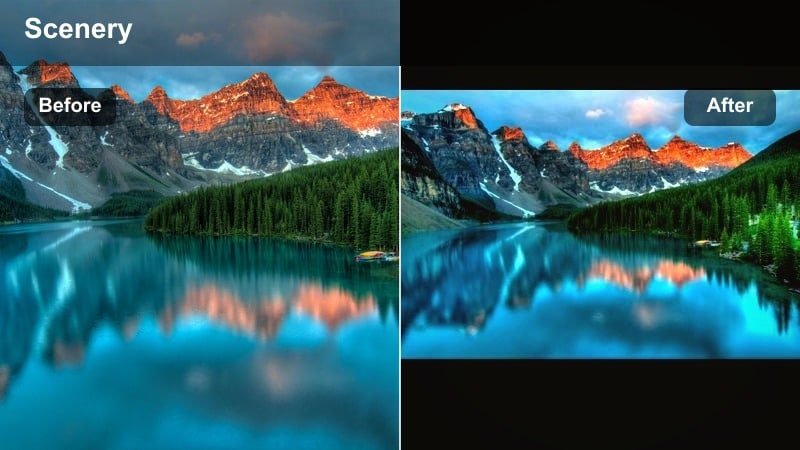
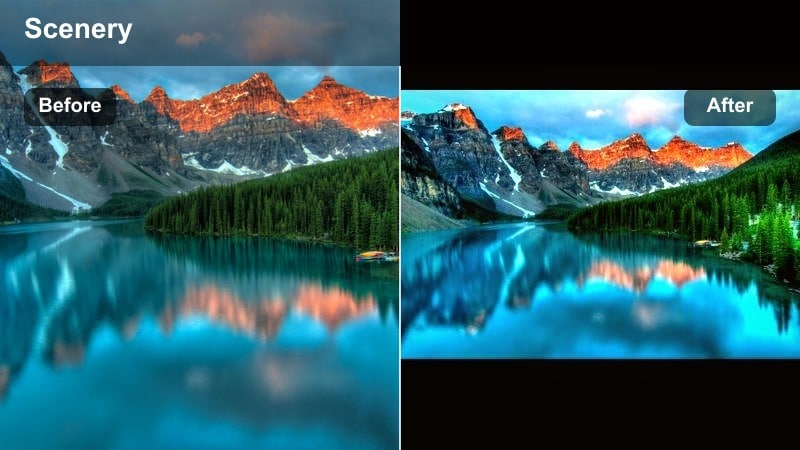
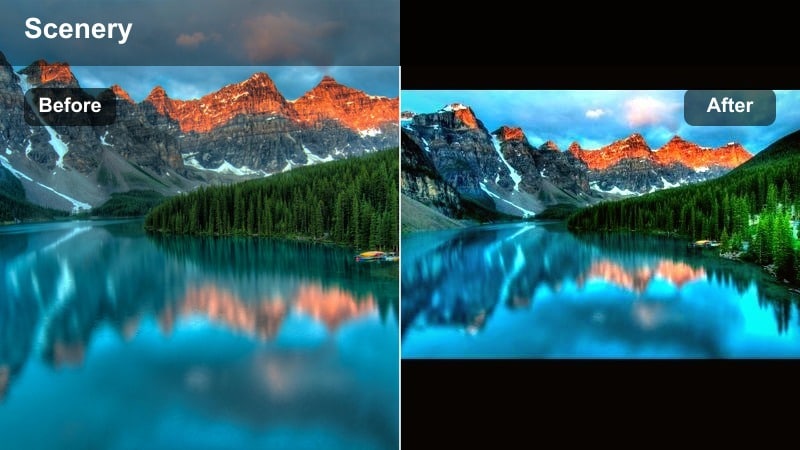
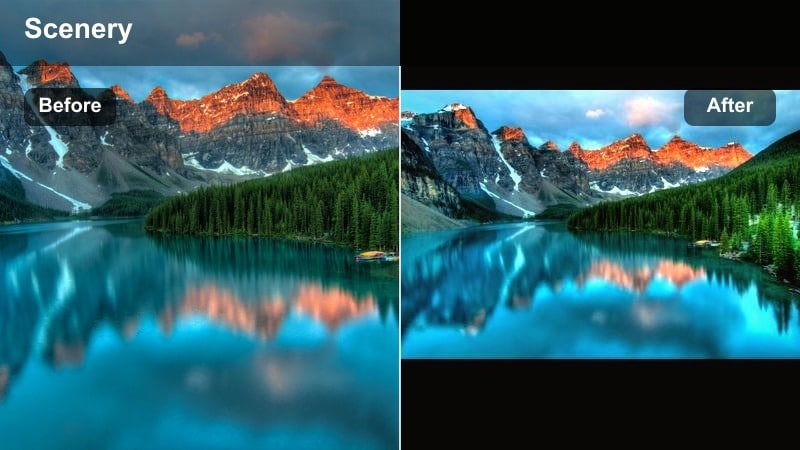
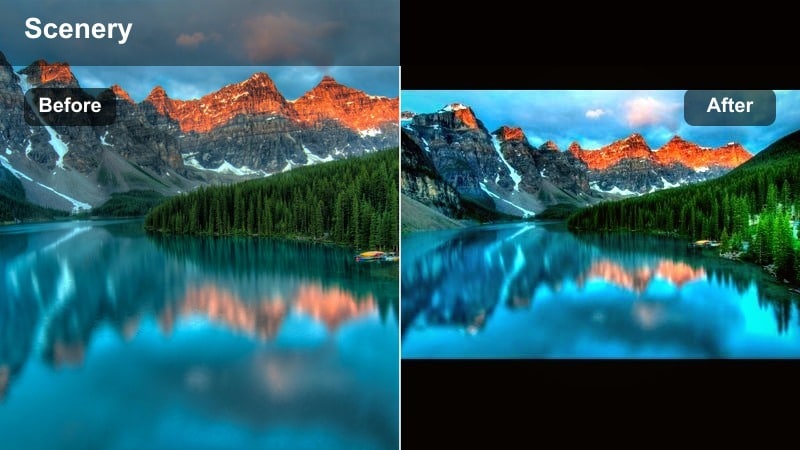
See Cinematic Sunset Filters in Action
Preview before-and-after clips of golden hour, dramatic dusk, and blue hour scenes to understand how each filter transforms your footage. This makes it easy to see whether Epic Horizon, a moody dusk look, or a blue hour bridge grade best fits your current scene.
From subtle moody dusk grading to bold epic finales, you can audition filters live on your clips and quickly decide which style fits your story and audience.
Drop a test sunset clip into your timeline, apply a few presets, and toggle them on and off to compare how each filter shapes the mood.
secure downloadCombine Filters with LUTs for a Film Look Sunset
Pair your favorite sunset cinematic filter with a creative LUT to introduce film stock character, highlight roll-off, and subtle color bias. Filmora includes 1000 plus video filters and 3D LUTs, so you can layer different moods and textures on top of your base sunset grade.
Apply the filter first for broad mood, then layer a LUT at reduced intensity to fine-tune the film look sunset style without overpowering the original colors.
Experiment with LUT intensity between 10 and 40 percent so your sunset filter remains the foundation while the LUT adds gentle film personality.
secure downloadGolden Halo Soft Cinema
- Effect look: Soft contrast, bloom in highlights, and pastel gold tones that gently wrap around subjects.
- Best for: Portraits at golden hour, wedding films, and dreamy cinematic sunset films with a romantic feel.
- Editing tip: Lower clarity slightly and add a touch of vignette to center the viewer on the subject while maintaining warm halos in the background.
A gentle cinematic filter that adds halation and pastel warmth for dreamy sunset portraits. In Filmora, this style works beautifully with face-tracking tools so you can make sure eyes and skin stay crisp while the background glows softly.
Use the blur and glow effects subtly on duplicate layers to increase the halo effect around hair and edges, then mask the subject so they remain sharp. Fine-tune saturation in yellows and oranges to keep skin from going too warm while preserving a romantic golden feel.
Backlight to Maximize Glow
Position the sun behind your subject so the filter can emphasize the rim light and golden halo around hair and edges.
Avoid harsh direct light on the face; a reflector or light bounce can bring back subtle detail while the filter keeps the scene dreamy.
Amber Road Travel Film
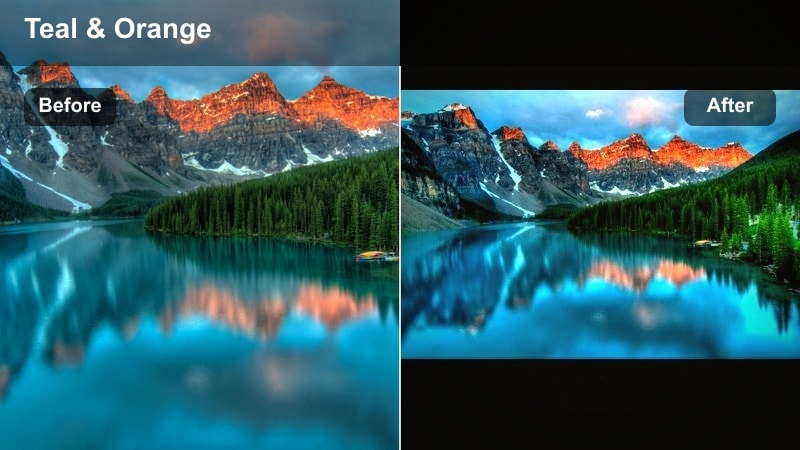
- Effect look: Rich amber highlights, gentle teal shadows, and moderate grain for a travel film look sunset style.
- Best for: Run-and-gun travel sequences, road trip montages, and handheld cinematic sunset video shots.
- Editing tip: Stabilize slightly noisy handheld clips, then add a modest grain layer so the amber tones feel like 16mm-inspired travel footage.
Travel-focused sunset filter with amber warmth and subtle teal contrast, ideal for road and city horizons. In Filmora, combine it with motion tracking titles and speed ramps to build dynamic montages that still feel cohesive in color.
Apply light stabilization before adding Filmora s grain and vignette effects so movement feels organic. Then, match color temperature across your travel clips using the color correction panel, letting the amber highlight treatment tie different locations together into one visual journey.
Shoot Towards Depth and Leading Lines
Use roads, rails, or shorelines as leading lines toward the sunset so the amber grading pulls the viewer deeper into the frame.
Cut your sequence to the rhythm of the music and keep color consistent across shots by applying the same filter and then fine-tuning exposure clip by clip.
Moody Dusk and Sunset Moody Filters
Moody Horizon Fade

- Effect look: Muted highlights, deep blues and purples, and soft lifted blacks for a moody dusk aesthetic.
- Best for: Sunset moody filter scenes, introspective narratives, and slow, atmospheric b-roll at the end of golden hour.
- Editing tip: Lower saturation in greens and cyans, then add a gentle fade in the shadows to create a filmic, melancholic tone.
A moody dusk filter that leans into blues and purples while softening contrast for emotional storytelling. In Filmora, combine this look with slower cuts, gentle cross-dissolves, and subtle music to deepen the reflective mood.
Use the curves and HSL tools to push warm tones slightly cooler and lift blacks a bit, creating a soft haze over your dusk footage. This makes even simple b-roll of streets or landscapes feel like part of a quiet, cinematic interlude.
Use Negative Space for Emotion
Frame small subjects against large, empty skies to let the moody colors carry the emotional weight of the scene.
Allow longer static shots and slow pushes so the viewer can absorb the subtle color transitions as dusk falls.
Twilight Contrast Film
- Effect look: High contrast, cool shadows, and restrained warm mids for a crisp, dramatic dusk profile.
- Best for: Silhouetted city skylines, mountain ridges, and graphic compositions with hard edges against the dusk sky.
- Editing tip: Push contrast and reduce midtone saturation to keep shapes bold while avoiding overly colorful skies.
A punchy twilight filter that emphasizes silhouettes and hard edges for dramatic dusk images. In Filmora, this is perfect for time-lapses or closing shots where you want clean, graphic shapes against a fading sky.
Raise contrast and clarity on skyline or horizon shots while slightly desaturating midtones so buildings appear almost in monochrome against cool skies. Add a subtle vignette to keep the viewer s eye locked on the silhouetted horizon line or architectural features.
Expose for Shape, Not Detail
Meter for the sky and accept very dark foregrounds so the filter can sculpt clean shapes against the gradient dusk backdrop.
Avoid heavy noise reduction that might smear edges; crisp lines are key to this graphic sunset look.
Noir Sunset Mist
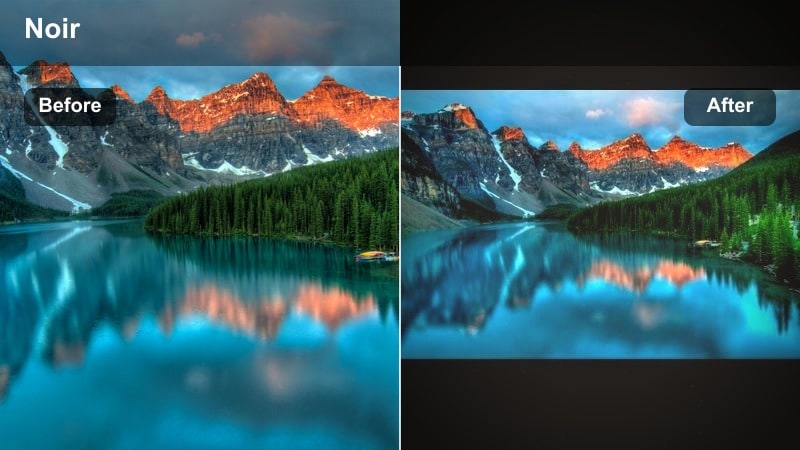
- Effect look: Desaturated palette with selective amber highlights, light film grain, and hazy low contrast.
- Best for: Neo-noir short films, quiet street scenes at sunset, and reflective character moments.
- Editing tip: Reduce global saturation, then selectively protect orange and amber so streetlights and sun streaks stay prominent.
A noir-inspired sunset filter that turns colorful scenes into muted, cinematic dusk with selective warmth. In Filmora, pair it with light grain, letterbox bars, and slower frame rates or motion blur to complete the neo-noir feel.
Use color masking to preserve amber and orange tones in signs, windows, or sun streaks while pushing the rest of the scene into cooler, muted shades. This selective color approach helps guide the viewer toward key details or characters in your frame.
Embrace Backlit Atmosphere
Look for haze, dust, or light rain that the filter can enhance into cinematic streaks around streetlights and sun flares.
Keep camera movement minimal and let reflections on wet pavement or windows mirror the last bits of sunset color.
Blue Hour Bridges from Sunset to Night
Blue Hour Cinema Bridge
- Effect look: Deep cobalt blues, gentle magenta tints in the sky, and preserved warm highlights from buildings and cars.
- Best for: Transition shots that bridge cinematic sunset video filters into full night scenes in a single sequence.
- Editing tip: Grade your sunset shots first, then apply this filter to bridge clips and match white balance so transitions feel seamless.
A transitional blue hour filter designed to connect warm sunset scenes with cooler night visuals. In Filmora, use it on bridge clips that sit between your golden hour footage and full night scenes so color temperature shifts feel intentional.
Adjust white balance slightly cooler while preserving warmth in practical lights and windows. Then, apply consistent LUT intensity across these transition shots so the audience feels the day sliding into night without any jarring color jumps.
Plan a Multi-Phase Dusk Shoot
Shoot the same composition at golden hour, sunset, and blue hour so you can cut between them with matching camera moves.
Use your main sunset filter first, then this bridge filter, and finally your night look to create a smooth visual time-lapse in the edit.
Neon Tide Sunset

- Effect look: Punchy blues and magentas with boosted neon signs and car lights over a fading warm sky.
- Best for: Urban blue hour scenes with street lights, store fronts, and reflections over water or wet pavement.
- Editing tip: Increase saturation in magenta and blue, then restrain luminance in reds to avoid clipping bright signage.
A vibrant city sunset filter that turns blue hour into a neon-lit cinematic environment. In Filmora, combine it with glow and light leak overlays to make signs, brake lights, and reflections pop.
Use HSL sliders to emphasize blues and magentas while carefully controlling red luminance so neon signs do not blow out. Add a bit of sharpening and contrast in the midtones to keep city textures crisp as the sky darkens.
Shoot for Reflections and Color Pockets
Seek out puddles, windows, and glossy surfaces that mirror neon colors the filter will boost.
Let practical lights motivate your exposure; keep ISO moderate and rely on grading to enhance neon vibrancy instead of overexposing in-camera.
Quiet Tide Minimal
- Effect look: Soft low-contrast blue hour look with subtle cyan shadows and minimal saturation.
- Best for: Calm waterfront scenes, contemplative walk cycles, and minimalist landscape shots at the edge of night.
- Editing tip: Dial back saturation and add a light vignette to keep attention on your subject moving across the frame.
A restrained blue hour filter that emphasizes quiet mood and gentle gradients across the sky. In Filmora, this pairs well with slower pacing, ambient soundscapes, and minimal on-screen text.
Lower global saturation and soften contrast slightly, then use a vignette or blur around the frame edges so the viewer follows your subject along the shoreline or through open spaces. This look is ideal when you want the audience to feel calm and introspective.
Use Long Lenses for Isolation
Compress space with a telephoto lens so the sky and water feel like a soft, unified color field.
Combine slow, steady movement with minimal cuts; this subtle filter works best when the viewer has time to sit with the scene.
Story-Driven Film Look Sunset Styles
Storyline Warm Grain
- Effect look: Balanced warm sunset tones with soft contrast and noticeable film-style grain.
- Best for: Narrative short films, character-driven scenes at dusk, and dialogue near windows facing sunset light.
- Editing tip: Apply grain after resizing and sharpening, then fine-tune midtones to keep skin tones natural while skies stay cinematic.
A classic film look sunset filter that adds texture and warmth, ideal for story moments at dusk. In Filmora, you can layer grain, subtle color shifts, and a slight vignette to give interior or dialogue scenes a unified, cinematic treatment.
Grade your sunset exposure to keep skin tones natural, then apply grain on a separate adjustment layer if possible so you can control intensity independently. This makes your narrative project feel cohesive from wide exterior shots to intimate close-ups.
Motivate Light from the Sunset
Place practical lamps in the scene that mimic the direction and color of sunset light to blend naturally with the filter.
Keep exposure consistent across angles; this makes grain and color shifts feel unified when cutting between shots.
Memory Flare Sunset

- Effect look: Soft highlights, gentle warm flares, and slightly lifted blacks for a nostalgic, memory-like quality.
- Best for: Flashback sequences, travel memories, and emotional montage scenes at golden hour.
- Editing tip: Add slow dissolves or subtle speed ramps and let the filter s lifted blacks create a dreamy, imperfect memory feel.
A nostalgic cinematic sunset filter that leans into glow and lifted shadows for emotional flashbacks. In Filmora, combine it with slow motion, cross-dissolves, and softer music cues to make everyday moments feel like cherished memories.
Raise black levels slightly and add a bit of blur or glow on highlights, particularly around the sun or bright reflections. This helps sell the impression of looking back through time while keeping the original footage readable and engaging.
Lean into Imperfections
Allow lens flares, small focus shifts, and handheld sway, which the filter will turn into expressive, emotional details.
Pair the graded footage with ambient audio or soft music, giving the viewer space to feel the nostalgia suggested by the color.
Epic Finale Sun Drop
- Effect look: Bold contrast, rich sunset saturation, and a subtle vignette that pulls attention toward the horizon line.
- Best for: Final shots of a film, closing wide frames, and drone pulls away from characters walking into the sunset.
- Editing tip: Place this filter only on your closing shots, then slightly increase saturation and contrast versus earlier scenes to feel like a visual climax.
A high-impact finale filter designed to end your cinematic sunset films with a powerful, lasting image. In Filmora, use it as the final step in your grade, pushing contrast and saturation a touch higher than earlier scenes.
Combine this look with slow pull-backs, drone moves, or locked-off wide shots that hold longer on screen. A subtle vignette and stabilized motion help the viewer absorb the epic color and composition of the last frame.
Reserve the Strongest Look for the End
Grade your project progressively, saving the most saturated and contrast-heavy filter for the last sequence so it truly feels epic.
Cut on musical swells or emotional beats, and hold the final shot a few seconds longer to let the rich sunset colors sink in.
Tips for Using Sunset Cinematic Filters in Filmora
- Shoot in a flat or log profile to preserve highlight detail in the sky before applying intense cinematic sunset video filters.
- Bracket exposure or record slightly underexposed to avoid blown highlights that cannot be recovered in dramatic dusk grades.
- Use a variable ND filter so you can keep a wider aperture for shallow depth of field while filming directly toward the sun.
- Lock white balance around daylight or cloudy presets to prevent color shifts as the sun sets and your filter does the creative work.
- Organize your timeline from golden hour to blue hour so you can apply related filters in batches and maintain a consistent arc.
- Always check skin tones when using strong warm sunset filters and adjust midtones if faces start to look overly orange.
- For handheld sunset shots, add a touch of stabilization before grain or texture effects so movement feels organic, not jittery.
- Export a short test sequence with your chosen sunset moody filter and review it on multiple screens to confirm the mood holds up.
Cinematic sunset video filters give filmmakers and photographers a fast, reliable way to transform raw dusk footage into cohesive, story-driven visuals with clear emotional intent.
Start with the Cinematic Sunset Filter. Epic Horizon preset, then build a small toolkit of moody dusk and blue hour looks so every sunset shoot can evolve into a polished cinematic sunset film in the edit.
secure downloadNext: Explore Sunset Moody Filter Styles for Darker Dusk Stories
