
 100% Security Verified | No Subscription Required | No Malware


 ChatGPT
 Perplexity
 Gemini
 Claude
 Grok
Grok
Aesthetic travel video filters can turn ordinary trip footage into dreamy, cinematic memories with soft tones, pastel colors, and romantic atmospheres. Instead of spending hours tweaking every clip, you can apply curated looks that instantly match the mood of your aesthetic vlogs and lifestyle videos.
This guide showcases a collection of aesthetic travel video filters in Filmora, inspired by pastel cities, golden hour adventures, and slow, romantic getaways. Use these ideas with the Aesthetic Travel Filter. Dreamy Escape preset to craft cohesive travel stories that feel calm, nostalgic, and cinematic.
In this article
Soft Pastel Daylight Travel Filters
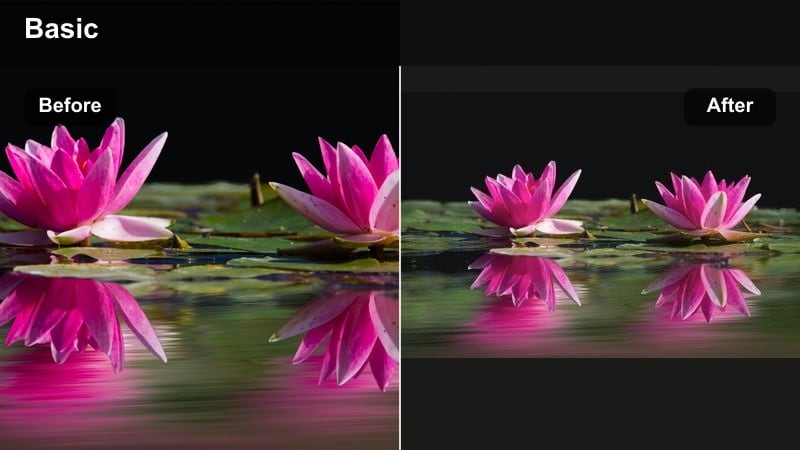
Dreamy Escape Pastel
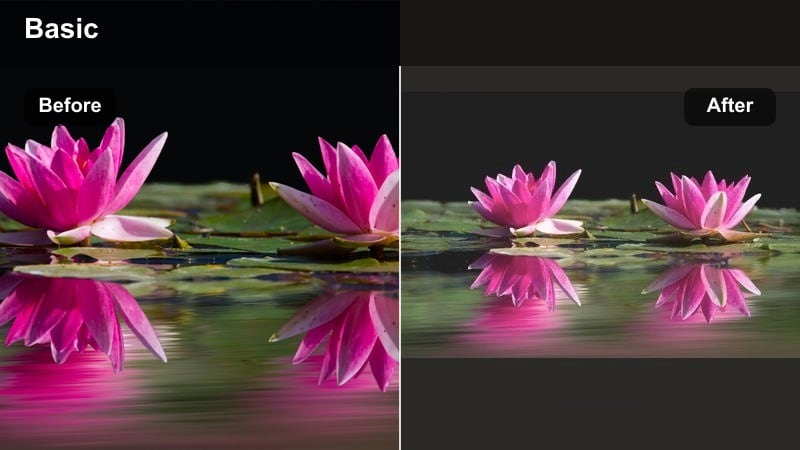
- Effect look: Soft, bright pastel tones with gentle contrast and a slightly hazy glow over highlights.
- Best for: City walks, cafe hopping, and aesthetic vlogs shot in open daylight with neutral or bright surroundings.
- Editing tip: Lower contrast slightly and nudge saturation down a bit if skin tones look too intense in harsh sun.
Dreamy Escape Pastel is a gentle all-round pastel filter that brightens travel clips and adds a dreamy, airy finish. In Filmora, you can drop it onto city walk footage, outdoor cafes, or bright plazas to soften harsh daylight and push colors toward a delicate, romantic palette.
For lifestyle travel videos, combine this look with slow camera movement and simple transitions so the pastel tones stay the star of the frame. Adjust exposure and contrast per clip to keep whites clean and avoid overblown highlights, especially when filming in very strong midday sun.
Pro tip: Balance Pastels with Natural Skin Tones
When using strong pastel filters on travel vlogs, always keep an eye on skin tones. Overly pink or orange faces break the natural, effortless feeling you want in an aesthetic travel video.
After applying the filter, slightly reduce saturation and use HSL to pull back reds and oranges just enough to keep faces looking realistic while the background stays dreamy.
Instant Aesthetic Travel Looks with AI Color Tools
Filmora s AI-powered color tools help you build cohesive travel aesthetics quickly by analyzing your footage and suggesting balanced color palettes. Instead of guessing adjustments, you can apply intelligent presets that match the mood of your trip, from pastel beach days to moody city nights.
Use these AI tools together with the Aesthetic Travel Filter. Dreamy Escape preset to refine tones like soft blues, muted greens, or romantic peach highlights. This combination keeps your aesthetic travel video filters consistent across clips, even when you filmed in mixed lighting conditions.
 secure download

See Aesthetic Travel Filters in Action
Before committing to a full edit, preview how different aesthetic travel video filters look on your clips. In Filmora, you can quickly toggle between soft travel filter styles, pastel travel options, and romantic travel tone presets inside the Effects panel.
Audition several looks over the same clip: one for daylight, one for golden hour, and one for night scenes. This trial-and-error approach helps you choose a signature style for your aesthetic vlogs and lifestyle videos without over-editing.
secure downloadCombine Filters and LUTs for Cinematic Travel Stories
For creators who want a stronger cinematic feel, combine Filmora s travel filters with LUTs tailored for filmic contrast and color. Filters give you the soft, dreamy mood, while LUTs define the overall dynamic range and color style.
Apply a LUT first for a solid base, then layer an aesthetic travel filter on top at reduced intensity. This stack lets you fine-tune romantic travel tones, pastel highlights, and soft shadows without losing control of the final image.
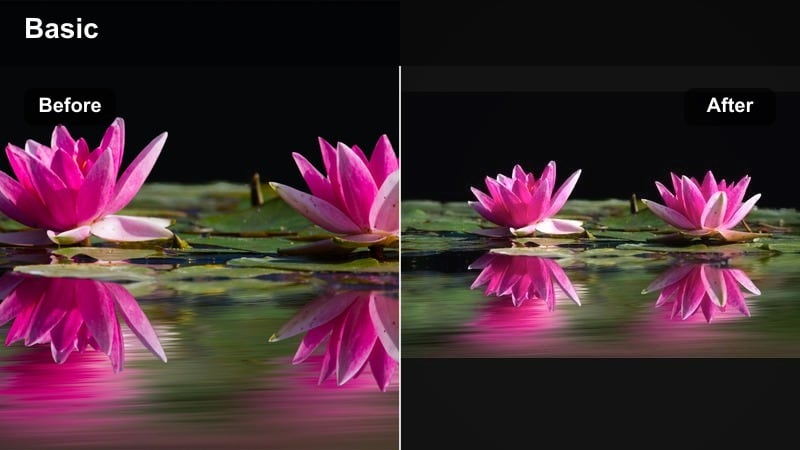
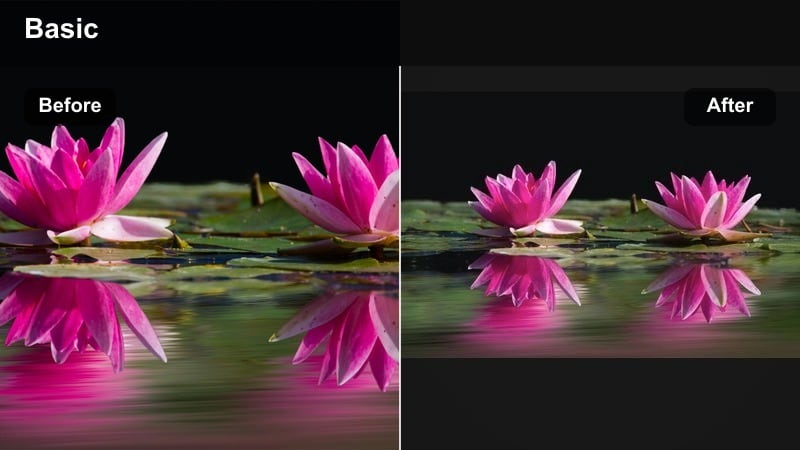
secure downloadSoft Souvenir

- Effect look: Subtle pastel wash with lifted shadows and a faint milky overlay for a film-inspired softness.
- Best for: Travel montages of streets, markets, and casual daily moments where you want a quiet, nostalgic tone.
- Editing tip: Add a very light vignette and reduce clarity slightly to enhance the memory-like, soft focus vibe.
Soft Souvenir wraps everyday travel scenes in a gentle, nostalgic layer that feels like looking back through old photos. In Filmora, it works well on handheld street clips, local markets, and simple transitions between city details.
Lift the shadows to avoid harsh contrast and pair it with slow-motion or 24 fps playback for a subtle film look. A touch of vignette around the frame keeps attention on your subject while still letting background colors glow softly.
Pro tip: Use Gentle Motion for Nostalgic Clips
Combine Soft Souvenir with slow pans or handheld walking shots stabilized in post to strengthen the nostalgic feeling.
Slightly slow down your footage, then apply the filter and add subtle background music to make the moment feel like a cherished memory.
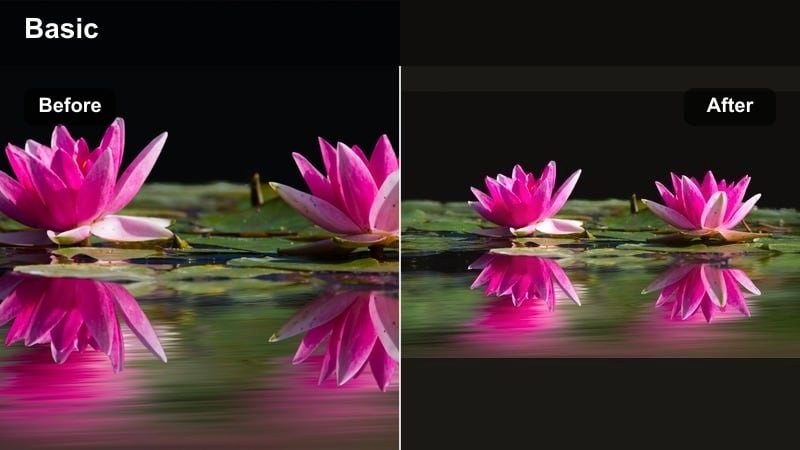
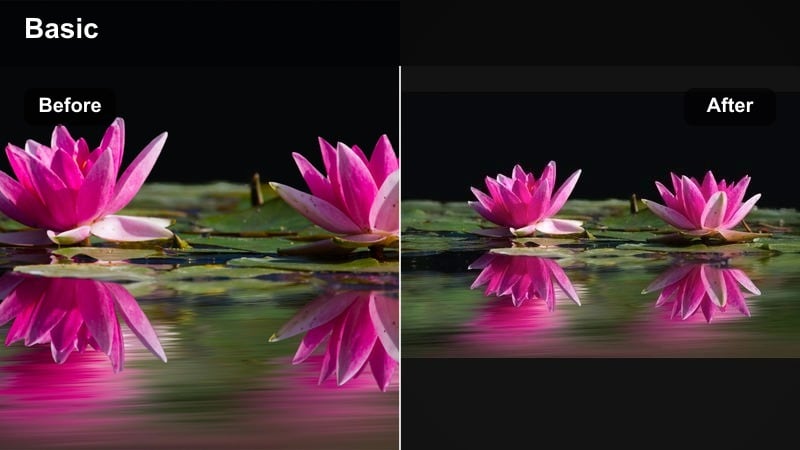
Cotton Cities
- Effect look: Muted highlights, soft pastel blues and pinks, and slightly cooled whites for airy urban scenes.
- Best for: Rooftop views, pastel buildings, and minimalist city compositions in your travel aesthetic vlogs.
- Editing tip: Warm up white balance slightly if your city footage looks too cold or gray after adding the filter.
Cotton Cities keeps buildings crisp while washing the frame in gentle, airy tones that are perfect for modern city escapes. Apply it in Filmora to skyline timelapses, rooftop cafes, and clean street compositions for a unified pastel city aesthetic.
Use the color tools to match sky tones across shots and slightly warm the image if your camera captured a very blue cityscape. This balance maintains the dreamy look without losing the sense of real place and time.
Pro tip: Match Sky Tones Across Clips
For skyline-heavy edits, keep the blue and cyan tones consistent from clip to clip to avoid jarring color shifts.
Copy color settings from your favorite clip, then paste to similar shots and fine-tune only exposure to maintain a cohesive look.
Golden Hour Romantic Travel Filters
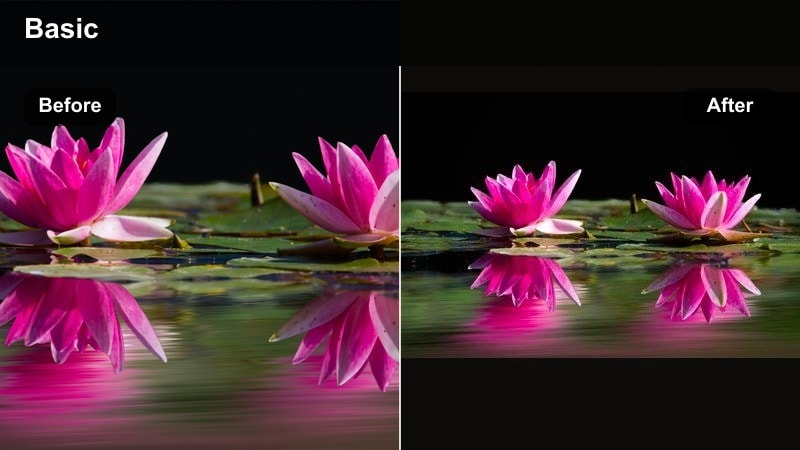
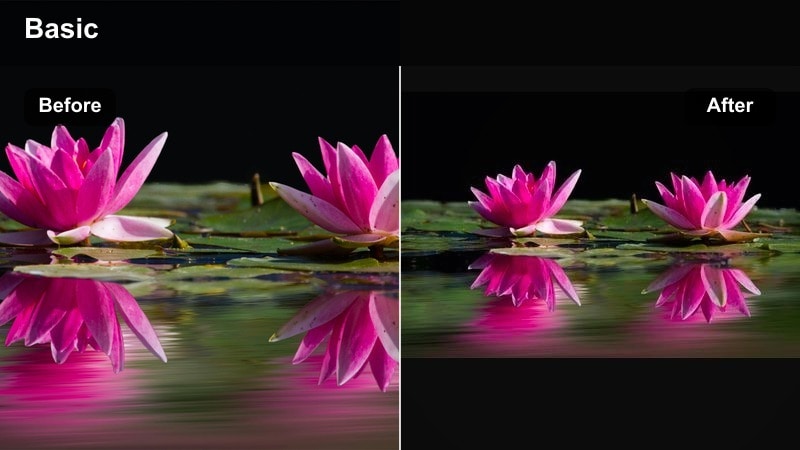
Golden Romance Glow
- Effect look: Warm, golden highlights with softened contrast and a dreamy, slightly diffused glow on bright areas.
- Best for: Couple shots, romantic sunsets, and slow travel moments captured during golden hour.
- Editing tip: Lower highlight intensity if the sun flares are too strong, and gently lift shadows to keep faces visible.
Golden Romance Glow enhances the natural warmth of golden hour, wrapping your subjects in soft light that feels intimate and cinematic. Use it in Filmora on backlit couple shots, sunset silhouettes, and slow, emotional moments during the last light of day.
Fine-tune exposure to preserve details in the sky while lifting the shadows enough to reveal expressions. A light glow on highlights keeps the frame dreamy without turning the image into a haze.
Pro tip: Shoot with Backlight for Maximum Glow
Position your subject with the sun behind them to create natural rim light that works beautifully with warm romantic filters.
Then reduce exposure slightly in editing and use the filter to reintroduce warmth and glow without losing detail.
Sunset Honeymoon
- Effect look: Peachy highlights, gentle magenta tint in the shadows, and a soft vignette to frame the center.
- Best for: Beach sunsets, balcony views, and intimate lifestyle travel videos with slow pacing.
- Editing tip: Reduce the vignette strength if your composition already has dark corners from the original footage.
Sunset Honeymoon leans into peach and magenta tones to give sunsets an ultra-romantic, postcard-ready finish. In Filmora, it is ideal for seaside evenings, balcony wine moments, and any closing scenes that should feel tender and cinematic.
Control the vignette amount so it supports, rather than overpowers, your composition. Keep saturation moderate so skies stay rich but believable, especially if you shot on a phone with already vibrant colors.
Pro tip: Pair with Gentle Camera Movement
Use slow tilts or push-ins to emphasize the calm, romantic nature of sunset shots treated with this filter.
Stabilize the clip lightly, then add soft music to complete the dreamy honeymoon travel aesthetic.
Amber Trails

- Effect look: Deep amber tones in midtones, slightly desaturated greens, and a warm film-inspired curve.
- Best for: Countryside walks, hiking paths, and slow-motion clips of nature at late afternoon.
- Editing tip: Use keyframes to gradually increase the filter intensity as the sun sets for a smooth mood transition.
Amber Trails transforms fields, forests, and paths into cozy, late-afternoon scenes with rich amber mids and softened greens. Apply it in Filmora to hiking montages or countryside drives when you want to emphasize warmth and calm over intense color.
Keyframe the effect intensity so the warmth slowly builds as the sun lowers, giving your sequence a natural emotional arc. Slightly fade the blacks to introduce a subtle vintage film vibe that matches the relaxed pace of slow travel.
Pro tip: Control Greens for a Softer Look
Dial back green saturation slightly so foliage feels soft and painterly instead of neon and distracting.
Combine the filter with a small fade in the blacks to mimic vintage film and amplify the romantic tone.
Muted Coastal and Seaside Aesthetic Filters
Seafoam Dream

- Effect look: Soft teal water tones, bright sand, and gentle pastel skies with reduced overall contrast.
- Best for: Beach walks, seaside cafes, and drone shots over clear water in aesthetic vlogs.
- Editing tip: If the water looks too green, push the teal hue slightly toward blue for a cleaner, dreamy sea look.
Seafoam Dream turns coastal footage into a calm, pastel escape with creamy sand and soft teal water. In Filmora, it shines on aerial beach shots, shoreline walks, and minimal compositions where the sea and sky dominate the frame.
Use hue controls to keep water closer to blue-teal rather than green, especially in tropical locations. The reduced contrast gives your travel footage a relaxed, airy feeling that pairs well with lo-fi or acoustic music.
Pro tip: Expose for the Highlights on Water
When shooting water, underexpose slightly so the bright reflections are not blown out before adding the filter.
Then apply Seafoam Dream and raise shadows to reveal details while keeping highlights silky and soft.
Harbor Haze
- Effect look: Soft gray-blue cast with slightly lifted blacks and desaturated reds for a quiet, foggy feel.
- Best for: Overcast harbor shots, boats, coastal towns, and slow travel days with moody weather.
- Editing tip: Lower the filter intensity for clips with people so skin does not look too muted or washed out.
Harbor Haze embraces cloudy, dim days and turns them into cinematic, introspective visuals. In Filmora, apply it to piers, fishing boats, and coastal towns when the light is flat but you still want a strong, stylized mood.
Dial back the effect slightly on close-ups to avoid dull skin, and let the gray-blue tone dominate wider establishing shots. The lifted blacks make shadows feel soft instead of harsh, keeping the mood calm and reflective.
Pro tip: Lean into the Moody Weather
Instead of fighting gray skies, use Harbor Haze to stylize them and lean into a soft, cinematic mood.
Combine it with ambient soundscapes like waves or distant traffic to reinforce the calm, reflective feel.
Coastal Pastel Lane
- Effect look: Lightened blues and pink-tinted highlights with gentle saturation for colorful seaside towns.
- Best for: Pastel house streets, coastal alleyways, and bright harbor fronts in lifestyle travel videos.
- Editing tip: Slightly increase saturation only in blues and reds to make buildings pop while keeping skies soft.
Coastal Pastel Lane is designed for charming, colorful seaside villages and narrow streets lined with painted houses. In Filmora, it lifts blues and adds a hint of pink to highlights, giving facades a soft, postcard-like charm.
Use selective saturation controls to help distinctive doors, windows, or facades stand out while skies and pavements remain gentle. A small amount of sharpening keeps architectural details crisp inside the otherwise delicate palette.
Pro tip: Use Leading Lines in Colorful Streets
Frame your shots so rows of houses or street lines guide the viewer s eye through the pastel scene.
Apply the filter, then use a slight crop to straighten lines and keep the aesthetic feeling clean and intentional.
Night Lights and Dreamy Travel Cinematic Filters
Neon Soft Nights
- Effect look: Softened neon lights, gentle bloom on highlights, and slightly cooled shadows for cinematic night scenes.
- Best for: City nightlife, street food scenes, and rainy neon reflections in travel vlogs.
- Editing tip: Reduce noise first, then apply the filter so the dreamy glow sits cleanly on top of your footage.
Neon Soft Nights keeps neon signs vivid but wraps them in a subtle glow that feels cinematic instead of harsh. In Filmora, it is perfect for busy night markets, wet streets reflecting lights, and handheld city explorations after dark.
Run noise reduction before adding the filter so the bloom effect enhances lights, not grain. Cool the shadows a little to contrast nicely with warm signs and lanterns, creating a dreamy cyber-city atmosphere.
Pro tip: Protect Skin Tones in Neon Scenes
Use the color wheels to pull skin back toward natural tones if neon signs cause strong color casts.
Keep the glow for the environment but slightly lower saturation on magenta and blue to avoid distracting faces.
Midnight Romance

- Effect look: Deep, rich shadows, warm light sources, and subtle film grain for an intimate night-time look.
- Best for: Rooftop bars, night walks, and slow, romantic lifestyle moments in big cities.
- Editing tip: Lift shadows only slightly to keep the mood dark and cozy while maintaining detail around faces.
Midnight Romance is built for intimate city nights, where pools of light gently reveal your subjects against dark surroundings. In Filmora, it adds warmth to windows, lamps, and streetlights while preserving moody, rich shadows.
Apply it to small conversation moments, rooftop views, and quiet walks, then introduce a touch of grain for a subtle analog feel. Avoid brightening the entire frame too much so the cozy, cinematic atmosphere stays intact.
Pro tip: Use Pockets of Light to Shape the Scene
Have your subjects stand near warm light sources like windows or street lamps so the filter can emphasize that glow.
Avoid over-brightening the entire frame; let the darkness frame your subjects for a cinematic, intimate vibe.
Twilight Travel Cinema
- Effect look: Cool twilight blues in the shadows, soft magenta highlights, and slightly lifted blacks for a filmic dusk look.
- Best for: Blue hour skylines, evening streets, and establishing shots for travel cinematic sequences.
- Editing tip: Apply slight sharpening after the filter to keep skyline details crisp against the soft twilight colors.
Twilight Travel Cinema is tailored for blue hour, when the sky turns deep blue and city lights start to glow. In Filmora, it enriches those colors with cool shadows and gentle magenta highlights, ideal for intros, outros, and time-lapse sequences.
Lift the blacks slightly so the frame feels filmic rather than crunchy, then sharpen buildings or silhouettes so they stand clearly against the soft sky. This combination gives your travel edits a polished, cinematic structure.
Pro tip: Shoot Early in Blue Hour for Flexibility
Capture your twilight clips when there is still enough ambient light so shadows remain clean after grading.
Then add the filter and fine-tune exposure to avoid noisy shadows while preserving the rich twilight color.
Tips for Using Travel Aesthetic Filters in Filmora
- Group your travel clips by lighting conditions and apply matching filters so each part of your vlog feels consistent.
- Lower filter intensity for close-up shots of faces to keep skin tones flattering and natural.
- Use one main aesthetic travel filter as your base look, then adjust exposure and white balance per clip instead of swapping filters constantly.
- Shoot slightly flatter in-camera if possible, so your pastel and romantic filters have more room to shape color and contrast.
- Export a short 10 to 20 second test sequence to check how your filter choices look on mobile screens where most viewers will watch.
Aesthetic travel video filters can transform raw trip footage into a soft, cohesive visual story that feels dreamy, cinematic, and personal. By choosing filters that match your destination, lighting, and mood, you can create travel vlogs and lifestyle videos that viewers recognize as your signature style.
Start with one or two favorite presets, like Aesthetic Travel Filter. Dreamy Escape, then build a simple workflow around them: organize clips by time of day, apply matching filters, and fine-tune exposure and color only where needed. With a consistent process, your travel edits will look polished while staying fast and enjoyable to create.
secure downloadNext: Explore Travel Cinematic Filters for Deeper Movie-Like Looks
