
 100% Security Verified | No Subscription Required | No Malware


 ChatGPT
 Perplexity
 Gemini
 Claude
 Grok
Grok
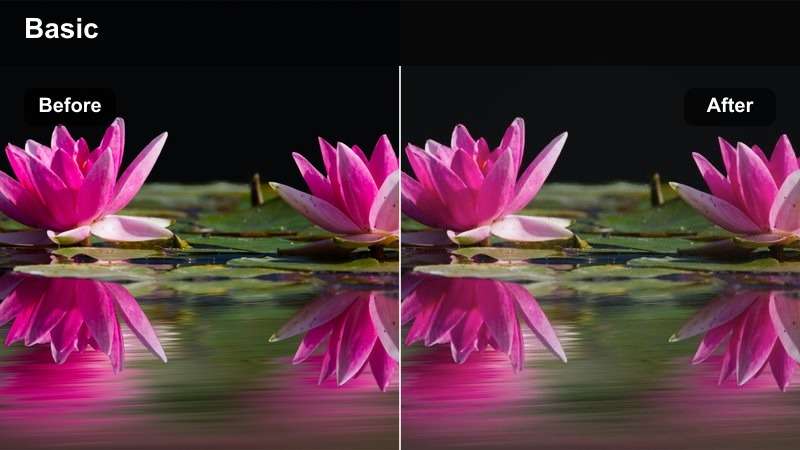
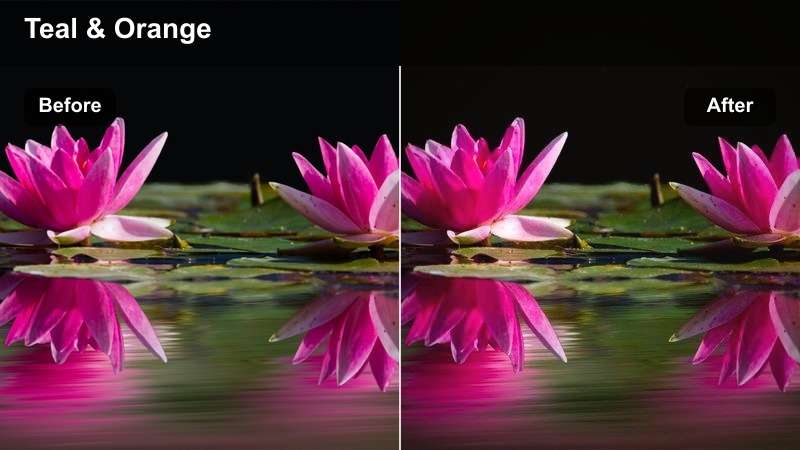
YouTube night vlogs live and die by mood: deep shadows, neon lights, and subtle contrast that still keeps your subject visible. With the right Filmora filters, you can quickly mimic popular YouTube night vlog LUTs and lock in a moody tone that feels cinematic instead of just dark.
This guide breaks down scene-based filter styles you can stack and fine-tune in Filmora, so your footage looks intentional whether you are walking under city neon, filming in a dim car, or capturing quiet late-night streets. Use these filter ideas as ready-made recipes to build your own signature YouTube night vlog look.
In this article
City Neon Walks and Street Adventures
Midnight Neon Glow
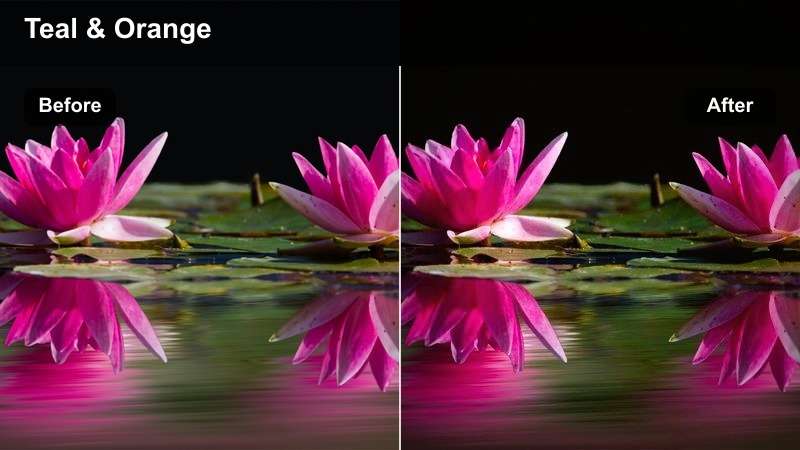
- Effect look: Soft contrast with lifted shadows, teal shadows and magenta highlights, preserving neon sign intensity without crushing dark areas.
- Best for: Handheld YouTube night vlogs walking through busy downtown streets full of neon signs, billboards, and reflective wet pavements.
- Editing tip: Drop overall saturation slightly, then selectively boost saturation in blues and magentas to keep skin tones natural while neon colors pop around your subject.
Use Midnight Neon Glow when you want your night city walks to feel cinematic without losing detail in dark corners. In Filmora, start by applying a teal tint to shadows and a gentle magenta push in highlights, then ease off global contrast so you keep texture in buildings, sidewalks, and your clothing.
To keep it watchable on mobile, lower overall saturation just a little and then boost blues and magentas with HSL so neon signs and reflections stay vivid. Finish by slightly lifting shadows in the color wheels to avoid crushed blacks that can turn into noisy patches on YouTube.
Turn Night Vibes into a Consistent Color Story
Filmora's AI-powered color tools help you keep your YouTube night vlog LUTs and filters consistent from neon streets to quiet car talks, automatically balancing exposure and tones across clips.
Use them as a starting point, then fine-tune shadows, midtones, and highlights so your entire vlog carries the same moody tone even when you shoot under mixed city lighting.
 secure download

Fine-Tune Moody Tones with HSL and Curves
Once your base palette is set, Filmora's HSL controls and curves let you lock in the exact teal, magenta, and amber tones you want for night vlogs. You can push neon colors while keeping skin tones believable and reduce distracting casts from mixed city lighting.
Target individual ranges like blues, cyans, and oranges to give signs, car lights, and storefronts a stylized punch without turning the entire frame into a single color wash.
secure downloadPreview Night Filters in Real Time
With Filmora, you can stack filters, tweak intensity, and play back your night clips instantly to see how different looks affect your city lights and skin tones.
Save your favorite combinations as custom presets so you can apply the same moody night style to every new vlog episode with a single click.
secure downloadSubway Platform Noir
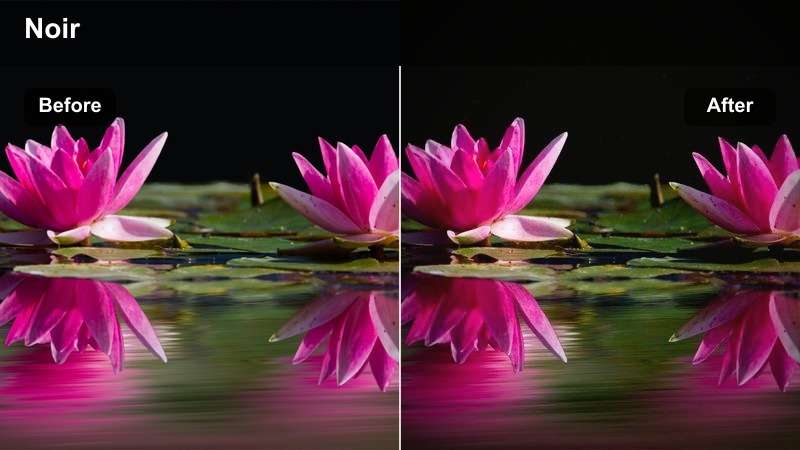
- Effect look: Low-key, high-contrast look with cool shadows and slightly desaturated overall color that leans toward a modern film-noir style.
- Best for: Night vlog story segments shot on metro or subway platforms with strong overhead lights and deep tunnel darkness.
- Editing tip: Use vignetting to darken the frame edges and raise midtones slightly so your face stays readable while the background falls off into shadow.
Subway Platform Noir is perfect when you want your underground scenes to feel tense and cinematic. In Filmora, push contrast and cool down the shadows, then roll back saturation so the environment feels gritty instead of colorful.
Add a vignette to pull focus toward your face and use the color wheels to gently warm midtones so your skin does not look lifeless under fluorescent lights. If tunnel darkness becomes a black void, lift shadows slightly to reveal just enough texture to keep the shot visually interesting.
Rainy Street Reflections
- Effect look: Soft, slightly hazy contrast with boosted saturation in blues and cyans to highlight reflections on wet streets and sidewalks.
- Best for: Night vlogs filmed after rain, featuring reflections of car lights, storefronts, and city signs on the pavement.
- Editing tip: Add a subtle fade in the blacks using curves and lean the overall white balance slightly cooler to enhance puddle reflections without making skin too blue.
Rainy Street Reflections works best for B-roll and walking shots where puddles and wet asphalt mirror the city above. In Filmora, lower contrast a touch, add a bit of fade in the blacks, and push the white balance slightly toward cool to make every reflection stand out.
Use HSL to selectively enhance blues and cyans so car lights and neon signage shimmer on the ground without overpowering your face. If your skin tone becomes too cold, warm the midtones or reduce blue saturation in the skin range only, keeping the environment stylized while you stay natural.
Inside the Car: Night Drives and Conversations
Dashboard Mood Glow
- Effect look: Soft, low-contrast image with warm midtones and slightly lifted blacks, using dashboard and street lights for a cozy yet moody feel.
- Best for: Sit-down conversations in a parked or slowly moving car at night where you want intimacy without total darkness.
- Editing tip: Use a subtle vignette and raise exposure only on your face with a mask so the cabin stays dark while your expression remains clear.
Dashboard Mood Glow is ideal when you want late-night car talks to feel safe and intimate rather than harsh or spooky. In Filmora, warm the white balance, soften contrast, and slightly lift the blacks so shadows in the car interior feel gentle instead of crushed.
Add a vignette to keep the cabin edges dark, then use a mask over your face to increase exposure and a bit of sharpness. This lets passing street lights and dashboard glows shape the mood, while your expressions remain easy to read even on small screens.
City Drive Blues

- Effect look: Cool-toned filter with crisp contrast and subtle blue tint in shadows, giving city lights a sharp, modern vibe through car windows.
- Best for: Driving shots where city lights streak across windows and the dashboard gets intermittent light from passing signs and traffic.
- Editing tip: Stabilize the clip slightly, then reduce luminance noise before sharpening so the cool contrast does not exaggerate sensor grain.
City Drive Blues gives your driving montages a slick, modern style where blue-tinted shadows frame sharp city lights outside the windows. In Filmora, push a cool tint into the shadow range, add medium to strong contrast, and keep highlight detail under control so street lights do not blow out.
Before you sharpen, apply light noise reduction and stabilization so the crisp look does not amplify grain and camera shake. If your face dips in and out of light, use keyframed exposure adjustments to gently lift brightness on your skin without flattening the entire shot.
Late Night Ride Confessional
- Effect look: Muted colors with gentle contrast and slightly lifted blacks, leaning neutral to let the emotional tone of your story come through.
- Best for: Personal, reflective monologues in the car after a long day or event where storytelling matters more than flashy colors.
- Editing tip: Lower saturation across the board and add a subtle fade in blacks so the environment feels quiet and the focus stays on your voice and face.
Late Night Ride Confessional is all about letting your story take center stage. In Filmora, pull down global saturation, soften contrast, and raise blacks slightly so the inside of the car feels quiet, with fewer bright distractions pulling viewers away from your face.
Keep the color balance neutral, only warming your skin tones a touch if they look too gray. Combine this look with gentle audio mixing and slower cuts so the overall feel of the vlog matches the calm, reflective visuals you have created.
Quiet Backstreets and Urban Alleys
Alleyway Cinematic Matte
- Effect look: Film-style matte blacks with a slight green-blue tint in shadows and gentle contrast that feels like a slow, cinematic sequence.
- Best for: Slow walking clips through narrow alleys, backstreets, and parking lots where light is minimal and mood is everything.
- Editing tip: Add a small letterbox crop and slow motion, then keep movement minimal in the frame so the matte look feels deliberate, not just noisy.
Alleyway Cinematic Matte turns dim backstreets into stylized, film-like passages in your vlog. In Filmora, use the curves tool to lift blacks and slightly compress highlights, then tint shadows toward teal or green-blue for a subtle, moody wash.
Apply a letterbox crop and slow down your footage if you shot with a higher frame rate, keeping camera moves steady or minimal. Adding light noise reduction before raising blacks helps prevent grain from becoming distracting in those ultra-dark corners.
Lamp-Lit Corner Amber
- Effect look: Warm, amber-toned highlights from street lamps with gentle roll-off into cooler shadows, ideal for isolated pools of light.
- Best for: Standing under a single streetlamp or corner light while the rest of the alley fades into cool darkness behind you.
- Editing tip: Place your subject just at the edge of the brightest spot, then raise midtones slightly so skin glows while background falls softly into shadow.
Lamp-Lit Corner Amber is made for those single-light setups where you are framed under a streetlamp or doorway. In Filmora, warm your highlights and midtones to a rich amber while keeping shadows cooler, creating a cinematic contrast between you and the dark alley behind.
Use a radial mask to brighten your face and upper body while leaving the edges untouched, and dial contrast to keep lamp glare controlled. If harsh shadows appear on your face, soften overall contrast and add a touch of clarity only to your subject so important details remain crisp.
Desaturated City Silence
- Effect look: Heavily muted colors with a cool tint and simplified palette, bordering on monochrome but preserving subtle skin tone warmth.
- Best for: B-roll of empty streets, closed shopfronts, and quiet corners when your night vlog shifts into a reflective or lonely mood.
- Editing tip: Drop global saturation, then selectively bring back a bit of warmth only to skin tones so you stay visually distinct from the empty environment.
Desaturated City Silence is your go-to look when the vlog shifts into quiet, reflective territory. In Filmora, pull global saturation far down, cool the white balance slightly, and keep contrast moderate so details in buildings and sidewalks remain visible without feeling lively.
To keep yourself separated from the environment, selectively warm and slightly saturate skin tones with HSL or color wheels. Allow only a few small colored accents, like a distant traffic light or sign, to peek through so the frame feels emotionally muted but not completely lifeless.
Rooftops and City Overlooks
Skyline Bokeh Mood
- Effect look: Soft focus feel with slightly lowered clarity in the background, warm midtones, and glowing city bokeh behind a well-lit subject.
- Best for: Talking shots on rooftops or balconies where the city skyline and blurred building lights sit behind you.
- Editing tip: Keep your face slightly brighter than the skyline and use a touch of blur or reduced clarity on the background to emphasize depth.
Skyline Bokeh Mood gives your rooftop shots a dreamy, cinematic depth with glowing lights behind you. In Filmora, keep your face clean and sharp, then reduce clarity or add a subtle blur effect only to the background so the skyline melts into soft bokeh.
Warm your midtones for a flattering skin tone and gently lower highlight contrast to stop city lights from clipping. Make sure your exposure keeps your face just a bit brighter than the skyline, guiding viewers to your expression while still showcasing the city around you.
City Haze Fade
- Effect look: Faded contrast with lifted blacks and a very light misty overlay that makes distant city lights feel hazy and dreamlike.
- Best for: Wide shots of the city skyline, drone-like perspectives, or establishing shots that open your night vlog.
- Editing tip: Lift the blacks gently and add a touch of film grain so the fade feels intentional rather than like washed-out, overexposed footage.
City Haze Fade is great for opening or closing your night vlogs with a dreamy skyline. In Filmora, raise the black point, soften overall contrast, and optionally add a light mist or glow effect to distant lights to create a sense of atmosphere.
To avoid a washed-out look, introduce a touch of film grain and keep midtones controlled so buildings retain structure. Use this filter when you want a visual breather between high-energy segments or as a recurring motif that signals the vlog is winding down.
Rooftop Chill Session
- Effect look: Balanced, slightly cool filter with medium contrast and clean colors, keeping the mood relaxed but not overly dramatic.
- Best for: Hangout scenes with friends on rooftops, casual conversations, or simple shots watching the city from above.
- Editing tip: Avoid overly strong tints and keep saturation moderate so faces, clothes, and city lights all look true to life yet cohesive.
Rooftop Chill Session is designed for casual, social moments where you want the night mood without heavy stylization. In Filmora, apply a gentle cool tint, keep contrast in the mid range, and avoid aggressive color pushes so everyone looks natural under mixed rooftop lighting.
Balance exposure so faces are clearly visible and city lights still read in the background, then keep saturation moderate for a clean, vlog-friendly palette. You can nudge the temperature slightly warmer or cooler depending on whether the conversation is lively or reflective, without needing to switch to a completely different look.
Tips for Using Youtube Night Vlog Luts Moody Tone Filters in Filmora
- Shoot slightly brighter than you want the final look, then darken in Filmora to avoid crushed shadows and noisy footage.
- Lock white balance in-camera at night so your clips do not shift color every time you pass a new light source.
- Use a consistent mix of two or three filters across an entire vlog instead of changing styles in every scene.
- Adjust saturation by color range to keep skin tones natural while giving city lights a stylized punch.
- Stabilize handheld night shots before heavy contrast or sharpening so grain and motion do not become distracting.
- Add a subtle vignette on most night clips to guide viewer focus toward your face or the brightest part of the frame.
- Export a short test cut and watch it on your phone, since most YouTube viewers watch night vlogs on mobile screens.
- Save your favorite combinations of exposure, contrast, and color as Filmora presets so you can grade new uploads quickly.
With the right mix of Filmora filters, you can turn ordinary low-light footage into moody, story-driven YouTube night vlogs that still keep your face clear and the city alive.
Experiment with these scene-based looks, refine them for your own style, and save your presets so every new night vlog uploads with a consistent, cinematic tone your audience instantly recognizes.
secure download