Note: This video tutorial is compatible with Filmora V11, V12 and V13 versions.
How to Change The Speed of Your Video?
In this video, you will also learn the importance of Frames Per Second (FPS) in changing the speed of the video. Whether it is increasing or decreasing the speed of the video, FPS has an important role to play. Generally, the higher the FPS, the better is the view of the video when the speed of the video is changed.
To check out the Frame Per Second of our video, we will right-click the video and then select the properties option. The properties panel shows us the other general properties of a video, including the FPS.
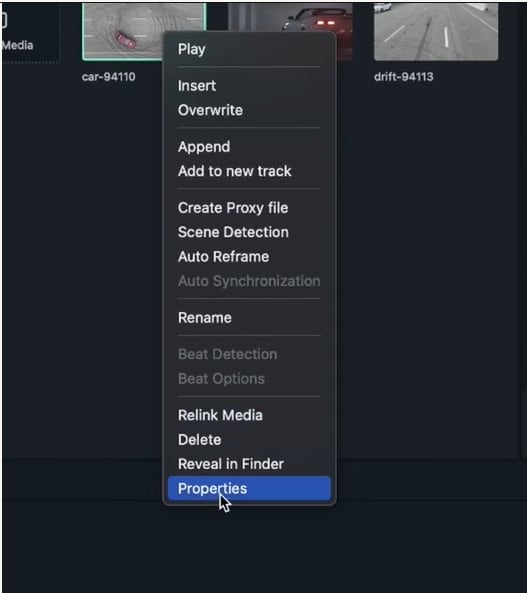 Properties option to check FPS
Now we get started with our tutorial.
We need to get started by firstly importing your footage. We can import video from your storage, or we can use one from the stock media. We can choose some high-quality videos using "Pixaby".
Select the video of your choice. Click the download option. Hit the "plus" icon and then choose the "match to media" option to keep the quality of the video intact.
 Add button to Add video
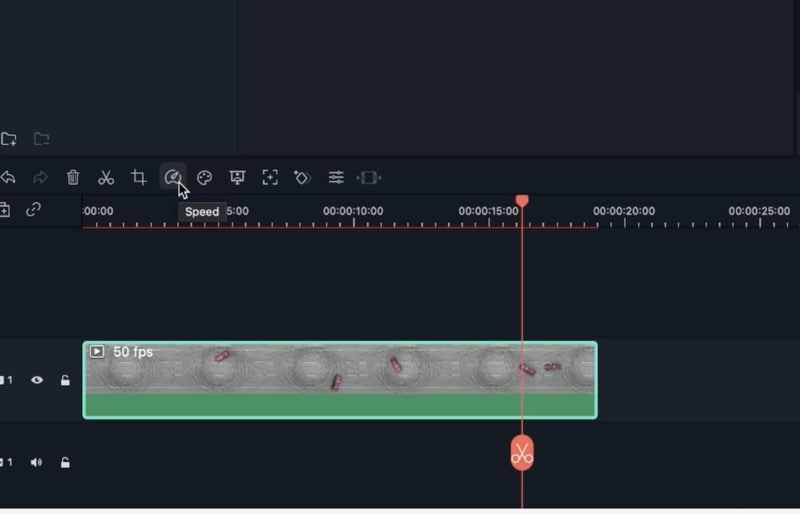
Once we get our video, we will either double-click on the selected video or click on the speed option given below the screen.
 Speed Preset on tools bar
When we double-click on the selected video, a window pops up. Under this window, we will go to the "SPEED" panel. This speed panel further has "uniform speed" and "speed ramping" panels. To change the speed of the whole video uniformly, we will work under the uniform speed panel. We are provided with a slider to change the speed of our video.
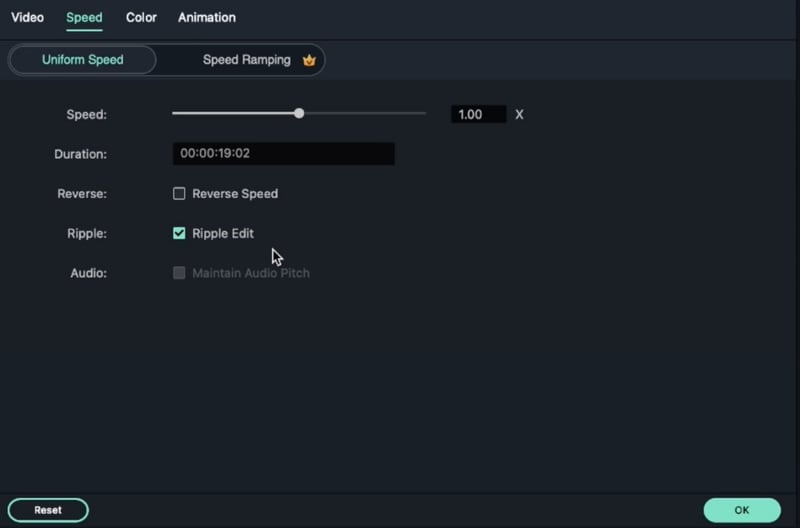 Speed slider to increase/ decrease speed
By default, the speed of our video is one. Moving the slider, to the right, to more than one will increase our video at a uniform speed of more than the normal speed. If we move the slider to the left, to any number below 1, it will decrease our video speed to a number less than 1. Using the uniform speed option gives our whole video a uniform increase or decrease in the speed of the video.
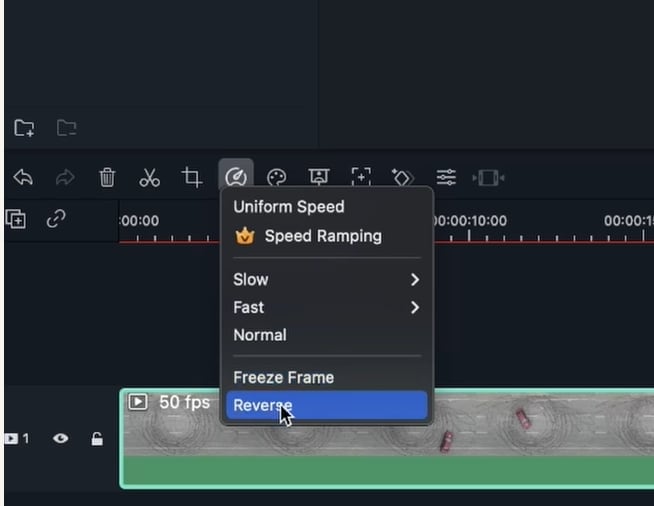
If we select the speed option, under the screen, it offers us the presets like fast, normal slow with an inbuilt set of numbers by which we want to increase and decrease the speed of our video. We can either use the slider or use these presets for changing the speed according to our needs.
Once we select the "OK" option, the speed of our video is automatically changed.
Filmora also provides us with the option to create a reverse video of our original video. For achieving a reverse video, we will undertake the following steps-
The reverse option is also placed under the uniform speed option and also given as a preset when you click the speed option under the video. We just have to click on the box in front of the reverse speed option and click on "OK" to turn on the reverse speed option.
 Reverse Preset For Reverse Effect
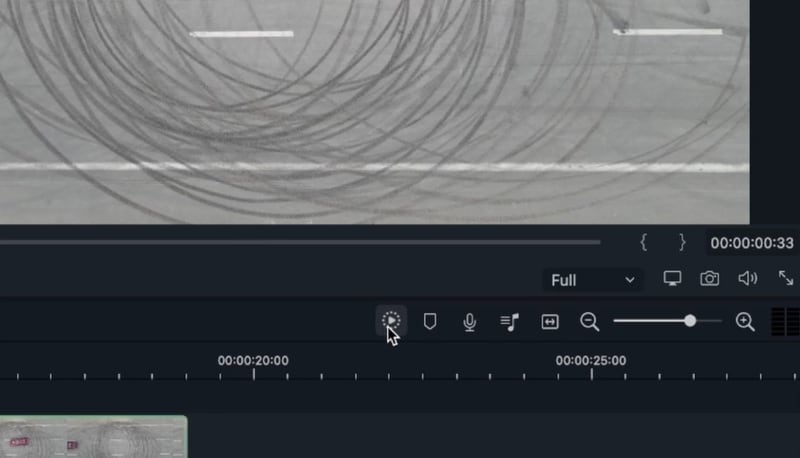
The video tends to show a glitch effect because the video has not been rendered yet. We can render the video by choosing the play option that is encircled with dots, given under the screen. Once our video is rendered, we get a smooth play of the video.
 Render option to render video
Next, we learn to use the "RIPPLE EDIT" option. What this option does is attach two videos by default so that no matter what changes are made to the speed of the video. The ripple effect makes sure that the second video starts immediately starts when the first video ends. When you don't choose the ripple effect, a variation in the speed of the video will bring in a gap between the two videos that you have placed together purposely.
In order to use the ripple effect, firstly you will place 2 videos adjacent to each other. Then double-clicking on one video will open the speed properties window, we will click on the box in front of the "ripple effect" and click on "OK". The ripple effect will attach the two videos together. Any variation in the speed of the video will not lead to any gaps between the video because the videos have now been attached to each other.
 Ripple option for ripple effect
Filmora also offers us the speed ramping option, which is used to variate the speed differently for different parts of the same video.
With the speed ramping option, we can design some timelines of the video to be fast and the other timelines of the video to be slow, whatever motion suits our video.
For setting up the speed ramping feature in your video, we will have to double click the video and under the speed panel, we will go on to the "SPEED RAMPING" option. On selecting the speed ramping option, we get to see a lot of different graphs. Each graph shows different variations to speed that we can put into our video.
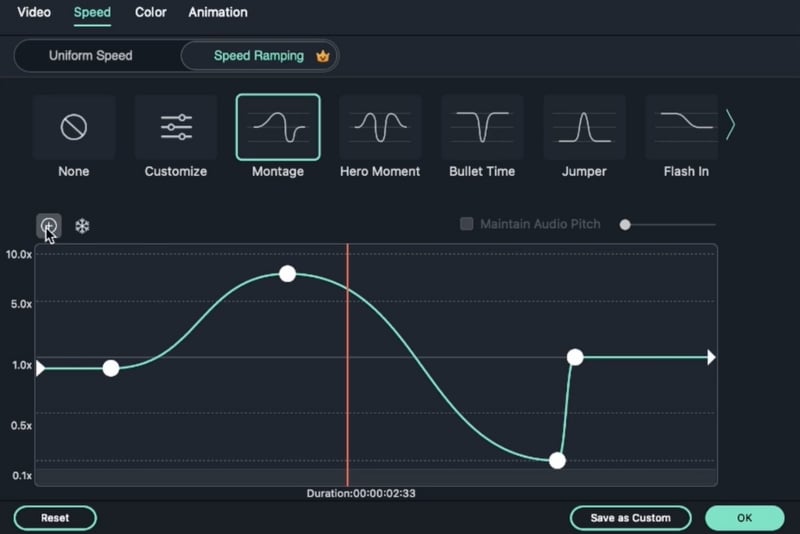 Speed Ramping option
For example, in the above image, when we select one of the presets "MONTAGE", the speed of the video increases and decreases according to the different keyframes that we select at different speeds. As mentioned above, when the graph goes below one, we will get a decrease in the speed of the video, and when the graph goes above 1, we will get an increase in the normal speed of the video.
 Different graphs for different ramping option
We can move these keyframes up when we wish to increase the speed of the video and bring it down when we want to bring in a slow-motion to our video. We can also add new keyframes by clicking on the add button on the top, as shown in the image. Once we are satisfied with our results, we will click on the "OK" button and then render the video.
We hope this tutorial helped you understand the SPEED feature of Filmora.
