Note: This video tutorial is compatible with Filmora V11, V12 and V13 versions.
You can perform color correction in Filmora by adjusting brightness, saturation, contrast, tint, temperature, and white balance and applying 3D LUT. You can use color tools to correct the imperfections in your raw footage after capturing it with your camera. Filmora's color correction tools make your videos look natural, more appealing, vibrant, consistent, and professional.
Color Correction Presets
The color correction Presets help your video achieve an enhanced cinematic look. Adjust gives you control over fine-tuning the colors in your footage. You can make various adjustments, such as color temperature and exposure.
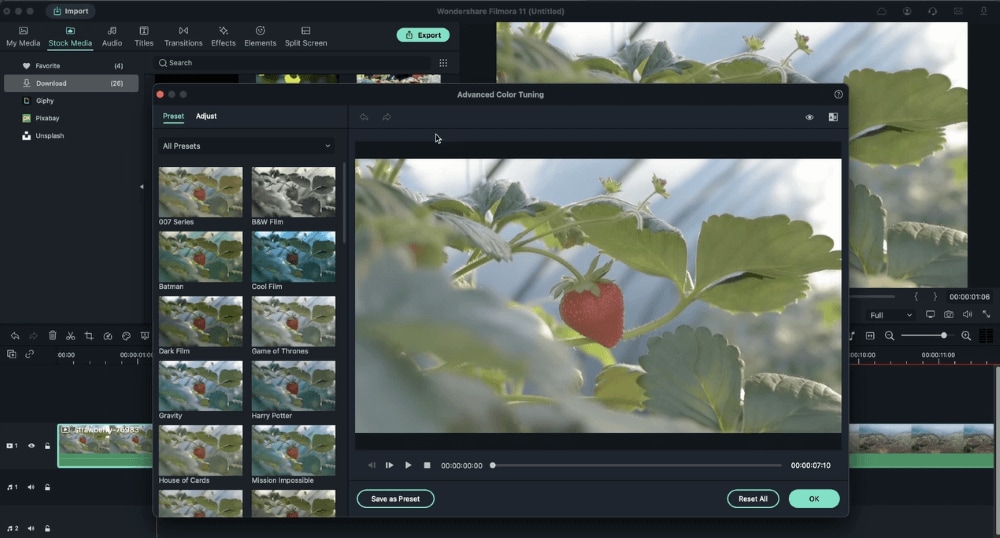
You will see an expansive selection of premade color settings in the Preset tab. These include Vignettes, Film looks like those in vintage movies, and cinematic 3D LUT effects, such as Harry Potter, Game of Thrones, House of Cards, and Mission Impossible.
 Presets in Filmora
Filmora's Color Correction tool also categorizes your Presets. Click on All Presents, where you'll see six categories: Favorite, Custom, 3D Lut, Common, Film, and Vignette.
 Preset Type in Filmora
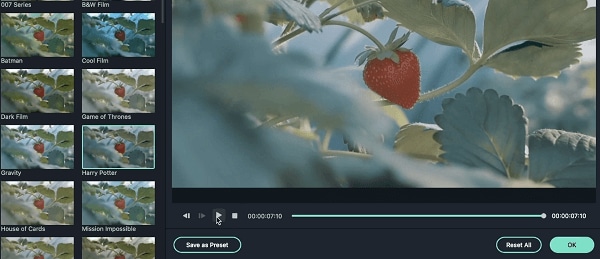
Double click on a preset to apply it to your video. You can watch what it looks like on the Advanced Color Correction preview window. Click the OK button if you are happy with the results.
 Apply Presets
If you like a preset, you can add it to Favorite. To add a preset on the Favorite, right-click on it and select Add to Favorite. Filmora will add this preset to the Favorite category.
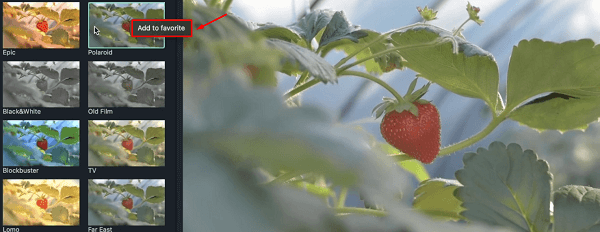 Add Presets to Favourite
You can also remove a preset from Favorite. Go to Favorite and right-click on the preset, and click on Remove from Favorite.
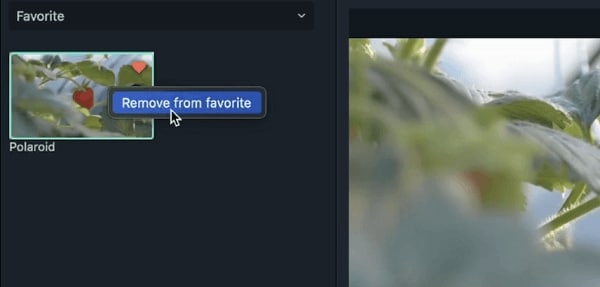 Remove Presets from Favourite
How to Adjust Color Correction
The Adjust tab allows you to fine-tune your color settings. Below are the parameters you can adjust in Filmora.
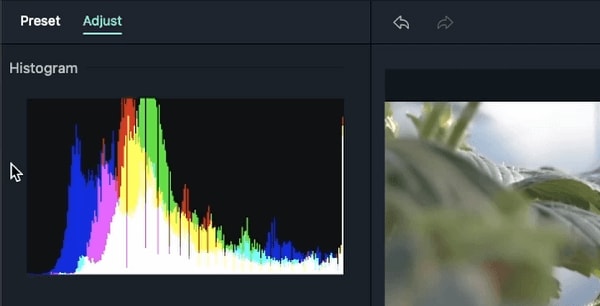
The Histogram shows you the color state of your video, reflecting the exact distribution of colors throughout the video. It highlights the different colors appearing on your screen and the pixel for each color type.
 Color Correction - Hitogram
This submenu allows you to adjust the tint and temperature of your video. Color temperature is measured in Kelvins. Drag the Temperature slider backward or forward.
If you move the slider forward, you will achieve a warmer-looking image. Moving the slider backward will give you a colder-looking image. By dragging the Tint slider, you'll apply tints of various hues to the video.
You can use this setting to choose presets imitating the visual styles of various TV shows and movies. Also, you can download and install 3D LUTs on your PC and then load them into Filmora using the Load New LUT option.
The Color setting allows you to adjust vibrance, saturation, contrast, brightness, and exposure.
 Color Correction - Color
- Exposure: a positive value lightens the colors in the video clip, while a negative value darkens them. You can use this setting to fix over and underexposed images. Exposure darkens and lightens by affecting the image highlights.
- Brightness: Use this slider to brighten or darken your video.
- Contrast: This slider adjusts the contrast between the darks and the lights in the image. Drag the slider forward to darken the dark areas of your image and lighten the light areas. To lighten the light areas, drag the slider backward.
- Vibrance: You can use the Vibrance slider to increase the intensity of more muted colors while leaving the already saturated colors alone. You can use it on not-so-colorful things, such as mountains, stones, and sand.
- Saturation: This slider targets anything in your image that has color. Drag the slider forward to increase the intensity of the color in the image. Dragging the slider backward will make the color less intense, making it look gray.
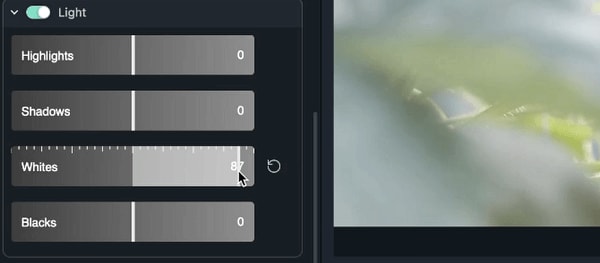
You can use this panel to optimize the light in a video by adjusting Blacks, Whites, Shadows, and Highlights. Drag the associated slider from left to right to adjust these qualities.
 Color Correction - Light
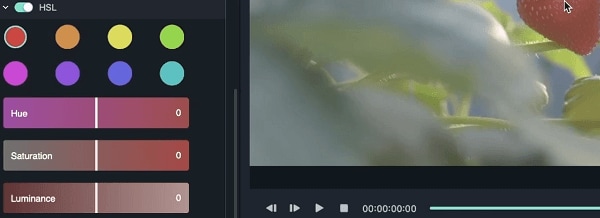
HSL stands for hue, saturation, and luminance. You can use this tab to adjust individual color ranges in a video. Choose the color you would like to adjust from the color panel, then drag the slider associated with HSL to adjust the color you have selected in your video.
With the Hue slider, you can fine-tune the lime green vs teal of the selected color in your video. The saturation slider allows you to change the intensity of a color. Lastly, use the Luminance slider to adjust the brightness of a color.
 Color Correction - HSL
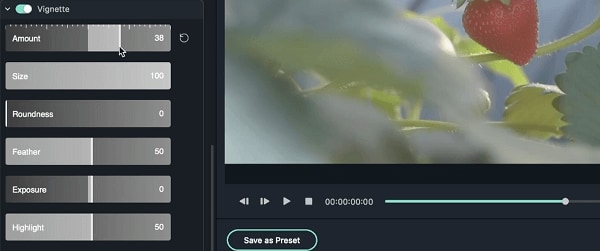
This tab allows you to apply a custom vignette effect to the video. You can do this by dragging the sliders located next to the qualities below:
 Color Correction - Vignette
- Amount: Dragging the slider left will make the corners of your video black. Drag the slider to the right to brighten them.
- Feather: Use this slider to adjust the sharpness of the edges of the vignette. Dragging the slider right will make the edge blurrier. Drag the slider to the left to achieve a cleaner line.
- Size: Dragging the slider to the left side to increase the area of the video affected by the vignette.
- Roundness: Drag the slider to the right side to turn the vignette's shape closer to a circle.
- Exposure: You can use this slider to adjust the video's exposure.
- Highlight: Use this slider to choose whether the blurry edges of the vignette will be darker or brighter.
You can use your customized color settings later in another video by saving these changes. Go to the video preview and hit the Save as Preset button. Name your custom color preset and click OK. Filmora will save the preset in the Custom tab.
 Save Custom Presets
 Find Custom Presets
How to Color Correct in Filmora
Follow these steps to apply color correction with Filmora.
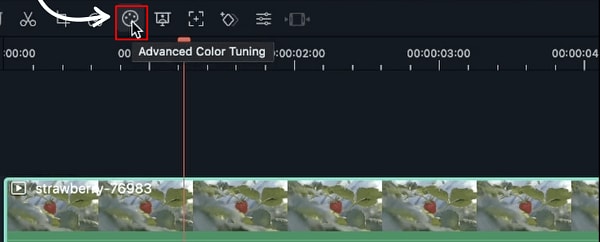
Open Filmora and import your target video clip into the media library. Drag and drop your video clip into Filmora's timeline. Double click on the video clip you would like to color correct and go to Advanced Color Tuning, represented by the color tuning icon. Click it once and select Color Correction from the drop-down menu.
 Import Media File
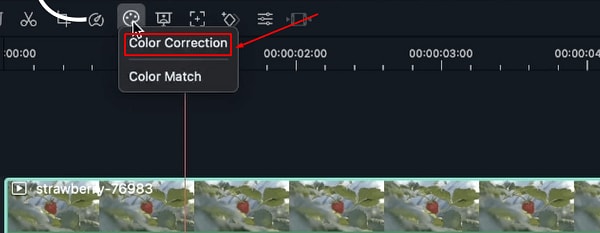 Click Color Correction
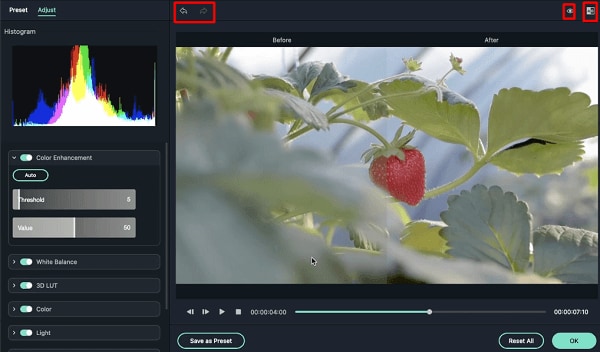
The Advanced Color Correction window will open, and you will see two options: Adjust and Preset.
Adjust & PresetChoose the preset you would like to use or customize your own one.
How to Check Comparison - Before and After
Head over to the top right corner and click on the A/B icon to choose whether you prefer seeing the before and after video clip on Side by Side view (next to each other or you would like to see the changes you have made applied in Split View - Top/Bottom or Split View - Left/Right.
You can disable comparison and use the eyeball icon to see the before and after. You can also use the undo buttons on the top left of the preview panel or click on the Reset All button to undo the changes.
 Before & After