Note: This video tutorial is compatible with Filmora V11, V12 and V13 versions.
Transitions are one of the essential parts of video editing, as they animate the movement from video A to video B. In addition to making your video look more fun and improving its flow, transitions also make your videos look cinematic and professional.
With that in mind, let's have a look at the transitions in Filmora.
Where Can You Use Transitions
Transitions can be used at the beginning/end of the video or between two video clips.
You can use transitions when you need to show a change of direction, the passing of time, a change of subject, or a change of mood in your videos.
How to Apply Transition
Filmora allows you to apply transitions to video tracks using the Transitions tab. To add transitions to your videos, you first need to import them to the media library by heading over to File and selecting the Import Media option. You will then click on Import Media Files and browse through your computer to locate your video files. Select the video files and click Open. Filmora will import your videos into the media library. You can also import the videos by dragging them and dropping them into Filmora's media library.
Now that you have imported your videos to the media library, you have to drag and drop them to Filmora's timeline.
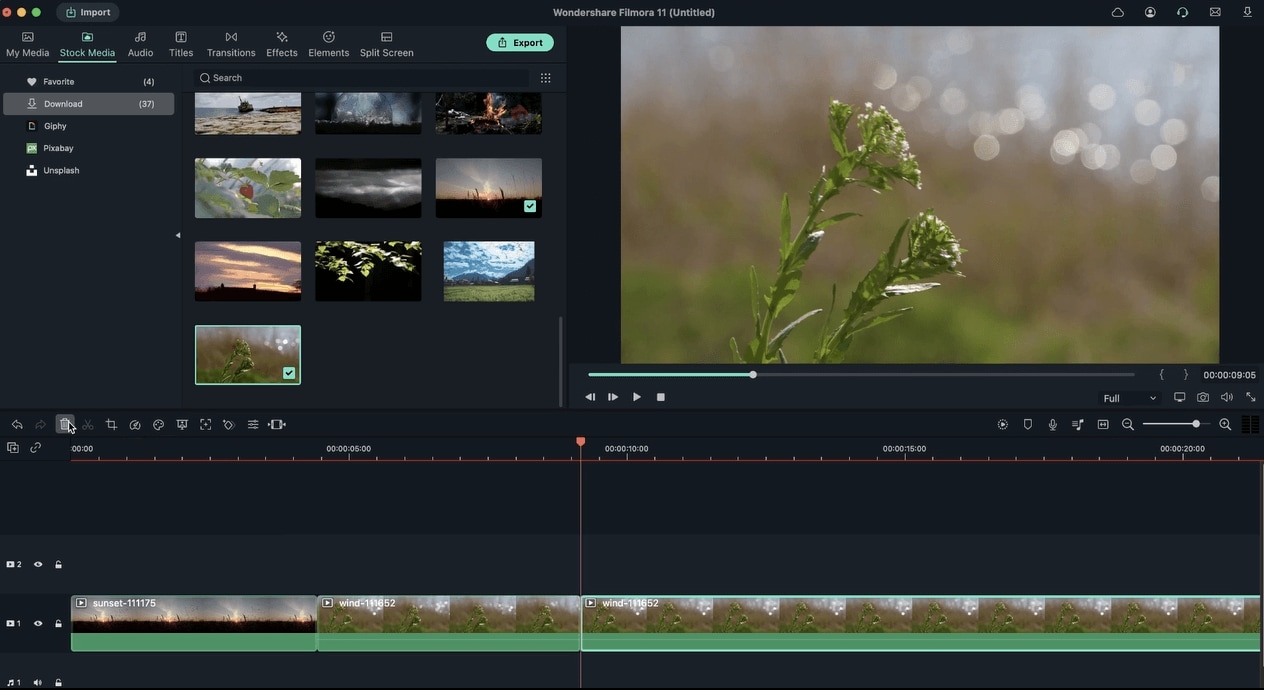 Filmora Editing Effects and Tools
There are two categories of transitions: Default and Filmstock. Default transitions are free to use, and there are many subcategories here. These include Basic, 3D, Ripple & Dissolve, Speed Blur, and Warp. The Filmstock category features more graphic options, including Anime Transitions and Motion Transitions.
 Filmora Transitions Type
If you want to apply a transition, drag your video to the timeline, then go to the Transition tab. You'll see loads of transitions, with some having a simple movement while others featuring animations. Select the one you like and drag it to the end or beginning of your video in the timeline.
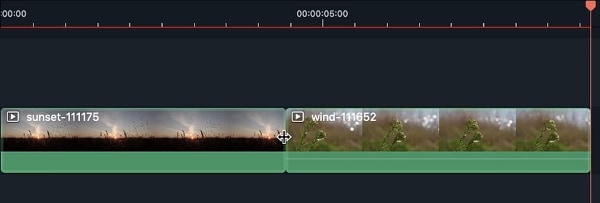 Apply Transitions to Video
Alternatively, you can place the play-head where you would like to add a transition on the timeline, then right-click on the transition. You'll then have to select Apply.
You can preview a transition by double-clicking on it. You'll see how it looks in the preview window.
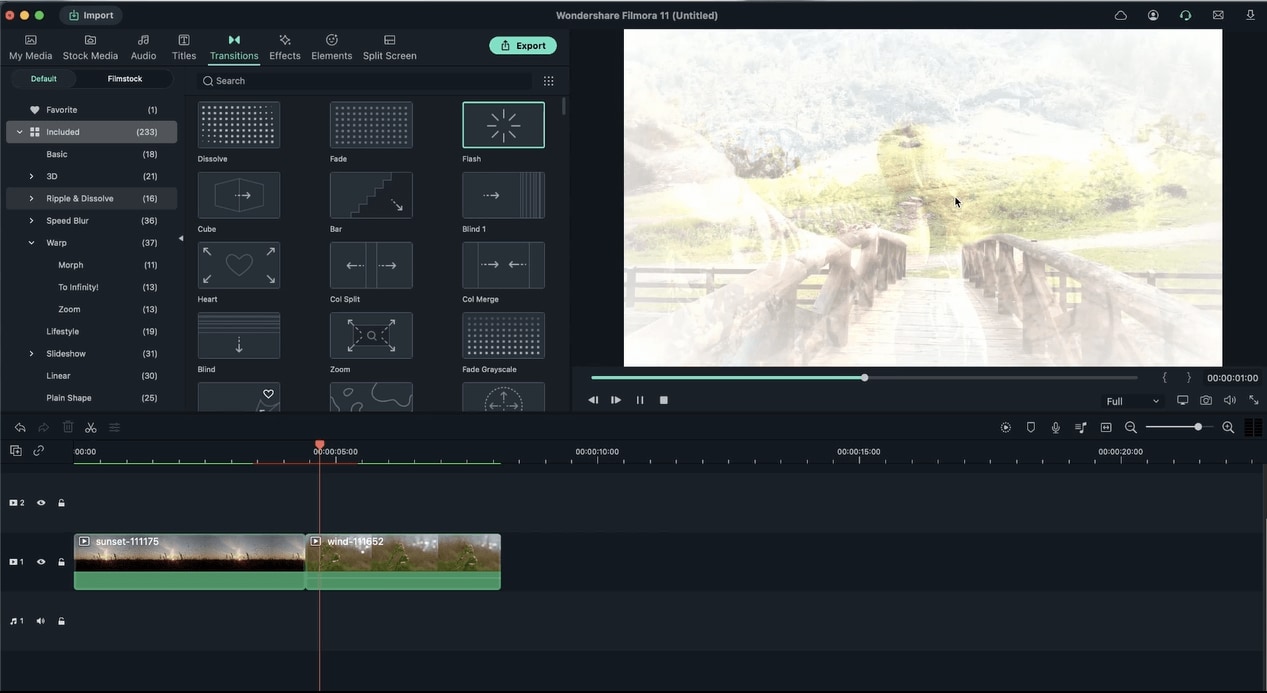 Preview Transitions
If you want to delete a transition, select it and hit the delete icon. You can also press the Delete key on your keyboard.
 Delete Transitions
You can change a transition's duration by double-clicking on it in your timeline, then setting a new duration. Hit the Apply to All button if you have multiple transitions.
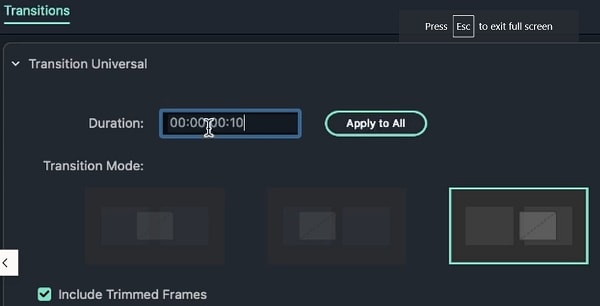 Adjust Duration
You can also select the transition in the timeline and then grab one of the sides; you can then lengthen or shorten the duration of the transition. The longer the duration, the slower it will be.
You can apply transitions between images. Import two pictures in the media library, then drag and drop them in your timeline.
Next, drag and drop the transition to the timeline to apply the effect.
 Apply Transitions Between Images
You can add transitions you love to Favorite and use them later on other videos. Right-click on it and select Add to Favorites.
To find a transition fast, type its name in the search bar.
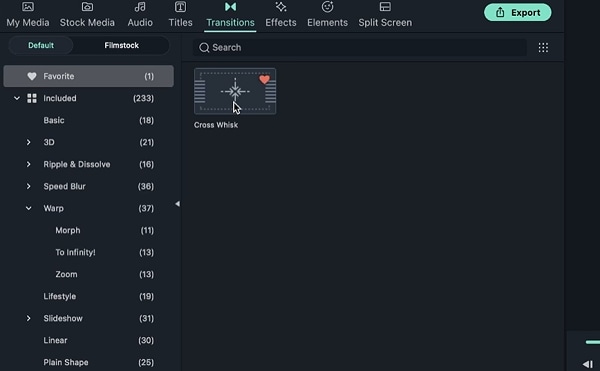 Search Transition
The Filmstock category includes both paid and free options. The paid transitions have a diamond symbol. You can download and try out a transition to see if you like it before purchasing it.
If you like a transition, click Export and hit the Purchase button.


