Note: This video tutorial is compatible with Filmora V11, V12 and V13 versions.
Audio Editing in Filmora
DAWs (digital audio workstations) are designed to assist you in producing clean, professional-grade audio. The top audio editors, such as Adobe Audition, provide strong tools for producing high-quality results faster. Because having the right sound is vital. Isn't it true that everyone is hard-wired to sense when something isn't right?
The complicated audio editing software interfaces may be intimidating to some newbies at first. However, the initial learning curve isn't always as steep as it appears. The capabilities and what these tools allow you to achieve more than makeup for it.
Wondshare Filmora is the solution to all your audio editing problems. You can learn to edit and adjust audio in a video or any other file using Filmora with the help of this tutorial. Let's dive into the steps to audio editing with Filmora.
Edit and Adjust Audio:
We can edit audios and use the available properties to change how they sound.
Go to the Audio tab and select the music of your choice.
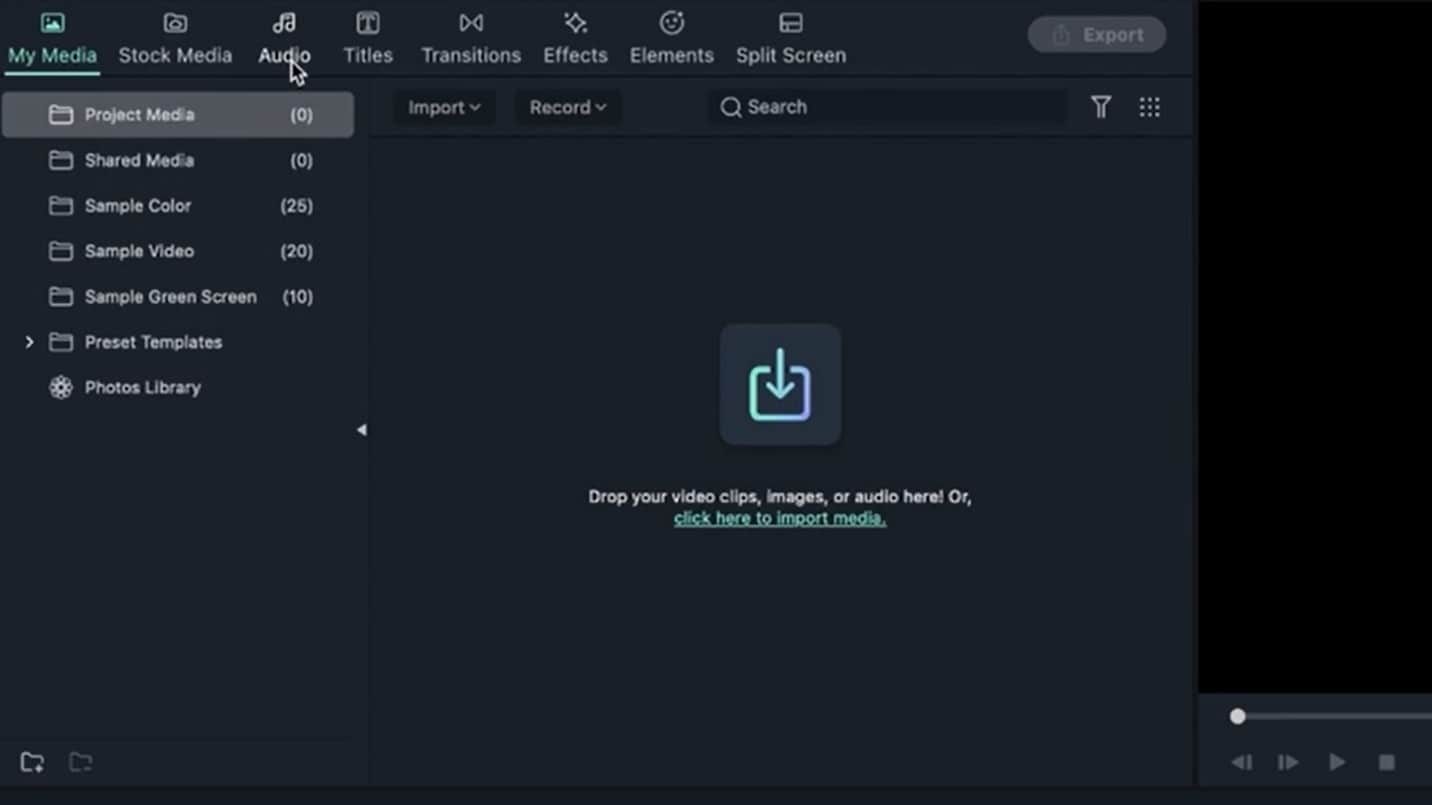 Import the audio file
Drag the audio file to the timeline by the simple drag and drop feature.
 Use the drag and drop feature
You can get into the Properties Panel or select it by clicking its icon below.
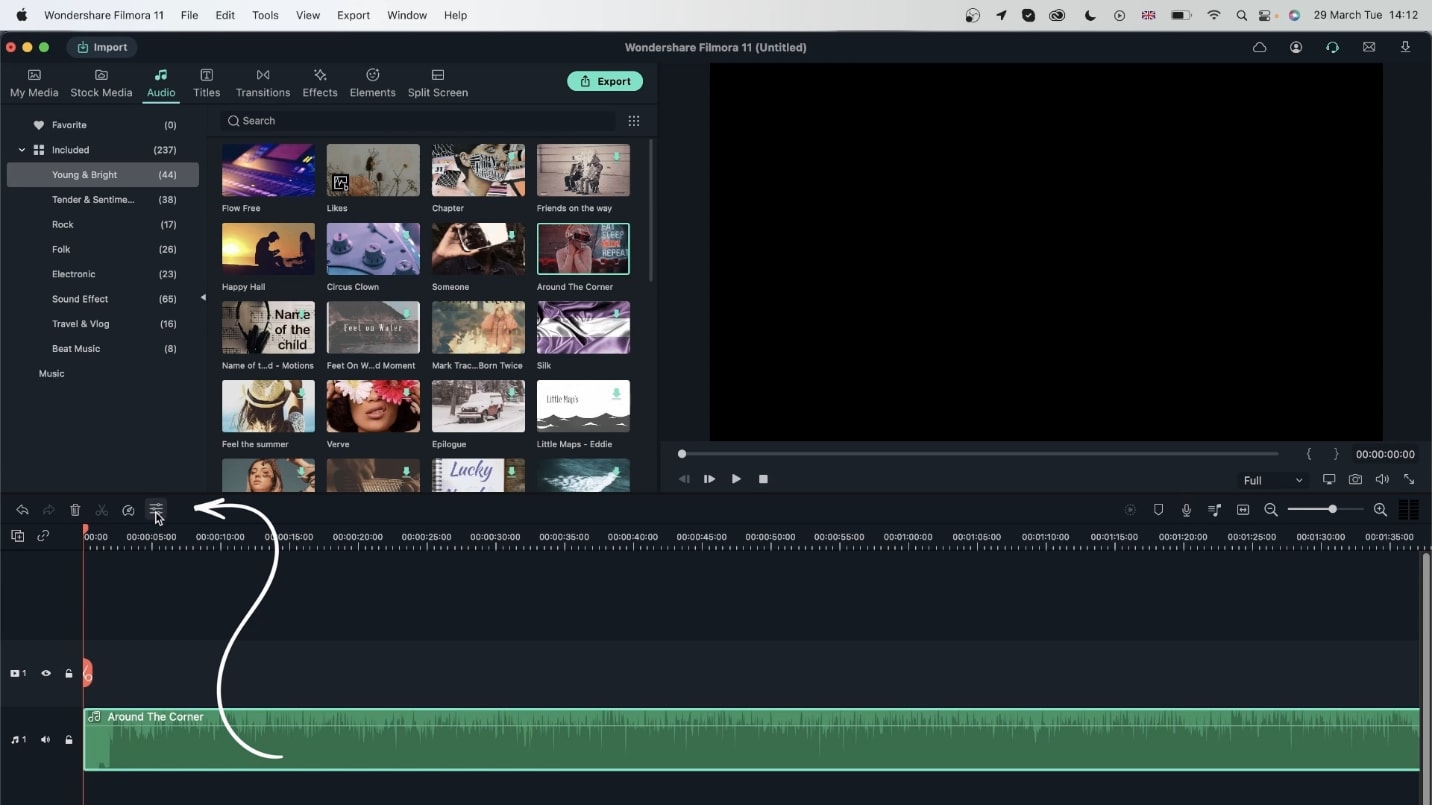 Open the properties panel
A dialogue box will appear with various options.
 A dialogue box with audio editing options
You'll see different colors on the scale when you play the audio. For example, if the bar goes from green to red, it indicates that the music is way too loud. So, try to keep the audio levels in the green area.
 Use the sliders for audio editing
By using the slider or entering the value inbox, you can adjust the volume of the music. The numbers indicate the intensity of the sound and are measured in decibels.
 Change Audio decibels to expand the sound
You can increase your audio's decibel in case of a voice-over and a person speaking with a shallow tone. But in the case of music, expanding the sound may hurt your ears.
L and R show the output coming from the speaker/headphone. With this, you can create the effect of sound coming from one side only.
 Use L and R to create sound effects
Fade in begins from the start of your music. Then, you can either use the slider or enter the desired value.
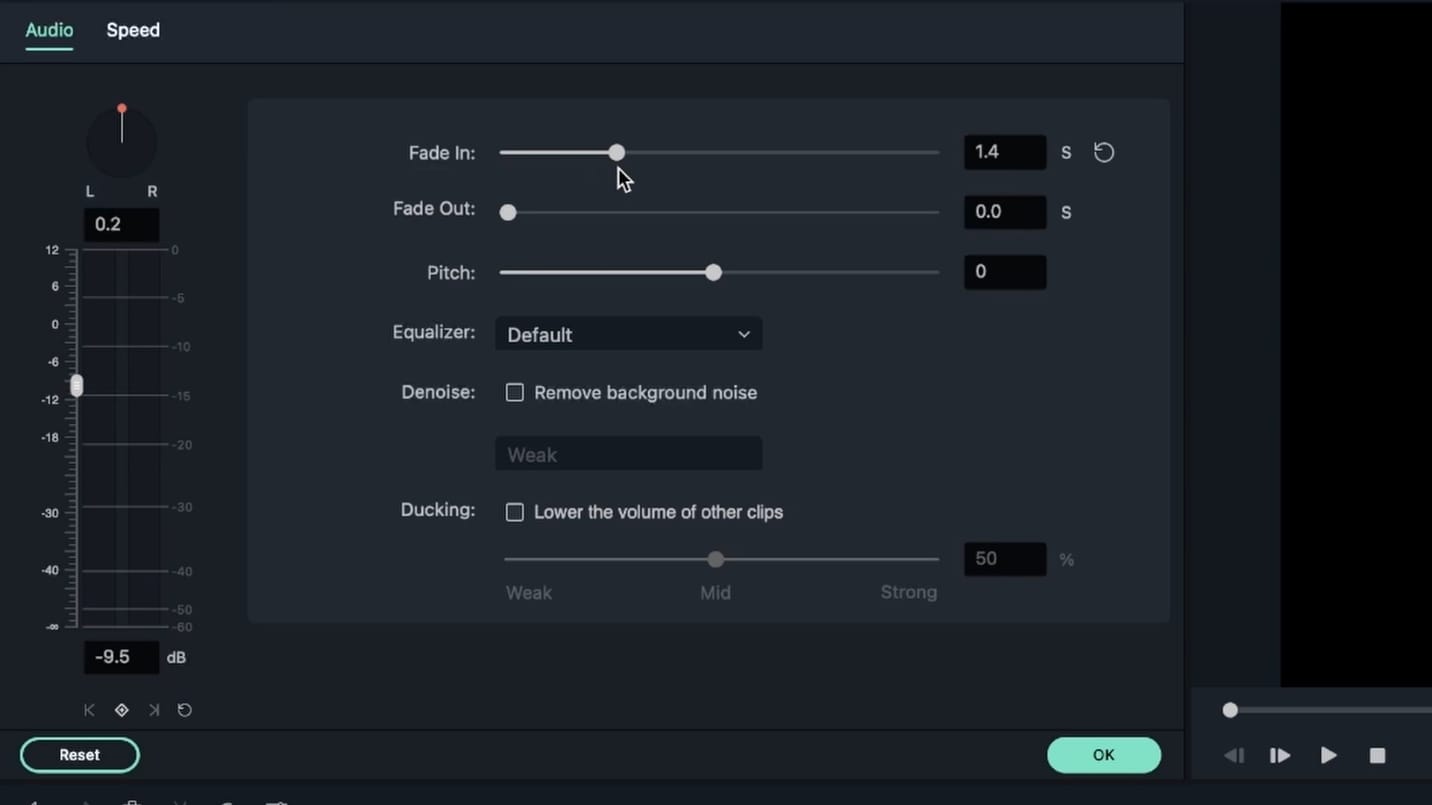 Use the slider or enter the desired value
A tiny grey triangle will appear from the side on increasing Fade in. The audio is low in the region, and it slowly makes its way up to the value shown in the decibel scale box on the left side.
 Decibel scale box on the left side.
But, you can adjust the volume as per your choice.
Similarly, a fade-out feature can be added at the end of the music.
 Use Fade out feature
If you use the slider, you can also use the Fade in/out for 5 seconds. But if you grab the white dots on the timeline at the start of each Fade.
 Fade in and Fade out
It determines how high or low the notes are in the sound.
You can use the slider or enter the value of your choice. You can make the sound sharper by increasing its value. For a muffled sound, you can opt for a negative value.
 High or low the audio pitch
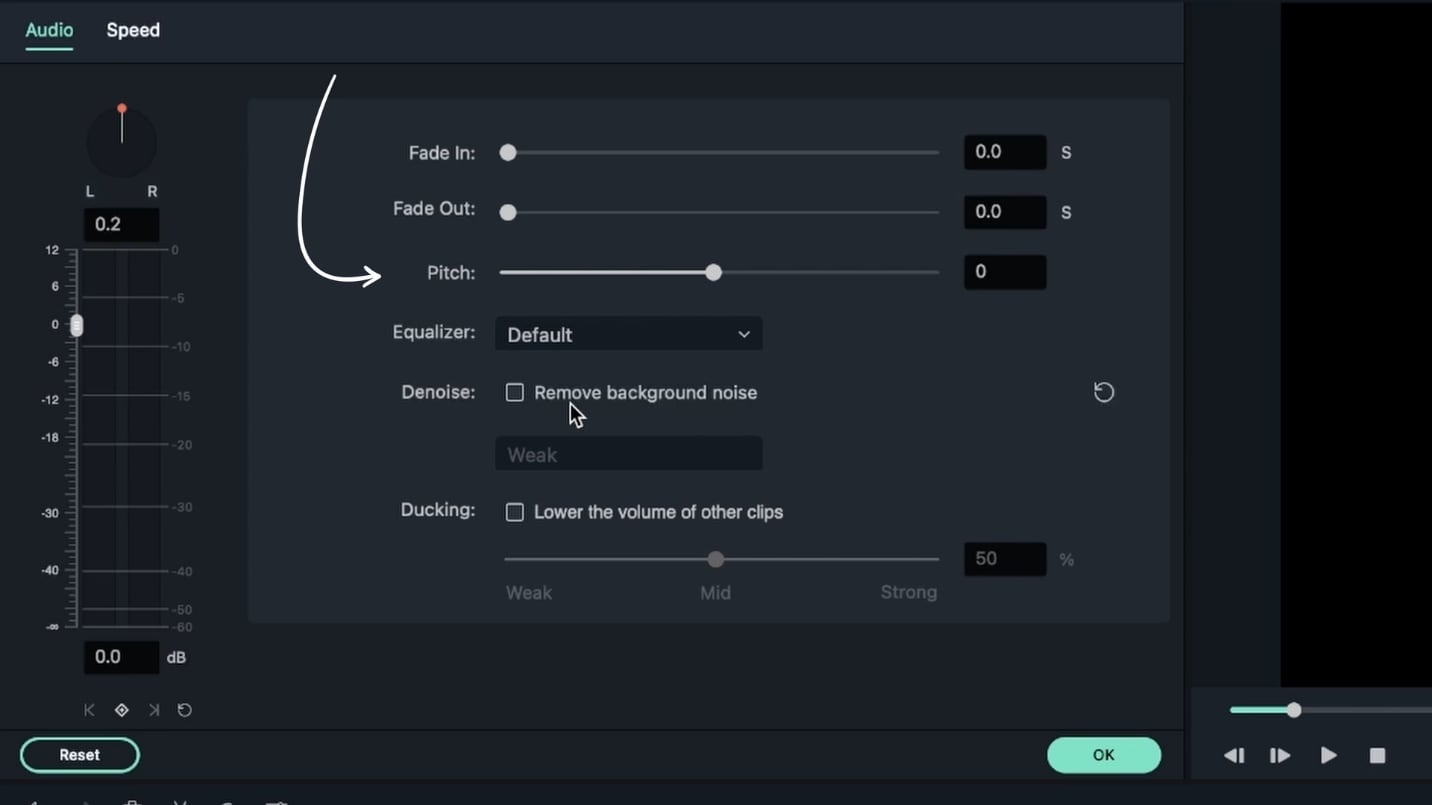
Audio de-noise does not apply to music but to raw footage like audio on a video file or a voice-over. But you can follow the methods below to remove undesirable background noise from your recorded audio:
Double-click on an audio clip in the timeline panel to open the Audio adjustment window.
Select Remove background noise from the drop-down menu.
Move the slider to the desired amount of noise reduction (Weak, Mid, or Strong).
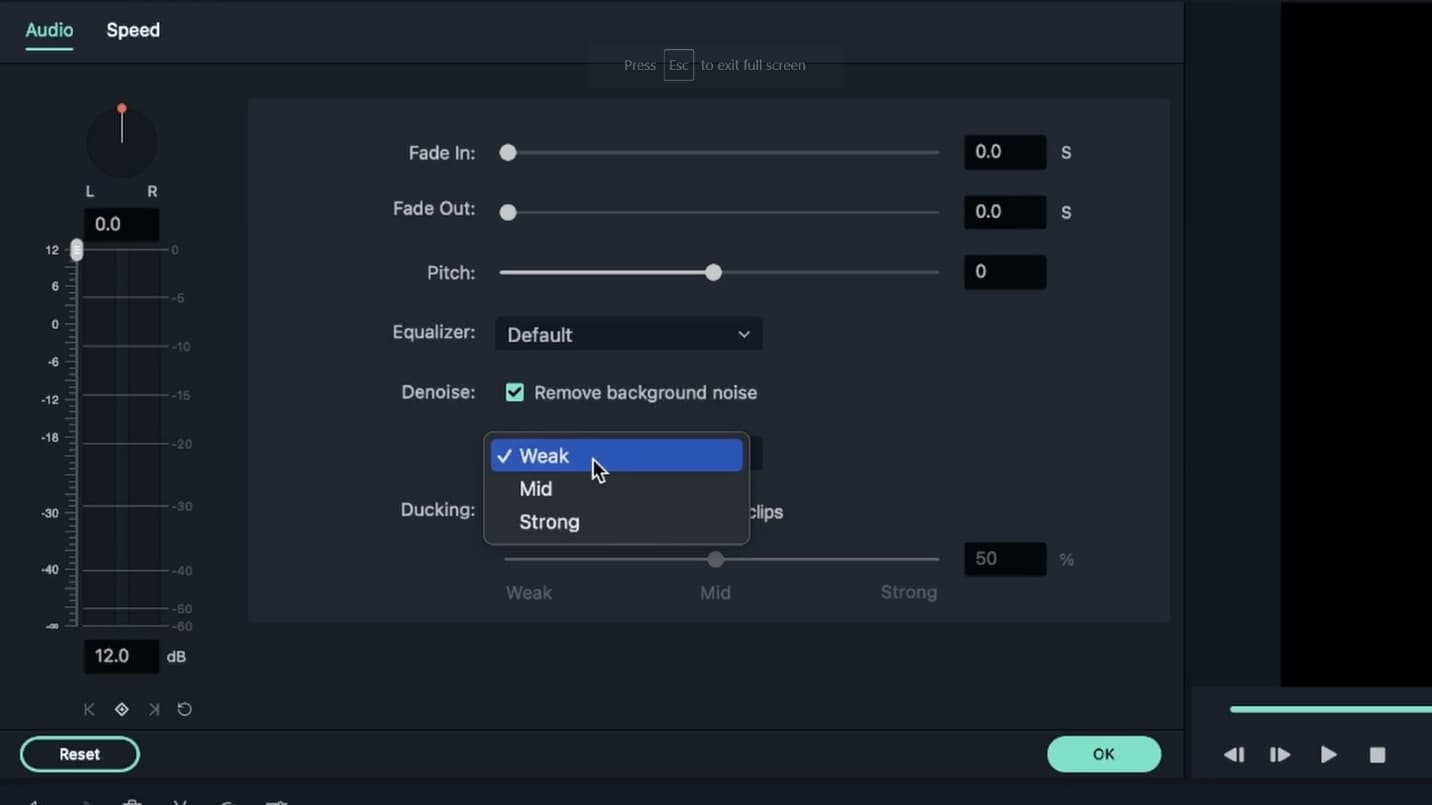 Remove background audio noise
The more you remove the background noises, it may end up distorting your voice. Experiment and see which one works best for you.
To remove background noise from a video clip, open the video adjustment panel by double-clicking on the video clip in the timeline. Then go to the Audio tab and continue the procedures above.
 Adjust the the denoise panel in the timeline
Wind noise, computer hums, and other constant sounds are among the noises that the denoise program may remove.
Changing the speed of your audio is similar to changing the pace of your video:
Right-click the audio file and choose Speed and Duration from the menu.
Click the Speed icon in the toolbar after selecting the audio clip in the timeline.
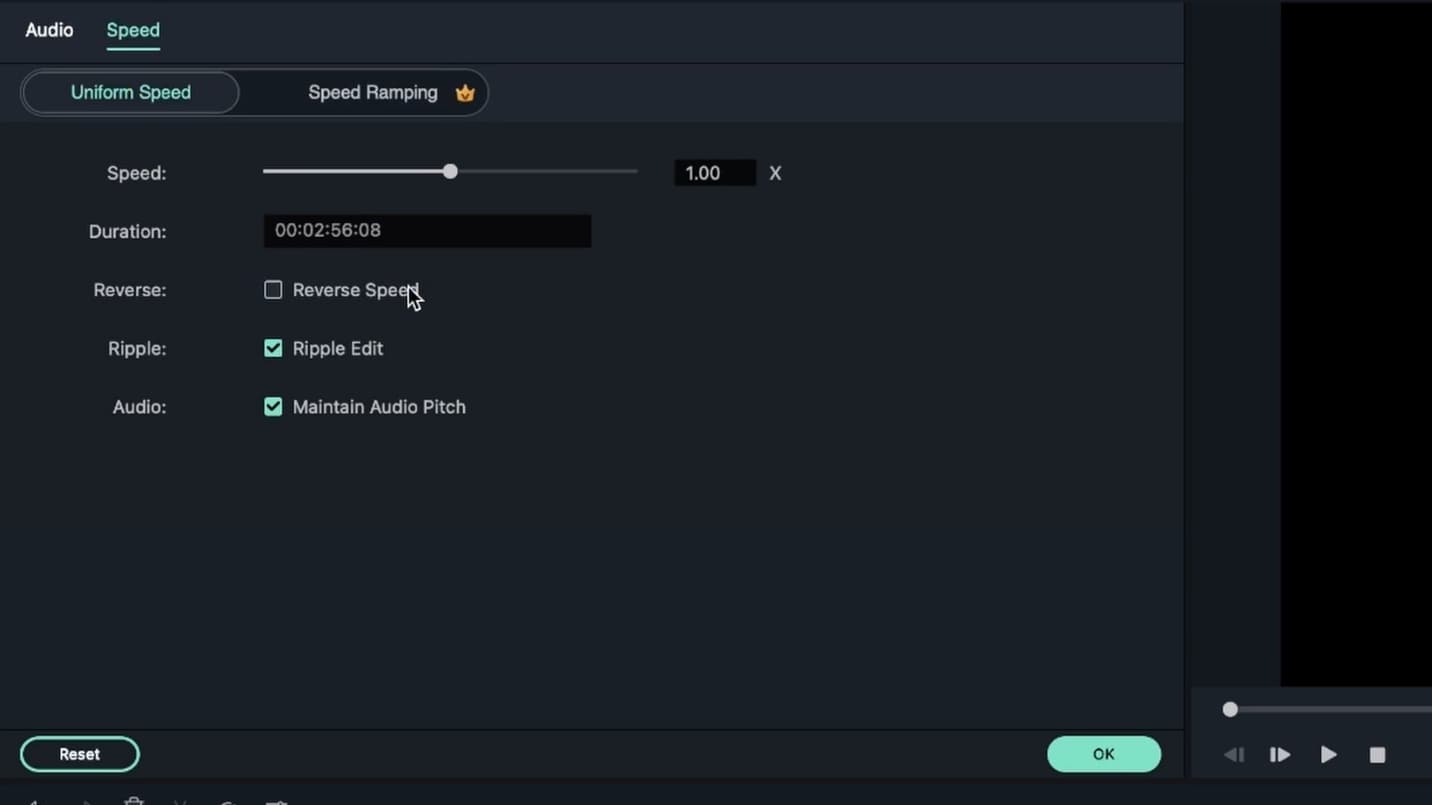 Adjust the speed of the sound
After modifying the audio track, click Export to save your changes. You can save the new movie in various formats or upload it directly to YouTube or Vimeo. Of course, you may also download the movie in mp3 format. In addition, the DVD tab allows you to burn a DVD production.
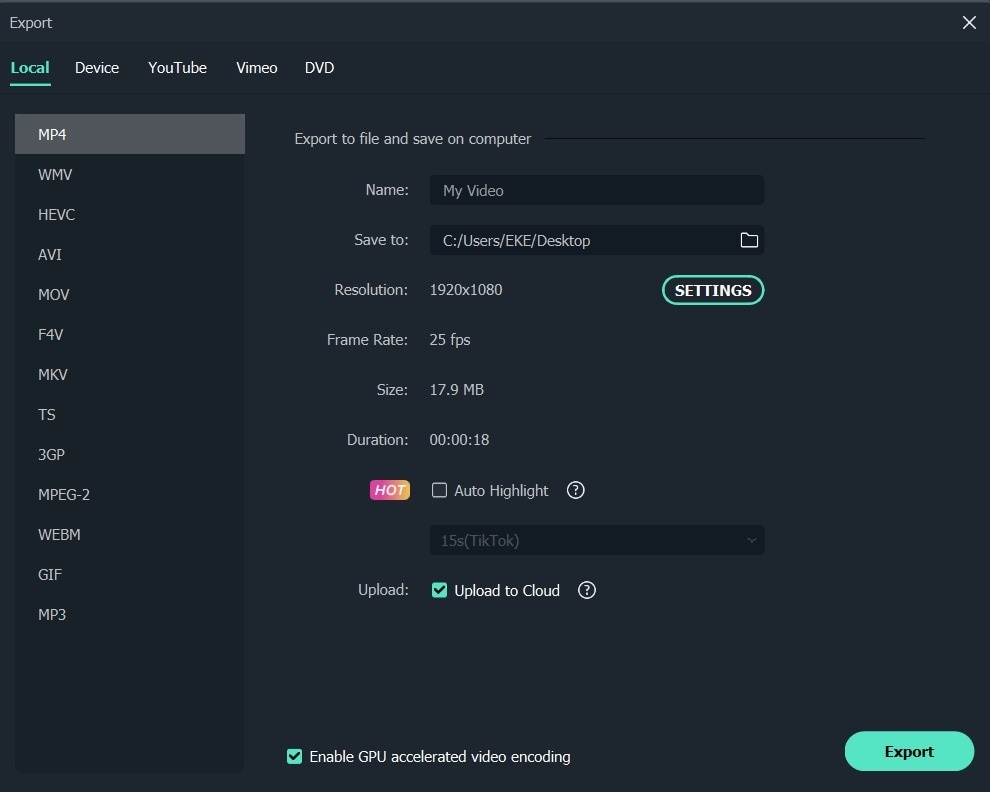 Save the edited audio file
Use Wondshare Filmora to give your audio videos a truly professional touch. However, the preceding tools are not only for professionals; novices may also utilize them without any assistance.
