
Making a 2D or 3D explainer video is a smart way to keep your audience engaged and interested in the topic or product you are presenting. However, many people think making one is tough, requires advanced skills, or requires a big budget, especially for animation.
While most of it is true, there is actually an easier way to create your own animated explainer video without spending a fortune. Today, you will learn about 2D and 3D animation explainer videos, explore some of the best examples, and find out how to make them easily and affordably.

In this article
Part 1. Introduction to 2D and 3D Explainer Videos with Examples
Explainer videos are often used by businesses, educators, and content creators to simplify complex ideas, promote products, or explain services so that the viewers can understand new concepts or products well.
Explainer videos come in various forms, including 2D and 3D animations. Each style has different advantages and visual styles. If you are still unsure, refer to the comparison table below to understand the differences between 2D and 3D animation explainer videos.
| Feature | 2D Explainer Video | 3D Explainer Video |
| Visual Style | Flat, often cartoonish | Realistic depth and dimension that can simulate real-life textures and lighting |
| Complexity | Easier to create due to less dimensional depth | Harder to create due to additional dimensional complexity |
| Dimensions | The image is comprised of height and width | The image is comprised of height, width, and depth |
| Geometry | Common shapes include rectangles, squares, triangles, polygons | Common shapes include cylinders, cubes, pyramids, spheres |
| Animation Focus | Focuses on frames of the images | Focuses on frames of the images |
To sum up, 2D explainer videos use flat graphics and are animated in a two-dimensional space. Meanwhile, 3D video explainers add more depth and realism. They showcase products or services in a life-like three-dimensional space. See some of the best samples of both types of videos below.
2D Explainer Video Examples
- TED-Ed's 2D Explainer Video on Cholesterol
TED-Ed uses fun 2D animations to make complex topics easy to understand. In their explainer video about Cholesterol, they add titles to point out important terms and play with keyframe animations like Slide Right to illustrate cholesterol moving and circulating in the bloodstream.
- Operata - 2D Explainer Video
Operata uses simple 2D animations to show how its cloud service monitoring works and to bring everyday scenes to life. The video features cool animated clips that demonstrate what Operata does best. It also mixes machinery sound effects with music that keep the vibe lively.
3D Explainer Video Examples
- MegaGrass - 3D Explainer Video
MegaGrass promotes its landscaping products (grass) in the form of a 3D explainer video so that the viewers can visually grasp the benefits and applications of their synthetic grass in a fun way. The animated format makes it possible to showcase its versatility in various environments.
- 3D Explainer Video for Blockchain Protocol by Novum Protocol
Understanding blockchain can be hard, so Novum Protocol has used 3D animated explainer videos to simplify it. By incorporating some animated clips and stickers, these videos effectively highlight how their product can benefit users amid the massive growth of blockchain technology.
Part 2. What You Need to Create a 2D/3D Explainer Video
While most of the animated explainer video samples above are made by professional studios and agencies, there's a solution if you want to make your own 2D or 3D animation explainer videos by yourself. Let's start with preparing what you need.
1. Making the Script
The script is the backbone of your explainer video. It lays out what will be said and helps guide the 2D or 3D elements you need for visualizing the narration. Start with a strong hook. Then, introduce a problem or question that resonates with your viewers and outline how your video will address it. You can also get help from AI Copywriting for making your explainer video script.

For example: Are you struggling to stay organized? Like many, you might find it overwhelming to juggle work, life, and everything in between. Say hello to TodoZen, your new productivity buddy! This app is here to manage your tasks effortlessly with intuitive design and powerful features.
After that, record your narration and make sure it sounds clear. If needed, use AI Voice Enhancer to refine the audio and achieve studio-quality sound. You will use the voice-over later to sync it with the visual elements of your explainer video.
2. Choosing the Right Software
Once your script is ready, you'll need software for recording the narration and creating your 2D or 3D explainer video. One of the best tools that is easy to use and also affordable is Wondershare Filmora.

As a 2D or 3D explainer video maker, Filmora has the features and assets you need to help you make high-quality explainer videos, such as:
- Built-in Recorder: Record the narration in high quality for your explainer videos directly with Filmora's recorder tool.
- Text-to-Speech: Generate speech from text using the Filmora Text-to-Speech feature, which offers various voices of all ages and genders, along with automatic sentence segmentation to streamline the work.
- AI Smart Cutout: Easily separate animated stock assets from their backgrounds with AI, making it simpler to integrate them into your projects.
- Titles and Text Overlay: Add dynamic titles and text overlays to your explainer videos to help emphasize key points and enhance viewer understanding.
- Creative Assets: Access a library of creative assets directly within Filmora, including characters, icons, and scenes that can be used to decorate your explainer videos.
- Music and Sound Effects: Choose from a wide range of music tracks and sound effects in Filmora to set the tone and create an atmosphere for your explainer videos.
- An extensive library of text styles, effects, stickers.
- Seamless Editing with AI-Powered tools.
- Preset animations and templates for dynamic impact.
- Intuitive, professional yet beginner-friendly.
- Works on Mac, Windows, iOS, and Android.


3. Compiling Animated Stocks
Next, you need the animated stocks that complement the script you've made. The easiest way to create both 2D and 3D explainer videos is using pre-made animation stocks. This way, you don't need to animate it from scratch.
Aside from using Filmora Creative Assets or other 2D explainer video makers, you can also use and download 2D and 3D animation clips from various sources, such as:
- Video Plasty
- Freepik
- Stock Animation
Part 3. How to Create Your Own 2D/3D Explainer Video Easily
After you have everything you need to create a 2D or 3D explainer video, the next step is to bring everything together. Watch the tutorial here or follow the steps below.
Record the Voiceover
Step 1: Create a new project and record a voiceover
After creating a new project on Filmora, click the recorder button and set the parameter settings.

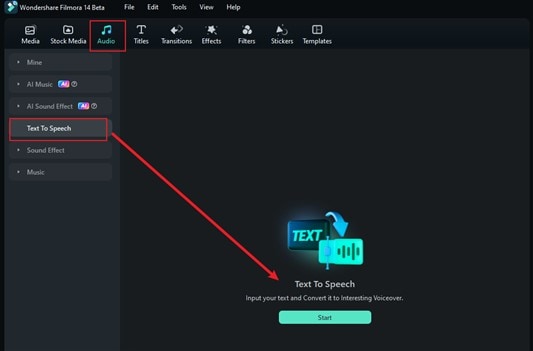
Alternatively, you can also generate the voiceover using Filmora's Text to Speech. To use it, go to the Audio menu and select Text to Speech. Click Start to proceed.
Next, enter the script or use AI Copywriting to help you make one. Then, choose from the available voice on the right. Scroll down to adjust the voice speed and pitch. Enable "Auto Split" to split the paragraph intelligently and click Generate.
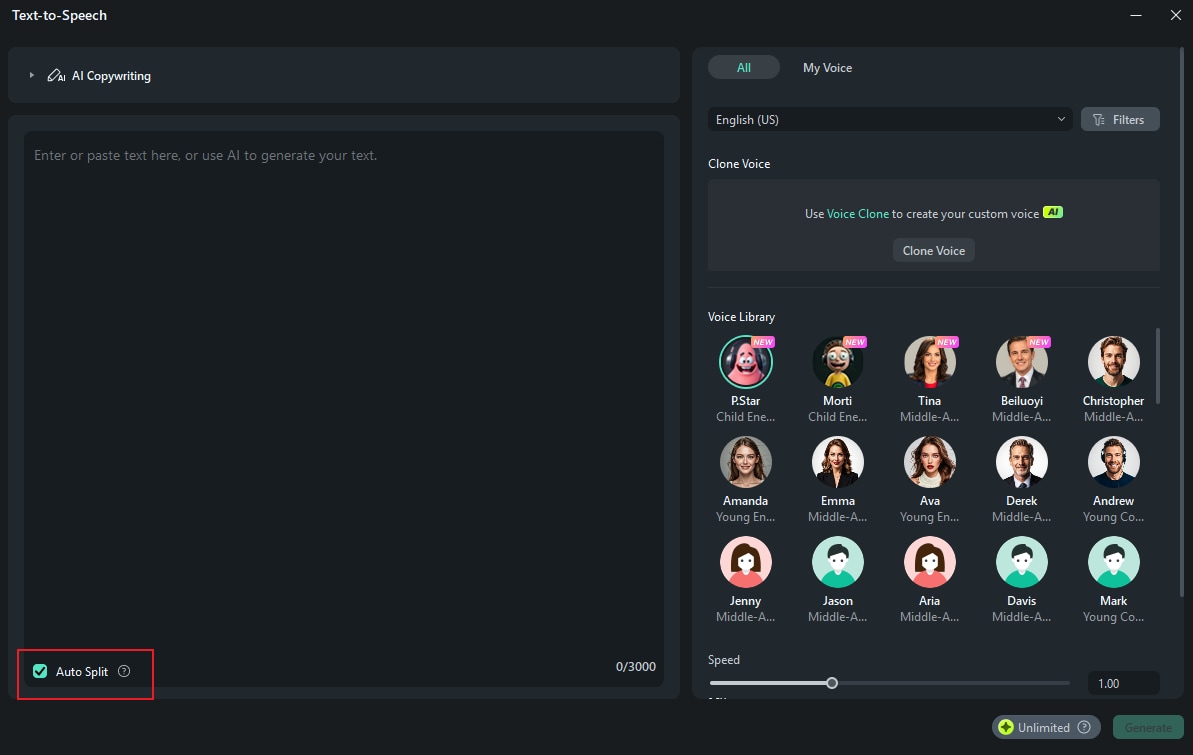
Tip: Use Filmora Voice Cloning if you want to use your own voice. Click Clone Voice in the Text to Speech window and follow the instructions.
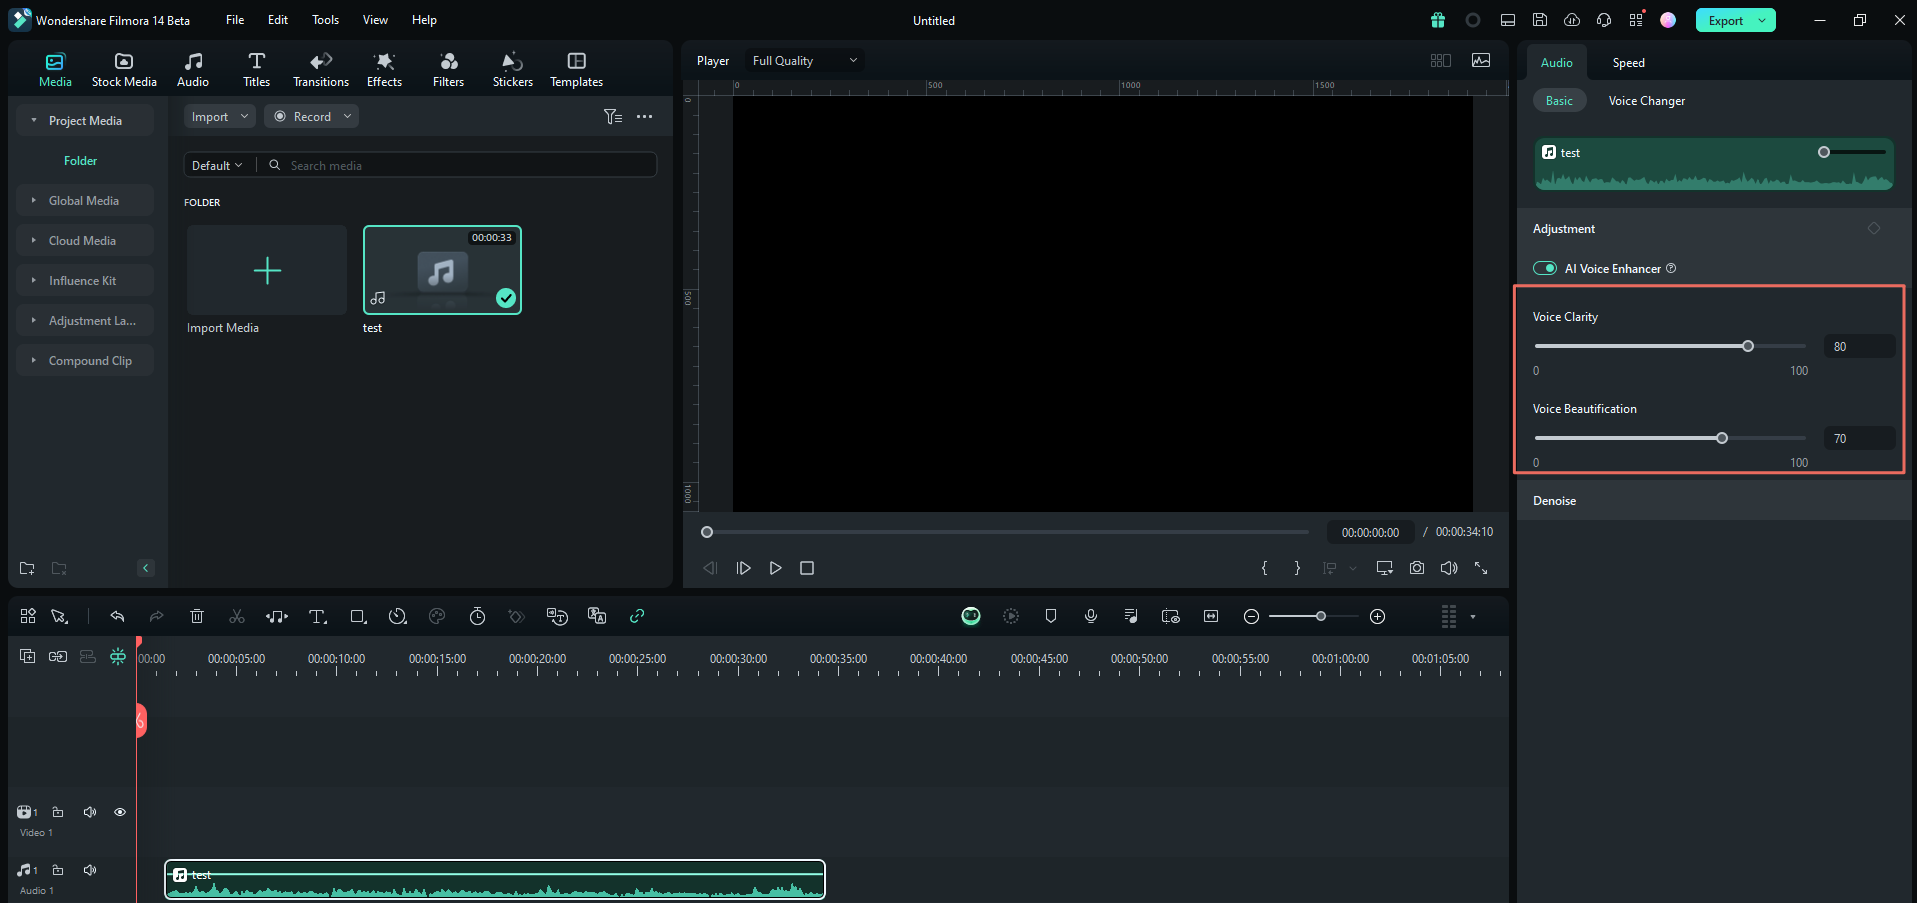
Step 2: Finetune the audio using an AI Voice Enhancer
Once finished, add the voiceover to the timeline. Trim or cut unnecessary parts if needed. To improve the sound quality, you can enable AI Voice Enhancer from the property panel. Use the slider to adjust.
Visualize the Audio with 2D/3D Animation
Step 1: Import animation stocks and narration.
With your narration and voiceover ready, it's time to integrate the 2D or 3D animations with your audio. In the Media menu, click Import to add the animation clips you have on your computer.

Or, you can go to the Stock Media menu to find the clips within Filmora's built-in library. Download and drag them to the timeline. Align the animation clips with the audio.

Step 2: Remove the background from the clips if necessary
If the animation clips have the background you wish to remove, you can select the clip and navigate to the Video > AI Tools on the property panel. Toggle on Smart Cutout and click the Start button. (You can also use Chroma Key if the background has a different solid color).

Select the area you want to keep. Fine-tune the edge detection using the Edge Thickness and Feather options to achieve a clean cutout. Click Save to once done.

After that, you can add a new background below the clip.

Step 3: Add additional elements
Add additional animations like circles, arrows, or other graphic elements to emphasize key points. Go to the Stickers menu and use the search bar to filter the results. You can also generate one using AI Stickers Generator.

After downloading, add it to the timeline and adjust the timing. You can adjust the position on the preview menu.
Step 4: Apply transitions between clips
To add transitions, go to the Transitions menu and find the one that suits your video best. Download and drag it between the clips on the timeline. You can also set the transition mode.

Step 5: Add background music to the explainer video
Finalize your 2D or 3D explainer video with background music or sound effects. Navigate to the Audio menu and download the music or sound effects that complement the video. Don't forget to adjust the volume.

Tip: If you can't find the one you like, you can generate it using AI Music Generator. Select the AI Music in the Audio menu and select the mood, theme, and genre you need.
Step 6: Save and share your 2D/3D animated explainer video
Once everything looks good, you can export the video by clicking Export. Enable the Advanced Compression to optimize the file size without compromising the quality.

To share directly to your social media platform like YouTube, TikTok, or Instagram, you can do so by selecting "Social Media" from the top menu.
Conclusion
With the right tools and a bit of creativity, anyone can make 2D or 3D animation explainer videos! One such tool that can help you is Wondershare Filmora, as it has extensive creative assets and tools to create professional-looking explainer videos with ease.
You can start by making a script to lay out your storyline and plan the visuals. Then, complement the narration with 2D or 3D animations you found in Filmora's library or other sources. With animations, you can make an explainer video that is more attractive to watch and easier to follow.
