Do you know stories or videos that appear to be watched while getting goosebumps or feeling like you are inside the horror story? If you've ever wanted to create that eerie ambiance in your own clips, you're in for a treat!
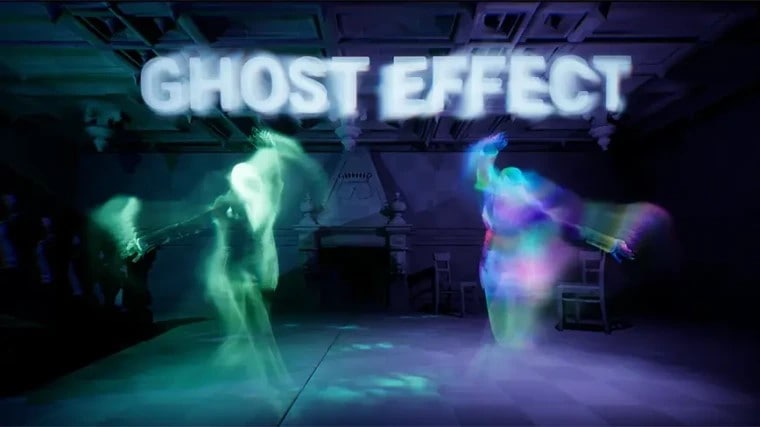
In this guide, we will show you how to apply the ghost effect to your videos with Filmora, iMovie, KineMaster, and VideoStar video editors. If you are creating something spooky for a Halloween party, or a scary movie or doing it just for the kicks of it, you will find this cool effect just perfect to bring your creatives to life.
So, equip yourself with a camera and take a deep dive into the world of Halloween video effects!
In this article
Part 1: How to Add Ghost Effect in Videos Using Wondershare Filmora
Without wasting your time, we want to introduce you to the tool named Wondershare Filmora, which is the perfect tool to add the ghost effect to your videos.
Wondershare Filmora is a perfect video editing tool specially designed for both novices as well as industry professionals. As it has numerous features and filters acceptable for different kinds of production, it stands out the best at adding creative flairs for seasonal videos.
It has a simple interface and you don't have to be a professional to get the hang of it and start creating great content. Also, it is bundled with a wide selection of effects, the Halloween ghost video effects, which can make a massive difference to your narrative!
Key Features of Wondershare Filmora - Best for Trendy Halloween Edits
- Easy-to-Use Interface: Even the beginner does not need to have a PhD before beginning to use Filmora because it has drag-and-drop options.
- Wide Range of Effects: It also has a list of royalty-free music, sound, and visual effects for its programs, with sections on Halloween themes. You can find anything, from the horror sounds to the foggy background.
- Customization Options: Incorporate your personal style in your ghost effects. Control factors of translucency, velocity, and hues so it resembles other genuine parts.
- Export Options: You can immediately post your Halloween creations on Facebook, Twitter, YouTube, and other social networks or save them in different formats for some other purpose.
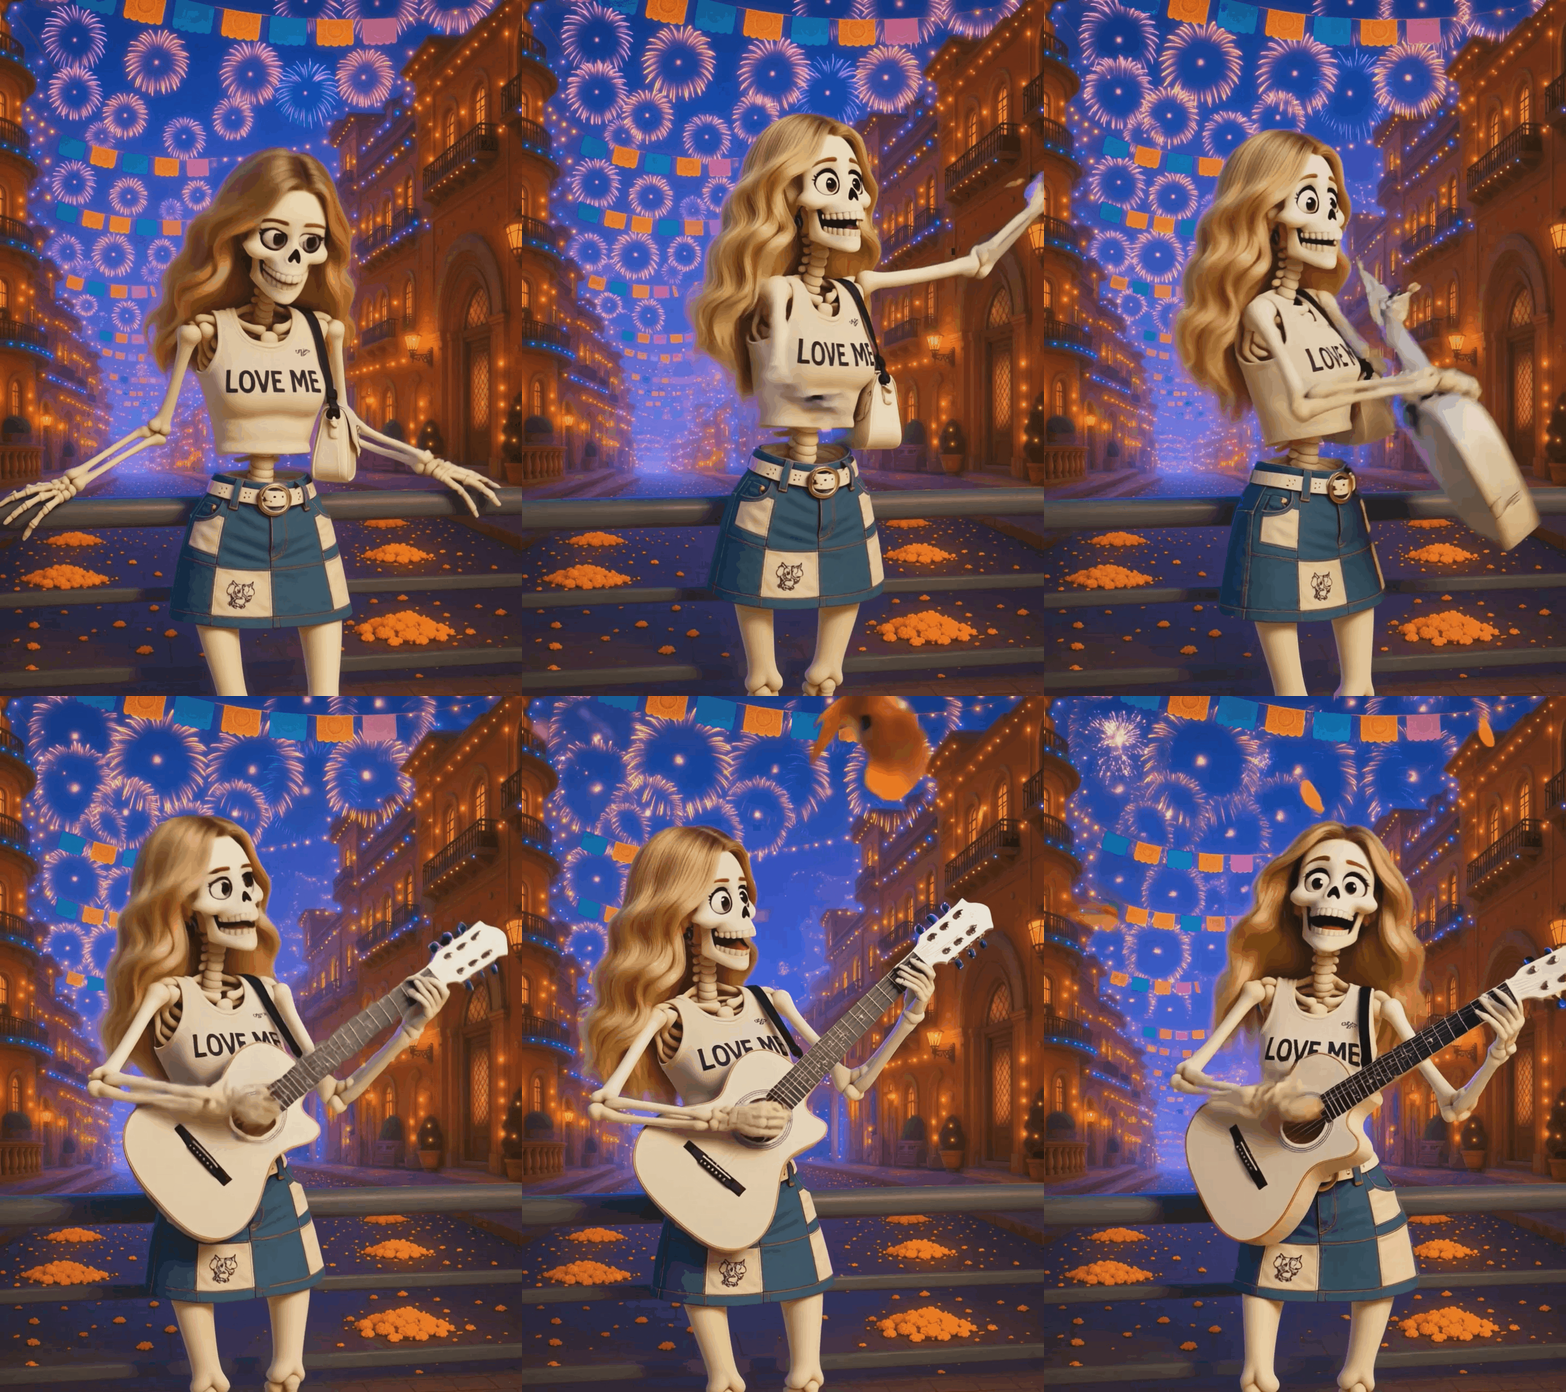
- Halloween Templates: Filmora includes a collection of ready-to-use Halloween video templates—from haunted house intros to spooky title cards—so you don't need to design everything from scratch. Just pick a template, swap in your clips or photos, and you instantly have a professional-looking scary video.
- Spooky Skeleton
- Day of the Dead
- Vampire Cos
Explore more templates in Filmora
New Halloween Effects You Can Add to Your Videos
With Halloween approaching, in addition to the previous horror effects, Filmora has launched the following new effects. Let's take a look at what they are.
- Halloween Vibe: Add the Halloween vibe effect to your videos and make your scenes or even the whole story look and feel like October, scary! Incorporating this style on your artwork creates a perfect background for the voodoo haunted house, with shadows of grave yards and much more.
- Bat Ambush: Put the fright into your scene with Bat Ambush, where flying creatures of the night descend into your scenes! Ideal for use when you want to scare your viewers with a jump scare or to make them feel that they are surrounded by dread, this effect will keep their attention on their toes.
- Ghost Flash: Spectrality has never been this fun: with the Ghost Flash effect, create glossy, translucent flashes of light flickering and chilling! This spine-tingling addition likes a story of suspense and mystery that will force your audience to pay close attention.
- Neon Nightwing: Take your Halloween atmosphere up a notch by using Neon Nightwing, the effect in which illuminated and multicolored bats fly across your screen. This electrifying twist simply injects a more contemporary approach to traditional haunting, so your videos would not look out of place among the heap of spectral videos.
- Blink Bat: See your viewers spook with the Blink Bat effect, which is where you make bats pop up and disappear instantly. This combines a kind of deft sensational playfulness with sensation and suspense, turning each frame into a cliffhanger.
- Eerie Bat: Continue the atmosphere with the Eerie Bat effect, which will cast sinister shadows in your scenes as the whisper of the night! This improves its haunted theme, moving your audience into a mysterious suspense that boosts the supernatural touch you need.
- Eerie Pumpkin: Add some spook to your Halloween videos with the Eerie Pumpkin effect and watch as the carved pumpkins are well lit by the moonlight! It's important for this effect to give out the exact Halloween feel and a mix of fun scares to the viewers' experience.
- Dark Weave: Top it with the Dark Weave effect to give the footage that mysterious touch or spooky look with the ghostly texture of tattered material! This created visual invite shivers, ideal for narratives that explore trespassing the line of fear and interest.
- Emerald Bat: Adding a water theme to your Halloween slime, try out the Emerald Bat effect, which gives these ghosts of the night a bright green light! This striking touch gives a spellbinding look to your videos and is at the same time thrilling to your audience.
- Dark Thread: Make a pattern of fear with the Dark Thread effect for a twisting shadow effect that'll fit perfectly for scenes that require some tension! This umbra-like visual brings another layer of fear to the visuals, which can be useful when telling long-forgotten tales in the dark of cinemas.
- Wednesday Filter (New Trend): Inspired by the viral Wednesday Addams look, this wednesday face filter adds a pale complexion, high-contrast shadows, and a subtle gothic tone to your ghost characters. Perfect for creators who want their spooky scenes to resonate with the latest Halloween trend on TikTok and Instagram.

How To Find the Halloween Effect in Filmora
- Method 1: The most entertaining way to get a Halloween effect in Filmora is through its AI Image-to-Video tool. Upload a photo, choose the Horror theme, and let the AI turn it into a spooky Halloween-style video — perfect for creating creepy, cinematic clips in seconds.
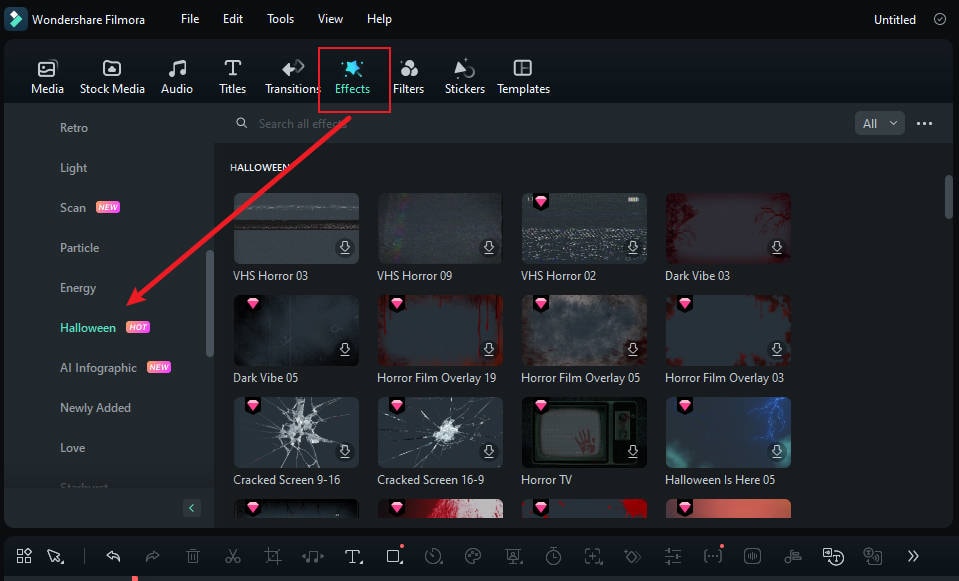
- Method 2: In the toolbar under Effect, there is a separate Halloween effects category. By selecting this category, you can see various types of Halloween video effects.
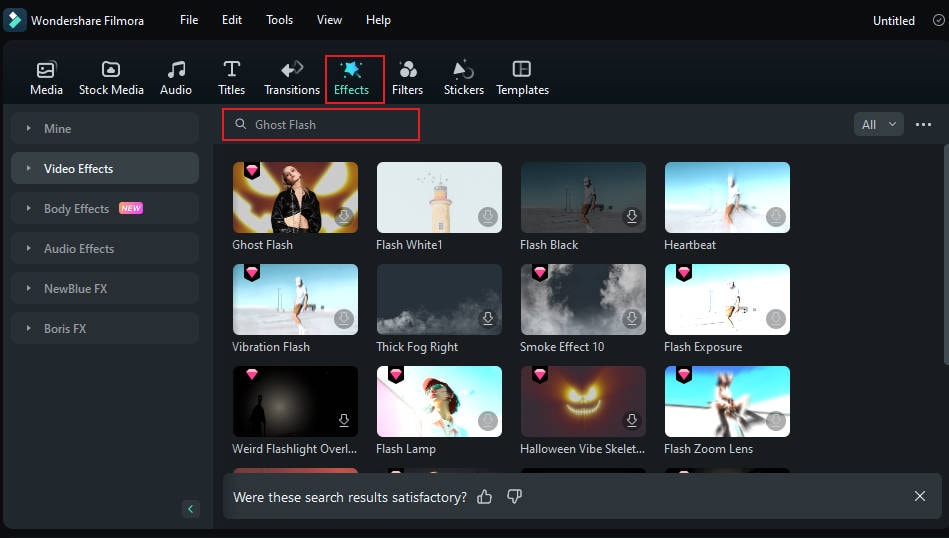
- Method 3: Directly search in the Effect interface, for example, the newly released effects mentioned above. Take Ghost Flash as an example; the search results will appear within the Effect box.
A Step-by-Step Guide to Adding the Ghost Effects to Your Videos
Unlike the Halloween video tutorial, the following demonstration focuses more on teaching you how to create a ghost effect in your video. If you want to learn how to add scary sound effects, text, transitions, templates, and filters to a Halloween video, you can read this Halloween video creation tutorial article.
Now let's take a look at how to create a ghost effect for your video!
Method 1: Generate Ghost-Style Videos with AI Image-to-Video
The easiest way to create a ghost effect is through Filmora's AI Image-to-Video feature.
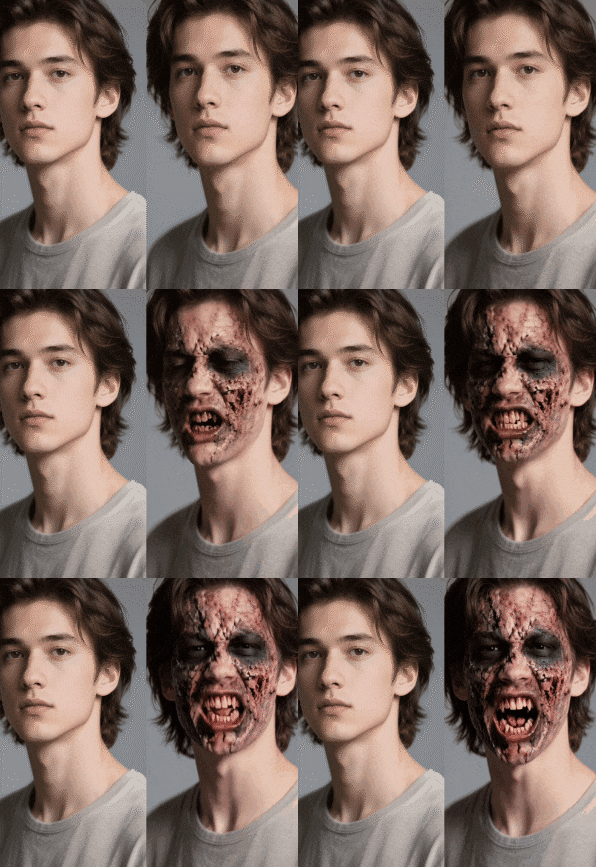
Step 1: Open Filmora and go to the AI Image-to-Video feature. Navigate to the Horror section.
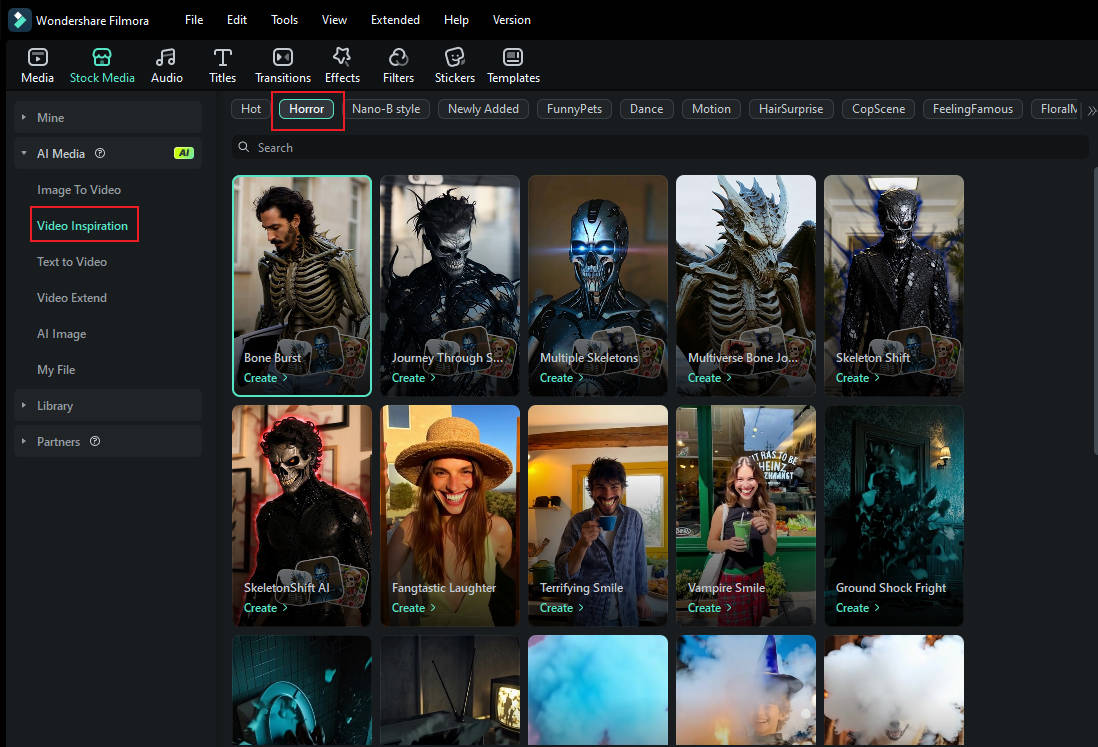
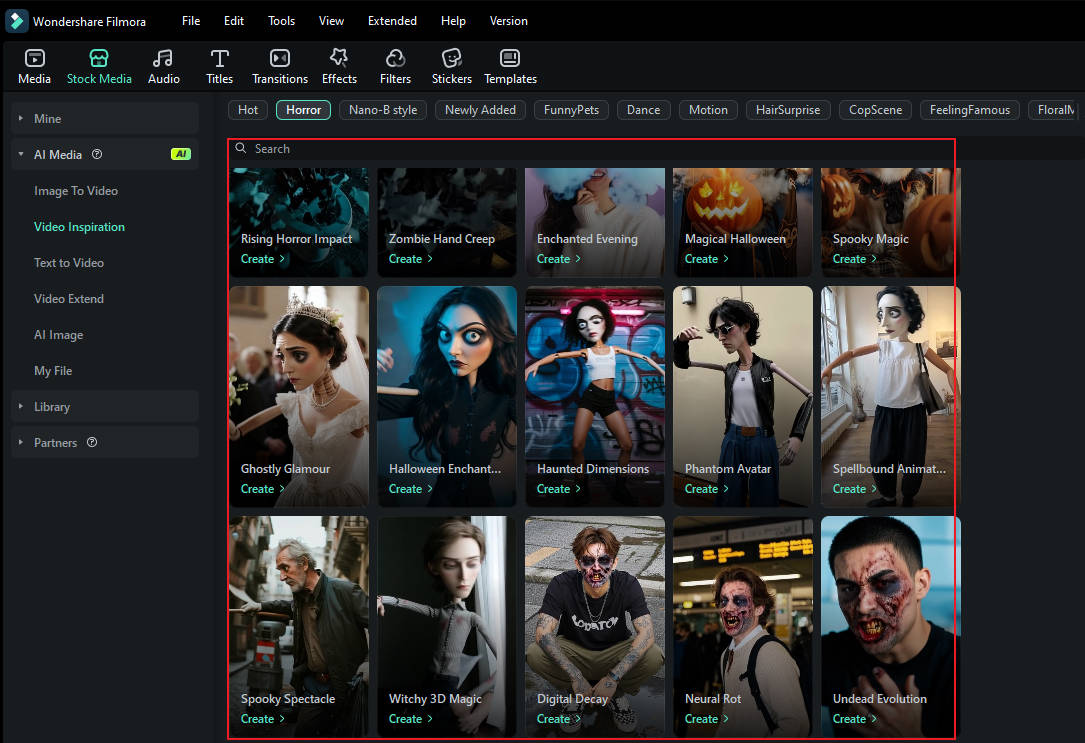
Step 2: Browse the Horror templates and choose the style or template you like (e.g., Ghost, Eerie, Haunted). Templates may show previews—pick one that fits your idea.
Step 3: Upload a clear portrait photo of yourself or a friend. (Some templates may ask for portrait orientation or multiple images—follow the on-screen prompts.) Then click Generate to let the AI create the clip.

Step 4: Review the generated clip, fine-tune effects or add spooky audio if needed, and click Export to save your ghostly video.

Method 2: Manually Add the Ghost Effect in Filmora
Now let's look at how to manually create a ghost effect step by step.
Step 1: Launch Wondershare Filmora and begin a new project. Choose the video clip on which you want to apply the ghost effect and import it into the program Then place the video on the timeline.
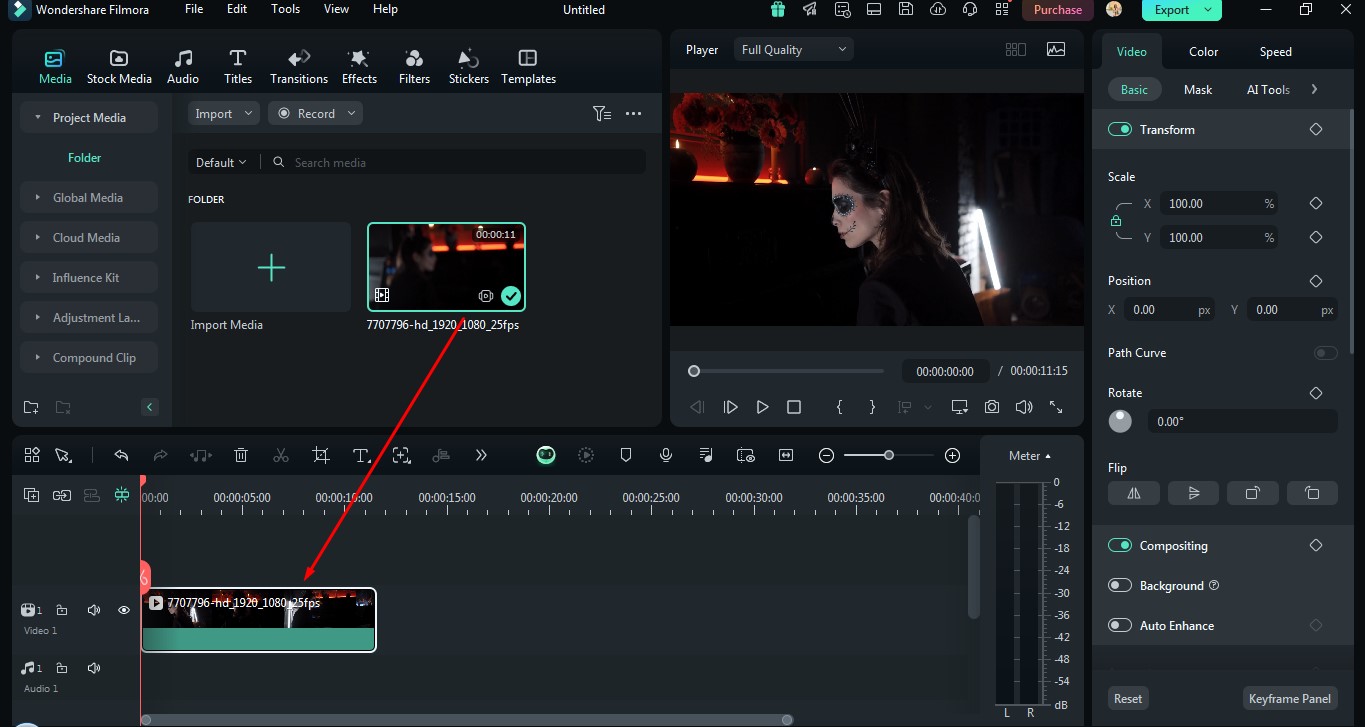
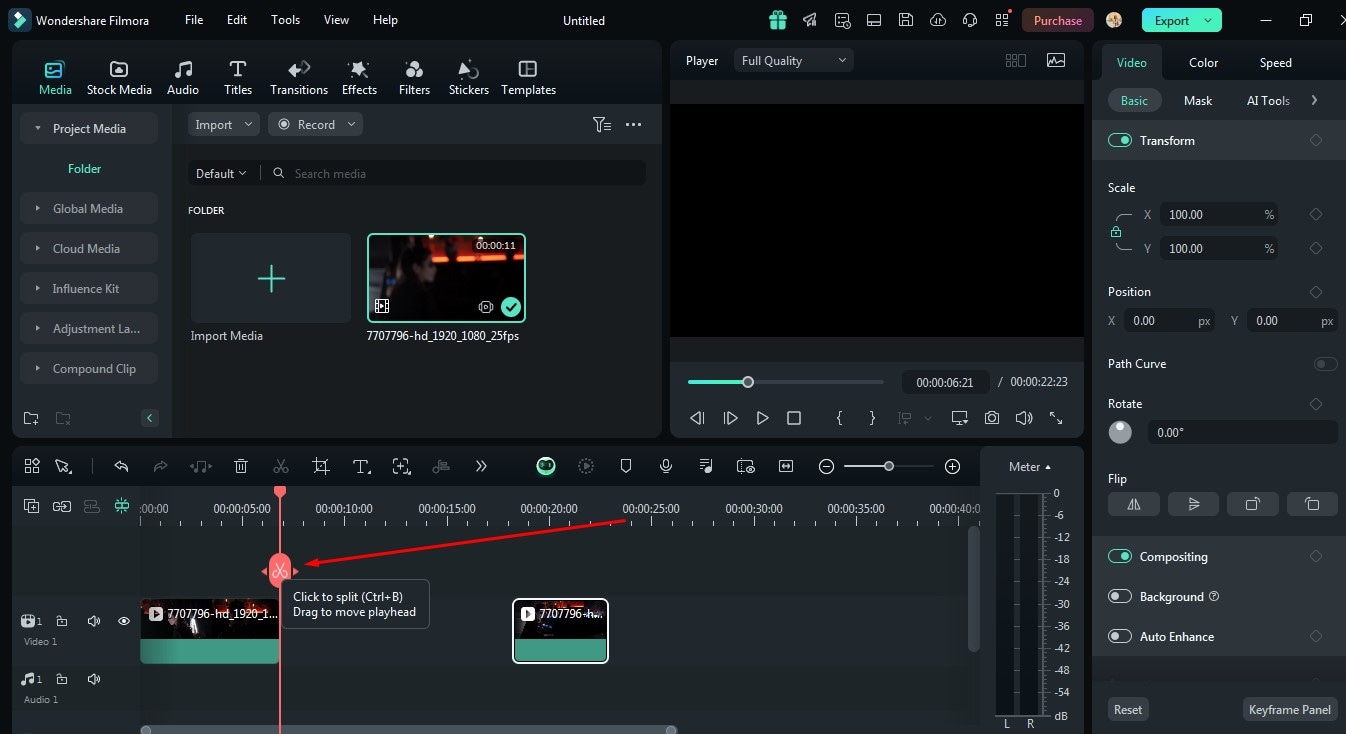
Step 2: The best way is to set the time cursor to the moment when a direct realization of the ghost image can be observed. In the clip, use scissors to cut apart to indicate that the effect is starting.
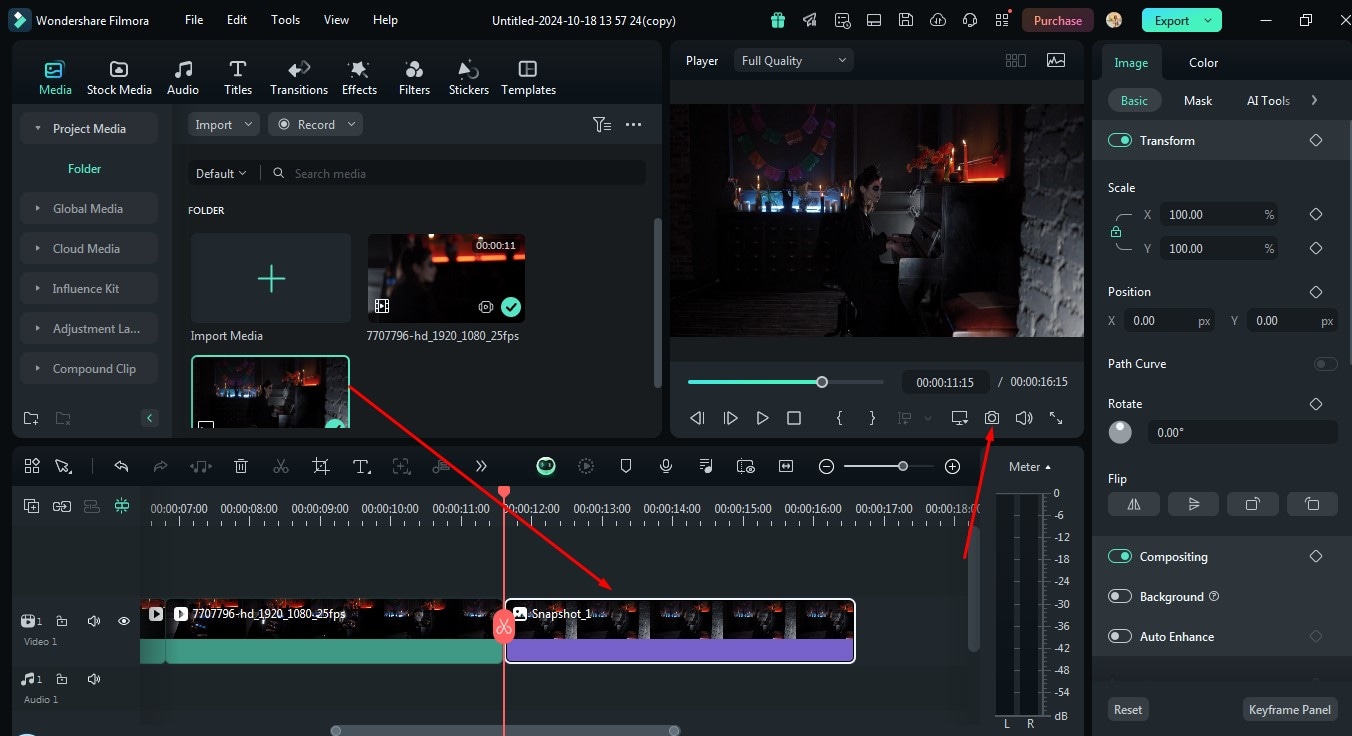
Step 3: Next, take a picture of the background; this may also be done by recording the feed of the scene without the character that you wish to turn into a ghost. Place this snapshot just beside the current position of your clip within the timeline.
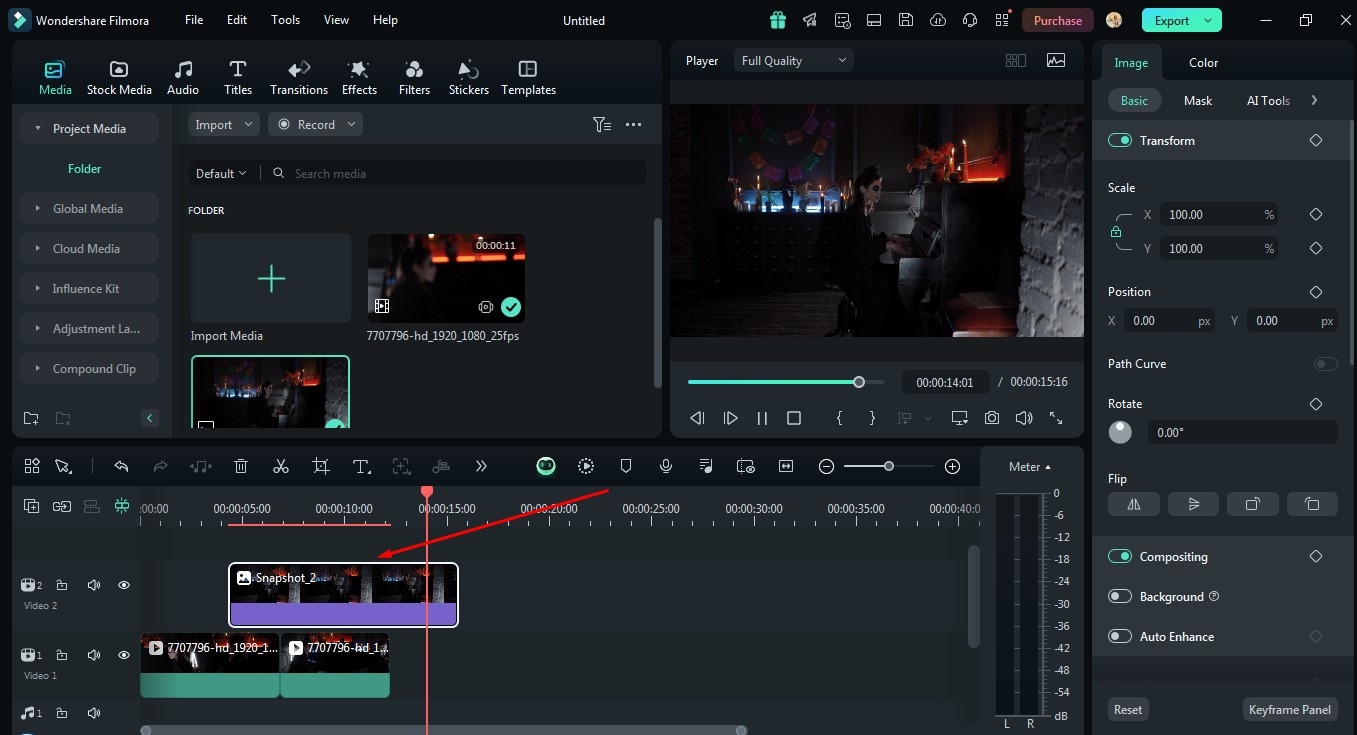
Step 4: Place the fragment you want to apply the ghost effect to above the background clip you have just created. All these layers are important in order to create a ghost-like effect on the image.
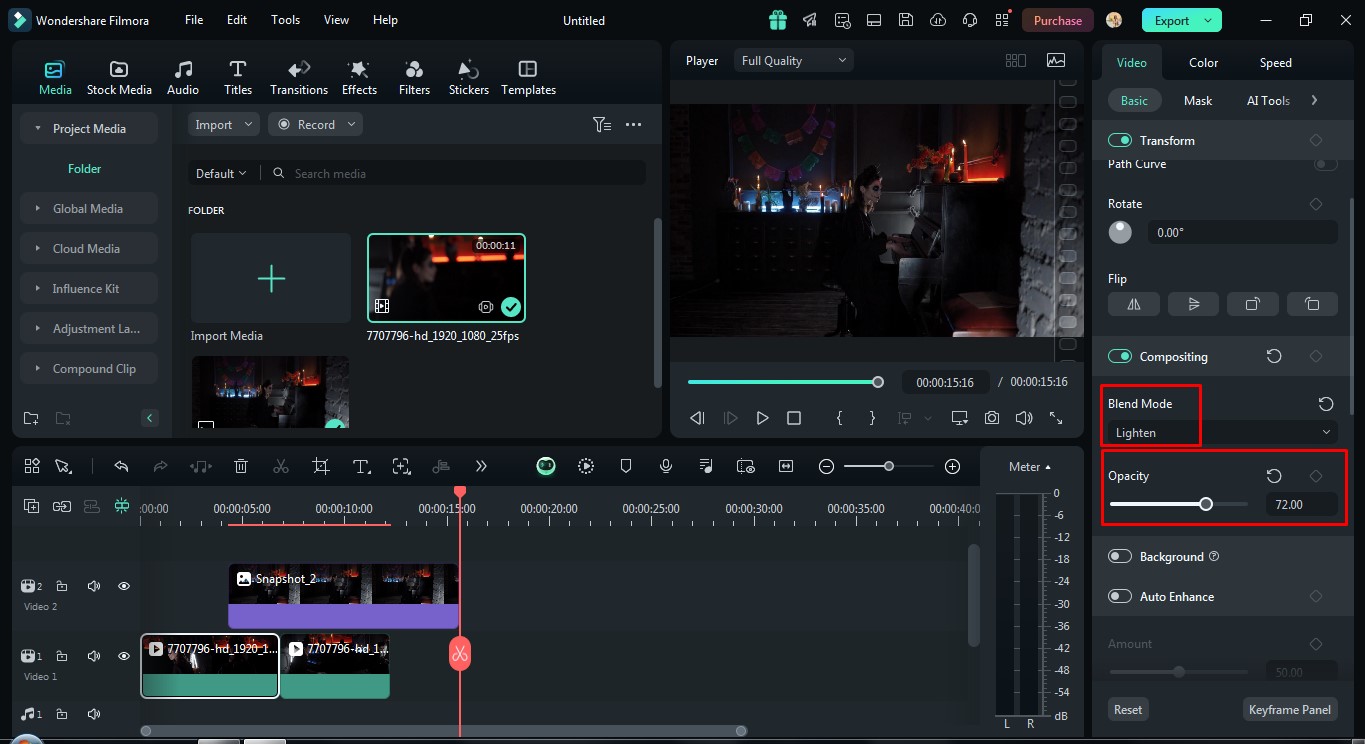
Step 5: Select the top clip, and zoom in on it by double-clicking; when the Video Editing panel appears in the right corner, go to Composing. Here you will decrease the opacity to have a more transparent result, and next change the Blending mode to the Lighten. This will begin to put in that spectral look.
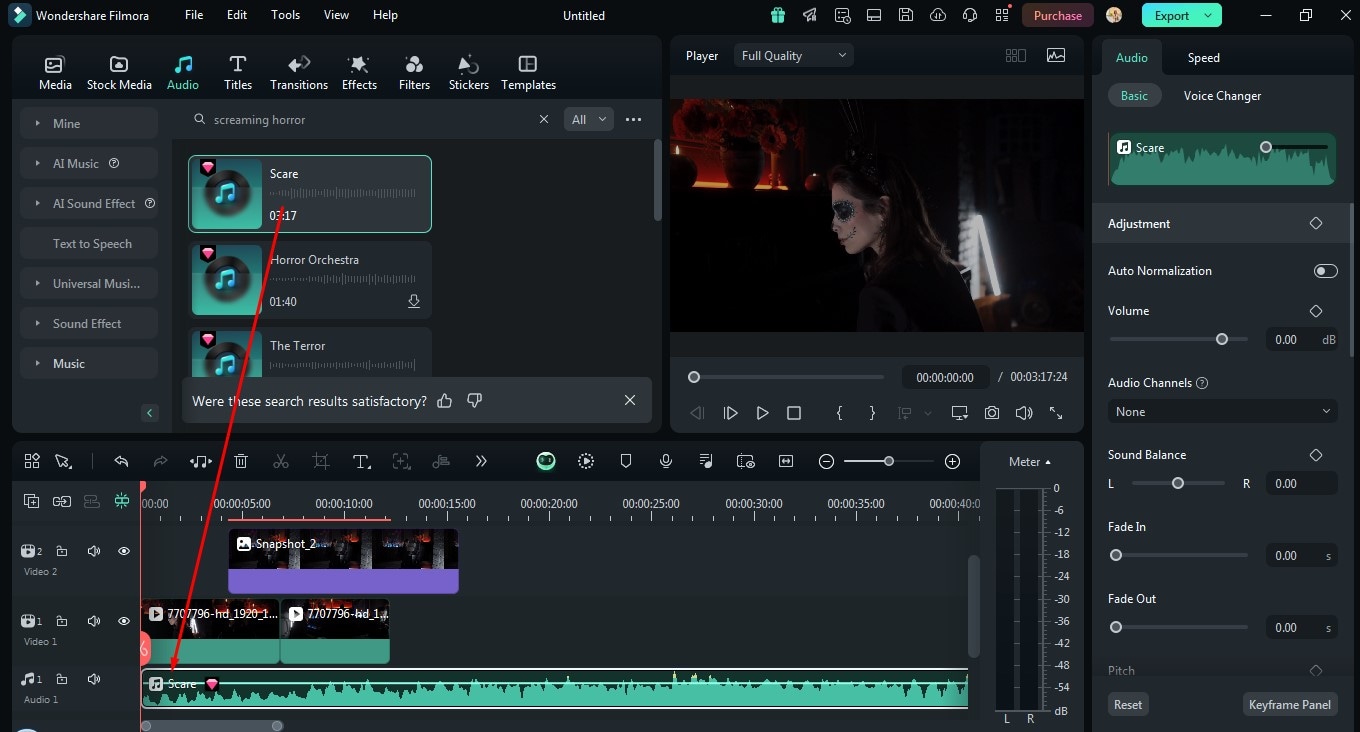
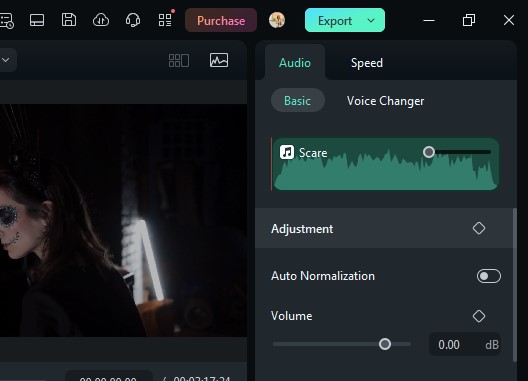
Step 6: To make the background even more frightening, you can add the sounds of screams and other creepy noises. If you hear a distant voice that looks like it's a ghost, eerie whispering, or winds howling, then use audio that will fit the video. The decision regarding what audio to use for the video depends on the given video as well as the character you want for the ghost.
Step 7: Now you can export your video from the option given in the top right corner.
So in this way, you can add the ghost effect to your video easily in Wondershare Filmora.
Part 2: Some Other Ways to Add Ghost Effect to Your Videos
We have already discussed how to add the ghost effect to your videos using Wondershare Filmora. But do you know that you can also add scary video effects to your videos using other resources? Let's discuss them one by one:
Adding Ghost Effect to Your Video with iMovie:
If you didn't understand the video, you can refer to the following step-by-step explanation.
Step 1: Make the character perform in front of a green screen for shooting.
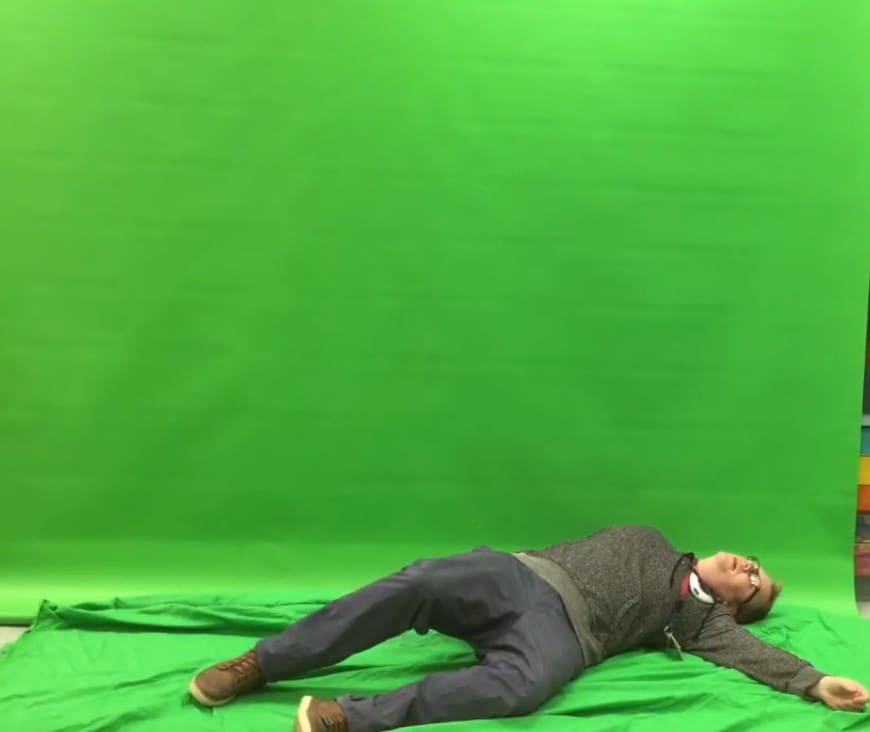
Step 2: Select a video clip you want to apply the ghost background to and ensure it has the background you want the ghost effect on. Bring the green screen footage and the background footage into iMovie and put them in the timeline.
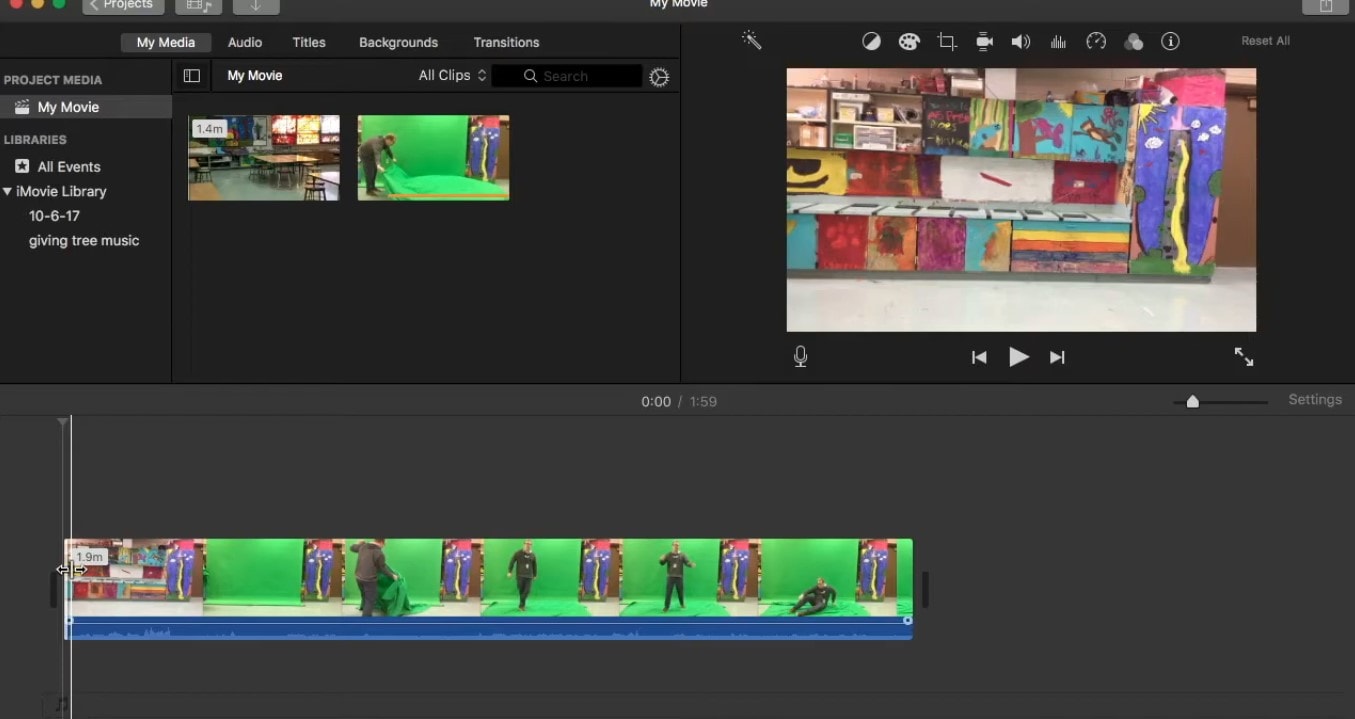
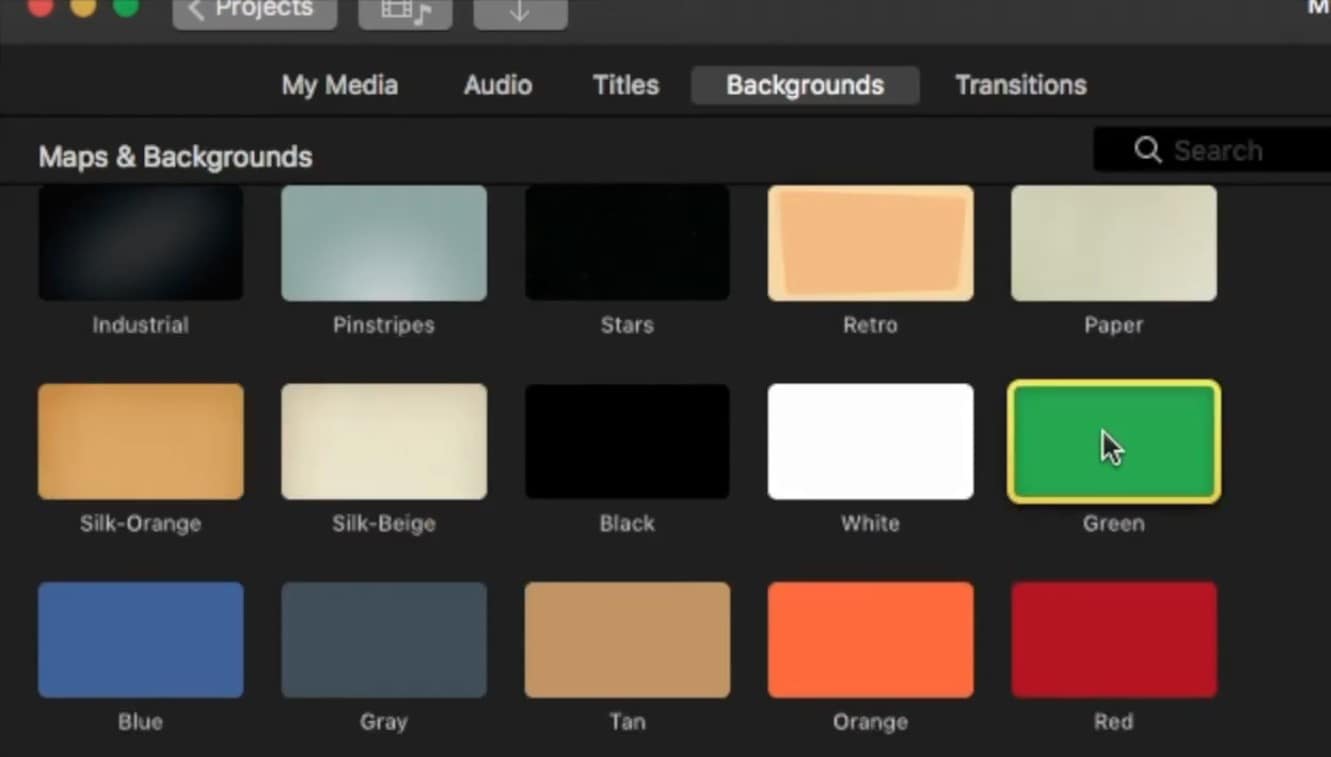
Step 3: Go to the Background section of the properties' panel and pattern the green background onto the timeline. Put the green screen footage above the background layer in the timeline. Drag the green screen footage and make sure the checkbox at the bottom for the green screen is checked.
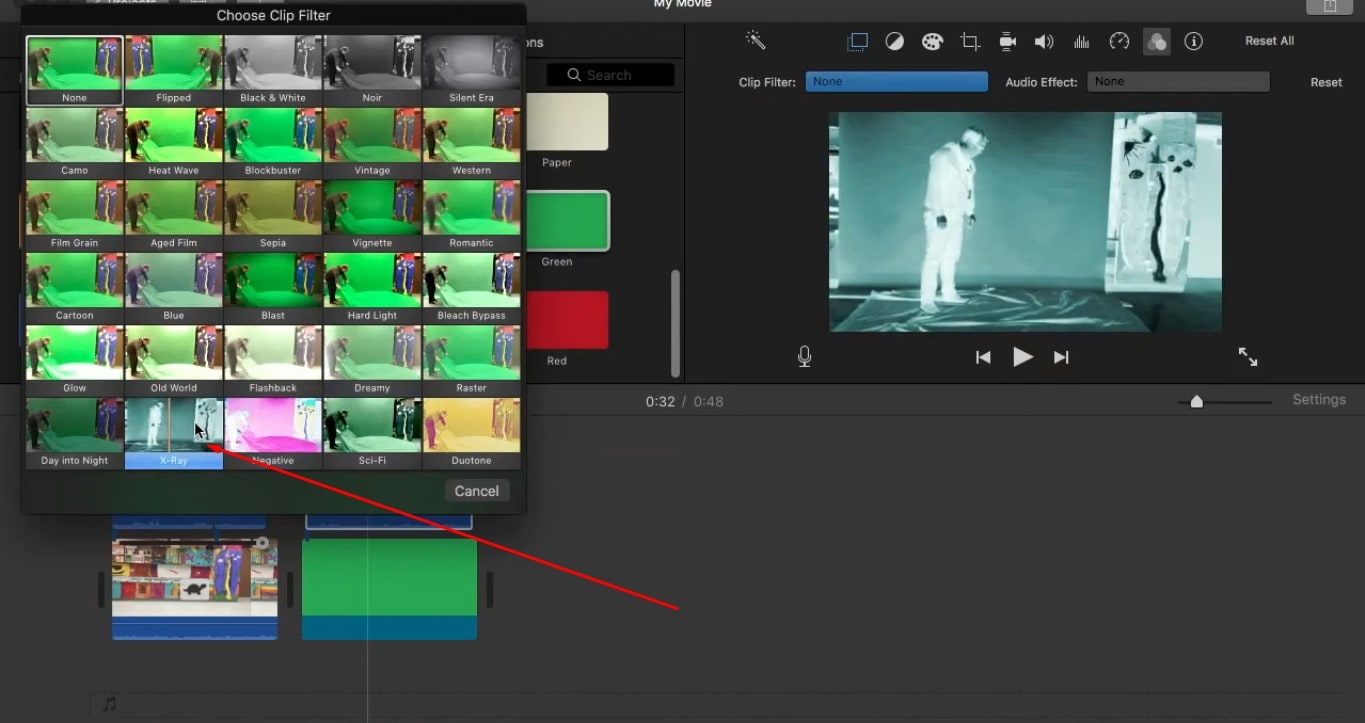
Step 4: Always select an interesting clip effect, such as negative or X-ray, on the green screen footage to make it appear somewhat translucent. Save the video to take the green screen effect off and make a monochrome background video.
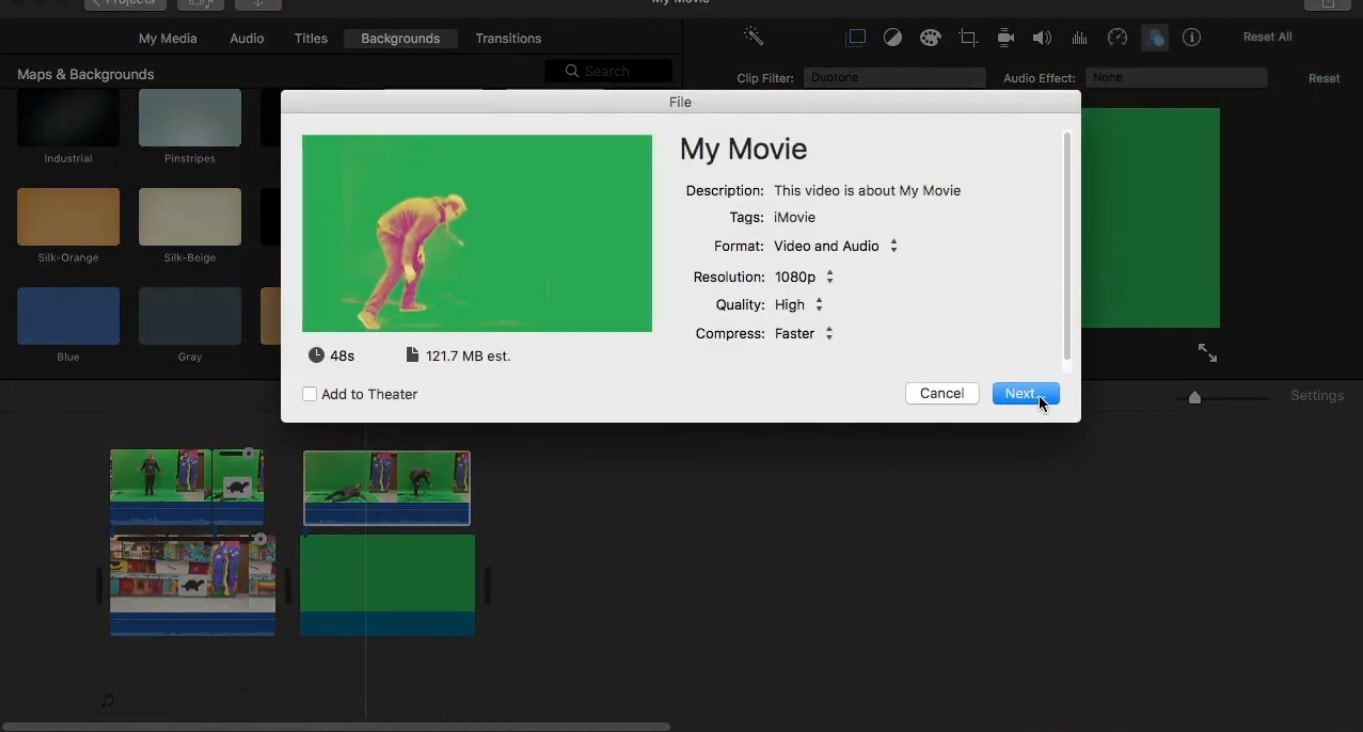
Step 5: Transfer the exported movie back into your iMovie program. Place the newly created clip on top of the background clips in order to complete the work. Choose the new video clip and lower the opacity level from the Cutaway menu for the faint look. Watch the video and try to make some modifications if necessary and also export your final ghost effect video.
Adding Ghost Effect to Your TikTok Videos with the KineMaster:
Step 1: Take two different videos, of your choice, that you want to join together. Launch KineMaster and then select the recorded video files from this application and import them.
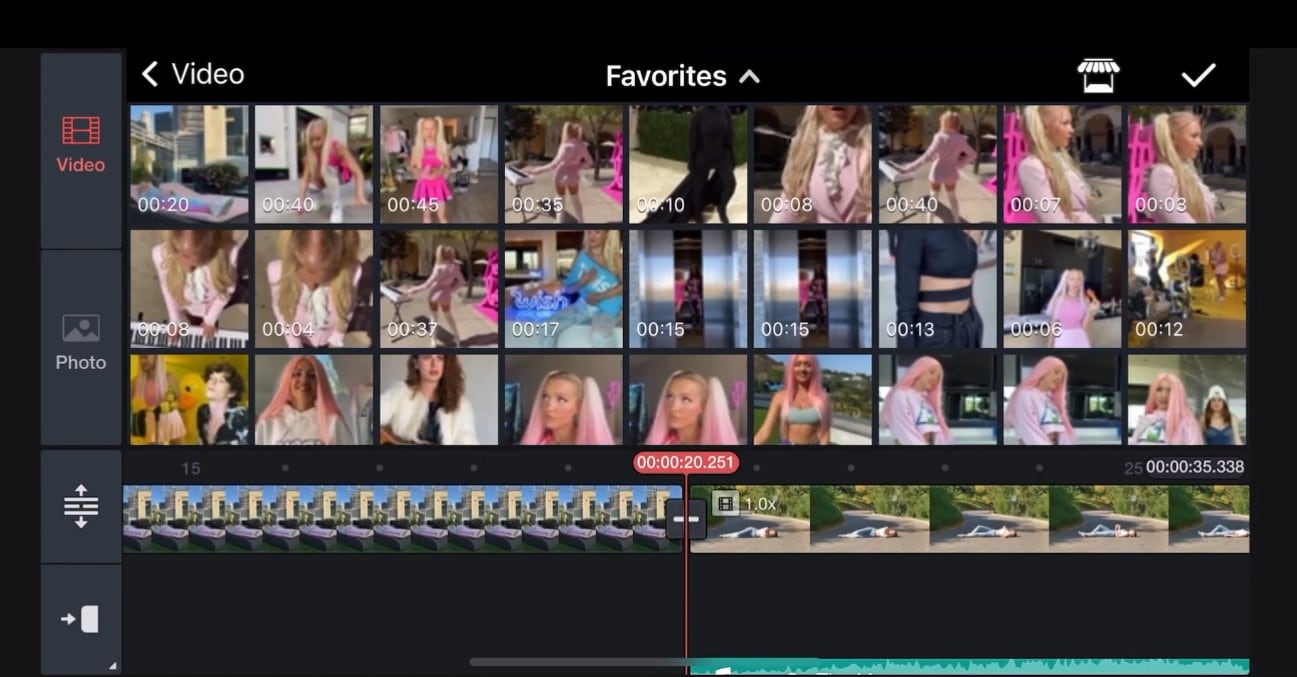
Step 2: Any extra clips that you do not want to include are required to be trimmed out from the clips. Stack the two video clips, one on top of the other on the timeline.
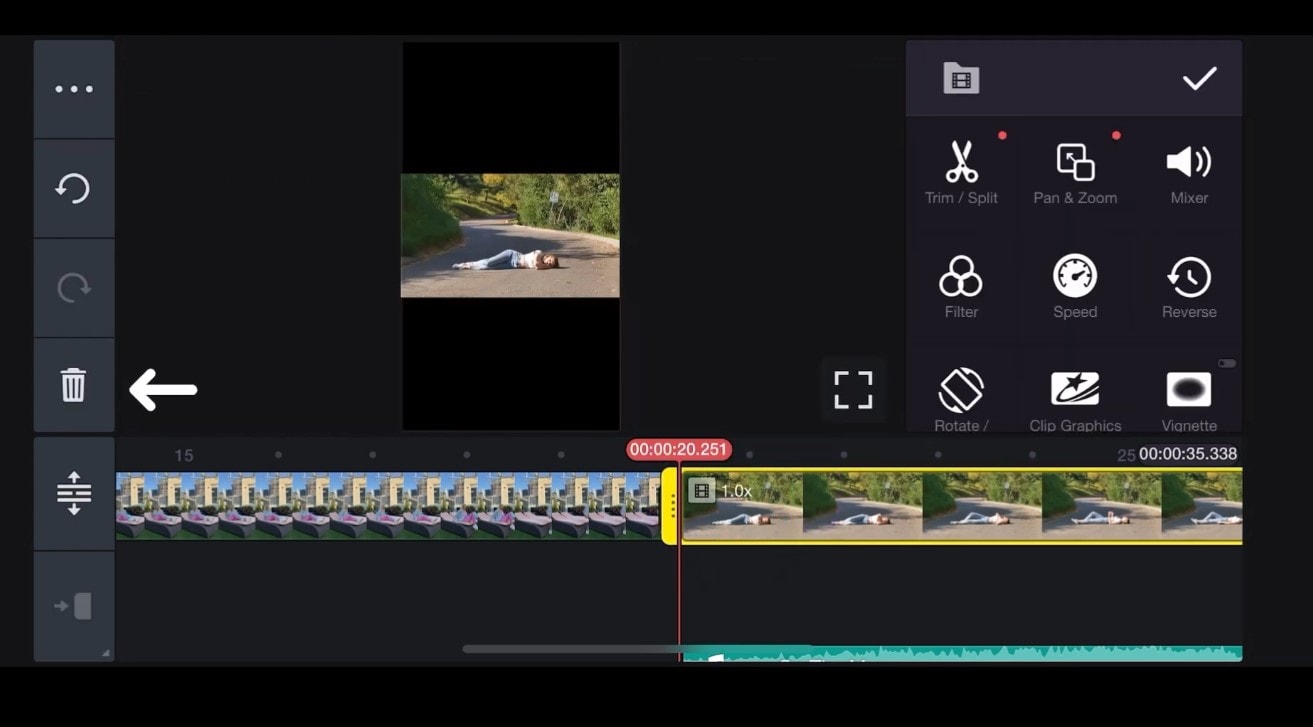
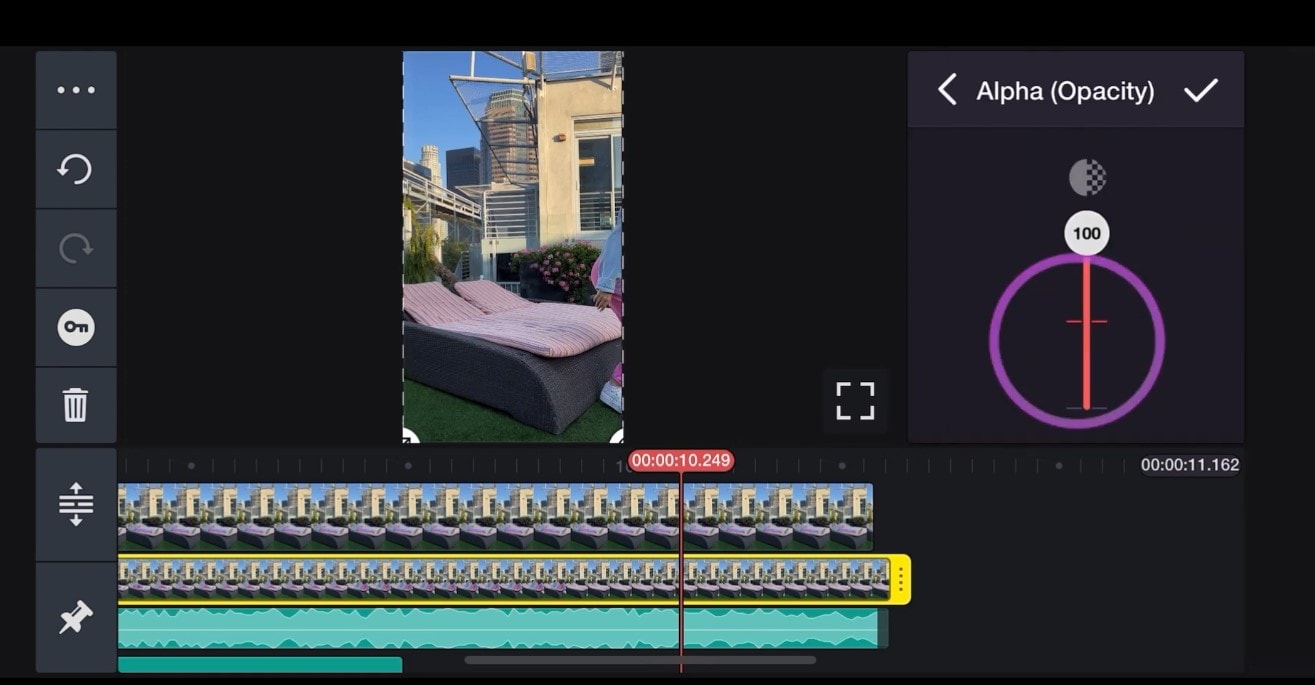
Step 3: To enhance the overlay effect, disable the Split Screen option on the Windows 10 patch. Choose the upper video clip and apply the chroma key effect. To make characters or objects on the overlaying clip completely or partly transparent, select the Alpha (Opacity) option. Make sure that the ghost is shown in the frame properly; when it's not perfectly aligned, use the crop feature to improve its position.
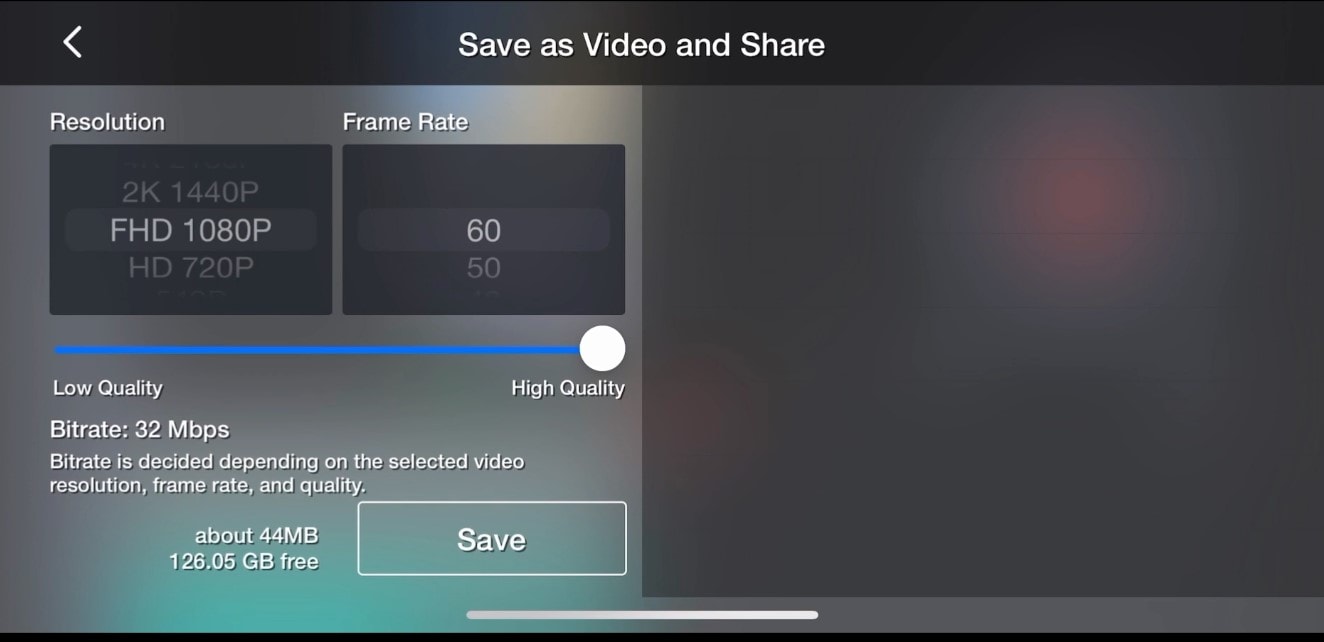
Step 4: After creating a ghost effect video, export and save the final product in Full High Definition video. Include it in a TikTok or any social media platform of your choice.
In case you are still confused, you can watch this video:
Adding Ghost Effect to Video with the Video Star:
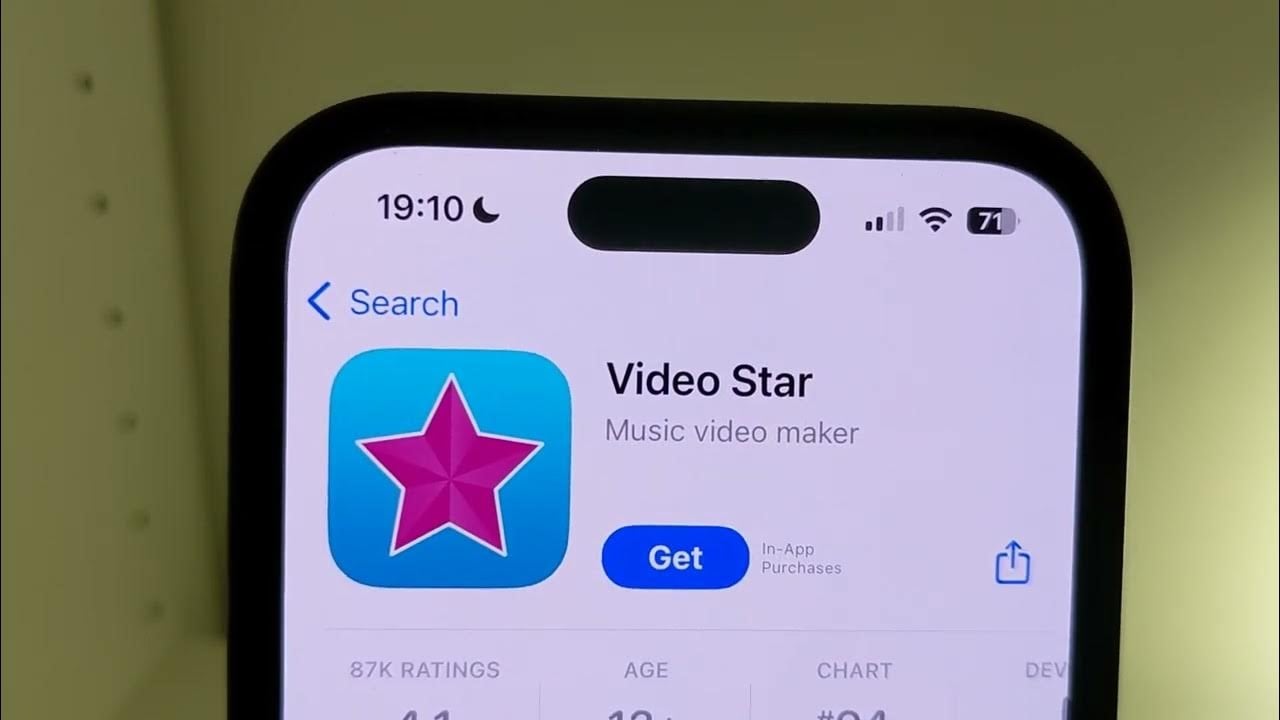
Step 1: Open your device and start the application known as Video Star. Then click the Camera Roll tab within the app. Place your finger on the video you wish to import.
Step 2: After importing the first video, click on the New button at the bottom of the screen. Now, click on the Import option to bring in the second video clip. Click the new button again, then select the Mix clips option on the list that appears on the screen.
Step 3: Find out where the Multiple Exposure feature is situated in the clip mixer. Select the clips you want to merge, and click on the Mix Clips option. If you'd like, you can also use the Multi-Layer Clip to partially obscure the video for a better ghost effect.
Step 4: After maximum satisfaction with the video, tap on export to take back the video to your camera roll. Lastly, upload the video into TikTok, where one can add sounds, music or even edit the video with other clips.
You can check the full tutorial here:
So these were some of the other ways you can add a ghost effect to your videos. Each option has some pros and cons. In the next part, we will find out which one is the best for your needs.
Part 3: Which Tool is the Best for Adding the Ghost Effect: Comparison!
- Best for Trendy Halloween Edits → Filmora
- Best for Quick iOS Editing → iMovie
- Best for Mobile Short Clips → KineMaster
- Best for Creative Filters → VideoStar
Now, it's time to decide which tool you should go for adding ghost effects to your videos. You can make a solid decision after looking at the comparison table given below:
| Feature | Wondershare Filmora | iMovie | KineMaster | Video Star |
| Richness of Resources | Extensive library of effects, transitions, and creep sounds | Good range of effects, but may be limited compared to others | Wide range of effects and tools | Decent selection of effects and filters |
| Vividness of Effects | High-quality ghost effects with customizable opacity, blending modes, and more | Good ghost effects, especially with green screen techniques | Offers effective ghost effects through chroma key and layering | Provides basic ghost effects through layering and opacity adjustments |
| Ease of Operations | User-friendly interface with drag-and-drop features | Relatively easy to use, but can be complex for advanced features | Intuitive interface with a learning curve for beginners | Simple to use, but may lack advanced features |
| Compatibility | Compatible with various platforms and devices | Primarily for Apple devices | Works on iOS and Android devices | Designed for iOS devices |
| Price | Free trial, Paid subscription, or a one-time purchase | Free for basic features, paid for advanced | Free with in-app purchases | Free with in-app purchases |
Conclusion
All in all, in terms of flexibility and numerous options, Wondershare Filmora is your choice if you want to spice up your videos with the ghost effect. So what are you waiting for? Once again, let your imagination go wild and see your videos materialize, or simply hover menacingly!


