
 100% Security Verified | No Subscription Required | No Malware

"When I import videos from my iPhone 15 Pro to Premiere Pro, the footage looks washed out or dull. Is there a fix? Does Premiere Pro now support Dolby Vision HDR from iPhone?"
Many users who shoot HDR videos on iPhone 14, 15, or even 17 Pro notice that their footage appears overexposed or faded in Adobe Premiere Pro. Here's why it happens — and how to fix it effectively in 2025.
While Adobe Premiere Pro is a powerful video editor, there are situations when iPhone HDR video looks washed out in Premiere Pro or appears overexposed after import. This happens due to incompatibility or misinterpretation of Dolby Vision HDR metadata from iPhone devices. Let's explore why this issue occurs and how to fix it easily.
In this article
Part 1: What Is Dolby Vision HDR Video on iPhone 12 to iPhone 17
Before fixing the iPhone HDR video washed out in Premiere Pro issue, it helps to understand what Dolby Vision HDR means. Apple first introduced Dolby Vision HDR recording with the iPhone 12 series, and the feature continues to exist in newer models like iPhone 15, iPhone 16, and the latest iPhone 17 Pro. These newer models support HDR10 and Dolby Vision at up to 4K 60FPS with improved tone mapping and 10-bit color depth.
Dolby Vision HDR captures extra data about brightness, contrast, and color range — making videos look more vivid on compatible displays. However, this same dynamic range can appear "blown out" or faded when played back or edited in SDR (Standard Dynamic Range) software or screens that don't fully support HDR playback.
Therefore, if you shoot in Dolby Vision on your iPhone but edit in SDR, you may see the colors look off in Premiere Pro unless the software or display supports HDR properly.
Part 2: Why iPhone HDR Video Looks Washed Out or Overexposed in Premiere Pro
Many editors notice that iPhone HDR video looks washed out in Premiere Pro because Dolby Vision and HDR10 color spaces are not properly interpreted by the software or by the display you're using. Although Premiere Pro 2025 has improved HDR workflows, mismatched color space (Rec.2020 vs Rec.709) and monitor limitations still cause the footage to look too bright or low-contrast.
If you're editing iPhone 14/15/17 Pro HDR footage, ensure that your display supports HDR and that your project color space is set correctly. Otherwise, the HDR video will automatically appear faded or overexposed when viewed in SDR.
✅ Premiere Pro 2025 HDR and Dolby Vision Support Update
As of the 2025 version, Adobe Premiere Pro now supports importing HDR10 and limited Dolby Vision metadata from iPhone 15 and newer models. However, the color interpretation may still vary depending on your monitor and export settings. To avoid HDR mismatch, convert iPhone Dolby Vision footage to SDR Rec.709 before editing or color grading.
Part 3: Most Effective 4 Ways to Fix Overexposed iPhone HDR Video in Premiere Pro
The following are proven solutions to handle Premiere Pro iPhone HDR exposure issues and restore accurate colors to your footage.
Solution 1: Turn Off HDR or Export Without HDR
One of the easiest methods to prevent iPhone HDR video issues is to turn off HDR recording directly on your device.
How to turn off HDR on iPhone:
Step 1 Open the Settings app on your iPhone.
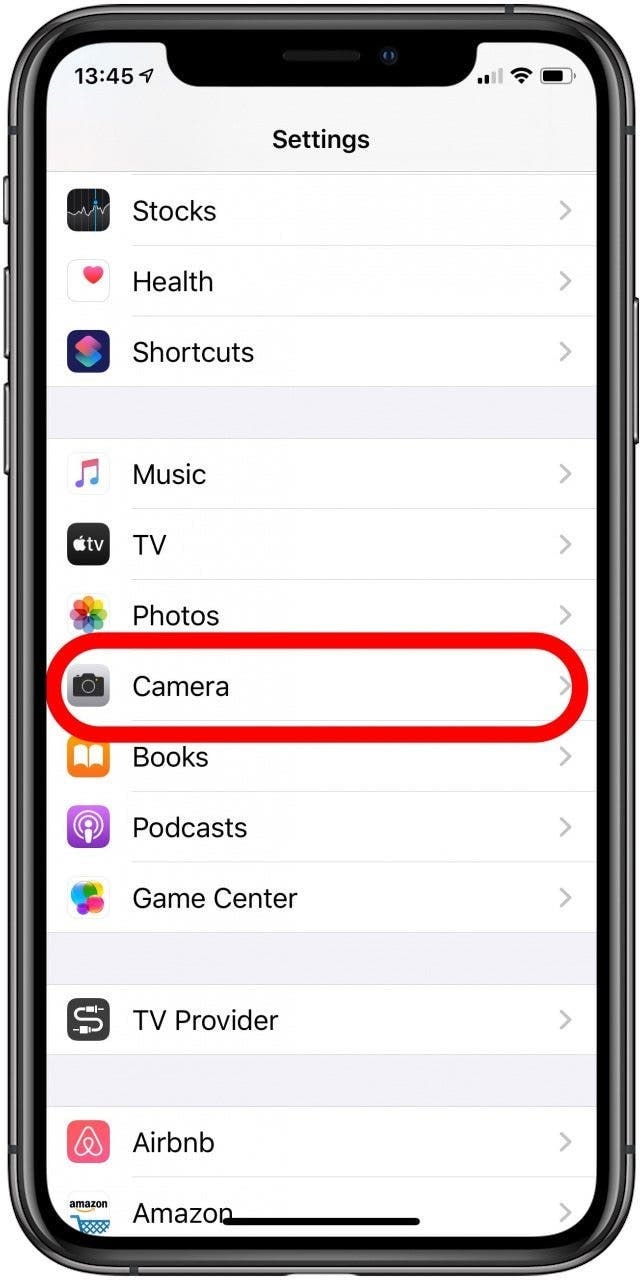
Step 2 Tap Camera → Record Video.
Step 3 Toggle off HDR Video (High Efficiency).
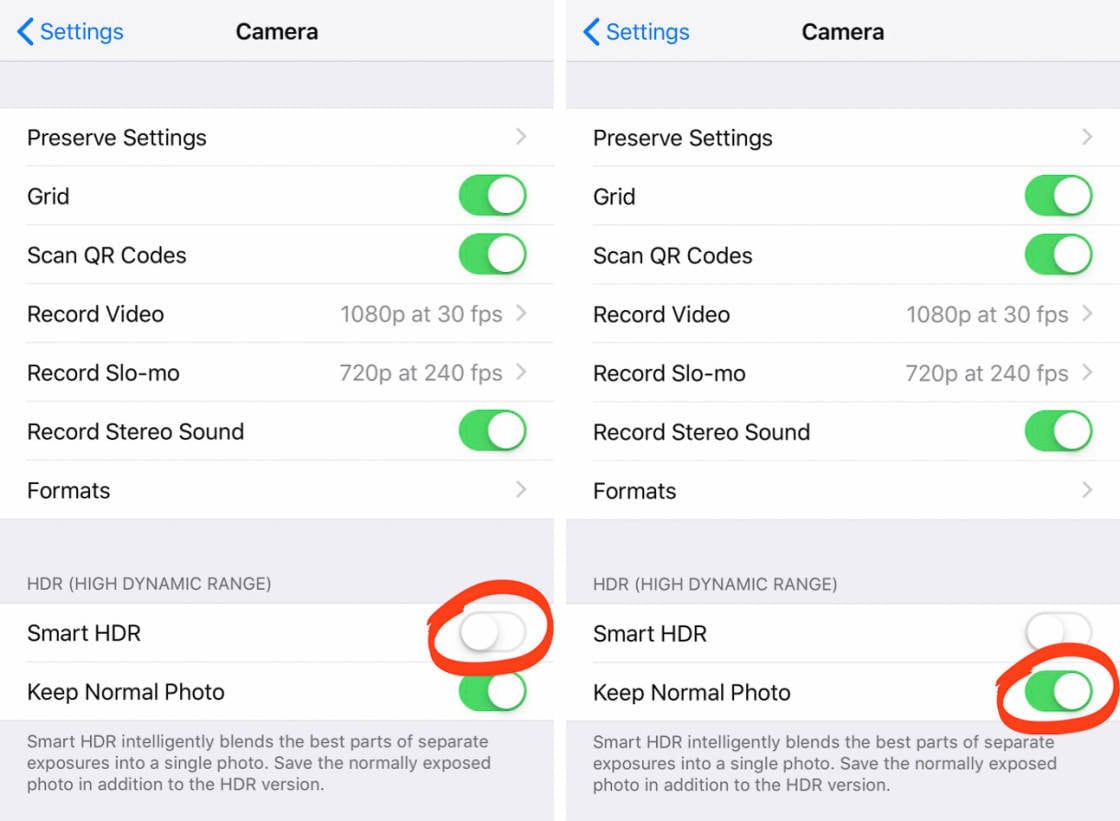
Step 4 Re-record your footage — it will now be saved in SDR (Standard Dynamic Range), which imports cleanly into Premiere Pro without color distortion.
Solution 2: Use a Video Editor that Can Convert iPhone HDR Video to SDR for Premiere Pro [Recommended]
Wondershare Filmora lets you easily edit and convert iPhone HDR video to SDR for Premiere Pro without losing color accuracy. It supports both HDR10 and Dolby Vision content from iPhone 12 to iPhone 17 Pro.
You can use Filmora's Color Match and Color Correction tools to sync the tone and contrast of your video and prevent washed-out visuals before exporting to Premiere Pro for advanced editing.
 secure download

How to convert iPhone HDR video to SDR with Filmora:
Step 1 Install and launch Filmora on your Mac or Windows computer.
Step 2 Click New Project → Import Media and add your iPhone HDR footage (MOV format).
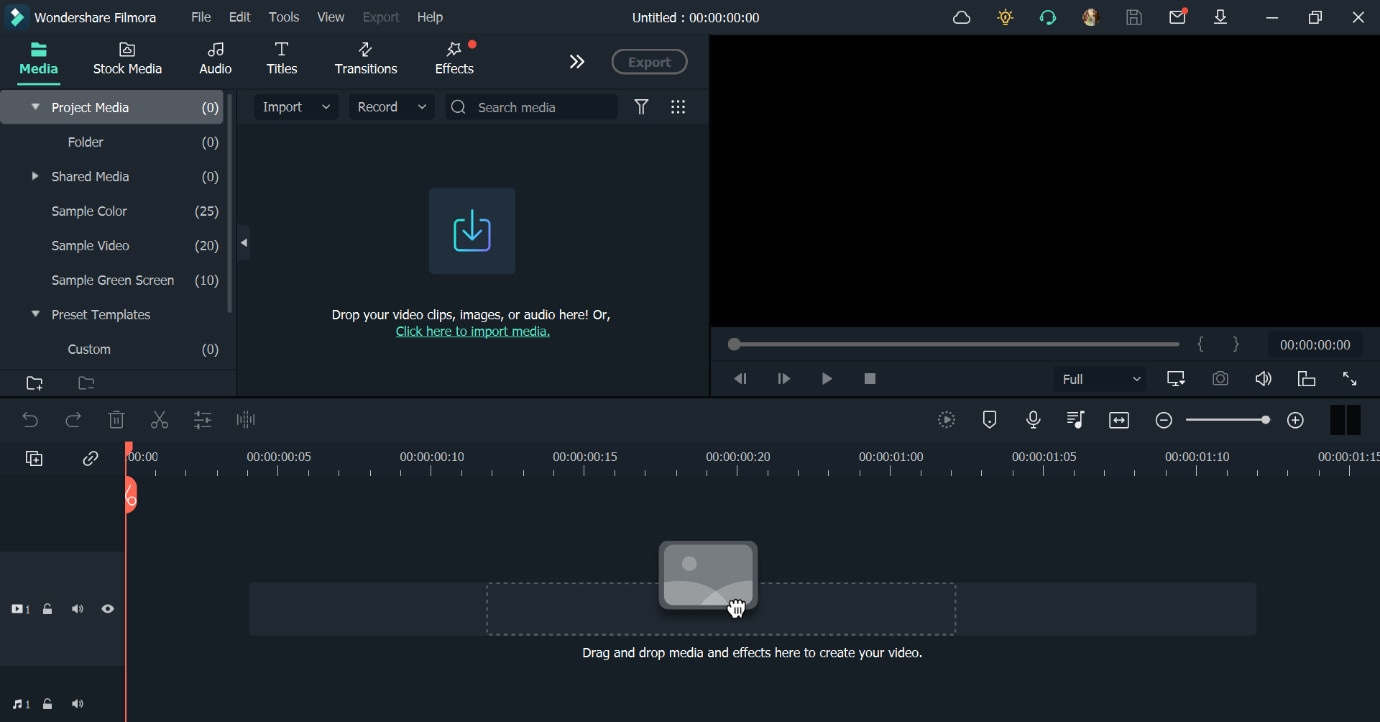
Step 3 Drag the clip to the timeline and make any desired edits (Color Matching, Chroma Key, etc.).
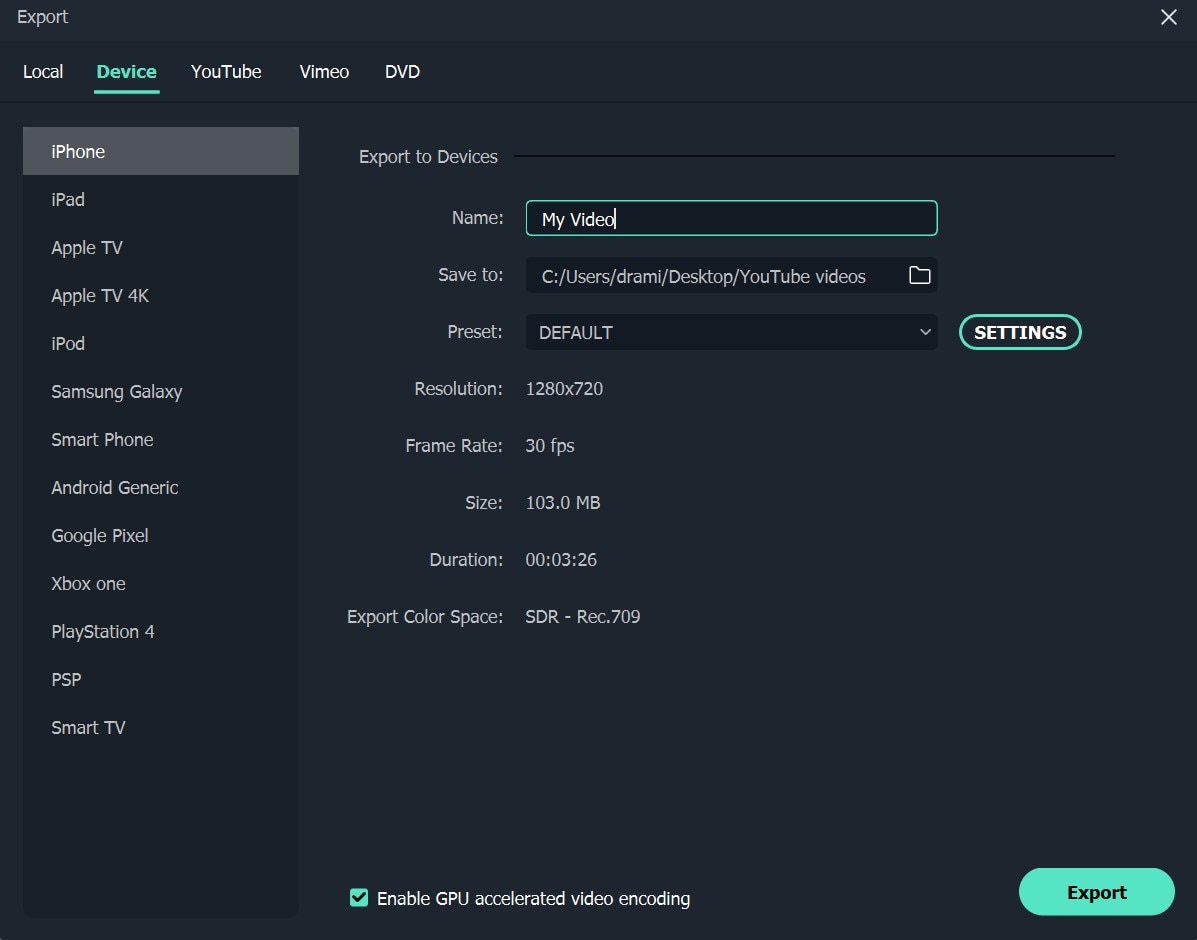
Step 4 Click Export → go to the Device tab → choose iPhone → select SDR (Rec.709) format for Premiere compatibility.
Solution 3: Edit Color Space Override with Rec 2020
If you prefer staying inside Premiere Pro, you can manually override the color space to fix HDR color interpretation. This is useful for Premiere Pro iPhone HDR workflows that appear overexposed.
When exporting in HEVC (H.265) or JPEG 2000 MXF formats, switch the Color Primaries to Rec.2020 and ensure Depth/Chroma is set to RGB 4:4:4 12-bit PQ. This aligns color space correctly and prevents HDR flattening.
Solution 4: Change Video Codec to Fix Color Translation [Untested]
Another workaround is to open the file in QuickTime on a Mac and re-export in H.264 or ProRes 422 format. Then re-import the video into Premiere Pro. This often normalizes color translation and eliminates the washed-out HDR look.
Though untested officially, this method can temporarily resolve Premiere Pro iPhone HDR color problems for users without HDR monitors.
Bonus Tip: Fix iPhone Footage Premiere Pro Problem Quickly
If your iPhone video looks too bright or faded in Premiere Pro, try re-exporting it from QuickTime or Filmora in SDR format. This effectively removes Dolby Vision metadata and converts your video to Rec.709 color space, ensuring accurate color and exposure when editing.
Final Words
To sum up, if your iPhone HDR video looks washed out in Premiere Pro, it's likely a color space mismatch rather than a software bug. The issue affects most Dolby Vision and HDR10 footage from iPhone 12 through iPhone 17 Pro. You can fix this by disabling HDR in-camera, converting HDR to SDR using Filmora, or overriding the color space in Premiere Pro to Rec.709. This ensures your iPhone footage in Premiere Pro looks vibrant and accurate again.
secure download
