


 100% Security Verified | No Subscription Required | No Malware

Many people are wondering how to set up lighting for video shooting. While there are many different ways to set up lighting, some methods are more effective than others.
Therefore, this article will give you a complete guide on how to set up your lighting to make your videos stand out.
In this article
Part 1. How-to Guide
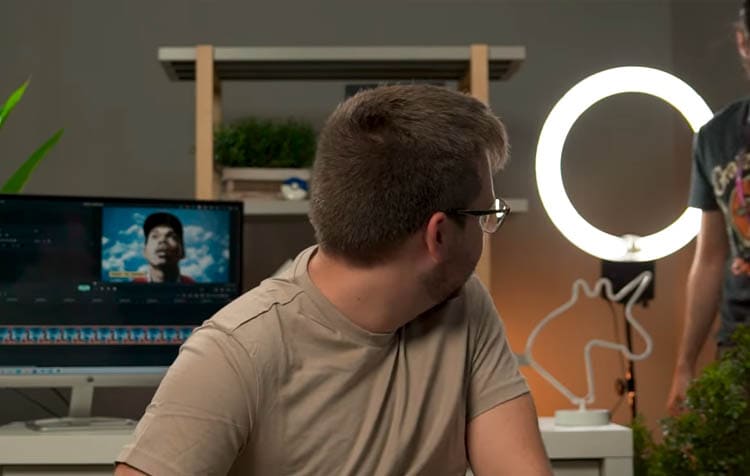
1) Preparation
Before we get started, you may need to prepare some things to set up your lighting:
1. Powerful LED Lights
LED lights are a huge step up from traditional incandescent lighting because they generate much less heat and energy. Also, you can change the color temperature and use different lighting effects.
2. Softbox
Softbox can help you diffuse and spread the light on the subject.
3. Fresnel lens
A Fresnel lens is an optional attachment that can bounce the light off of the ceiling of your studio and diffuses the light to look soft.
2) Steps
For this tutorial, we will use the Three-Point Lighting technique:
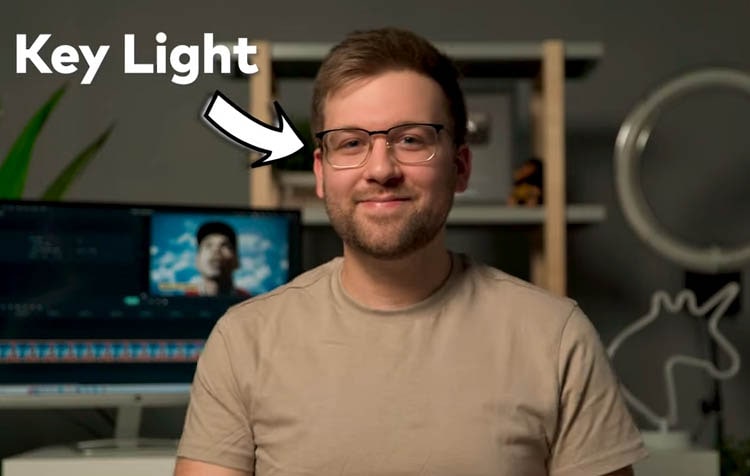
Step1 Set the Key Light
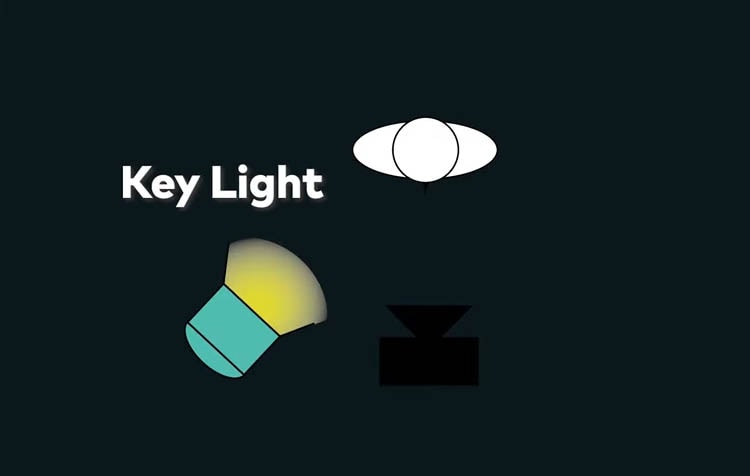
The key light is the main light that illuminates the subject. You can place it in the front and slightly to one side. For this key light, we use an LED called Aputure 300X as an example, and with a soft box called light Dome 2.
Step2 Set the Fill Light
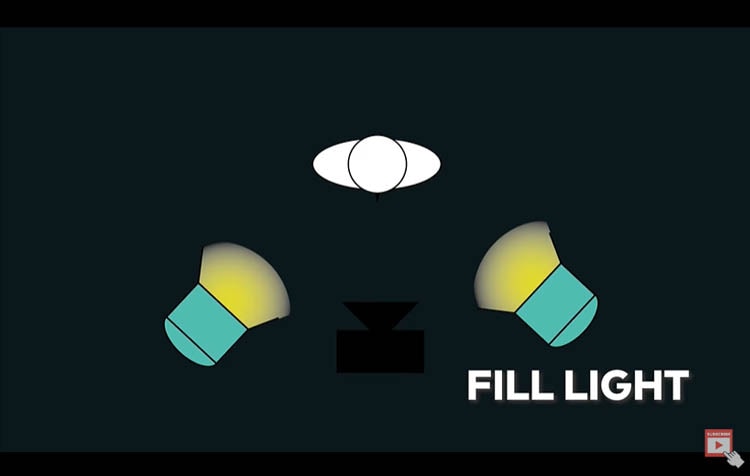
The fill light is used to fill in the shadows created by the key light. It is usually placed on the opposite side of the subject. For the fill light, we use an Aputure 300D with a fresnel lens attachment.
Step3 Set the Backlight
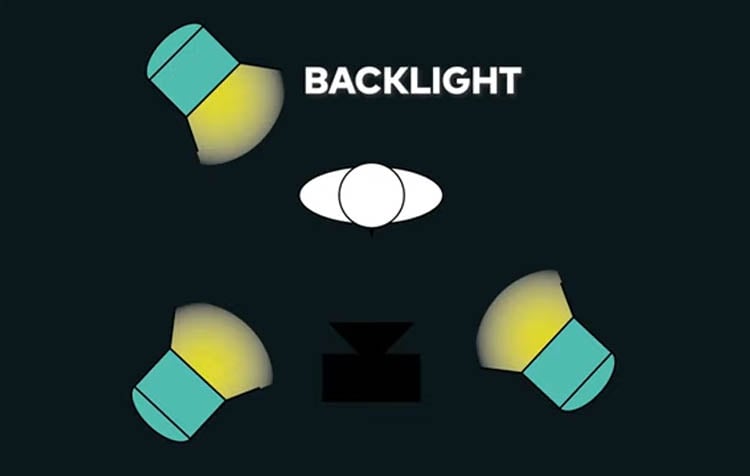
For this tutorial, we use Aperture 120d as the backlight and lift it up into the air with a c-stand so it can light the subject from above. It helps to separate the talent from the background and give the audience a full view of the set
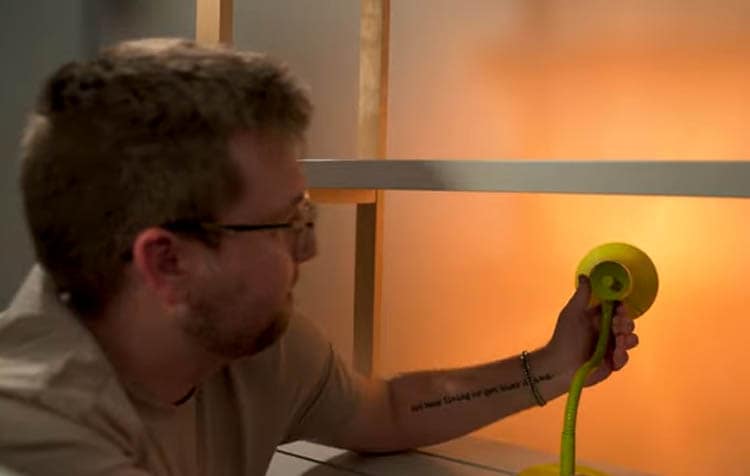
Step4 Use Practical Lights
Practical lights appear on the camera to add some visual flair. It can be any light source that isn't meant for lighting the subject. For example, we use a green lamp to help our background pop as it casts a nice orange light on the back wall.
Then, we also have a LED ring light that shines toward the camera. The light adds even more light to the frame and gives a slight backlight to the subject.
Finally, we have a few other small LED lights like this unicorn to put in the background. This lighting helps us to get even more visual flair out of our shots.
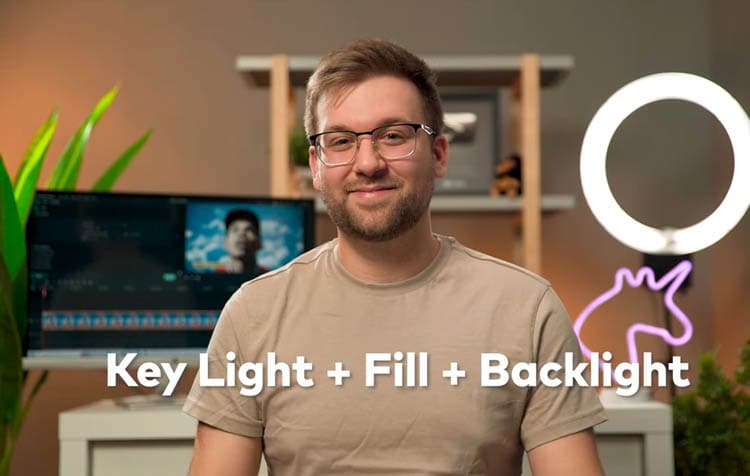
After setting up all the lighting above, you can take a look at the comparison below:
Using Key Light only
Using Key Light + Fill + Backlight
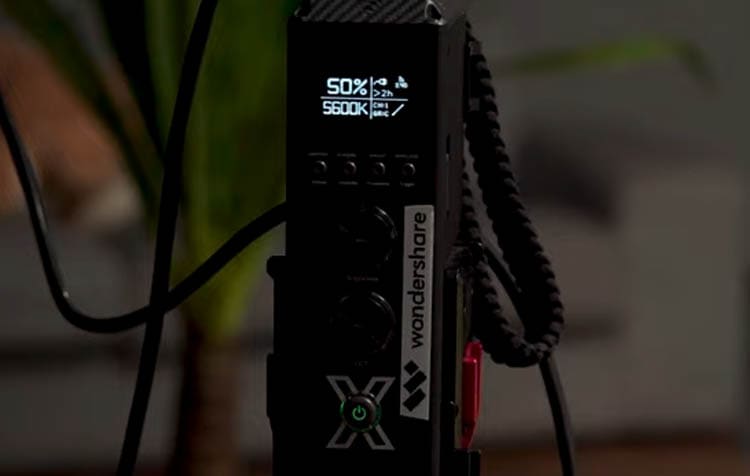
3) Pro Tips: The light setting
We usually set the lights around 50% brightness and a color temperature of 5600K.
Related Posts:
Summary
Hopefully, you learned something about lighting by taking a look at our setup. If you want to know and learn about other lighting tutorials, don’t hesitate to let us know in the comments.
