
 100% Security Verified | No Subscription Required | No Malware


 ChatGPT
 Perplexity
 Gemini
 Claude
 Grok
Grok
When you repurpose YouTube videos into Reels, you do not have time to rebuild a full color grade from scratch. Ready-made YouTube video filters for Reels let you match your long-form look in just a few clicks, even when you are cutting your clips down to 15-30 seconds.
Below are 12 short clip color filter styles tailored for creators repurposing YouTube clips into Reels. Use them as fast presets to fix skin tones, match your channel aesthetic, and keep your YouTube to Reels color grade consistent across platforms.
In this article
Channel-Consistent Filters for YouTube Clips Turned Reels
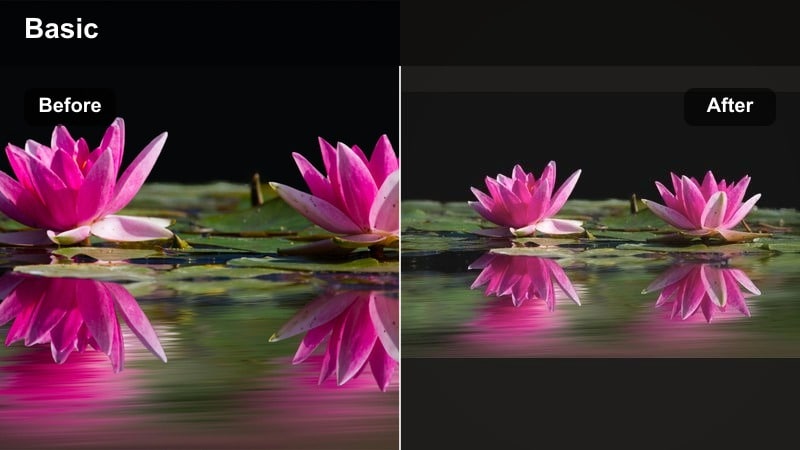
Clean Studio Neutral

- Effect look: Soft contrast, neutral colors, and even skin tones that match a typical YouTube studio setup without looking overprocessed.
- Best for: Talking head YouTube clips repurposed as Reels, tutorials recorded in controlled lighting, and educational short video content.
- Editing tip: Apply after basic exposure correction, then slightly lower saturation for Reels to keep text overlays and captions easy to read.
This clean, neutral studio filter is ideal when you want your repurposed Reels to look exactly like your main YouTube uploads, just reframed for vertical. In Filmora, you can quickly achieve this by adjusting contrast and saturation in the Color panel, then saving those settings as a preset that you can drop onto every clip from the same recording session.
For a consistent channel look, start by correcting white balance and exposure, then apply a gentle contrast curve and subtle saturation pullback. Use Filmoras scopes and skin-tone line to keep faces natural, and test the preset on a few different angles from your studio to be sure your 9:16 crops still feel polished and professional.
Auto-match your YouTube look to Reels with AI color tools
Instead of rebuilding your color grade from zero, use AI-assisted color matching to analyze your original YouTube clip and generate a similar look for your Reels version. Filmoras AI Color tools can sample a reference frame from your 16:9 video and transfer that style directly onto your 9:16 cut.
Once you lock in a favorite style, save it as a preset titled YouTube Video Filters for Reels: Short Clip Color Grades so you can reuse the same look across multiple short edits. This keeps your colors on-brand even when you are batch-cutting dozens of Reels from a single long-form project.
Try importing one finished YouTube video, sampling your favorite shot, and letting AI suggest a Reels-ready filter that preserves your existing brand style.
 secure download

Preview filters on vertical and horizontal formats side by side
Because you are editing for both YouTube and Reels, preview filters in split view to see how a single grade behaves in 16:9 and 9:16 at the same time. In Filmora, you can duplicate your sequence, set different aspect ratios, and toggle between them while testing color presets.
This makes it easier to decide whether a filter should be stronger on the Reel and softer on the YouTube upload or shared exactly as is across both. You will avoid surprises like crushed shadows or blown highlights that only show up after cropping for mobile.
Drop a timeline marker on key frames, then toggle through filters quickly to find the best cross-platform match before you commit.
secure downloadTurn your favorite Reels filters into reusable LUT-style presets
Once you have tuned a filter for your short-form clips, export or save it as a reusable LUT-style preset so you can apply the same look to future uploads in seconds. Filmora lets you save custom color settings and apply them to any new timeline, so your YouTube and Reels pipeline stays efficient.
Label presets by use case, like studio shorts, travel b-roll, or product close-ups, to speed up your workflow whenever you repurpose content. Over time, this builds a personal library of short clip LUTs tailored to your exact channel aesthetic.
Create a small library of short clip LUTs dedicated to your YouTube to Reels pipeline so every new edit starts from a consistent base look.
secure downloadSubtle Pop Channel Look

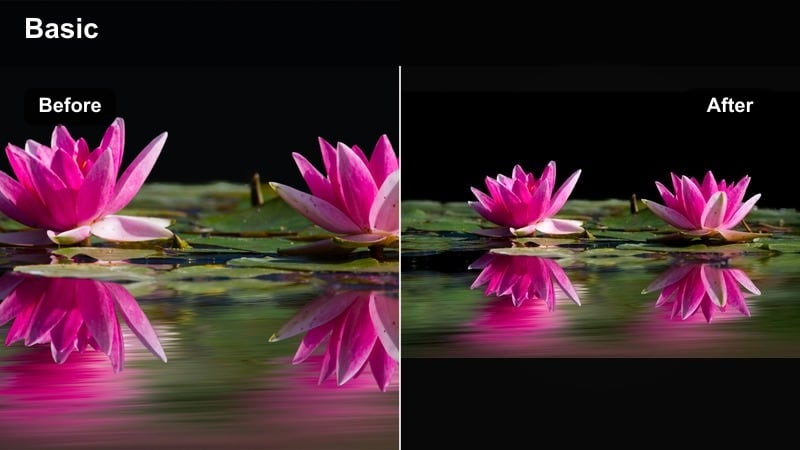
- Effect look: Light contrast boost with a gentle saturation lift that adds energy without pushing colors into an overly commercial look.
- Best for: Creator channels, personality-driven clips, quick commentary, and reaction snippets turned into short Reels.
- Editing tip: Use keyframes to slightly increase intensity near call-to-action moments like subscribe or follow to draw the viewers eye.
Subtle Pop Channel Look is designed to add just enough punch so your talking-head or commentary clips stand out in a fast Reels feed. In Filmora, you can combine a mild contrast increase with a bit of Vibrance rather than heavy Saturation so skin tones stay pleasing.
When repurposing your YouTube segments, apply this preset to the entire clip, then keyframe the Color panel to nudge saturation and brightness a touch higher right before key moments. This draws extra attention to reactions, punchlines, and CTAs without making the whole video feel overly processed.
Soft Brand Pastel
- Effect look: Lower contrast, slightly lifted blacks, and pastel leaning colors that give your clips a soft, brand-friendly finish.
- Best for: Lifestyle channels, wellness and productivity videos, and repurposed YouTube b-roll used as background for text-heavy Reels.
- Editing tip: Add brand-colored text and shapes on top of this filter since the softer image will keep overlays clear and non-distracting.
Soft Brand Pastel is perfect for creators whose aesthetic leans cozy, minimal, and calming. In Filmora, reduce contrast, lift shadows slightly, and push Hue and HSL controls gently toward your preferred pastel palette to create a soft base under your overlays.
Use this filter on b-roll segments you bring over from YouTube and layer subtitles, timers, or checklist text on top. Because the image is intentionally gentle, your typography in Filmora can stay thin and delicate while remaining legible on small phone screens.
High-Impact Filters for Short Reels Clips
Crisp Viral Contrast

- Effect look: Sharpened edges, bright highlights, and bold contrast to make details jump on small mobile screens.
- Best for: Fast-paced YouTube highlights, repurposed gaming clips, tech reels, and product callouts that need instant visual punch.
- Editing tip: Dial back sharpening slightly on faces to avoid haloing, and apply a tiny bit more on text or UI overlays for extra clarity.
Crisp Viral Contrast is built for grabbing attention in the first second of a scroll. In Filmora, stack a contrast boost with clarity-style sharpening and a slight lift in highlights so icons, gameplay HUDs, and product edges look razor sharp, even in 1080 x 1920 exports.
For YouTube clips you are repurposing, duplicate the track, crop for vertical, and then apply this preset only to the version destined for Reels. Use Filmoras mask and sharpen tools to keep faces smoother while letting text, logos, and interfaces pop more strongly.
Neon Social Pop

- Effect look: Vibrant, saturated colors with extra emphasis on blues, pinks, and purples to mimic neon social media aesthetics.
- Best for: Dance clips, party edits, nightlife vlogs, and music-driven Reels pulled from long-form YouTube videos.
- Editing tip: Lower exposure a touch before applying the filter so neon colors stay rich instead of clipping into pure white.
Neon Social Pop turns ordinary club or concert footage into the bold, cyber-inspired look that performs well on social feeds. In Filmora, you can use HSL tuning to push blues toward cyan and reds toward magenta while boosting saturation selectively in those ranges.
Before you apply this preset to your YouTube-to-Reels cut, pull exposure down slightly in the Color panel. This ensures that neon signs, LED panels, and stage lights hold detail rather than blowing out, giving your short-form edits a polished, energetic finish.
Dynamic Highlight Recap
- Effect look: Lifted midtones and dynamic contrast that emphasize movement, gestures, and fast action within short edits.
- Best for: Sports highlights, travel montages, recap cuts, and event coverage shortened from longer YouTube uploads.
- Editing tip: Apply the filter first, then fine-tune exposure on the brightest frames so your action moments do not blow out in vertical format.
Dynamic Highlight Recap is ideal when you are building quick montages from longer YouTube videos and need motion to read clearly on a small screen. In Filmora, emphasize midtones and clarity while keeping shadows and highlights balanced so details remain visible throughout the sequence.
Once this preset is applied, scrub your vertical timeline for the brightest action frame and adjust exposure and highlights there. Then copy those adjustments to the rest of the clip to prevent distracting flickers in brightness as viewers swipe through your Reels.
Cinematic Feel for YouTube Shorts and Reels
Soft Filmic Rolloff

- Effect look: Gentle highlight rolloff, slightly muted saturation, and a smooth filmic contrast curve that feels cinematic but not heavy-handed.
- Best for: Narrative shorts, vlog b-roll, and travel sequences repurposed from YouTube into more story-driven Reels.
- Editing tip: Pair this filter with slower cuts and minimal on-screen text so the cinematic feel does not compete with busy motion graphics.
Soft Filmic Rolloff gives your repurposed clips a tasteful cinematic vibe without going full vintage or extreme. In Filmora, apply a custom curve to tame highlights, slightly desaturate the image, and add a mild vignette if needed to guide the eye toward your subject.
Use this look on clips where mood matters more than speed, such as travel shots or reflective vlog moments clipped from your main YouTube uploads. Keeping text overlays minimal in Filmora lets the tone of the grade carry the storytelling in short vertical format.
Teal and Orange Story
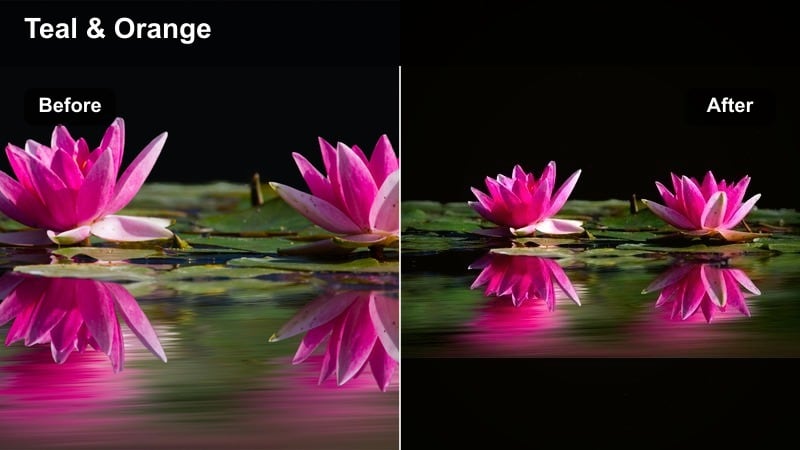
- Effect look: Classic teal shadows and warm skin tones, adding a cinematic blockbuster feel to everyday footage.
- Best for: Story-based YouTube content, cinematic b-roll sequences, and dramatic reaction shots clipped into Shorts or Reels.
- Editing tip: Lower the intensity slightly for Reels so that compressions from different platforms do not exaggerate the teal-orange split.
Teal and Orange Story brings a familiar movie-style palette to your vertical edits. In Filmora, adjust the Color Match or HSL tools to cool down shadows and midtones while gently warming oranges and reds around skin tones for an engaging cinematic contrast.
When preparing YouTube clips for Reels, apply this look with restraint. Platform compression can intensify color separation, so dial back saturation and contrast a bit in Filmora to keep the teal and orange effect stylish rather than distracting on smaller mobile screens.
Moody Desaturated Reels

- Effect look: Muted colors, slightly deeper shadows, and a cooler overall tone that creates a moody, editorial style.
- Best for: Cinematic vlogs, night city scenes, behind-the-scenes footage, and emotional storytelling repurposed for vertical viewing.
- Editing tip: Use this filter on b-roll sections and keep your A-roll more neutral so mood shifts are clearly felt in short clips.
Moody Desaturated Reels is great for giving certain moments in your YouTube-to-Reels edits a more emotional, editorial feel. In Filmora, lower saturation globally, cool the white balance slightly, and deepen the shadows to build a subtle but dramatic atmosphere.
Apply this filter primarily to b-roll and cutaway shots while keeping your main talking-head segments closer to neutral. That contrast in grading, managed via presets in Filmora, helps viewers feel the mood shift in just a few seconds of vertical storytelling.
Conversion-Focused Filters for Reels Hooks and CTAs
Bright CTA Focus
- Effect look: Clean brightness, soft contrast, and lightly warmed skin tones to make faces and call-to-action overlays stand out.
- Best for: Hooks, intros, and outro clips from YouTube videos that drive traffic, sign-ups, or channel subscriptions through Reels.
- Editing tip: Place your strongest CTAs on frames where the filter keeps the background simple so tap targets and text remain easy to read.
Bright CTA Focus is optimized for clarity and legibility so that your subscribe, follow, or link instructions never get lost. In Filmora, brighten exposure slightly, soften contrast, and add a gentle warm tone to skin so your face and overlay text both remain inviting.
Use this look on your hook and closing sections when converting YouTube segments into Reels. Design your on-screen text and arrows in Filmoras Titles and Elements panels with colors that contrast the cleaned-up background, ensuring every CTA is readable at a glance.
Product Detail Macro

- Effect look: Micro-contrast, controlled highlights, and boosted texture that highlight product surfaces and fine details.
- Best for: Unboxings, tech reviews, beauty close-ups, and any product demo clips transferred from YouTube to Reels.
- Editing tip: Apply selective sharpening to the product only and reduce noise in out-of-focus areas to keep attention where you want it.
Product Detail Macro is designed to make textures, labels, and small design features pop in vertical close-ups. In Filmora, combine local sharpening with increased clarity and careful highlight control so reflective surfaces stay crisp without glaring.
When reframing your YouTube reviews or unboxings for Reels, crop tightly around the product, then use Filmoras masking tools to sharpen only the object while applying a bit of noise reduction or blur to the background. This directs viewer focus exactly where it needs to be for conversions.
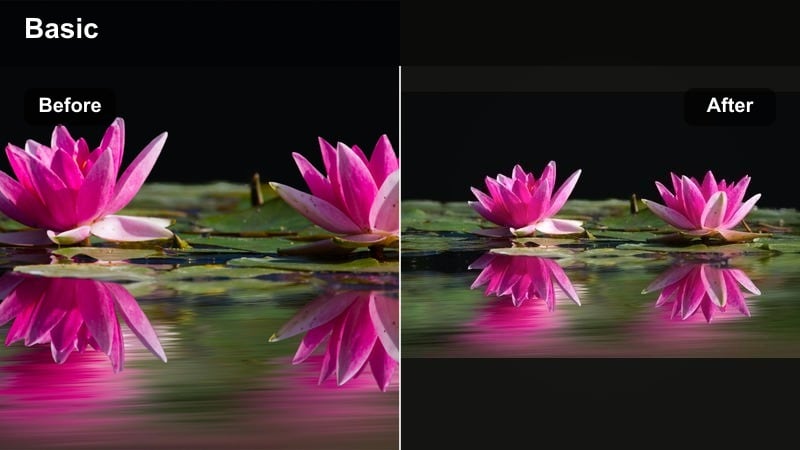
Feed-Friendly Natural
- Effect look: Low-contrast, true-to-life colors that blend seamlessly with native phone clips users see in their feeds.
- Best for: Educational clips, quick tips, and casual moments clipped from polished YouTube uploads that should still feel organic on Reels.
- Editing tip: Skip heavy vignettes and keep the filter subtle so your content feels like it belongs among everyday user-generated videos.
Feed-Friendly Natural helps your repurposed clips look polished but not overly produced, which can improve watch time on platforms where native phone footage dominates. In Filmora, keep contrast modest, maintain accurate white balance, and use minimal saturation adjustments.
Apply this look when you take talking points from your long-form YouTube videos and turn them into bite-sized tips for Reels. The subtle grade ensures your content feels authentic and approachable while still benefiting from the cleaner optics of your main camera.
Tips for Using Youtube Video Filter Reels Filters in Filmora
- Batch export several Reels from the same YouTube timeline and apply one filter across all of them in Filmora to keep your series visually consistent.
- Always check vertical framing after adding filters because contrast and brightness shifts can change how edges and cropping feel on small screens.
- Use slightly lower saturation for Reels than for YouTube so text overlays, subtitles, and UI elements stay readable on mobile devices.
- Name your Filmora presets with both the platform and use case, such as Reels Studio Neutral or Reels Product Detail, to speed up preset selection.
- Test each filter on at least three different lighting situations from your video so it does not break when the scene changes mid-Reel.
- Save your favorite Filmora color settings as custom LUT-style presets to reuse the same YouTube-to-Reels look across multiple projects.
- Combine Filmoras AI color tools with manual tweaks to quickly match your existing YouTube aesthetic while fine-tuning for vertical playback.
- Preview your graded Reels on an actual phone to confirm that skin tones, text, and product details all look balanced in real-world viewing conditions.
YouTube video filters for Reels give you a fast way to turn long-form projects into short, platform-ready clips without rebuilding your grade every time.
Build a small set of go-to presets, test them on your most common repurposing scenarios, and your YouTube to Reels color grade will stay consistent, recognizable, and efficient to manage.
secure downloadNext: Cinematic YouTube Video Filters: Give Your Clips a Filmic Edge
