When it comes to content creation, presenting your video in the correct orientation is key to making a lasting impact. One common scenario where video rotation is needed is when a video is filmed in portrait mode, but the platform you’re using, like YouTube or a website, requires landscape. Such mistakes can make your video appear unprofessional if left unchecked.
Fortunately, Mac users have various tools available for rotating videos to fix these issues. To rotate videos on macOS, built-in options like QuickTime Player offer a quick solution. More advanced tools, like Filmora, allow for precision rotation at custom angles. Hence, it gives you greater flexibility to adjust video orientation while also providing other editing features.

In this article
Part 1. Key Considerations Before Rotating a Video
Before jumping into rotating a video on your Mac, there are several important factors to keep in mind to ensure you achieve the best results. From understanding how different file formats handle rotation to preserving video quality, making informed choices can save you time and improve your final output.
1. File Formats and Compatibility
Not all video formats handle rotation the same way. If your video is in a less common format or is incompatible with the software, you may need to convert it into a more widely supported one (like MP4) first to avoid quality loss or software restrictions during rotation. Then, you can rotate the mp4 video on your Mac using the methods in the next section.
2. Understanding Video Orientation (Landscape vs. Portrait)
Rotating from portrait to landscape (or vice versa) requires consideration of how the video will be viewed. Landscape orientation has a wider horizontal dimension. It’s perfect for platforms like YouTube and presentations. Meanwhile, portrait orientation is taller and commonly used for mobile and social media content like Instagram or TikTok. Be sure to match the orientation to the platform’s requirements to avoid awkward cropping or black bars around your video.
3. Impact on Video Quality and Aspect Ratio
Rotating a video may affect its aspect ratio, which can result in stretching, cropping, or black bars if the original ratio doesn’t fit the new orientation. For instance, moving from a 16:9 landscape to a portrait may cause the image to appear squished or cut off if not adjusted properly.
Therefore, it’s crucial to select a tool that allows you to adjust the aspect ratio or crop the video effectively so that the rotation doesn’t degrade the visual quality or distort the content.

Part 2. 3 Best Methods to Rotate Video on Mac
Rotating a video on your Mac can be done through various techniques, offering flexibility depending on your editing needs and preferences. Depending on your needs, whether quick adjustments or precision editing, here are three effective methods:
1. Built-in Rotation with QuickTime Player
QuickTime Player is a built-in application on Mac that is simple and straightforward. One of its capabilities is the ability to rotate videos, making it a quick and easy solution for basic video rotation.
Here’s how to rotate your video using QuickTime:
Locate and open QuickTime Player on your Mac.
Go to File > Open File, then select the video you want to rotate.
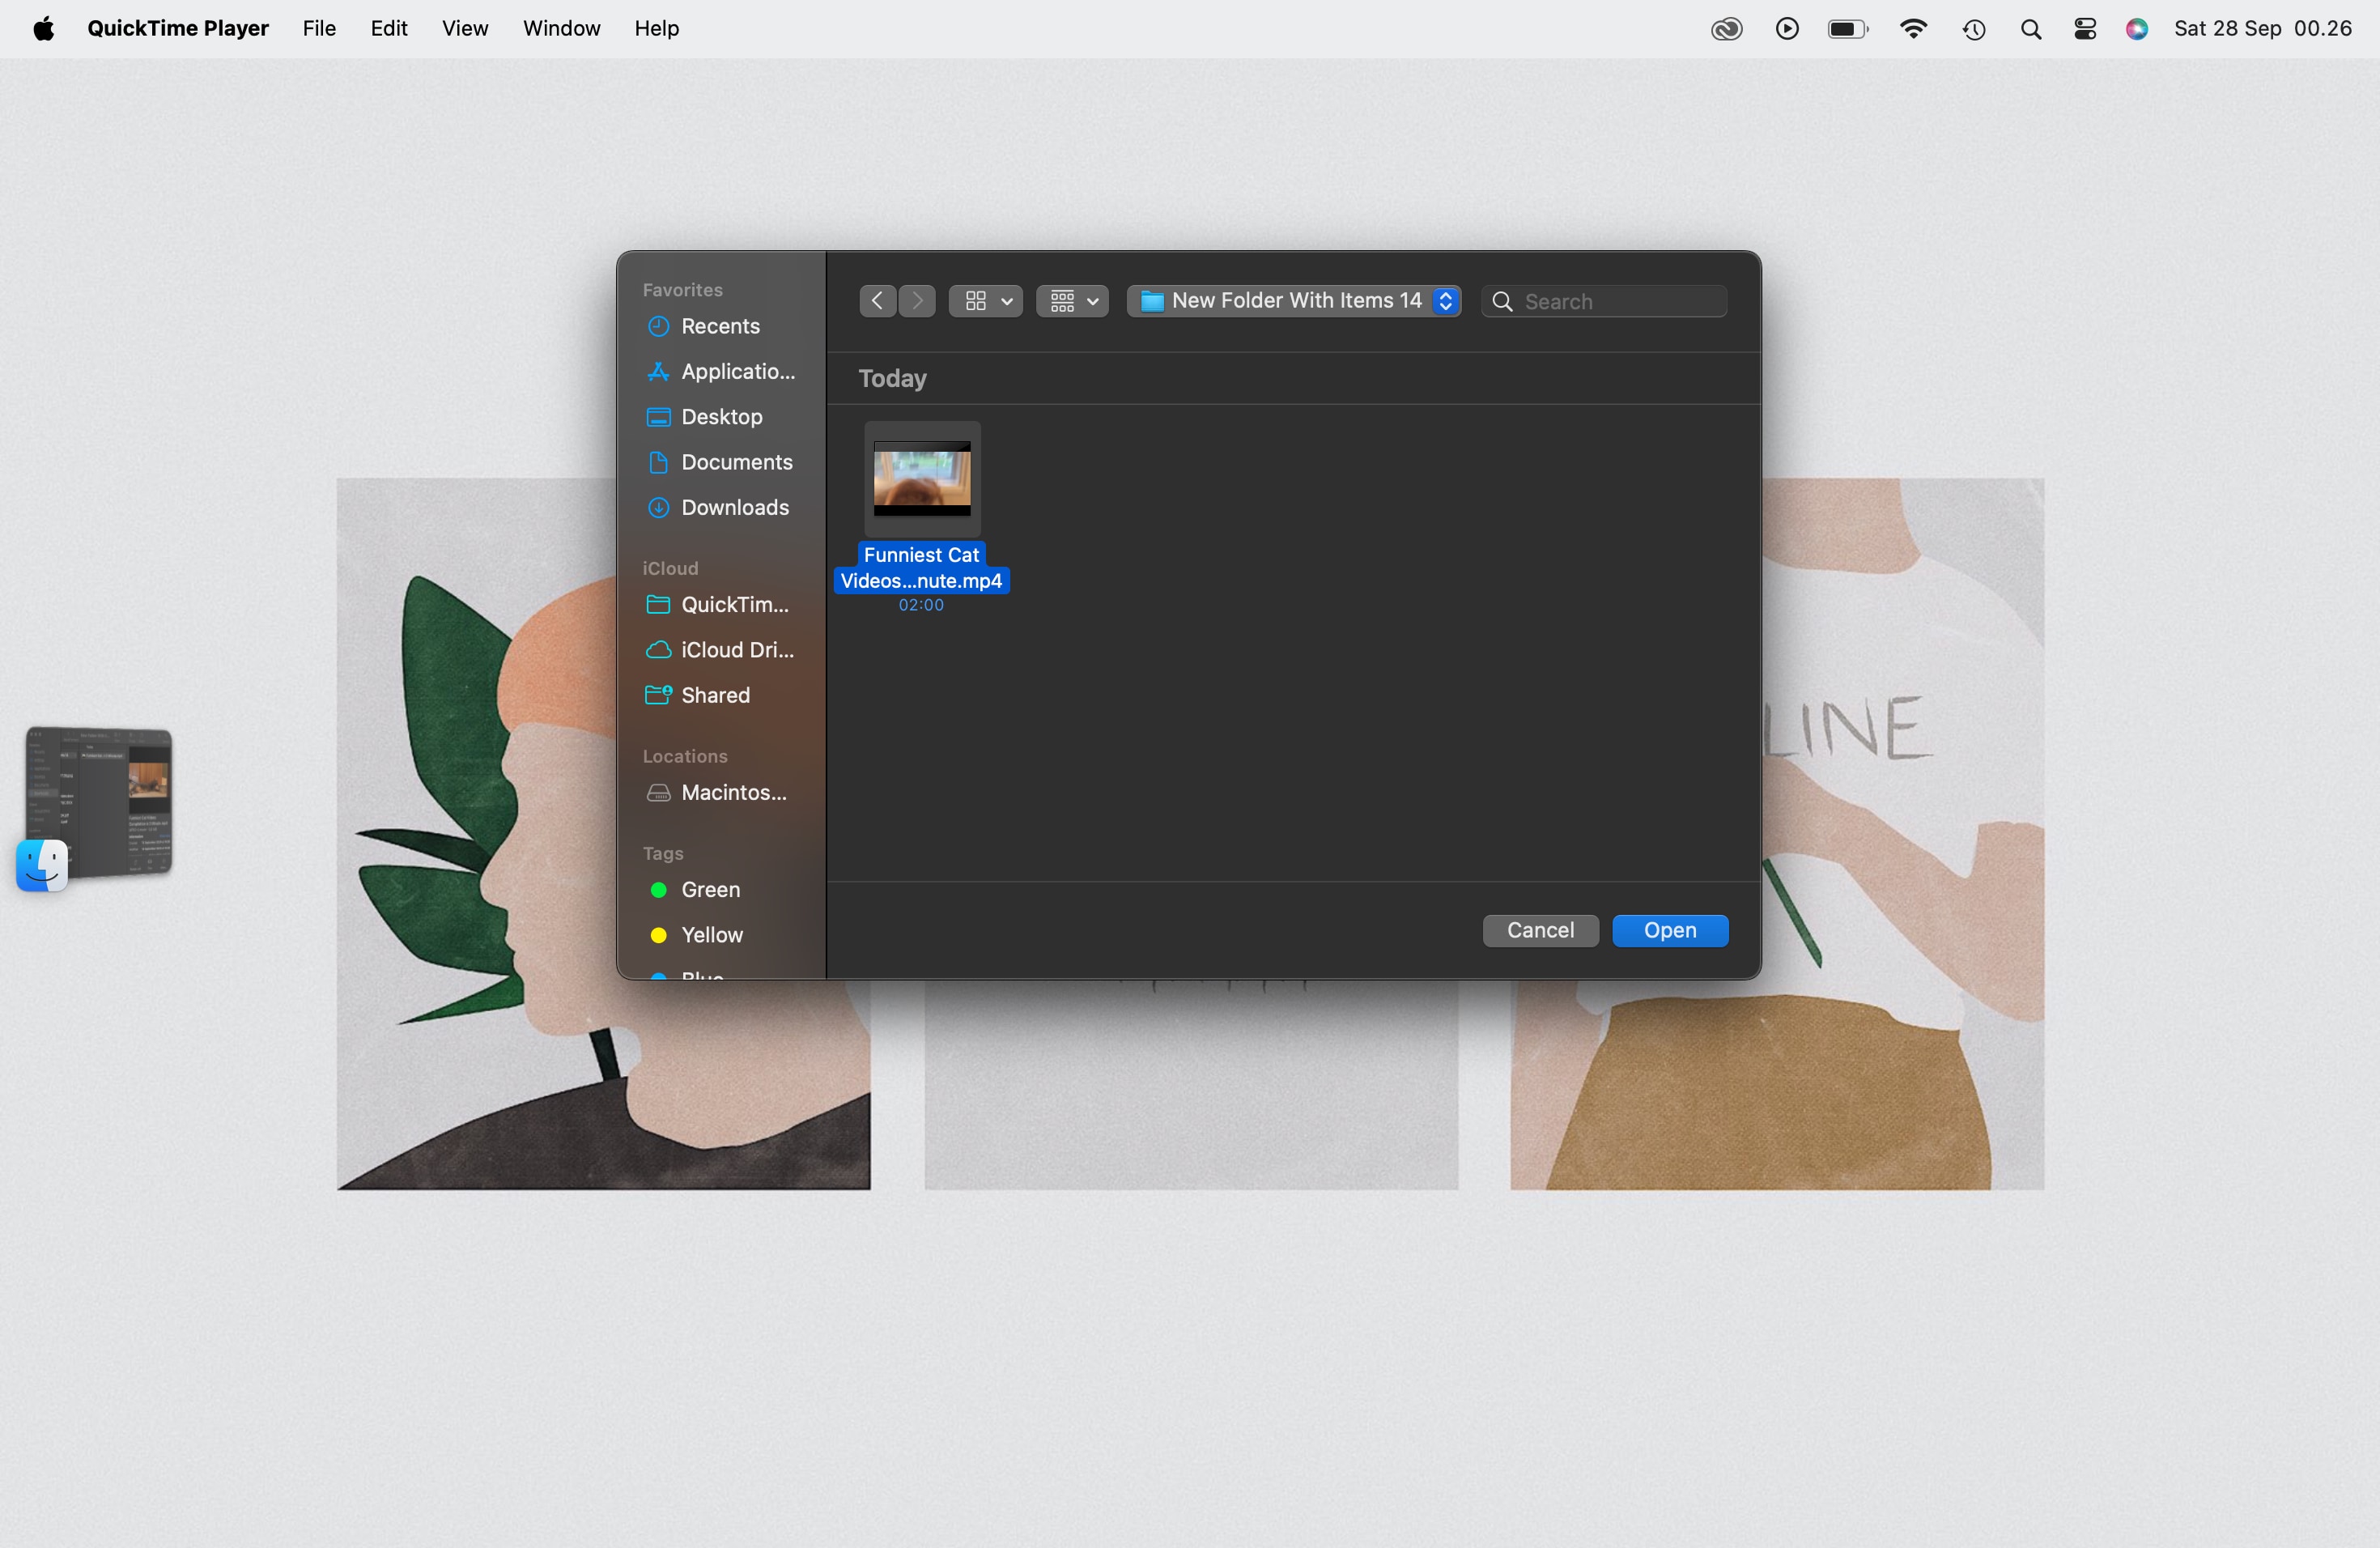
Once the video is open, click on Edit in the top menu.
Choose Rotate Left or Rotate Right depending on the direction you want to rotate the video.

If you need to flip video on your Mac, you can also select either Flip Vertical or Flip Horizontal under the same menu.
After rotating, go to File > Save or Export As to save the rotated video in your desired format.
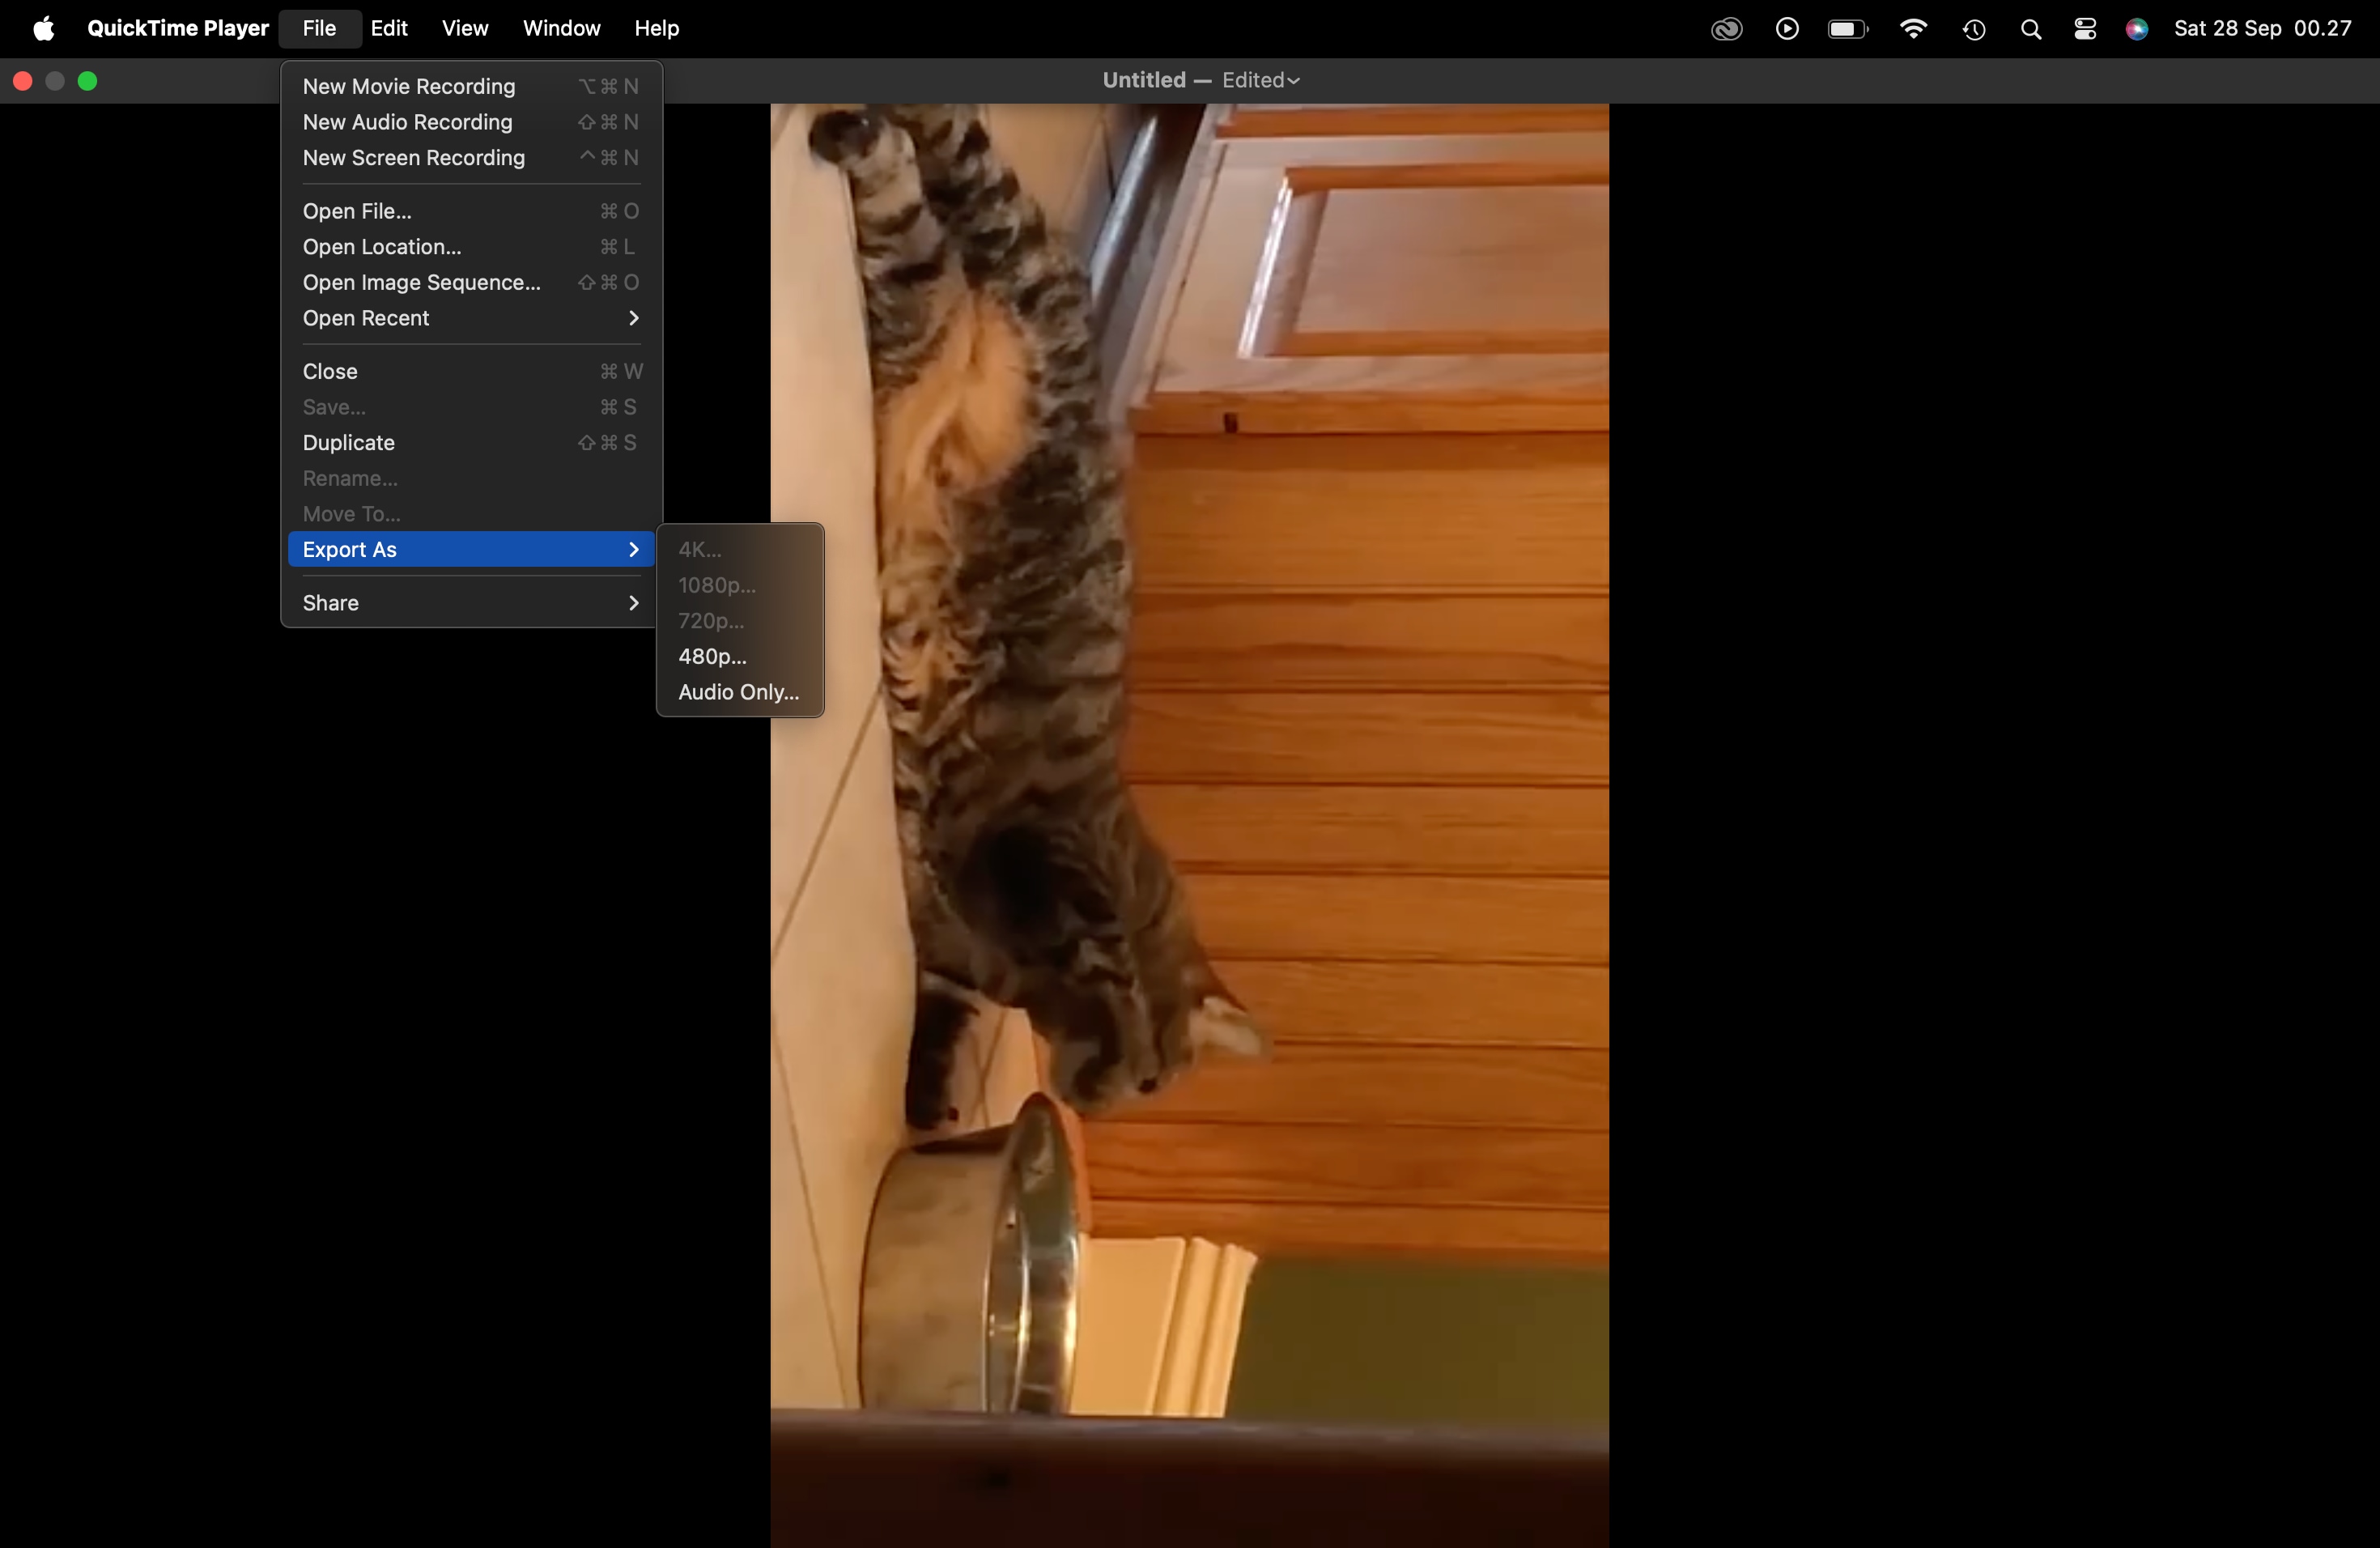
This method is perfect for quick fixes when you need a simple 90-degree or 180-degree rotation without additional software. However, it doesn’t offer precise angle adjustments or advanced editing options.
2. Manual Frame Rotation with Video Editing Software
For more advanced users requiring precision or specific angles beyond 90 or 180 degrees, editing software makes frame-by-frame manual rotation possible. Third-party software like Wondershare Filmora allows you to rotate each frame for precise adjustments.
Filmora is a versatile video editing tool that allows for more advanced editing, including manual frame-by-frame rotation. This method is ideal for users seeking precise control over their video’s orientation and additional editing features like transitions, effects, and text overlays. Besides rotating video, you can also use Filmora to reverse video on Mac. You can watch the tutorial here.
Follow these steps to rotate a video on macOS in Filmora:
Download and install Filmora on your Mac if you haven’t already. Open the application once it's installed.
Click on Import Media Files Here to select the video you want to rotate from your Mac.
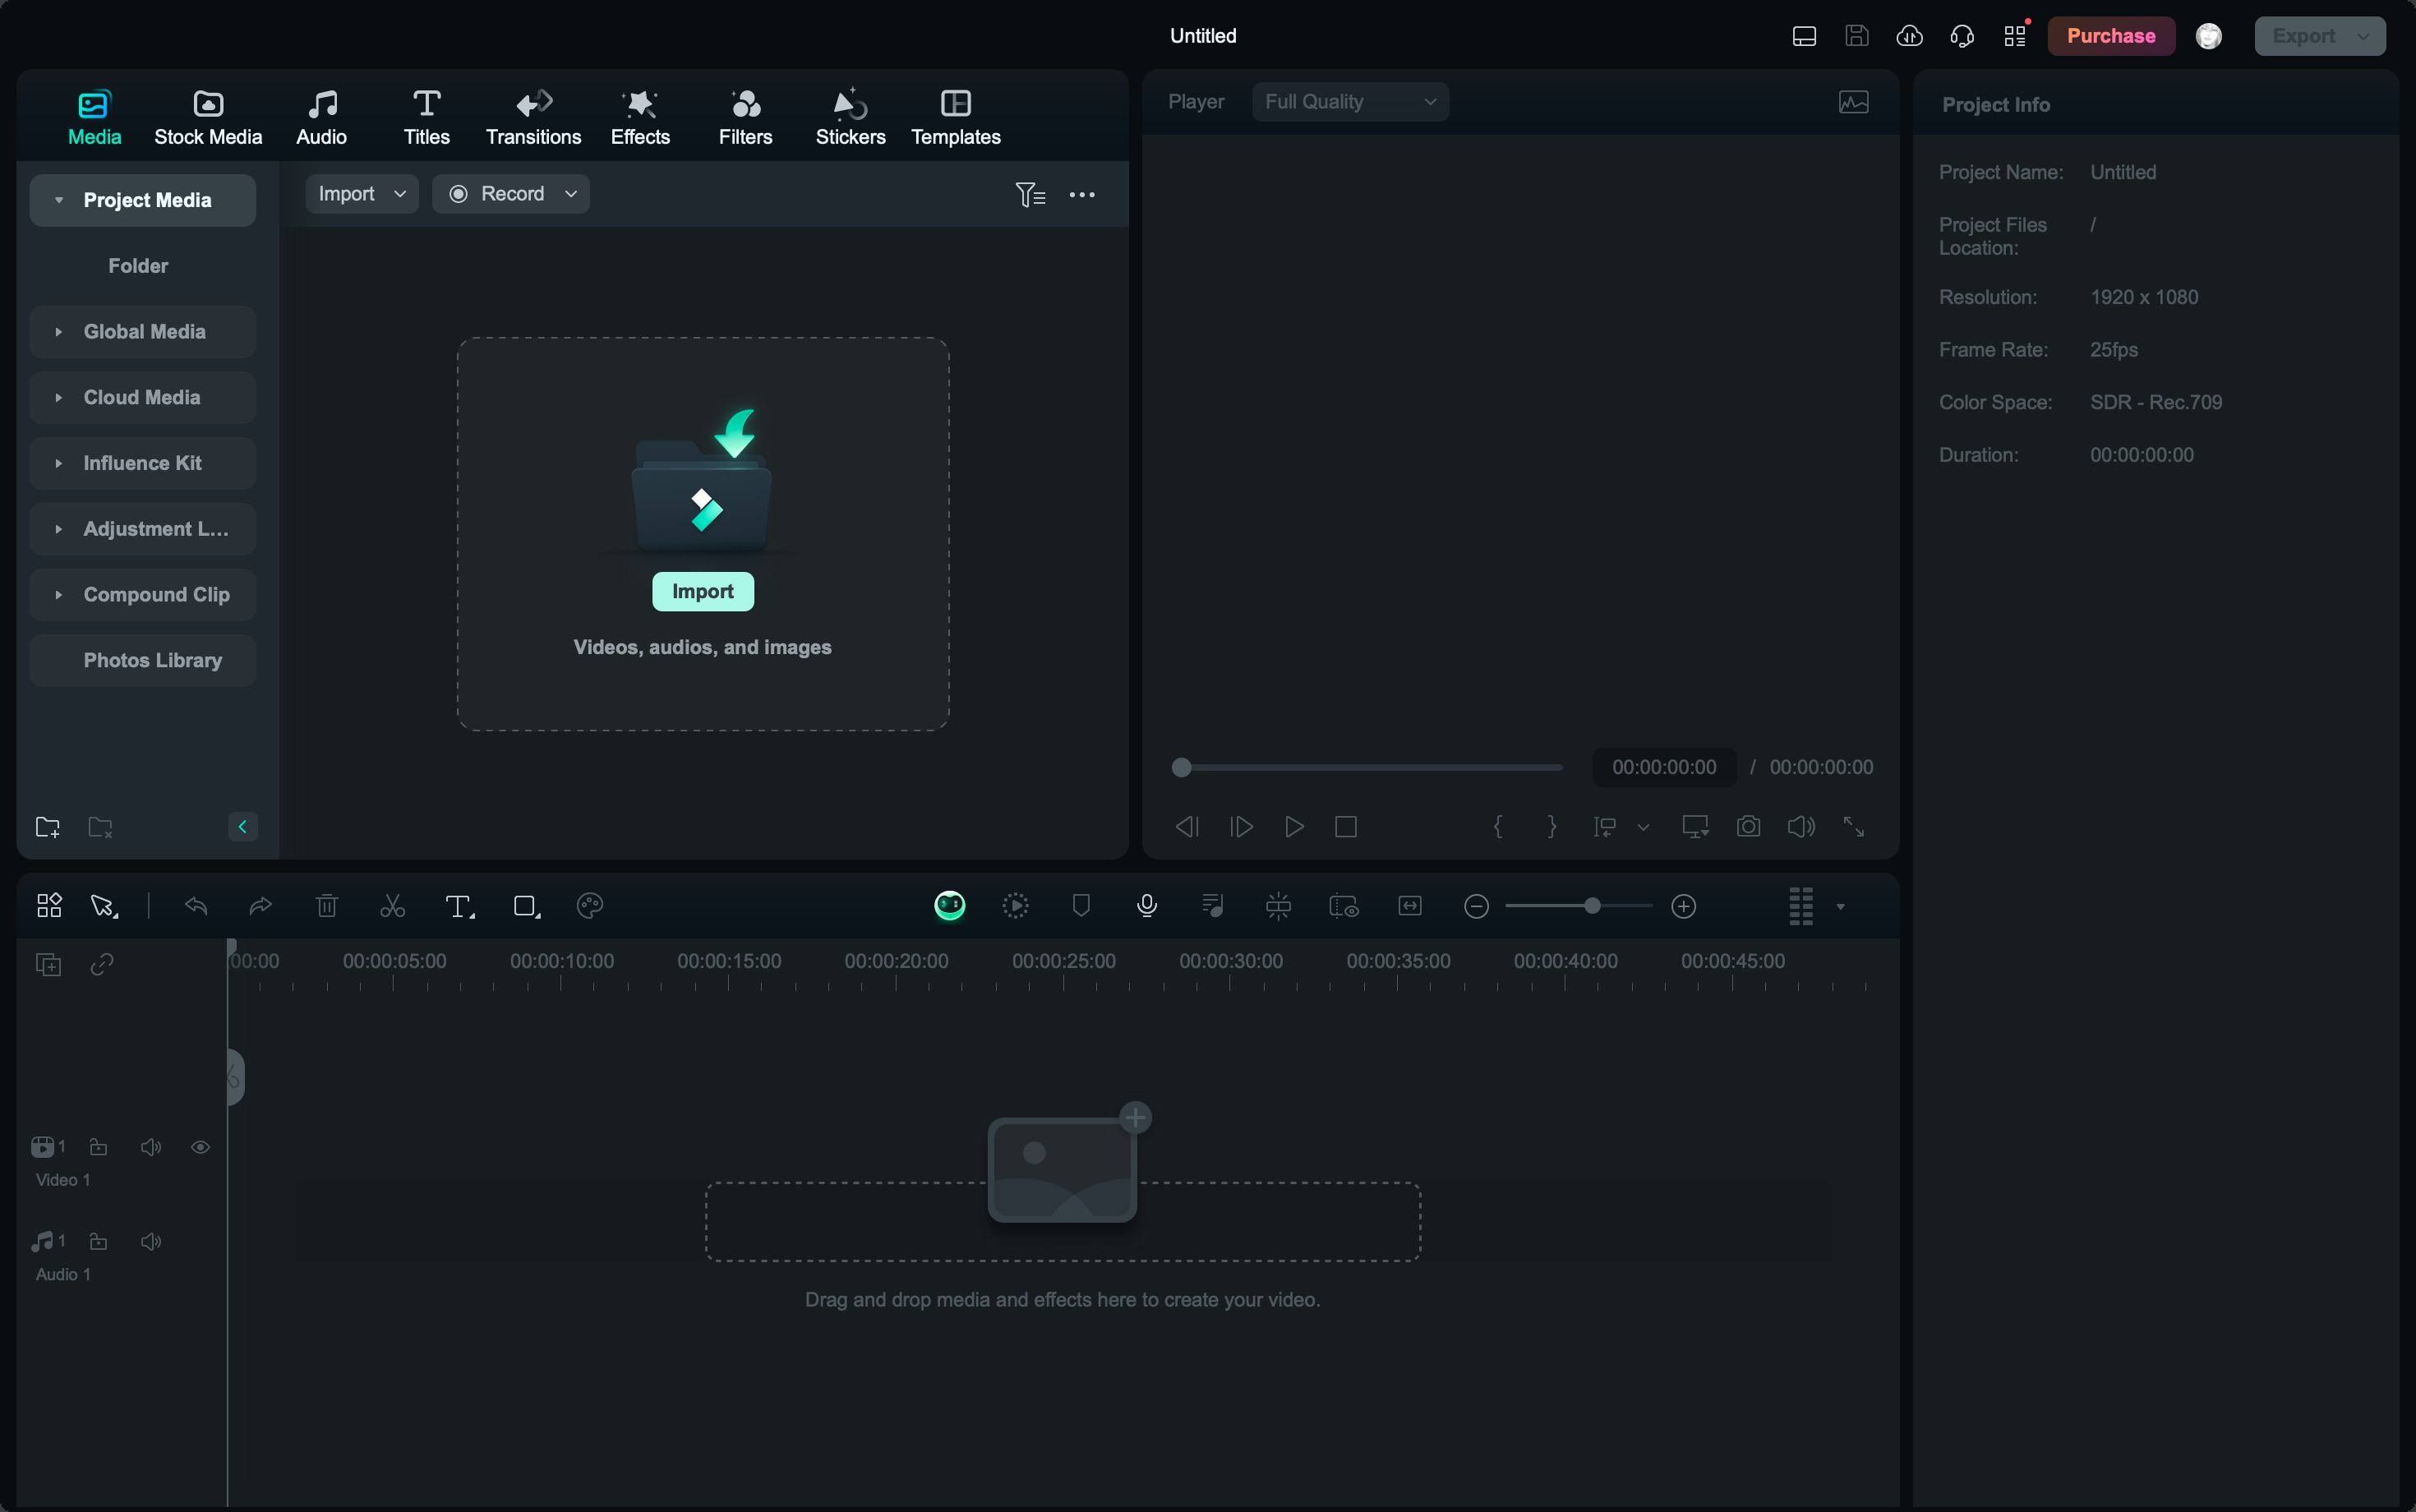
Drag your imported video from the media library to the timeline at the bottom of the screen.
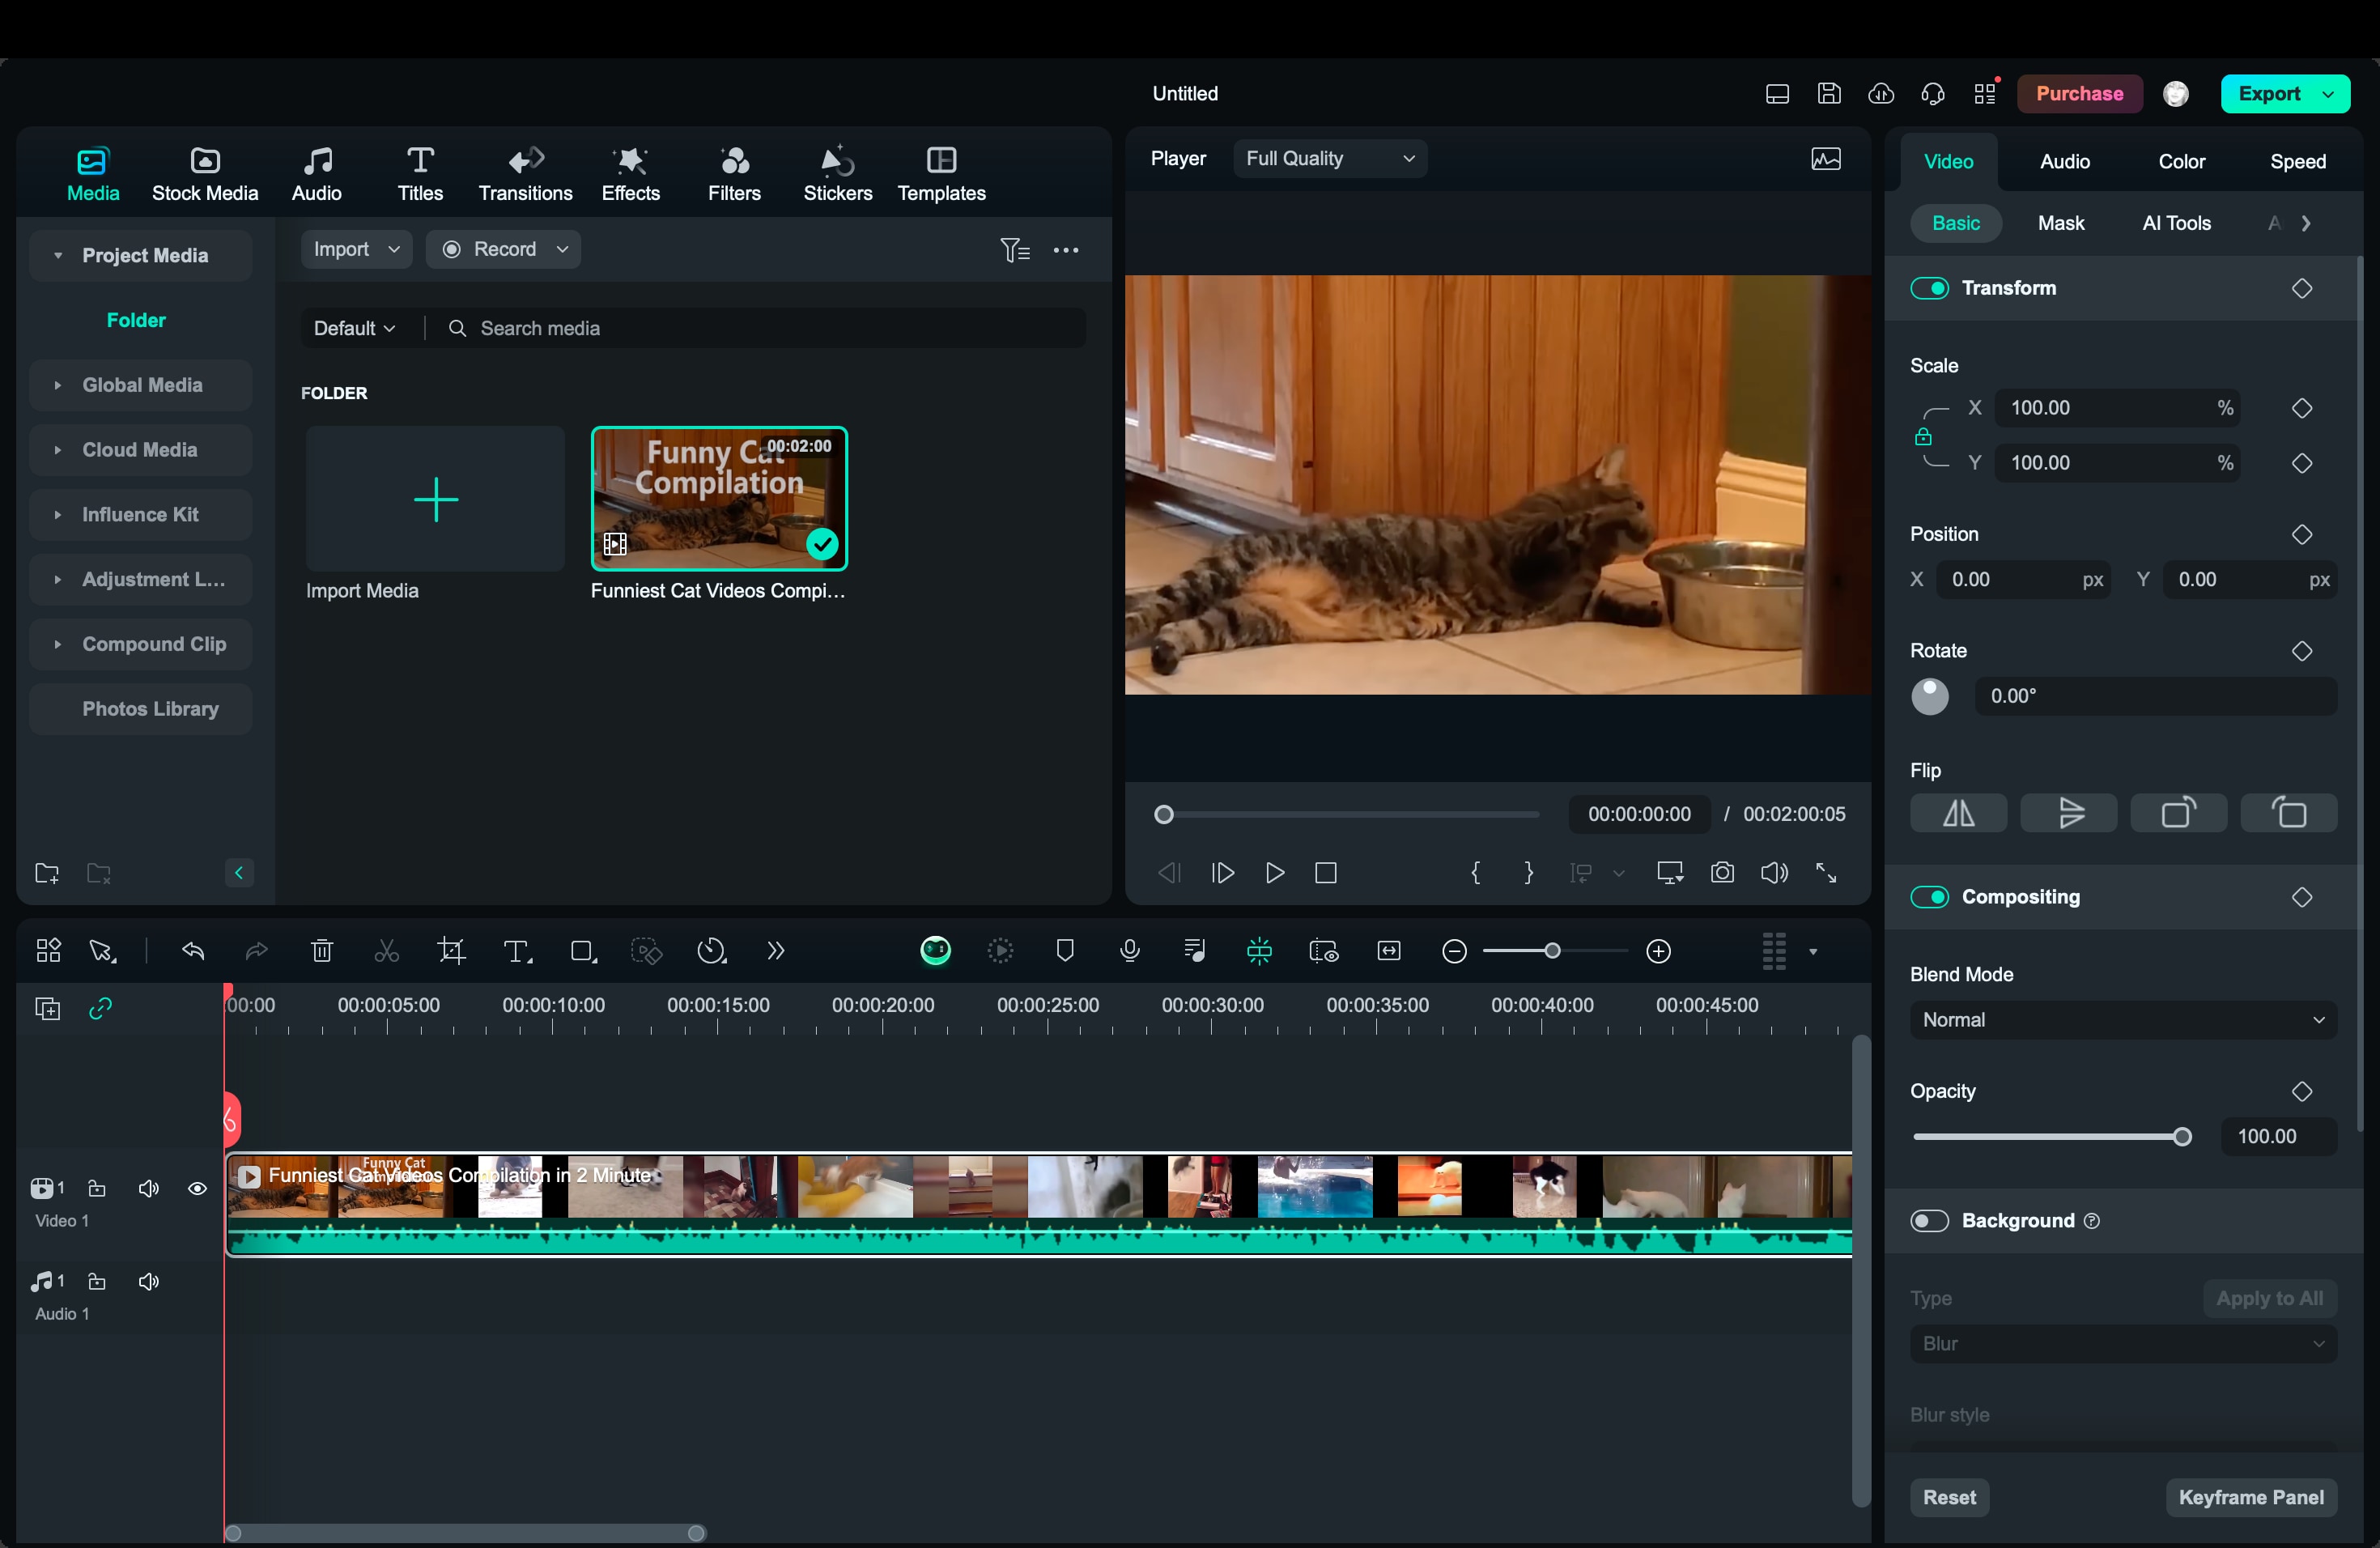
Right-click the video in the timeline and choose Edit or double-click the video to bring up the editing panel.
Under the Transform tab, you'll find Rotate options, where you can rotate the video by 90°, 180°, or 270°, or flip the video horizontally or vertically.
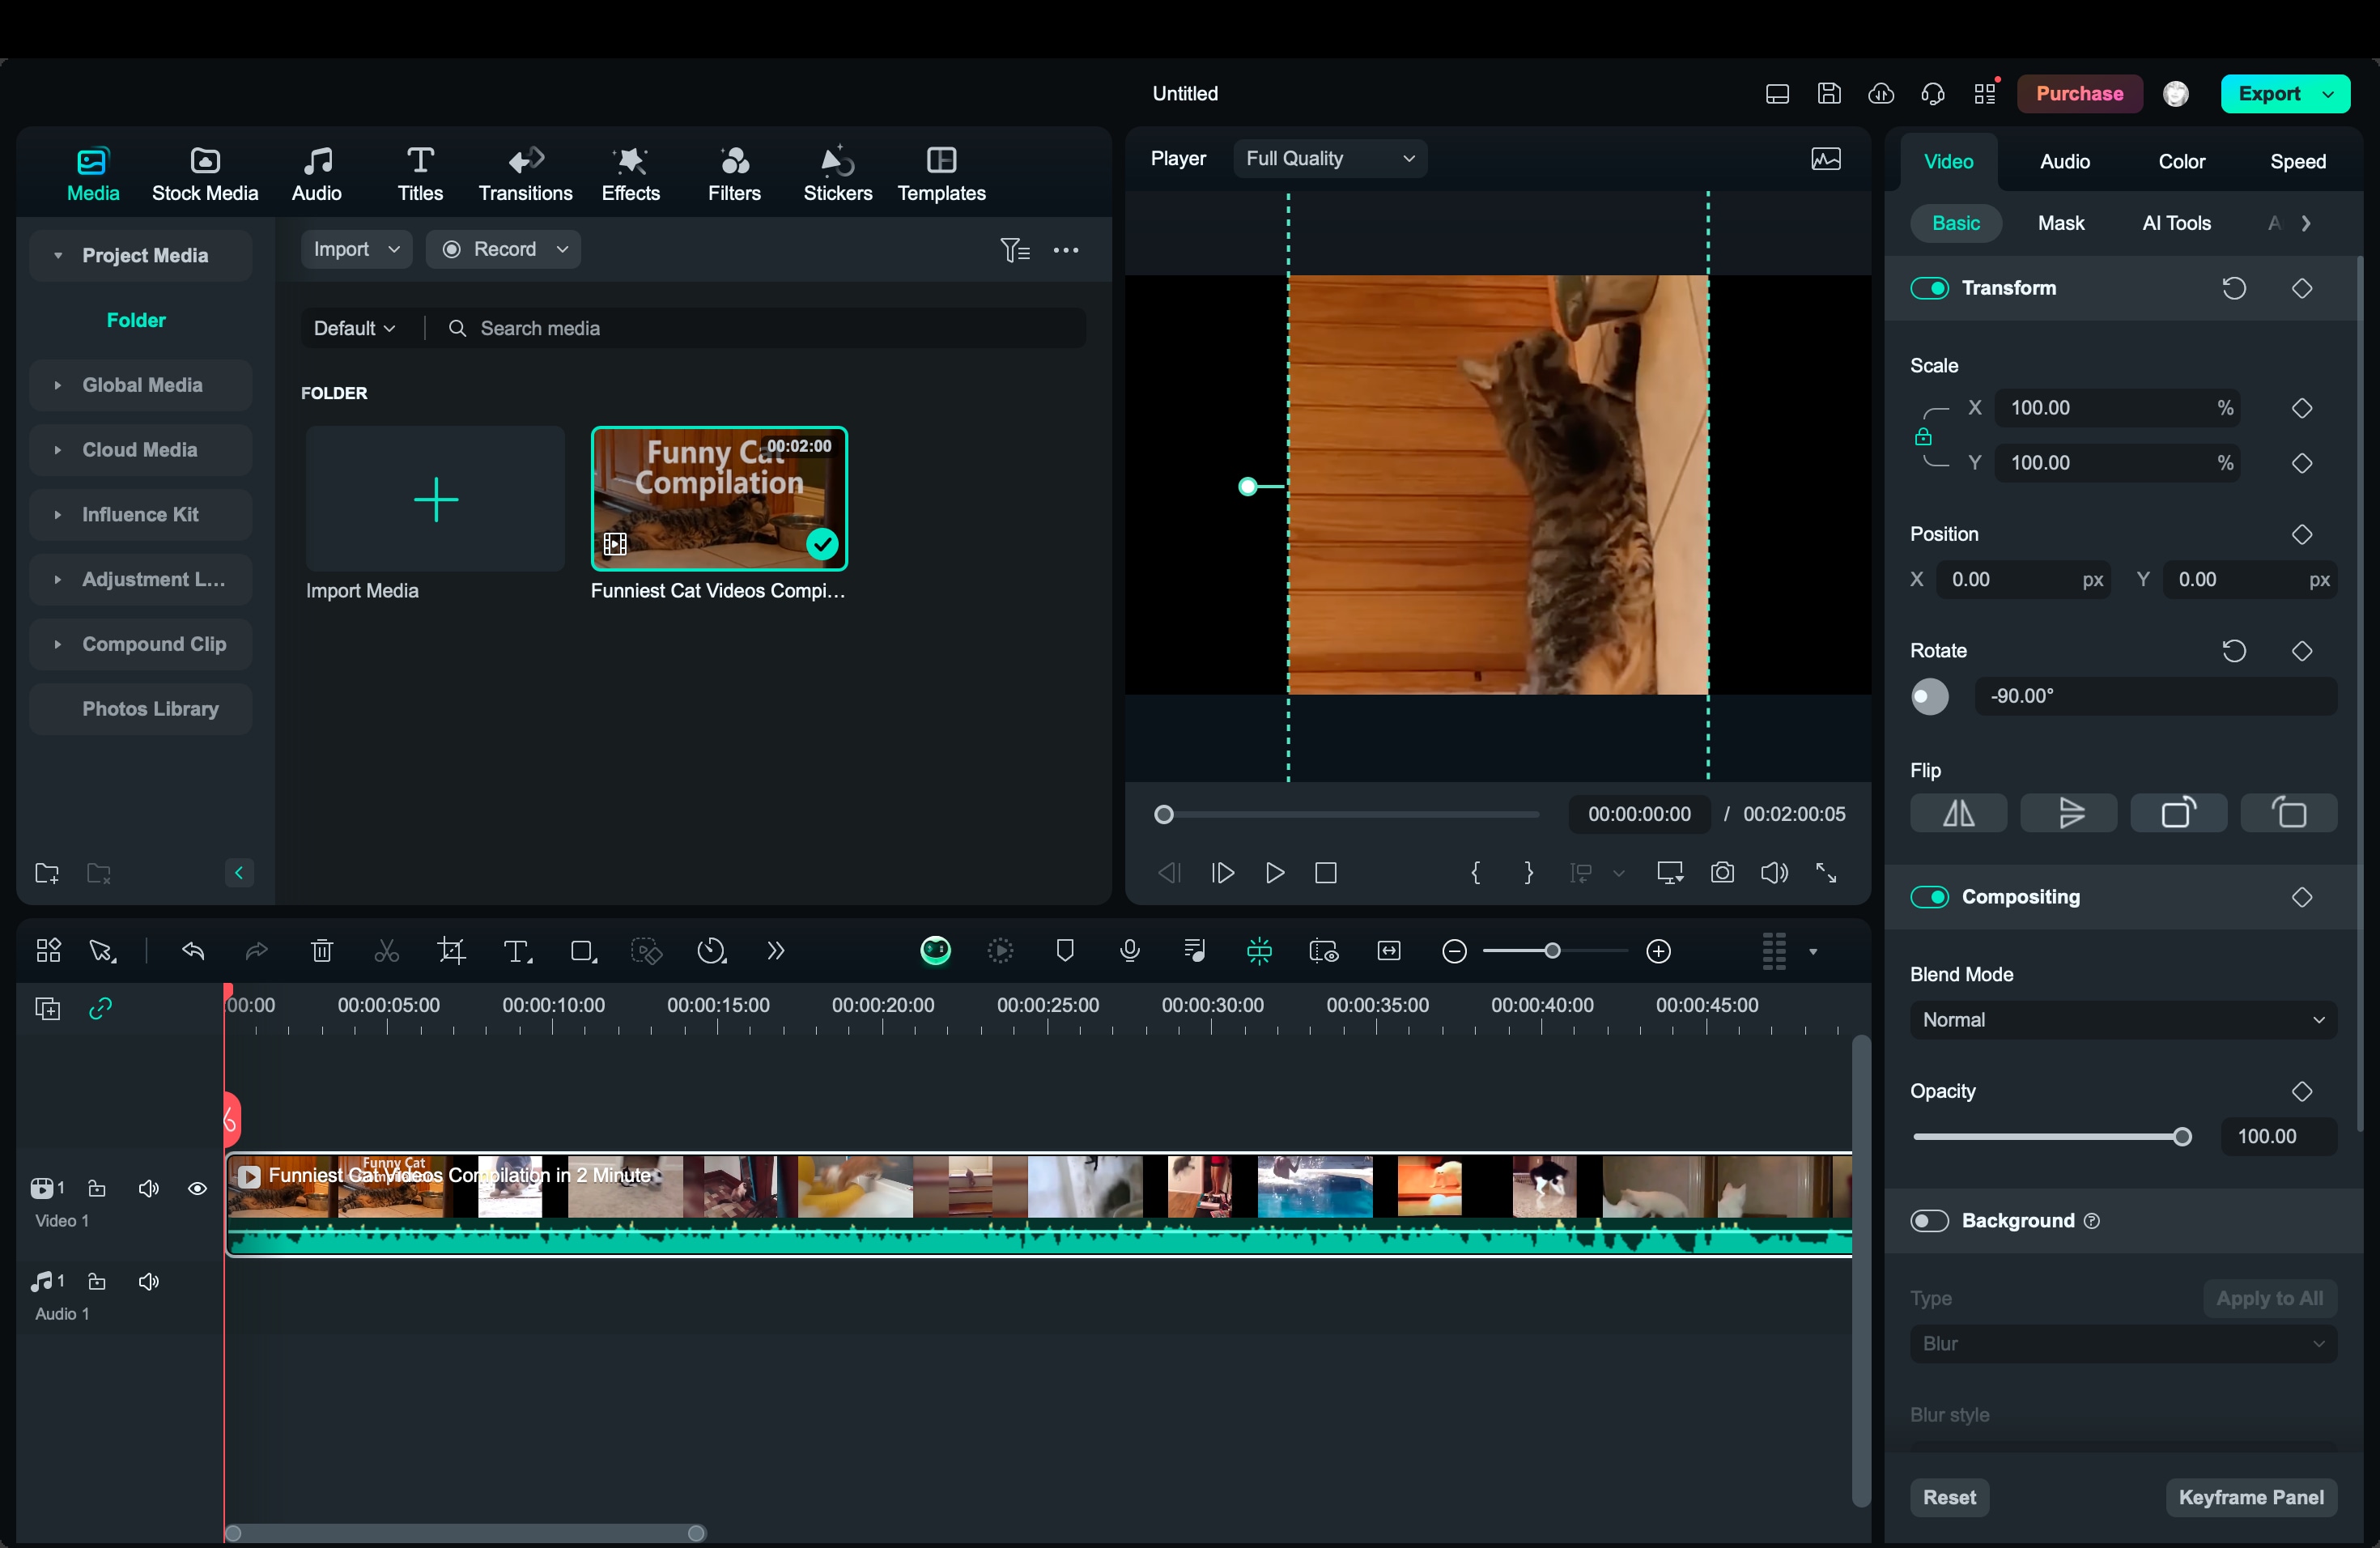
Using the rotation slider, you can also input a custom angle for precise rotations.
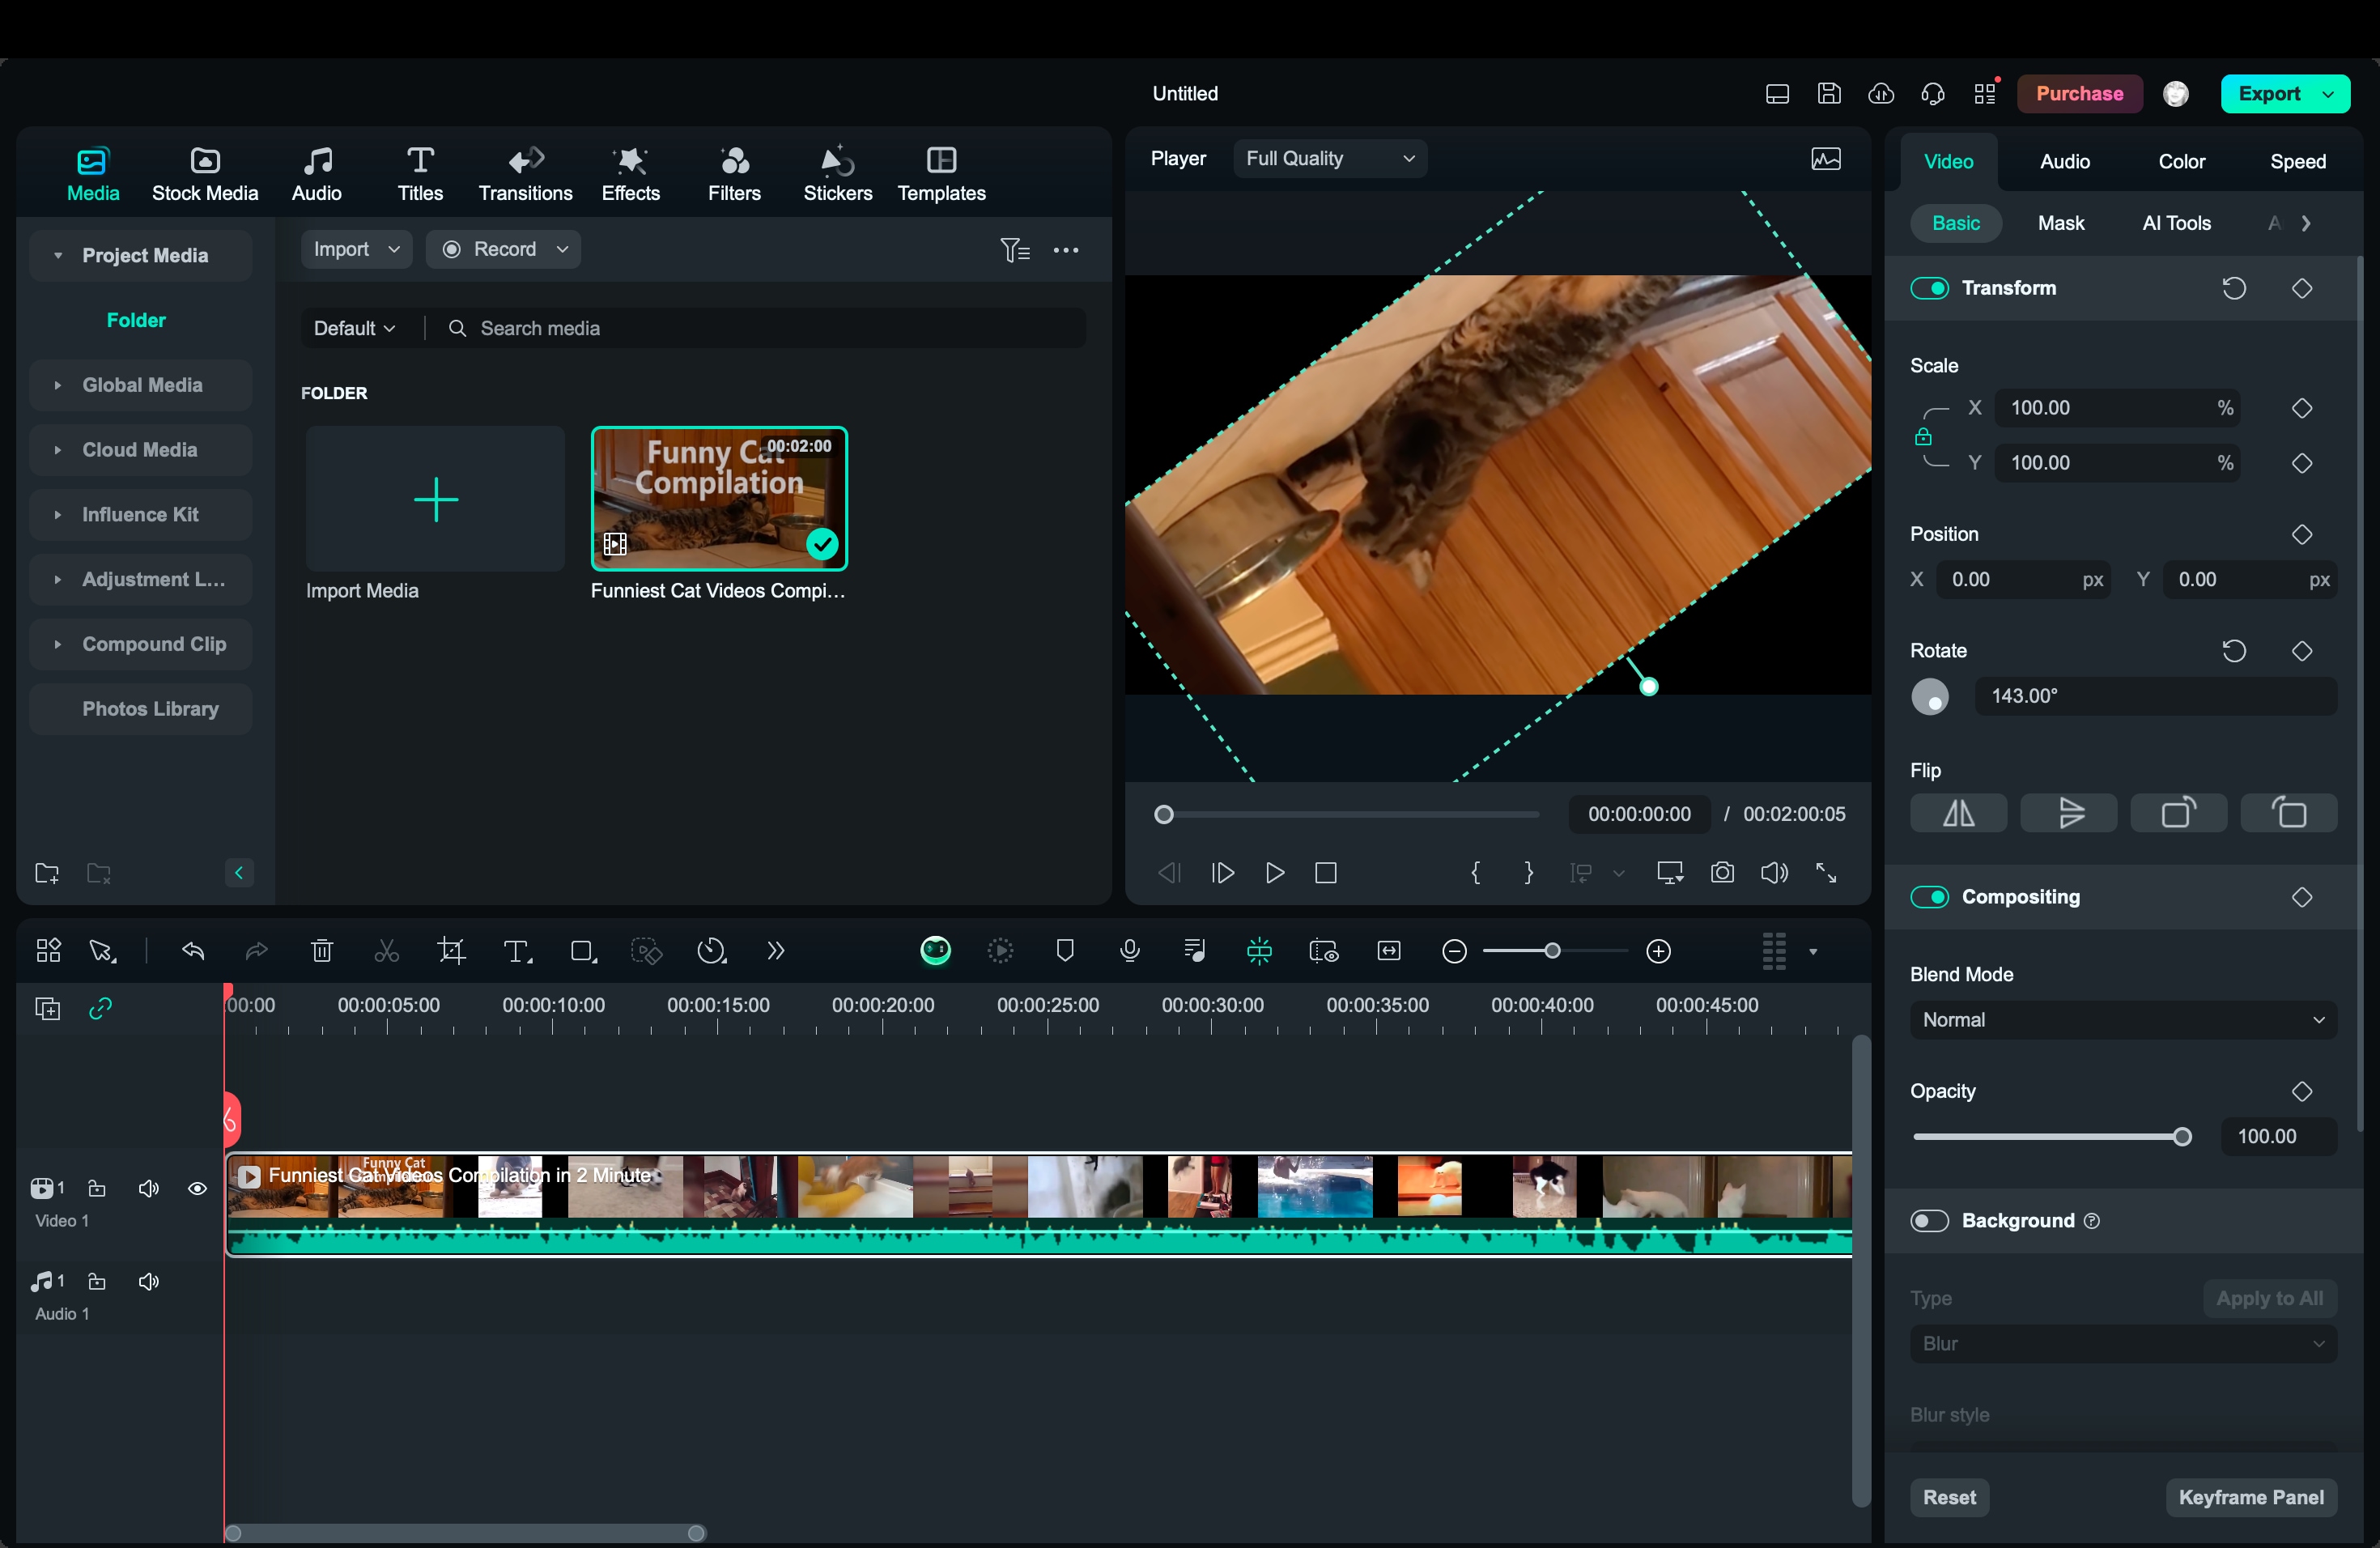
As you make the rotation changes, preview the result in the video preview window on the right. Adjust the angle as necessary to achieve the desired look.
When you're happy with the rotation, click on the Export button. Choose the desired format and resolution before saving your edited video.
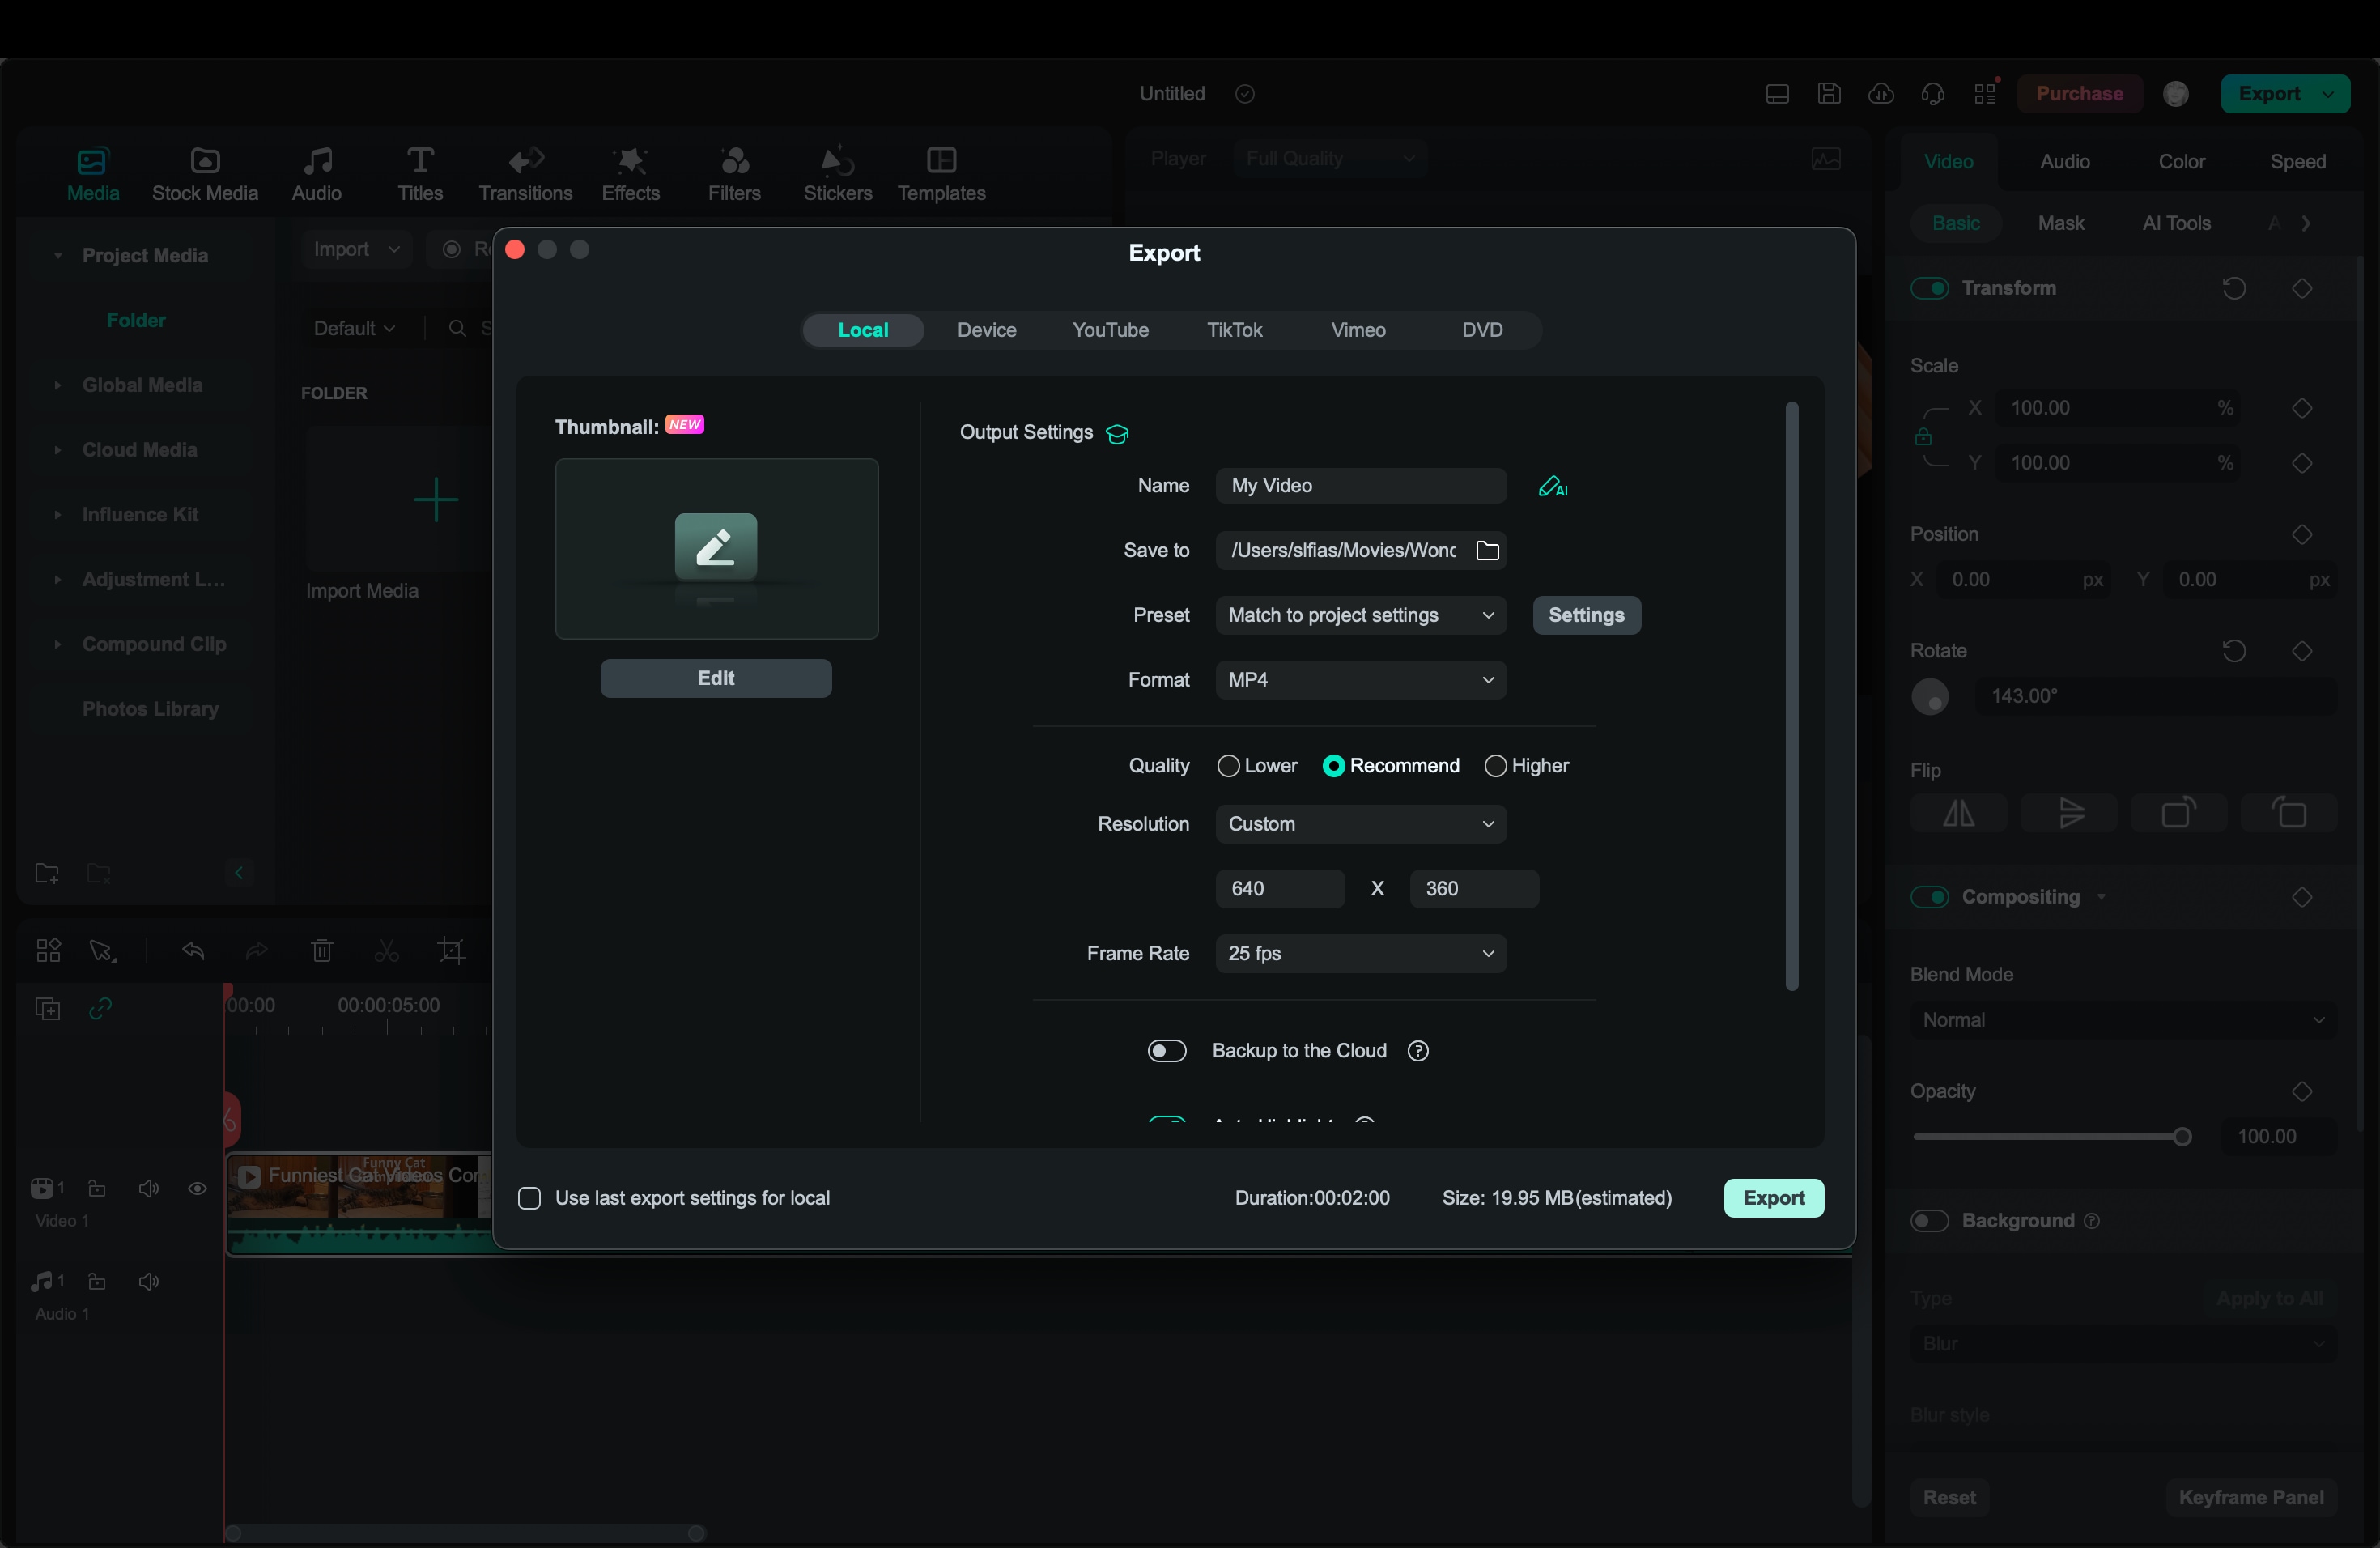
Filmora offers easy rotation tools and other editing features like transitions, effects, and text, making it a comprehensive solution for both basic and advanced video projects.
3. Using Online Video Tools
Online video tools are excellent for users who want a no-download option. Websites like Clideo and Online Video Cutter allow you to rotate videos through a web browser.
Here's the guide to rotating video using Clideo:
In this tutorial, we are going to use Clideo as an example. Visit the Clideo website in your browser to start rotating videos online.
Click on Create Project and select Rotate Video. Then, click Choose File to upload your video.
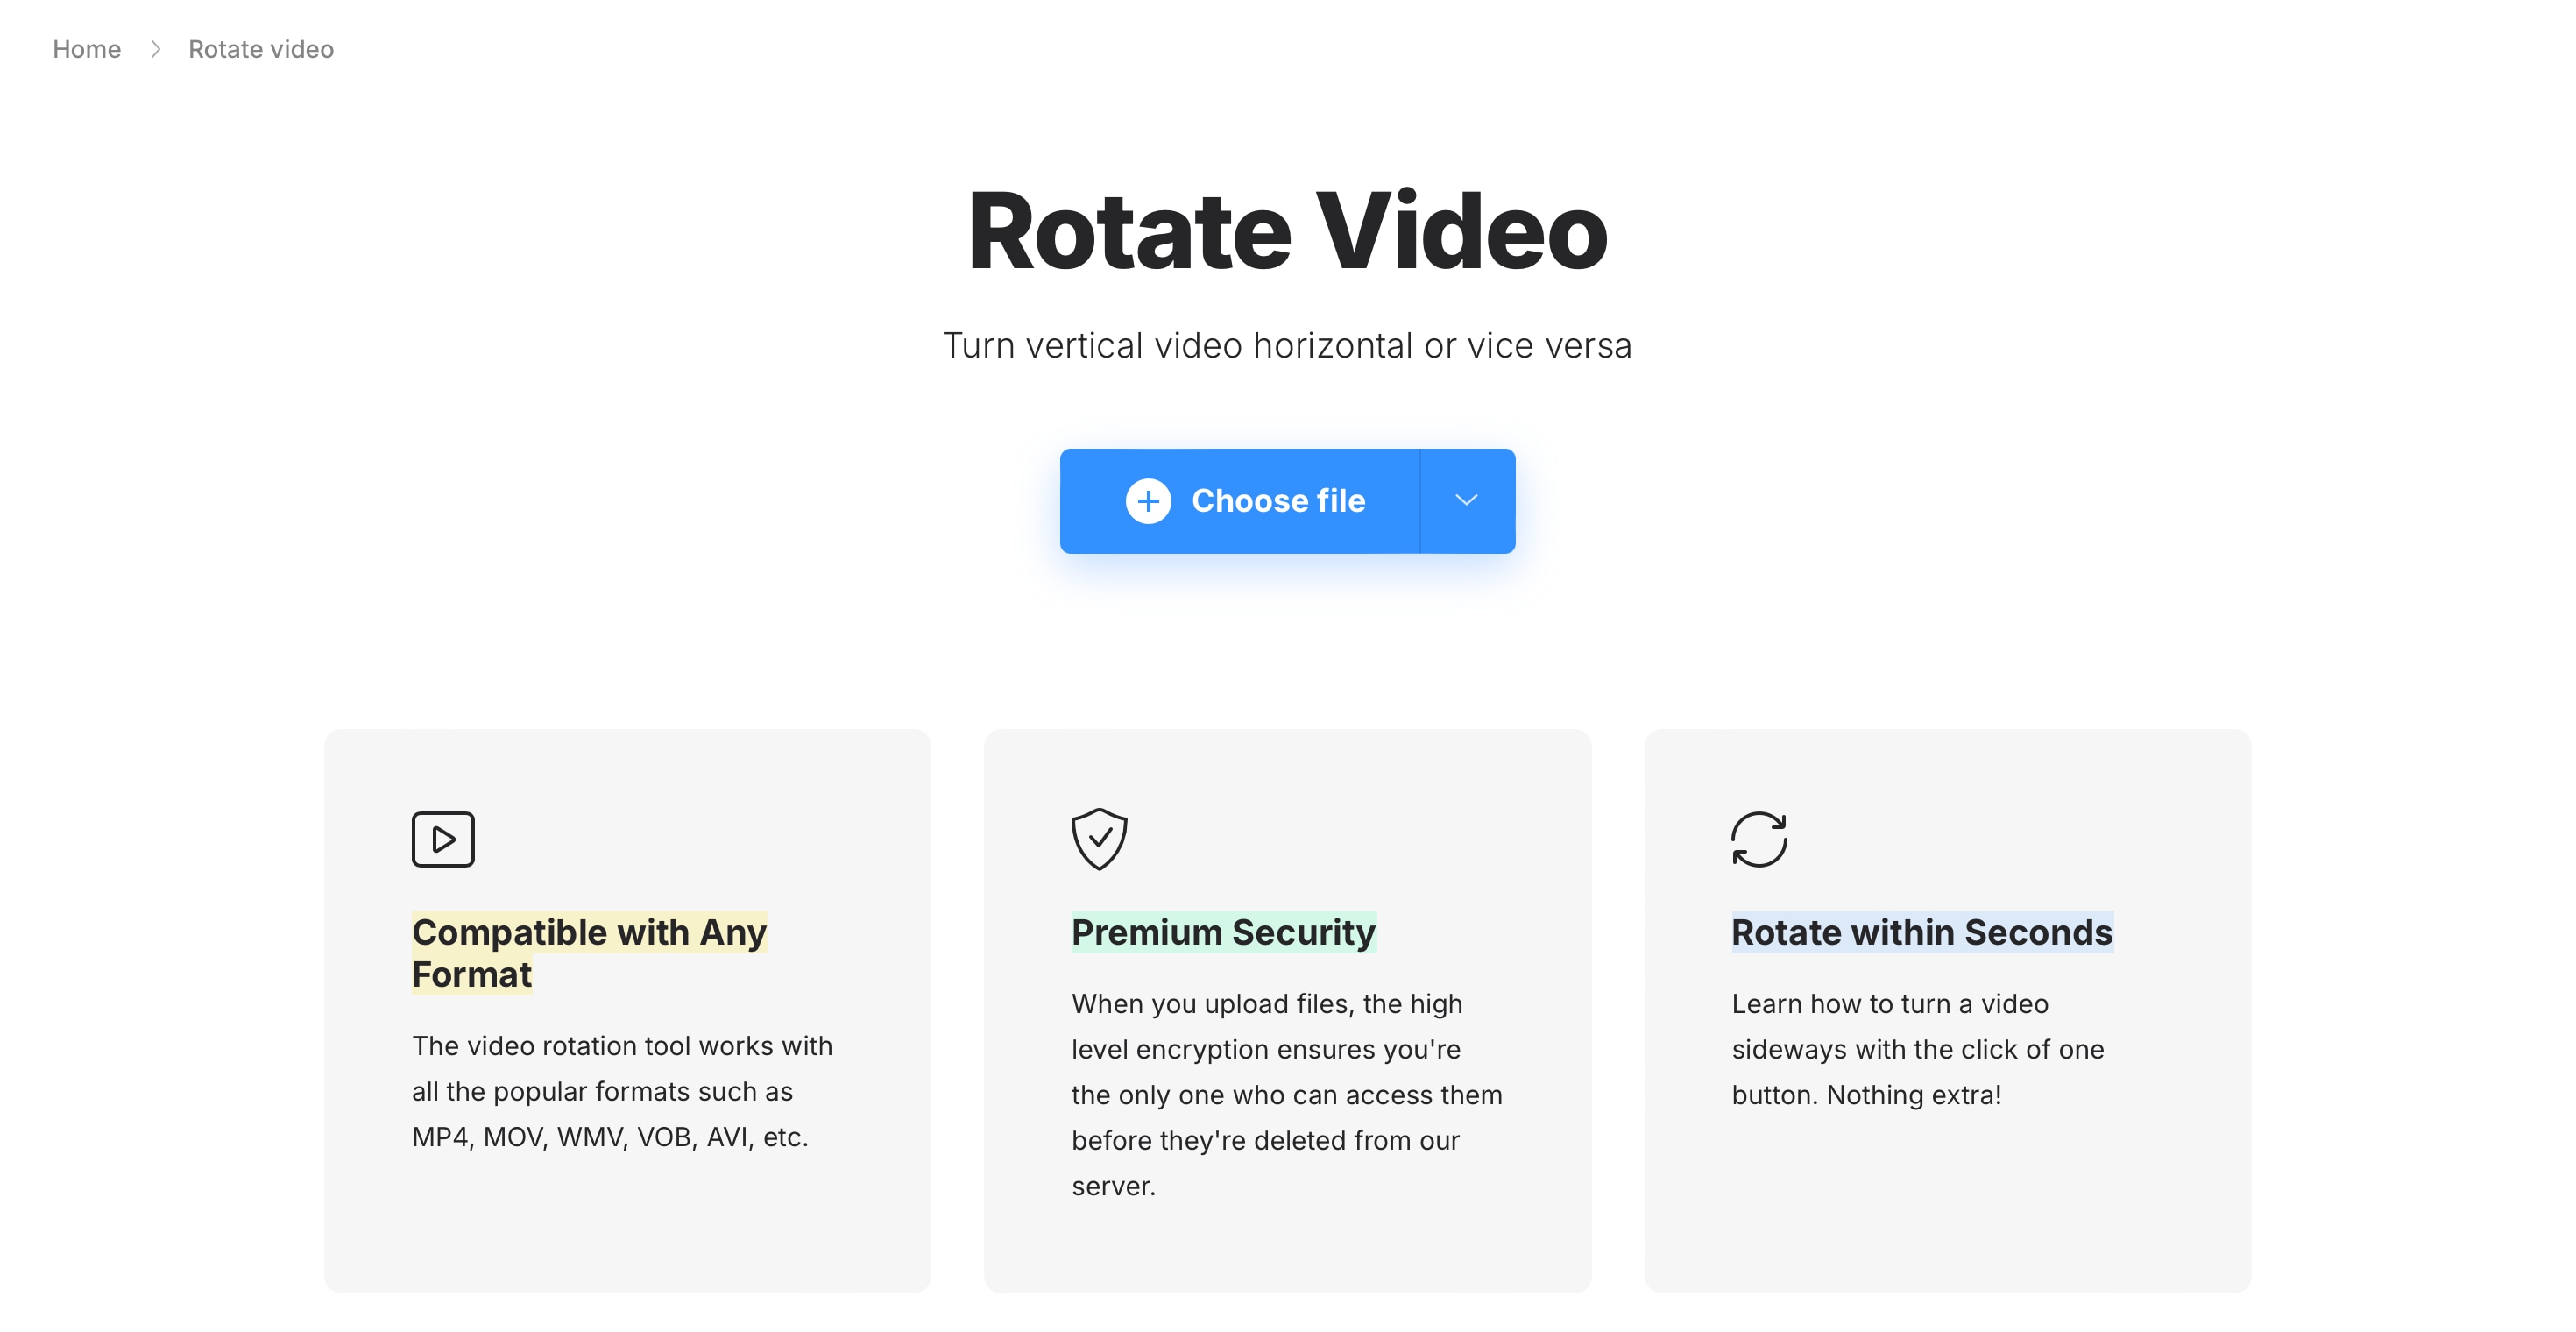
After the file uploads, you’ll see options to rotate the video. Choose the desired direction (e.g., 90° clockwise or counterclockwise).

Once the video is rotated, click Export or Download to save the edited video to your Mac. Online tools are ideal for small files or quick edits, but they might have size limitations and slower processing times depending on your internet connection.
Comparison Table of Methods
| Method | Difficulty | Customization | Best For | Customization Option |
| QuickTime Player | Easy | Basic 90°/180° Rotation | Quick, built-in tool for simple fixes | Basic rotation, trim, split, export options, etc. |
| Online Video Tools | Easy | Basic 90° Rotation | No software installation, small files | Basic rotation only |
| Filmora | Easy | More precise angle adjustments | Professional-level editing with advanced features | Multiple angle adjustments, basic video editing tools such as adding filters or effects, and other advanced AI-powered tools |
Bonus Tips: Know the Right Rotation Angle and Get the Best Quality
When it comes to rotating videos, choosing the right angle and ensuring high-quality output is essential for creating professional, engaging content. Here are some tips:
1. Choosing the Right Rotation Angle
Selecting the right rotation angle for your video plays a critical role in ensuring a smooth and visually coherent experience. Here are some tips to help you make the best decision:
- Content Alignment
Always rotate your video in a way that complements its visual elements. Proper alignment ensures that key subjects or objects remain well-oriented. It makes the video easier to follow.
- Avoid Distortion
Be careful not to rotate the video to an extreme angle that might compromise its quality. Large rotations can sometimes distort the video, so aim for angles that improve orientation without affecting clarity.
- Platform Compatibility
Consider the platform where your video will be shared. Some platforms favor certain orientations, so ensure the rotation fits the platform’s preferred standards for a seamless upload.

2. Maintaining Quality After Rotation
Once your video is rotated, preserving its quality is equally important. You can focus on:
- Resolution Check
Make sure to adjust the resolution to match the original quality of the video. Keeping a high resolution prevents the loss of details and ensures a crisp output.
- Aspect Ratio
Be mindful of the aspect ratio after rotation to avoid any unwanted stretching or distortion. Matching the aspect ratio to the intended display format preserves the video's natural look.
- File Format
Choose a widely compatible file format for saving your video. A good format ensures smooth playback across different devices and platforms without any issues.
Conclusion
Rotating or flipping videos on your Mac doesn't have to be a complicated task. While QuickTime and online tools offer quick fixes for basic rotations, if you're looking for more precision and control, advanced software like Filmora is the way to go.
Filmora not only allows for custom angle adjustments but also provides additional features like aspect ratio control and video quality preservation, making it an excellent choice for professional editing. By understanding the strengths of each method and focusing on maintaining video quality, you can ensure your content is polished, professional, and ready to share.
- Vast video/audio effects and creative assets.
- Powerful AI for effortless content creation.
- Intuitive, professional yet beginner-friendly.
- Works on Mac, Windows, iOS, and Android.


