The present-day high-end smartphones, like iPhone, Samsung, and Huawei, come packed in with advanced camera features that can let you capture interesting and bright images having depth. To get this done, you first need to check if your smartphone has an HDR mode and if it does, how to use the same.
So, we are here to help you to learn in detail about HDR Android photography and how to use the HDR mode on your smartphone. Keep reading till the read and we assure you that you will be able to capture some breath-taking images with your phone.
In this article
Part 1: What is HDR photography?
HDR (High Dynamic Range) photography enhances the contrast and details of images by capturing a wider range of light and dark elements. Dynamic range refers to the difference between the brightest and darkest parts of a photo. With HDR, the final image appears more realistic, vibrant, and detailed.
This method works by taking multiple shots at different exposures and merging them into one image. The result is a photo with balanced highlights, shadows, and richer colors.
HDR is especially useful in specific scenarios such as landscapes, bright backgrounds, or low-light conditions. However, it may not be ideal for all types of photography, depending on the subject and lighting.

Part 2: How to tell if I can shoot HDR images on my Android devices or not?
While capturing HDR images with a DSLR requires technical skills, using an Android phone makes it simpler and faster. Android devices automatically correct exposure imbalances, enhancing both background and foreground details for more dynamic photos.
Here’s how to check if your Android device supports HDR:
- Shooting Mode Menu: On high-end Samsung phones, look for the HDR option under Shooting Mode.
- Camera Scenes Section: For devices like HTC One X or Desire X, HDR can be found under Camera Scenes.
- Settings Menu: Some devices, such as Sony Xperia T and Xperia V, offer the HDR option in the camera settings.
- Viewfinder Icon: On Nexus 4 (Android 4.2), long-press the viewfinder and tap the HDR icon to enable it.
- Alternate Labels: HDR may be labeled as Backlight HDR, Backlight Correction HDR, or Rich Tone on Samsung Galaxy models (found under Smart Modes).
Part 3: How to Take an HDR Shot with Your Android devices?
Once you have found the HDR mode on your Android device, using the feature is simple.
Below listed are the steps to take HDR shots on your Android phone.
Step1 First of all, open the camera app on your phone and find the option of HDR.
Step2 Enable the HDR option on your device.
Step3 Once the feature is enabled, you simply need to capture images like you would normally do- point and focus on the image subject and click the image.
The rest will be taken care and your HDR shot image will be captured.
Part 4: How to Use HDR Apps android to take HDR photography
As we have mentioned above not all Android phones come with HDR function. So, if your device does not have this function, no need to worry as there are Android apps available for the same. You can search and download one such HDR-capable camera app on your device from Google Play Store and enjoy capturing HDR images.
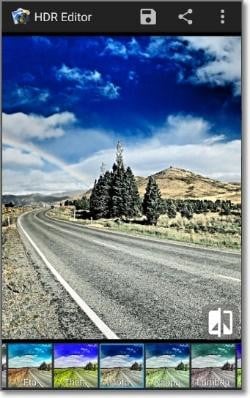
One such widely used app is HDR Camera that simple to use and allows for capturing high-quality HDR pictures. Using the upgraded version of the app you can even edit your captured images.
Steps to using HDR Camera Apps
Step1 First of all, download, install, and launch the HDR Camera app on your Android smartphone.
Step2 The interface of the app looks like the interface of the Android camera and the majority of the screen is taken up by the viewfinder.
Step3 Next, simply start taking the picture as you would do normally by pointing towards the subject and clicking on the shutter button.
Step4 If you have opted for the advanced version of the app, you can even add a pre-set filter or edit your images as needed.
Step5 Finally, save the HDR-captured image on your phone.
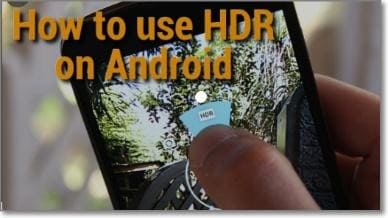
If you are still not clear about using the HDR feature on your Android smartphone, the YouTube video tutorial will help you to learn the entire process.
Part 5: Pro tip: How to Edit HDR Video without Washed Out Color
In several situations, you would want to edit the HDR videos recorded using your phone or other device but the major problem lies when the editing makes your video washed out. So, to ensure that this does not happen with your recordings, we suggest using a professional tool and one of the best that we recommend here is Wondershare Filmora.
This is a versatile Windows and Mac-based software that can let you edit and customize videos simply and quickly. The software is known for its multi-video editing facilities, it comes packed in with all basic as well as advanced features that may be needed for enhancing your overall videos.
The software supports all key video formats and to further make the files look interesting, you can add multiple effects supported by the tool.
Steps to edit HDR videos using Wondershare Filmora
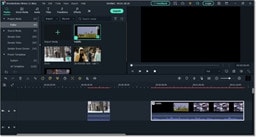
Step1 Download, install, and launch the software on your system. Click on the Create New Project on the main interface.
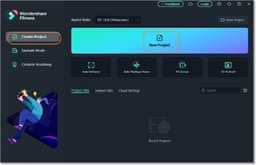
Step2 On the next screen that appears, tap on the Import Media Files Here button to browse and add the HDR video that has to be edited. Multiple files can be added here for batch processing.
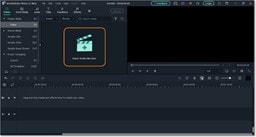
Step3 Next, drag and move the added videos to the timeline at the bottom of the software interface. After the videos are added to the timeline, you can edit using the editing tool as needed.
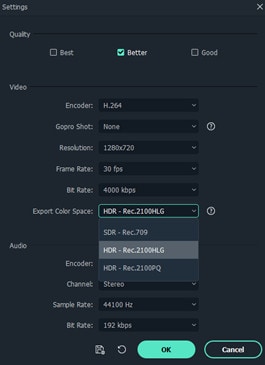
Step4 When done with editing, click on the Export button, choose the target format, also, click the ‘Export Color Space’ drop/down icon from the ‘settings’ to change HDR video output quality (default quality is SDR - Rec.709). Then click on the ‘OK’ button once you're done to finalize the operation.
Final Words
To take your mobile photography to another level and capture interesting and bright images, HDR mode is one of the great options to use. So, even if your smartphone does not support the HDR feature, install an app from the Google Store. When it comes to HDR videos and their editing, Wondershare Filmora works as the best tool as it helps to add those little tweaks and customize your files without worrying about the quality or washed-out color.


 100% Security Verified | No Subscription Required | No Malware

