


 100% Security Verified | No Subscription Required | No Malware

Aperture is a valuable technique to capture stunning photographs. If you are in a low light environment or on a sunny day, using the correct aperture photo settings will increase your photography skills. Mainly, the aperture limits the size of light entering the camera sensor, which enhances the quality of the image. Also, mastering the aperture will improve your proficiency as it empowers photographers to infuse their images with emotion, atmosphere, and story-telling powers.
In this article, we will guide you on the definition of aperture in photography and the key features that will help you capture the perfect image in real-world scenarios.
In this article
An all-in-all AI video editor that will help you create engaging videos!

Part 1: An Overview of Aperture in Photography
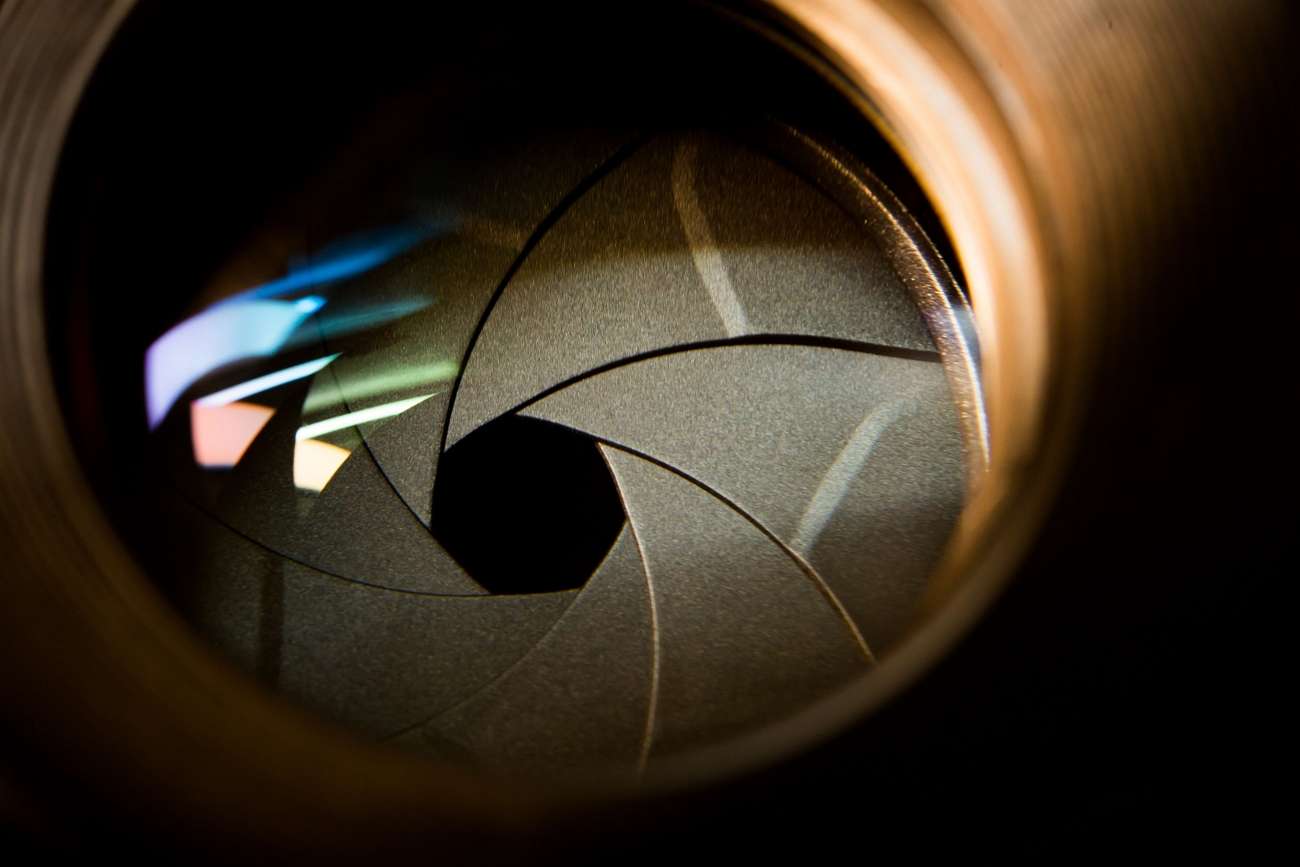
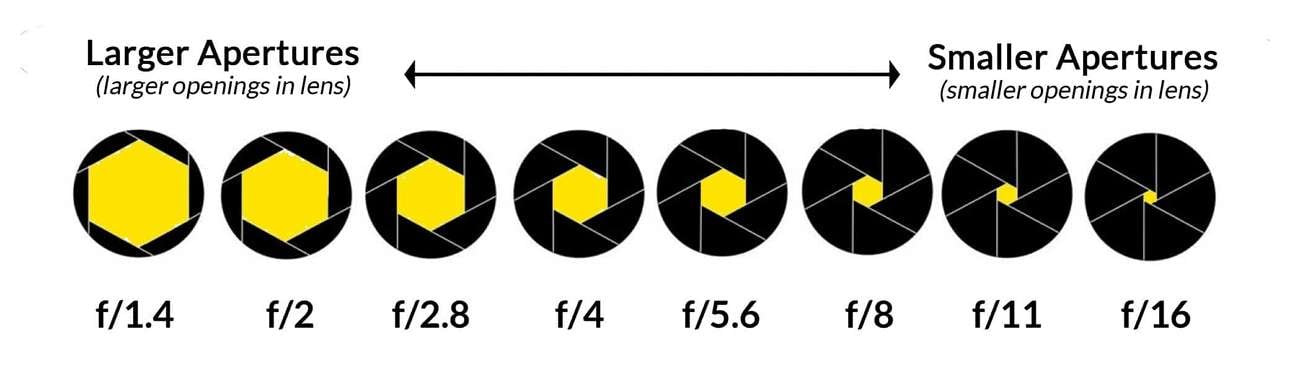
Aperture refers to the opening of a hole in the lens through which light passes to the camera. The wider aperture shows the lower f-stop number that allows light to enter the camera, resulting in a brighter image. On the other hand, a higher f-stop number shows narrower apertures that limit the amount of light, leading to a darker image.
However, there are three major aspects of camera lenses that are interlinked with each other: aperture, shutter speed, and ISO. While the aperture in mobile cameras limits the size of light, shutter speed is the duration of exposure, and ISO shows the camera sensor's sensitivity to light.
To isolate subjects from the background, you can use a wider aperture (lower f-stop number). For landscapes and scenes, you require extensive focus throughout the frame, for which you need a smaller aperture (larger f-stop number).
Part 2: The History of Aperture in Film Photography
The aperture for photography was first invented in 1858 by John Waterhouse. He used brass plates with holes of various sizes and changed the position of the plates to adjust the aperture. Innovating this invention took 30 years to realize that the aperture is a great factor in capturing the depth of field. For film photography, aperture settings were introduced using F-stop numbers, which showed the size of the lens opening.
Professional photographers use aperture settings to achieve the desired exposure and depth of field. Therefore, adjusting the aperture settings is crucial to determine how bright or dark an image appears. For portraits, you can use lower F-stop numbers to create a shallow depth of field that will blur the background and emphasize the main object. The higher f-stop numbers ensure that all objects are in focus, suitable for capturing landscapes.
Following the historical overview of aperture settings, a dominant comparison is available between film and digital photography. For both photography standards, the aperture serves the same fundamental function of controlling the amount of light entering the camera.
However, these differ when implementing photography. For film photography, you might need to adjust the aperture settings manually by rotating the lens, while in digital photography, it automatically adjusts the amount of light entering into the camera.
Part 3: Types of Apertures and Their Utility in Photo Making
It is evident that the aperture has an extensive role to play in photo-making and helps achieve sharpness within an image. However, when you enter the field of aperture setting, several types come into utility. Provided below are some of the prominent types of aperture pictures that can be utilized in professional photography:
- Fixed Aperture: These camera lenses provide a fixed maximum aperture setting throughout the focal range. Known as prime lenses, these promise high image quality and are readily available to professional photographers. Capturing a shallow depth of field, you can achieve the blurred background with ease. Focal lengths of 35mm, 50mm, and 85mm are common for fixed aperture lenses.
- Zoom or Variable Aperture: This lens format has a variable aperture setting with an option of zooming in or out. Although it varies its aperture setting to inculcate versatility, it has a narrow maximum aperture compared to a fixed aperture lens. This, somehow, restricts it from providing optimal results in background blur; however, users will find it efficient in telephoto lens mode.
- Wide Aperture: Wide aperture lenses provide a large maximum aperture, which goes between f/1.4 to f/2.8. This elevates the ability to capture low-light photography with ease. Without compromising the quality of the image or using high ISO settings, photographers can ensure proper results. Wide-aperture lenses are extremely common in portrait and street photography.
- Narrow Aperture: Referred to as small aperture, this type provides a high F-Stop number and is effective for landscape photography. With a narrow aperture, photographers can ensure focus for foreground and background. Since limited light enters the camera lens, the user needs to go for longer exposure times and higher ISO settings.
- Variable Aperture Control: This type of aperture setting is the best option for covering a wider utility in photography. With greater coverage of the photography genre, you can attain creative control over exposure, depth of field, and many other factors. You can typically observe these aperture photo settings across mirrorless cameras or DSLRs.
Part 4: How To Make Perfect Use of Aperture: Some Practical Tips
Choosing the right aperture for photography can greatly enhance your images' overall quality and composition. Here are some practical tips on how to make perfect use of aperture in pictures:
- Portraits: When capturing portraits, you need to set a wide aperture equivalent to a small F-Stop number. These numbers are essential in the aperture setting to maintain a shallow depth of field and blur the background.

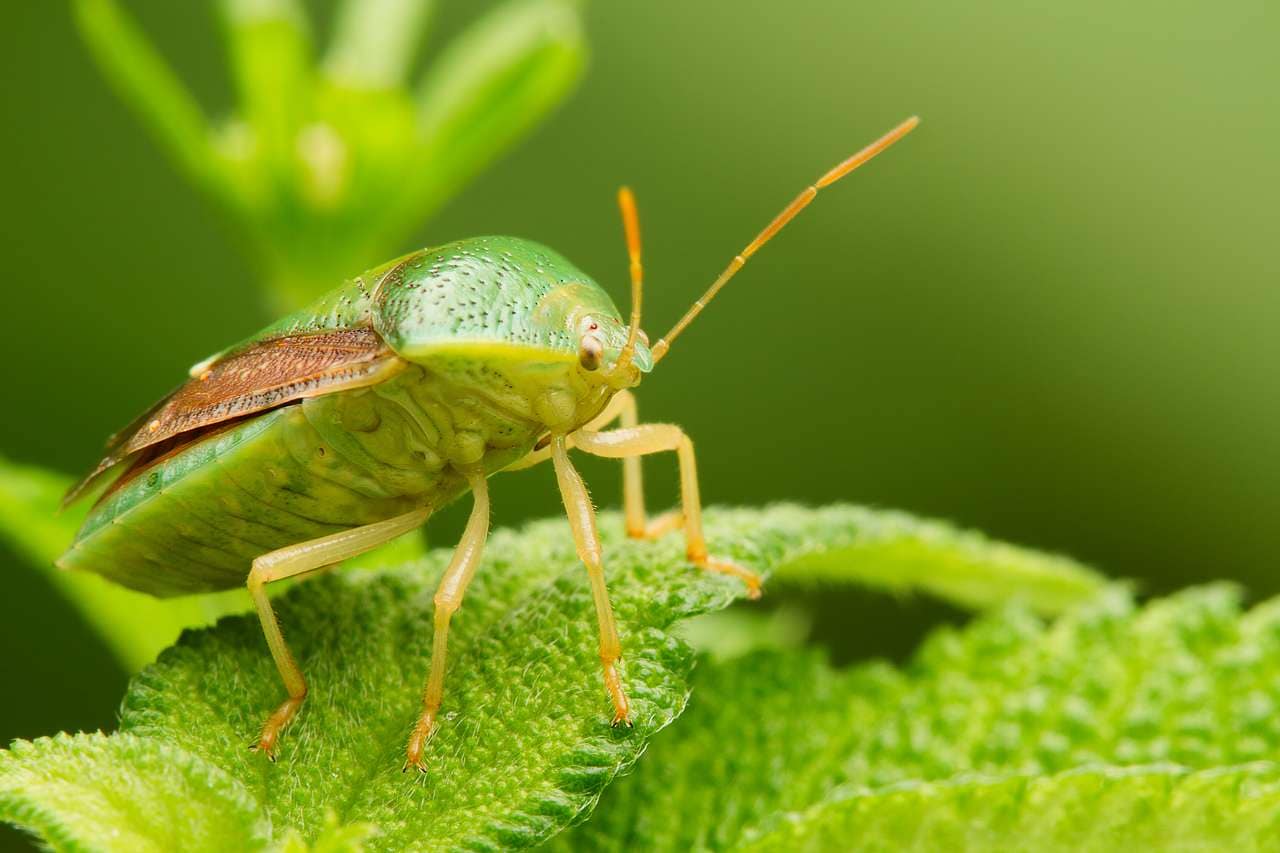
- Macro Photography: Like portrait photography, macro photography looks for similar requirements in aperture settings. It looks for narrower apertures to increase the depth of field and put the subject in the most focus.
- Landscape Setting: Such settings in photography go with narrow apertures or high F-Stop numbers. With the motive of achieving a large depth of field for sharp image results, you can focus on the entire foreground and background in the process.

- Sports Cam: When it comes to dealing with fast-paced conditions, a wide aperture with faster shutter speeds is preferred. As it can freeze actions, you need to go for wider options to capture moments without blurring them.
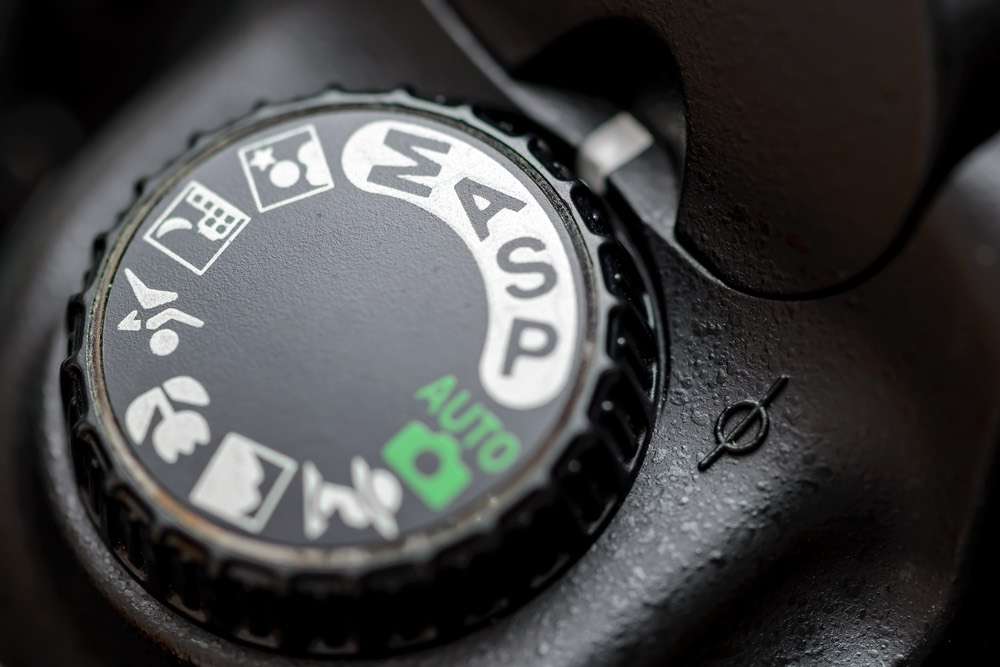
- Aperture Priority: This mode is quite common in cameras as it helps photographers control the aperture while setting it at the appropriate shutter speed. The selection of the desired aperture is evident, and users can capture properly exposed images without multiple adjustments.
High-Profile Recommendation: Creating Professional Images With Wondershare Filmora
There are multiple conditions where you cannot take professional pictures, leaving you with no media to deal with. Although you've understood much about aperture for photography, there might still be some things that are failing you in creating the right image. In this case, you need to have a solution that goes in the opposite direction.
Wondershare Filmora provides its users with a comprehensive video editing platform for creating stunning visual content. However, it does not restrict itself to creating and editing videos across the platform. With the option of generating images with AI, you can generate professional images with Filmora. Provided next is a step-by-step guide to using the AI Image feature properly:
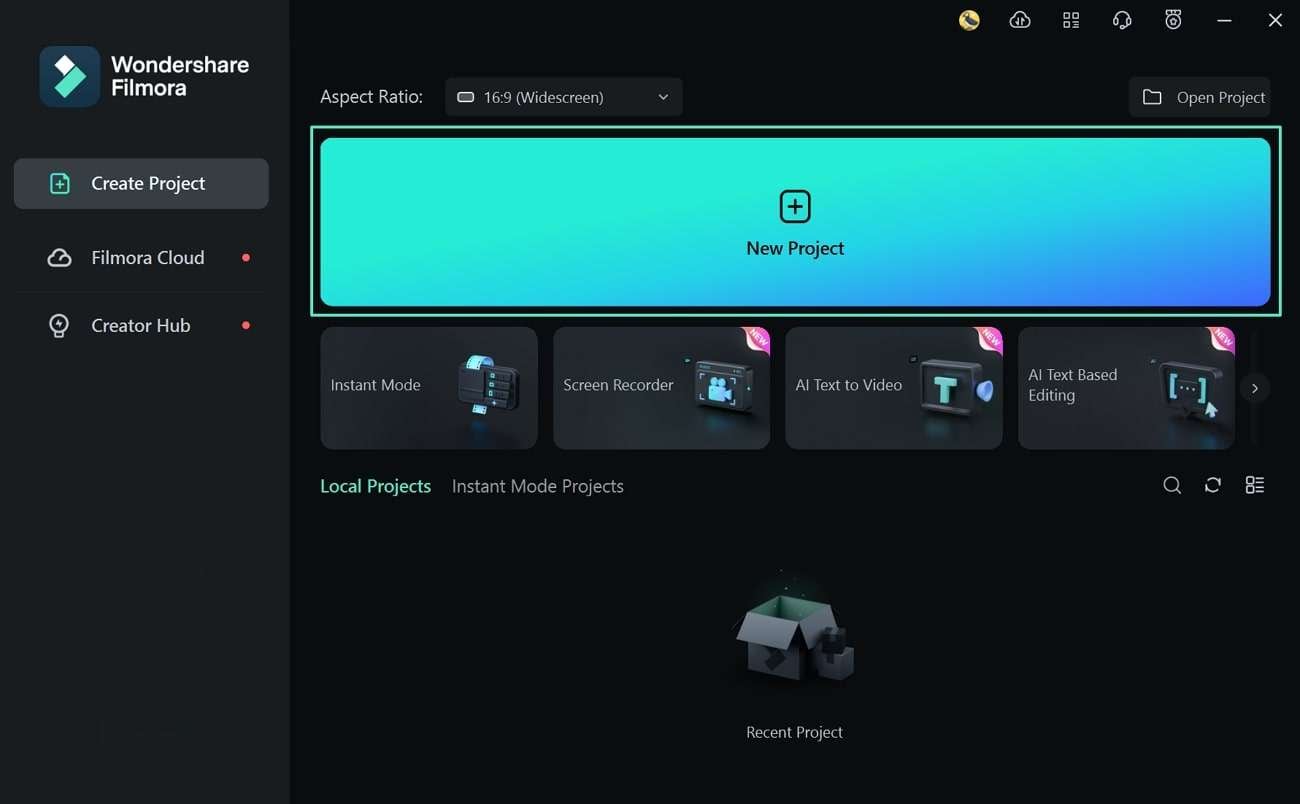
Step1
As you launch Wondershare Filmora on your device, continue to select “New Project” to open it on a new window.
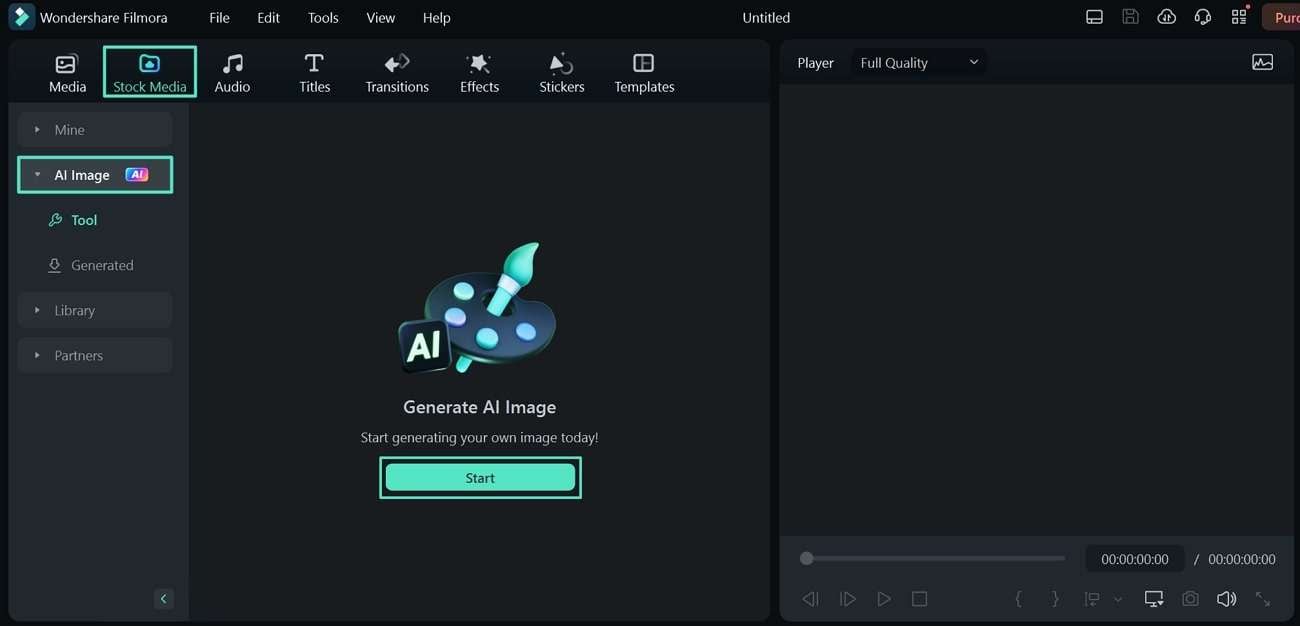
Step2
This leads you to the editing interface, where you need to look for the "Stock Media" section. Continue to navigate towards the "AI Image" section on the left to navigate onto a new menu. Click the "Start" button to start generating your image with AI.
Step3
On the next screen, provide a simple text prompt to describe the image that needs to be created. Proceed with defining the “Aspect Ratio” and select the image style before tapping "Start creating." As this provides a result, use the "Download" button to save the final AI image.

Conclusion
With that, this article comes to the end of discussing aperture definition in photography along with multiple other details. As you’ve gone through the details of its history and types, there has been much that is covered involving aperture photos. For conditions where you've failed to get a professional image, consider using the AI Image feature offered by Filmora.
You May Also Like:
