


 100% Security Verified | No Subscription Required | No Malware


 ChatGPT
 Perplexity
 Gemini
 Claude
 Grok
Grok
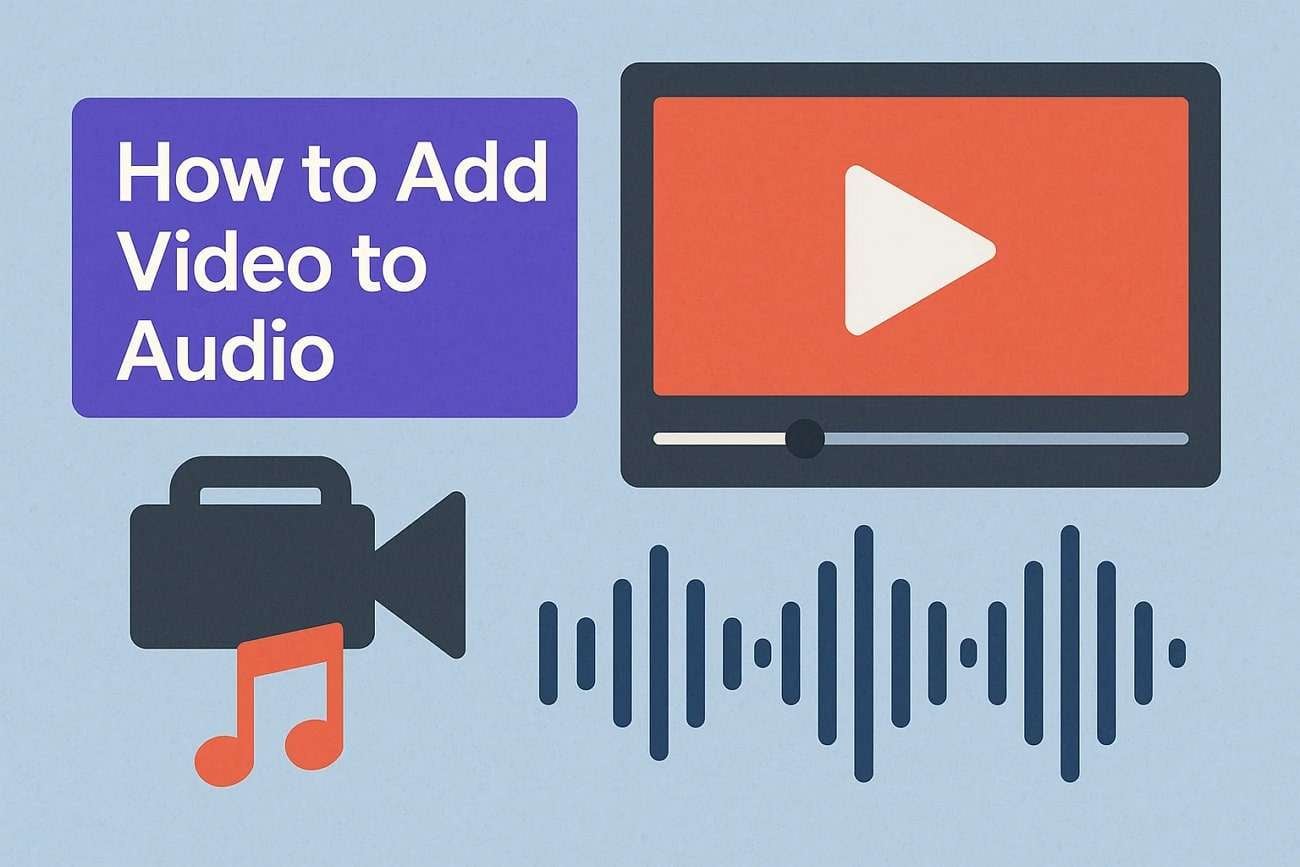
Whether producing audio-reactive visuals, creators often require a combination of professional-quality video clips to enhance storytelling. The rise of audio-first content on platforms such as YouTube Shorts and TikTok has amplified the trend, prioritizing audio-visual experiences. In this article, the best ways will be discussed; where Filmora is considered as a versatile tool to add video to audio, featuring timeline editing and built-in effects.
In this article
Part 1. Why Add Video to Audio?
Integrating video with audio is an effective way to enhance visualization, audience engagement, and strengthen most social media platforms. Here is why adding video to audio is essential for promotional projects:
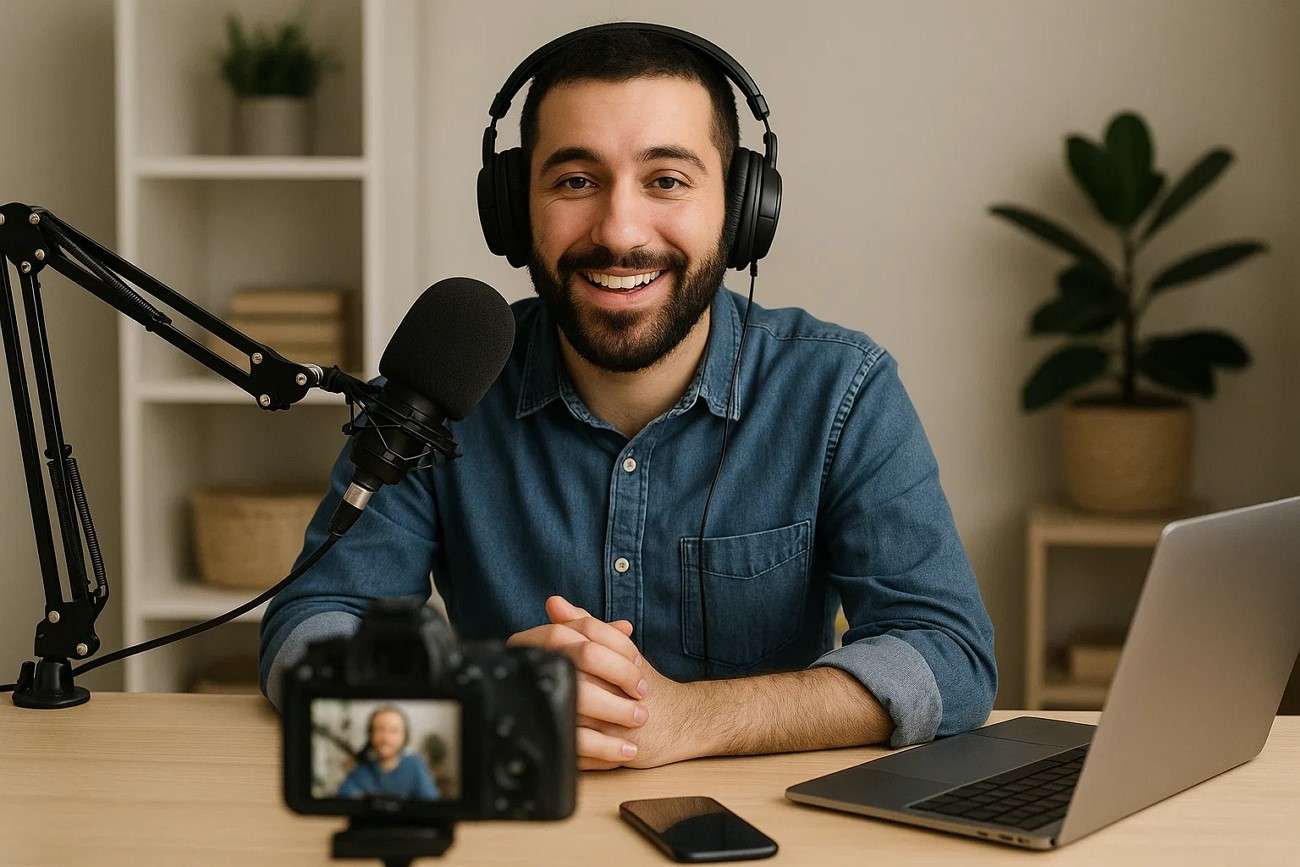
- Creating YouTube-Ready Content for Podcasts, Voiceovers, or Narrations
The addition of video elements, such as images and animations, helps transform a simple audio track into compelling videos. It enables sharing of podcasts, and narrated content on various platforms, including YouTube, resulting in increased audience reach.
- Making Aesthetic Visualizers or Reels Using Music/Audio
Visualizers that move in sync with the audio turn recordings into shareable art pieces. These reels can then be posted on Instagram and TikTok, providing richer sensory experience and capturing the attention of large audiences.

- Enhancing the Storytelling Experience in Tutorials or Vlogs
Video vlogs and tutorials give clips more visual appeal, clear, and sensitive context because they are accompanied by commentary audio that captivates viewers and keeps them in touch. It makes a complex subject easier to follow, too, and enhances interaction.

- Social Media Formats Where Engaging Visuals are Necessary
Social media formats often favor content that is eye-catching and appealing. Adding audio with video content ensure that announcements, stories, or music tracks capture more attention to remain accessible to the viewers.

Part 2. How to Add Video to Audio Using Filmora [Desktop]
Imagine you are preparing a recording for an online course or crafting a music visualizer to post on your social media platforms. While your followers may like the audio, you want to add striking visuals to capture more attention. Whether it is pairing vibrant videos to your recording, Wondershare Filmora offers the ability to synchronize compelling videos with audio tracks using ducking and photo wall diffusion.
Filmora's intuitive drag-and-drop interface features built-in voice recording and advanced AI-powered audio editing capabilities. It provides an extensive library of presets for audio tracks and sound filters. This platform enables users to add AI-generated sound effects to their videos, synchronizing speech with the visuals. There are two different methods to add video to audio in the Filmora tool, as discussed below in detail.
2.1. Methods to Add Video to Audio using Filmora on Desktop
The powerful AI-powered tool, Wondershare Filmora, offers two different methods on how to add video to an audio file, which are mentioned below:
Method 1. Using the Audio to Video AI Functionality
Filmora's AI-driven Audio to Video tool is designed to enable conversion of audio files into visually compelling videos with customizable styles and effects. A detailed roadmap for using Audio-to-Video tool is given in the following:
Step1Launch Filmora and Choose the Audio-to-Video Tool.
Initially, install the tool and access the main interface of Filmora to click the "Audio-to-Video" button.

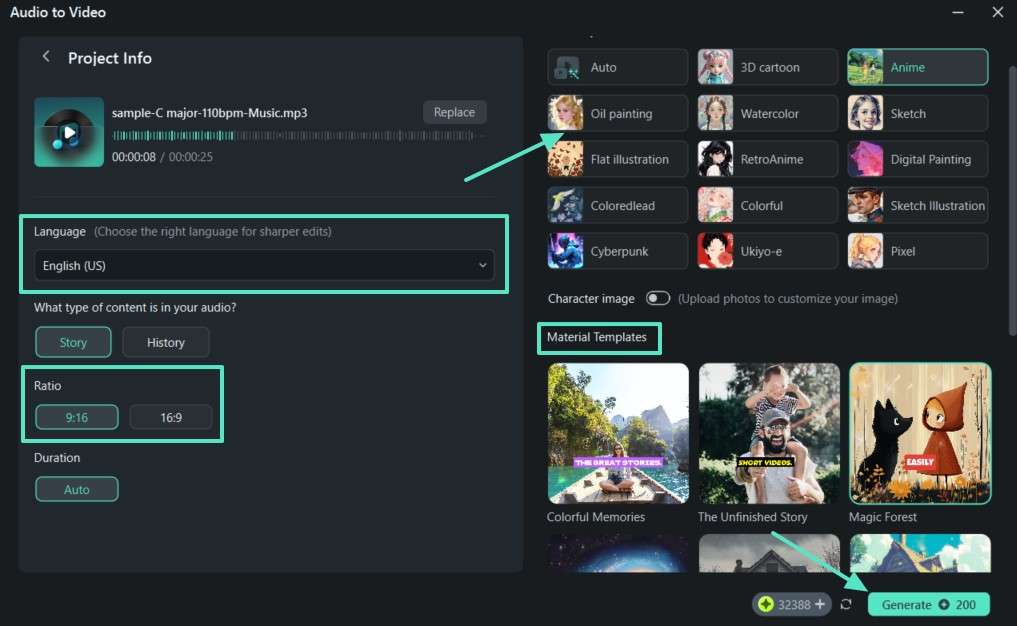
Step2Import Audio File to Set Up Project Settings.
Import your audio file, and choose “Language” to identify source language of file from the left side. Next, pick type of content and aspect ratio from options on the left. Afterward, select the desired style under “Video Style” section, and choose template from “Material Templates” section before clicking the “Generate” button at the bottom.
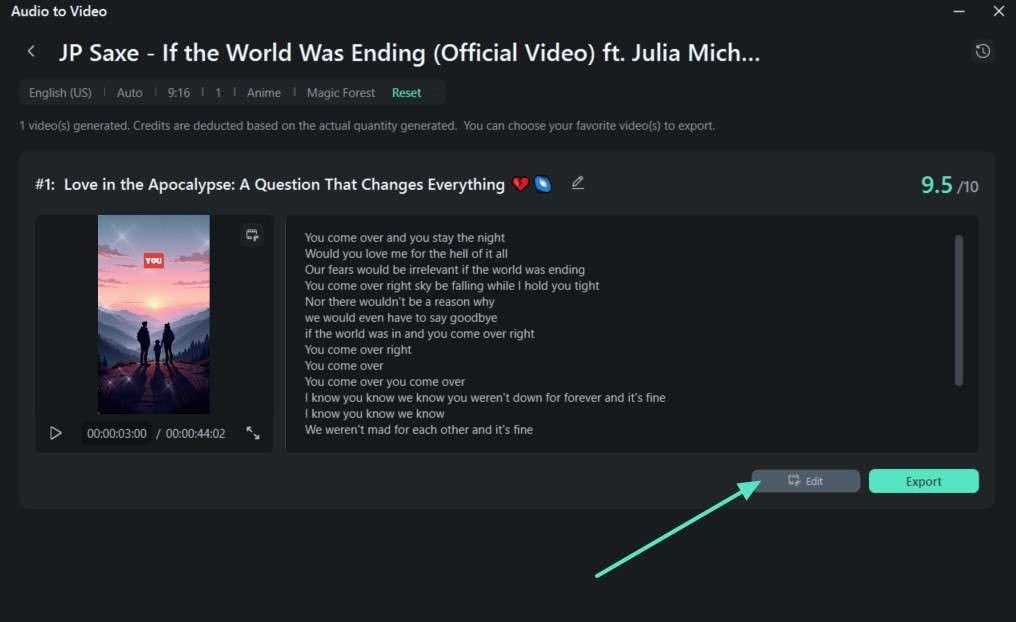
Step3Press Edit Once Video is Generated.
Once the video is generated, click “Edit” button to enter the editing interface.
Step4Click the Script to Change the Audio.
Moving on, click "Script" option from the top left corner to edit your script, then click on “Audio” section on the timeline to enable audio settings. Navigate to the "Audio" section and toggle "Voice Beautification" under the “AI Voice Enhancer” tab. Fade background audio by toggling "Auto Ducking," reduce background noise using "Denoise Model," preview the final video, and click the "Export" button.
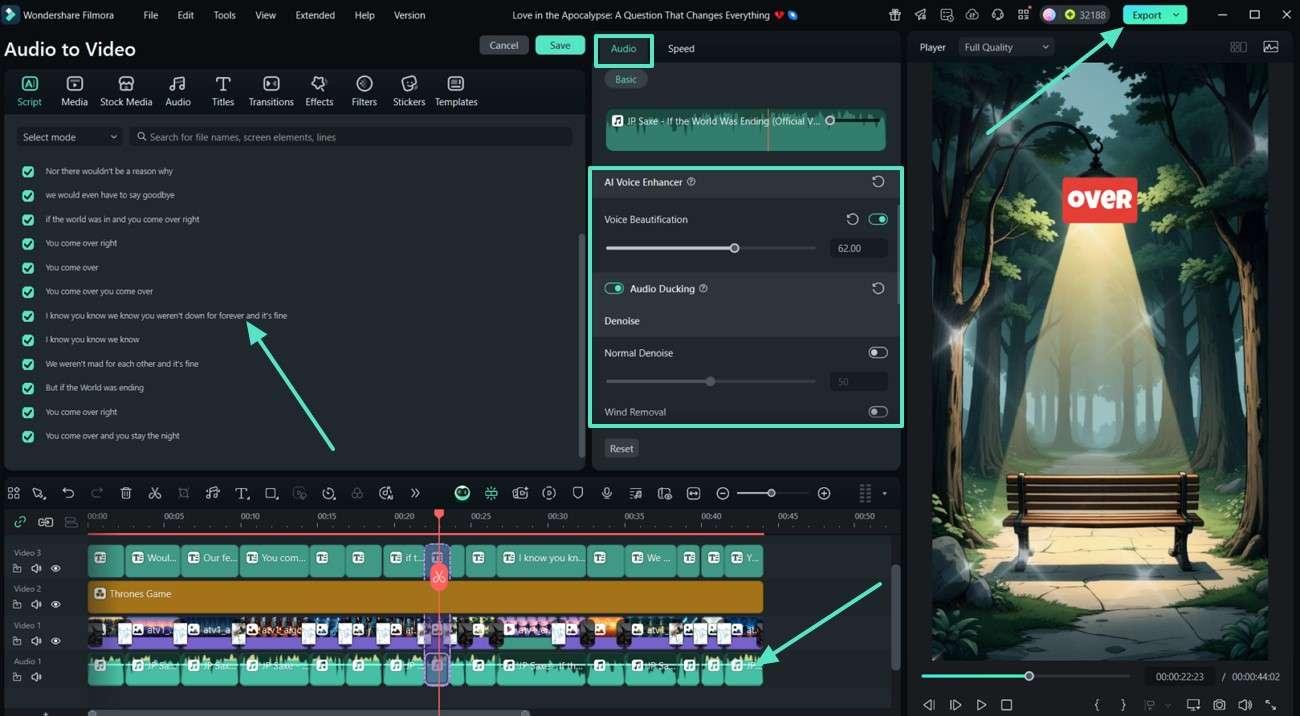
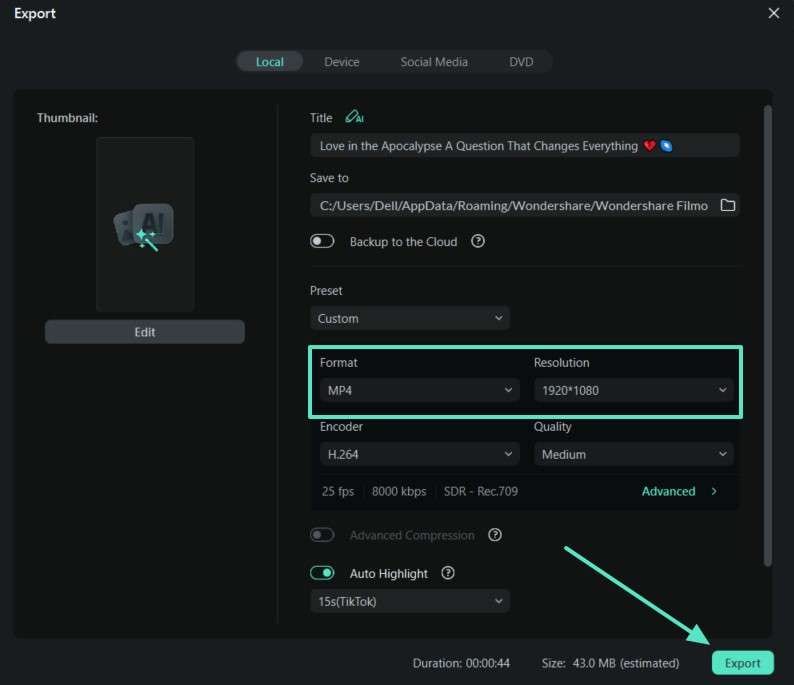
Step5Adjust Settings in the Export Window.
Finally, you can change format and resolution in export window, then click “Export” button to save it to your device.
Method 2. Manual Method to Add Video to Audio Through Filmora
A comprehensive guide with clear navigation for adding video to audio within Filmora is mentioned in the following:
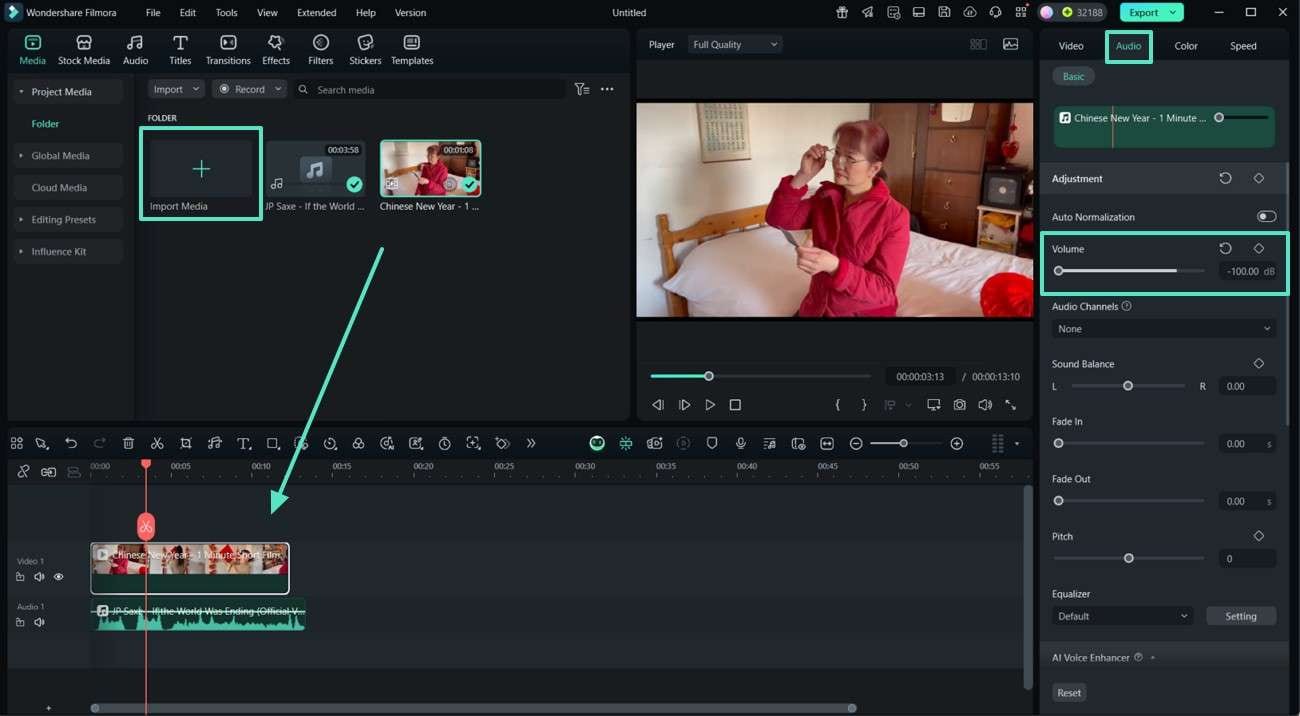
Step1Access the Home Page of Filmora and Select New Project.
First, access the Filmora home page and press “New Project” to start the process. Next, import your audio file and drag it to editing timeline. Then, click “Import Media” to add your video clips, and mute their original sound from the “Audio” editing left panel.
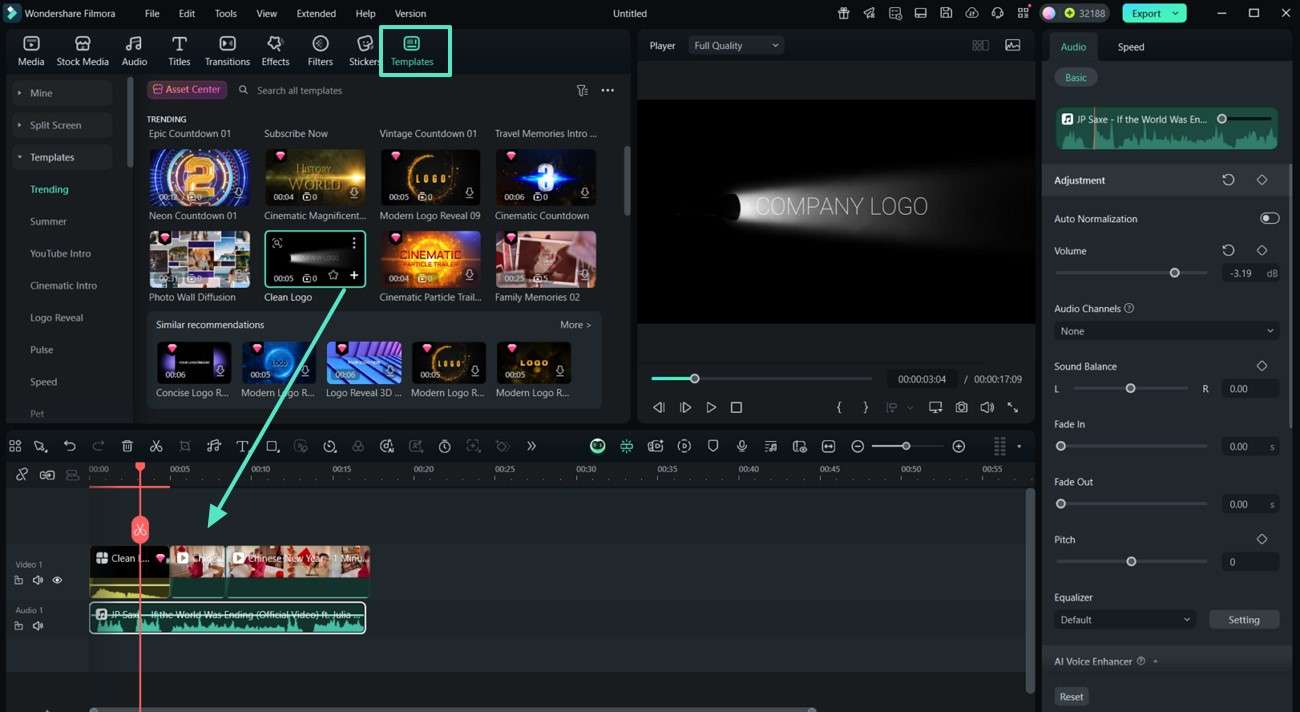
Step2Select Templates from the Top Menu.
Add more related video content to the imported audio by accessing "Templates" from top menu. Choose a template from the template presets library by clicking the “+” icon.
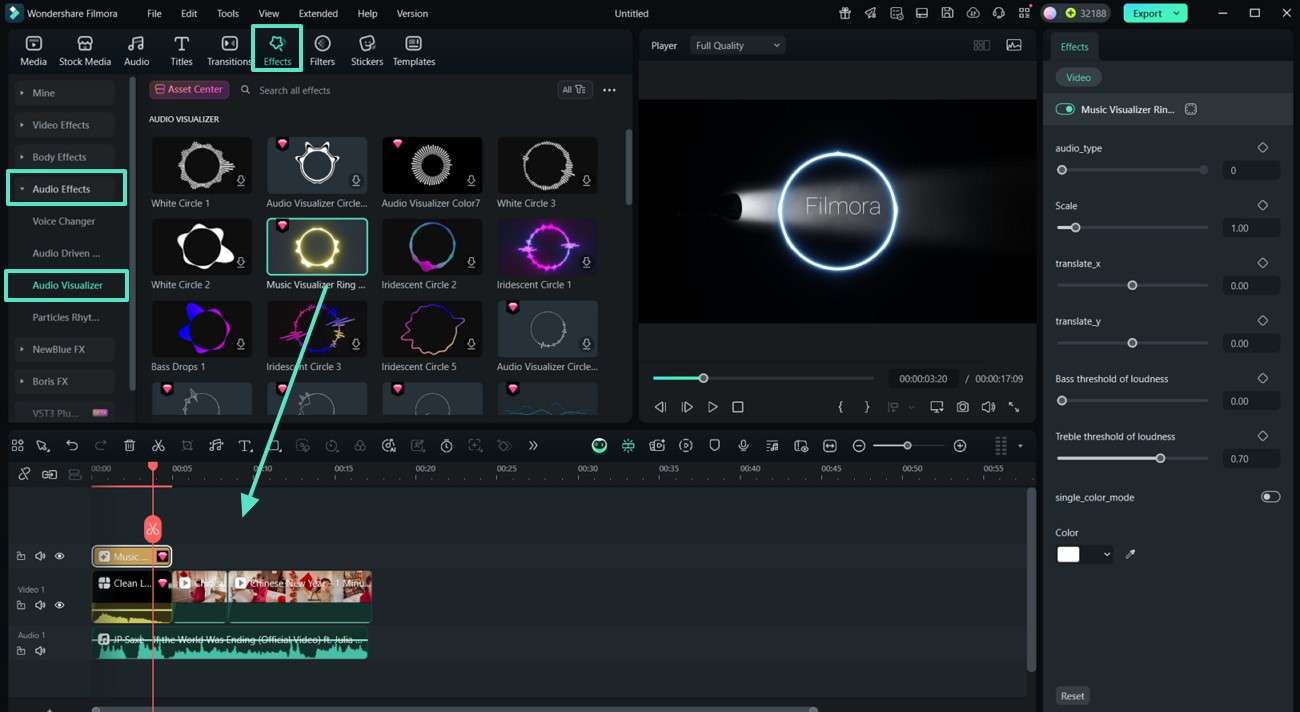
Step3Choose Audio Visualizer Effect.
You can add an audio visualizer to the imported audio by clicking "Effects" tab and choosing “Audio Effects” section to pick the "Audio Visualizer" effect from the presets.
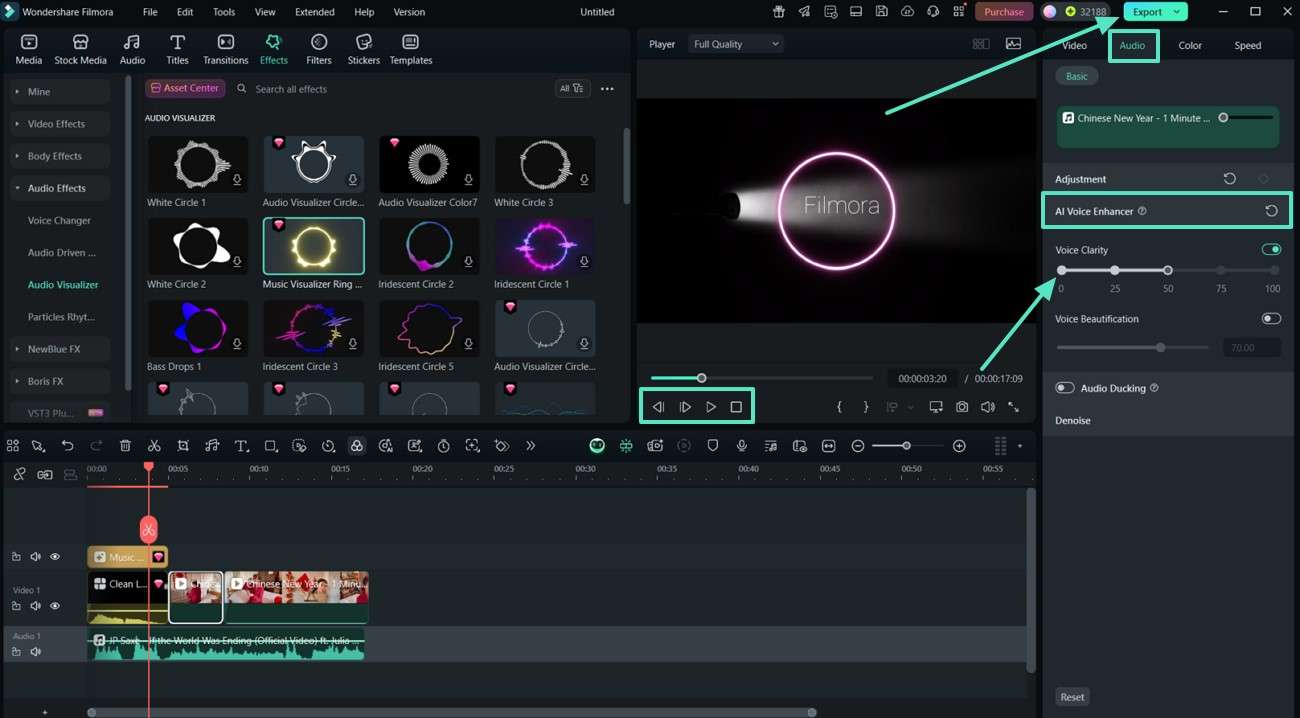
Step4Adjust AI Voice Enhancer and Export.
Double-click on the “Audio” timeline and opt for “Audio” section on the right, then click “AI Voice Enhancer.” Later, toggle “Voice Clarity” to enhance voice quality, and preview video in the preview window, then press “Export” button at the top right.
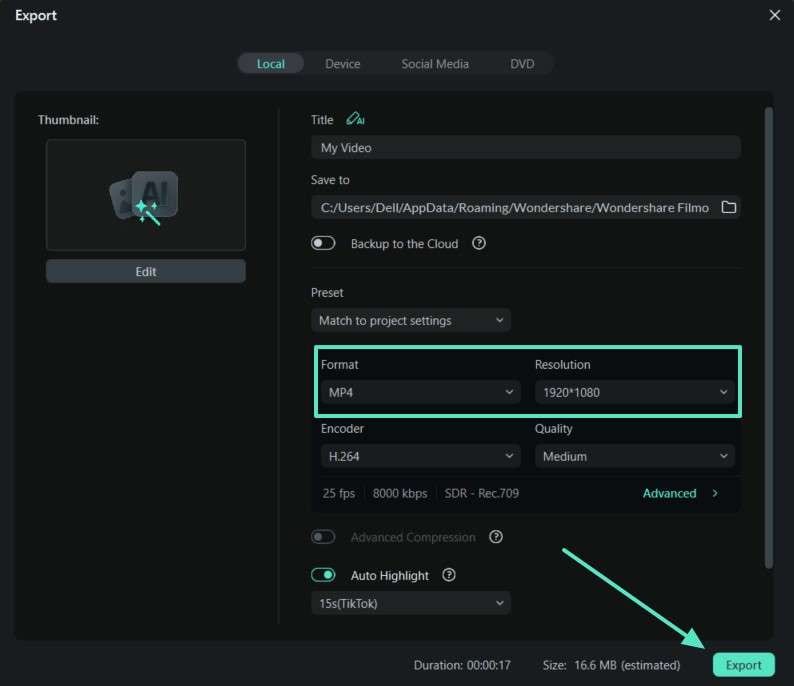
Step5Change Settings in the Export Window.
Finally, you can select desired format and resolution of your video in the export window, then tap “Export” button to save it to your device.
2.2 What Other Functions Can Be Done in Filmora?
Here are other functions of Filmora, essential for adding video to audio using AI algorithms and tools, discussed in the following:
- Image-to-Video –Veo3: Filmora offers advanced technology to transform still images into cinematic-quality videos with synchronized audio tracks and various effects. By uploading your photo and entering a detailed prompt, it can generate video sequences.
- Color Tool: This tool provides a suite for automatic color correction and grading, enhancing the mood and visual quality of videos. It also offers advanced features, such as HSL, curves, tint, color wheels, and white balance.
- Split Screen: This feature in Filmora allows the display of many video clips at once within a single frame. It also creates side-by-side comparisons, reaction videos, or multi-angle storytelling. There are many presets available, supporting up to 6 screen splits per screen.
- Audio Ducking: It is designed to lower the background music and ensure that critical spoken words in the audio are clear. With a toggle, background audio can be faded or positioned to maintain audio balance.
Part 3. Tips to Make Your Video-to-Audio Pairing Stand Out
Some more tips on how to add video to audio by utilizing Filmora to enhance your creations are discussed in the following:
- Use Visual Effects or Stock Footage as Background Visuals.
Using dynamic visual effects can create an engaging backdrop for the audio, making it suitable for voiceover content. Creators make their videos thematic by using specialized footage stocks, such as digital overlays or light leaks.
- Add Animated Subtitles or Waveform Animations
Adding subtitles to animated videos makes them more engaging and accessible to viewers. By utilizing animated styles, such as bouncing effects, speech can be synchronized. It reinforces emotions and creates a more engaging experience.
- Create Looped Visuals If the Audio is Long But the Video is Short
When the audio is longer than the available video footage, looped visuals can be designed. These looped visuals include animated graphics, motion elements, and repeated background videos. This method is used to add video to audio for ambiance channels and TikTok clips.
- Use Transitions and Filters to Add Professional Polish
By applying modern transitions in video sections, you can enhance overall polish, maintain flow, and add rhythm. For unifying scenes, adjustment layers and lighting overlays ensure consistency throughout the project.
Conclusion
To wrap it up, adding video to audio has become a vital tool for content creators. It boosts engagement and creates shareable posts across various social media platforms. When it comes to executing dynamic stock visuals, Filmora stands out to fulfil all requirements of adding video to audio.
