Zoom is a necessary communication tool to present valuable business concepts and task information to remote workers and virtual classrooms. The Picture in Picture Zoom is one of the most wanted features of Zoom, especially during conference calls, because it enables users to minimize the main meeting in order to switch to other applications. It is useful to take notes, multitask, and view conference resources during virtual meetings.
Many video editing tools provide built-in PiP support for managing multiple tasks during video conferencing. In this article, we will thoroughly discuss different methods to activate Picture in Picture mode during Zoom calls and other supported platforms.
In this article
Method 1. How to Enable Picture-in-Picture Mode Directly within Zoom?
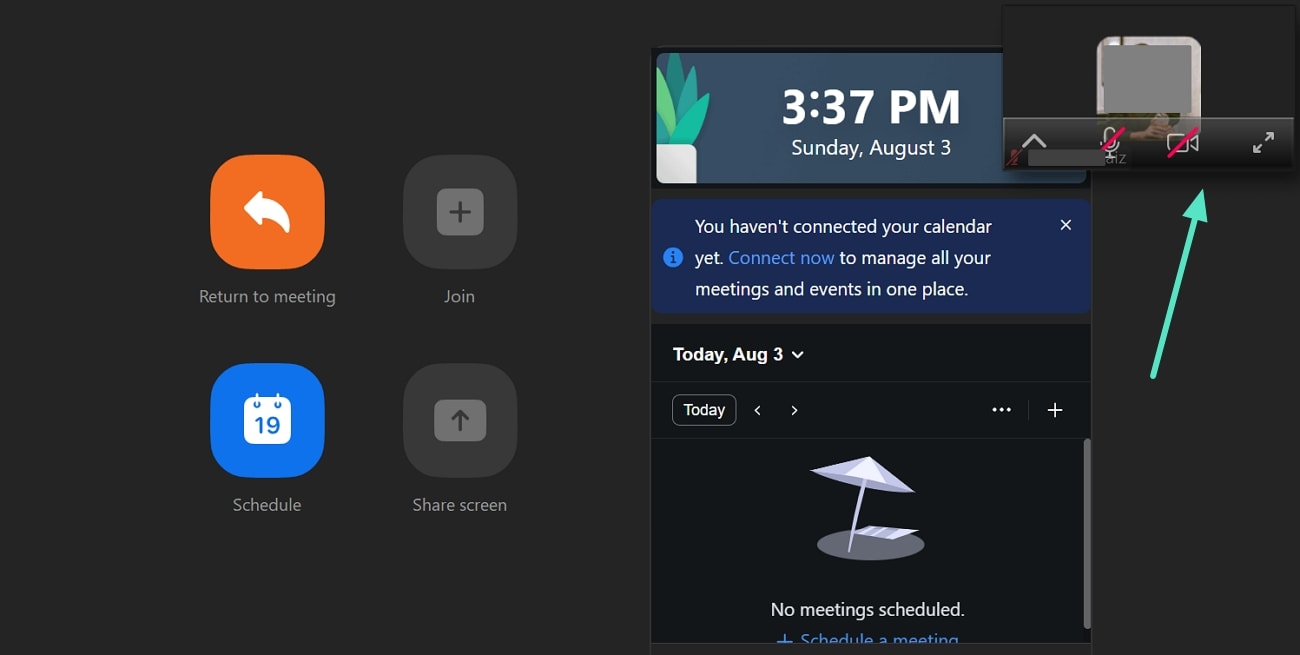
Suppose you want to check important messages and reply to your emails without missing out on the key aspects of the Zoom meeting. Picture-in-Picture mode allows you to perform these tasks effortlessly while observing the presenters of the meeting. By enabling Zoom PiP, users can view the meeting video in a floating thumbnail while multitasking. Anyhow, to learn how to switch between PiP mode within Zoom, follow the steps next:
Instructions. Start or join an existing meeting and click the "Minimize" icon on the top-right to get a floating mini-window of the active meeting.
Method 2. How to Use Picture-in-Picture Using Ecamm Live?
To deliver impactful content, many educators utilize Ecamm Live PiP mode and keep their face on screen while multitasking simultaneously. Mac users particularly benefit from this Zoom PiP Mac tool to create a polished livestream with a camera window. Follow these steps to use PiP mode in Ecamm Live on your Mac:
Instructions. From the left corner of the on-screen control, click the "Picture in Picture" button to enable the PiP video box on your primary video source. You can adjust the position of your PiP camera source by dragging the "PiP" box screen.

Method 3. How to Use Picture-in-Picture of Recorded Zoom Videos in Filmora Desktop?
Being a content creator who has just finished a Zoom meeting, you might now want to showcase the key moments with demo footage. If so, Wondershare Filmora allows you to overlay your demo footage with a Picture-in-Picture Zoom meeting video. Through PiP, the recorded Zoom call displays on top of your explanatory video, creating more professional and engaging content for viewers.
Filmora PiP tool allows you to place various video clips on the top of the main meeting footage to build a dynamic storytelling. The video clips of the overlay can be adjusted through resizing, cropping and the masking effect to fit in the main footage. The instructions on to overlay a demo video over Zoom recordings through Filmora are as follows:
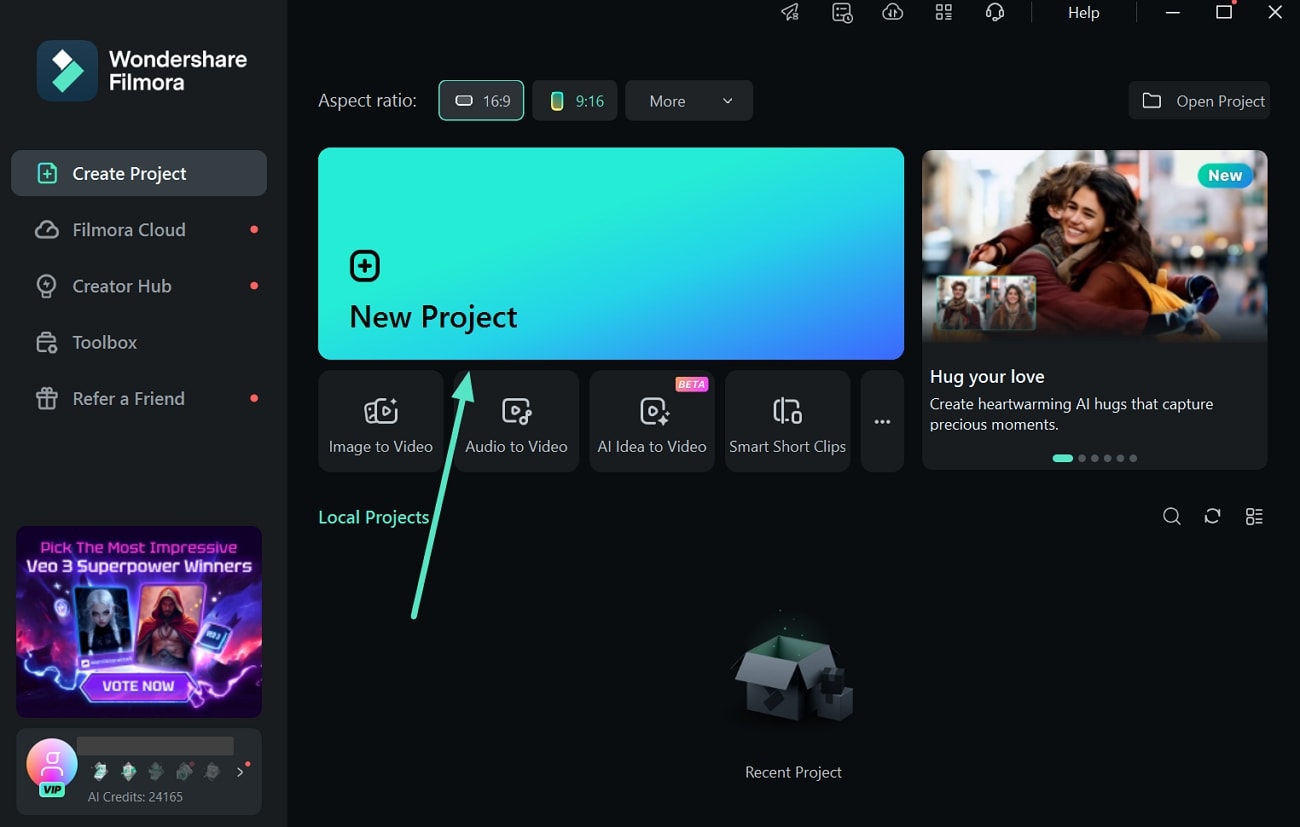
- Step 1. Launch Filmora and Click New Project. Click the "New Project" from the home window after launching Filmora on your desktop. Now, tap the "Import" button to import your Zoom recording and drag it onto the editing timeline.
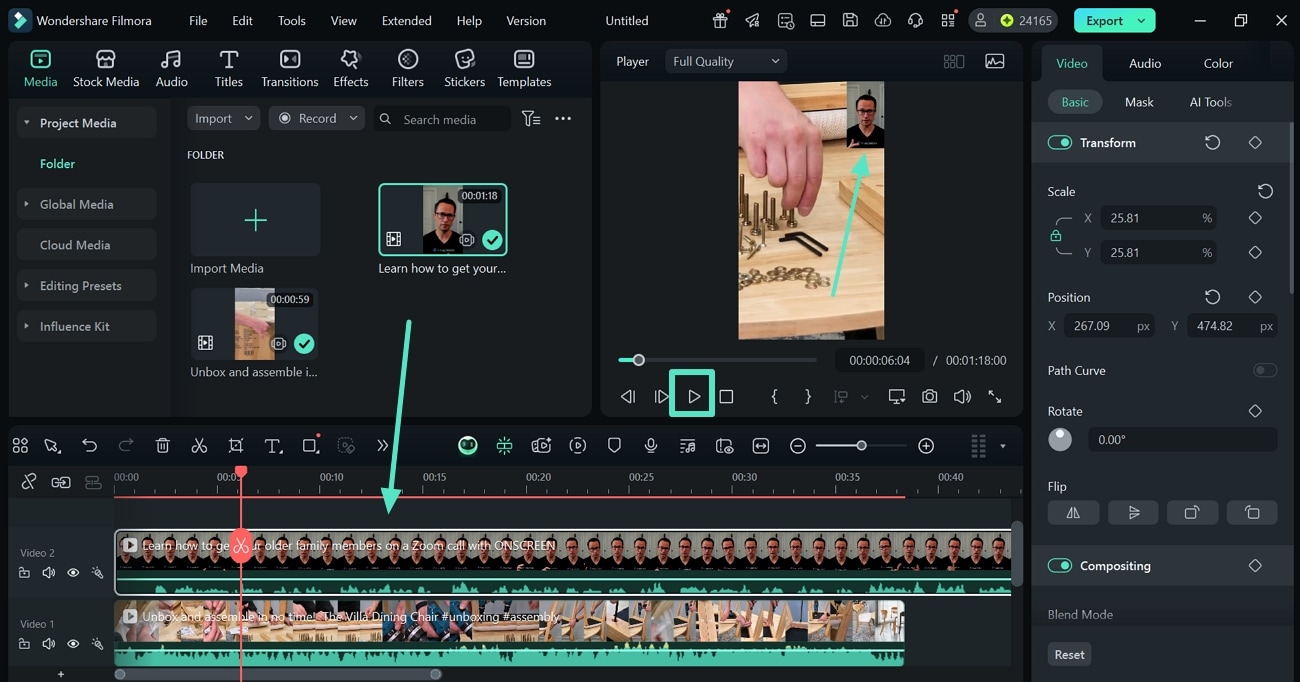
- Step 2. Import Your Demo Video and Overlay It on Your Zoom Recording. Next, import your demo video and click the "+" icon to drag it onto the editing timeline at the top of your Zoom recording. Resize the video to display as a Picture in Picture overlay and click the "Play" icon to view the edits.
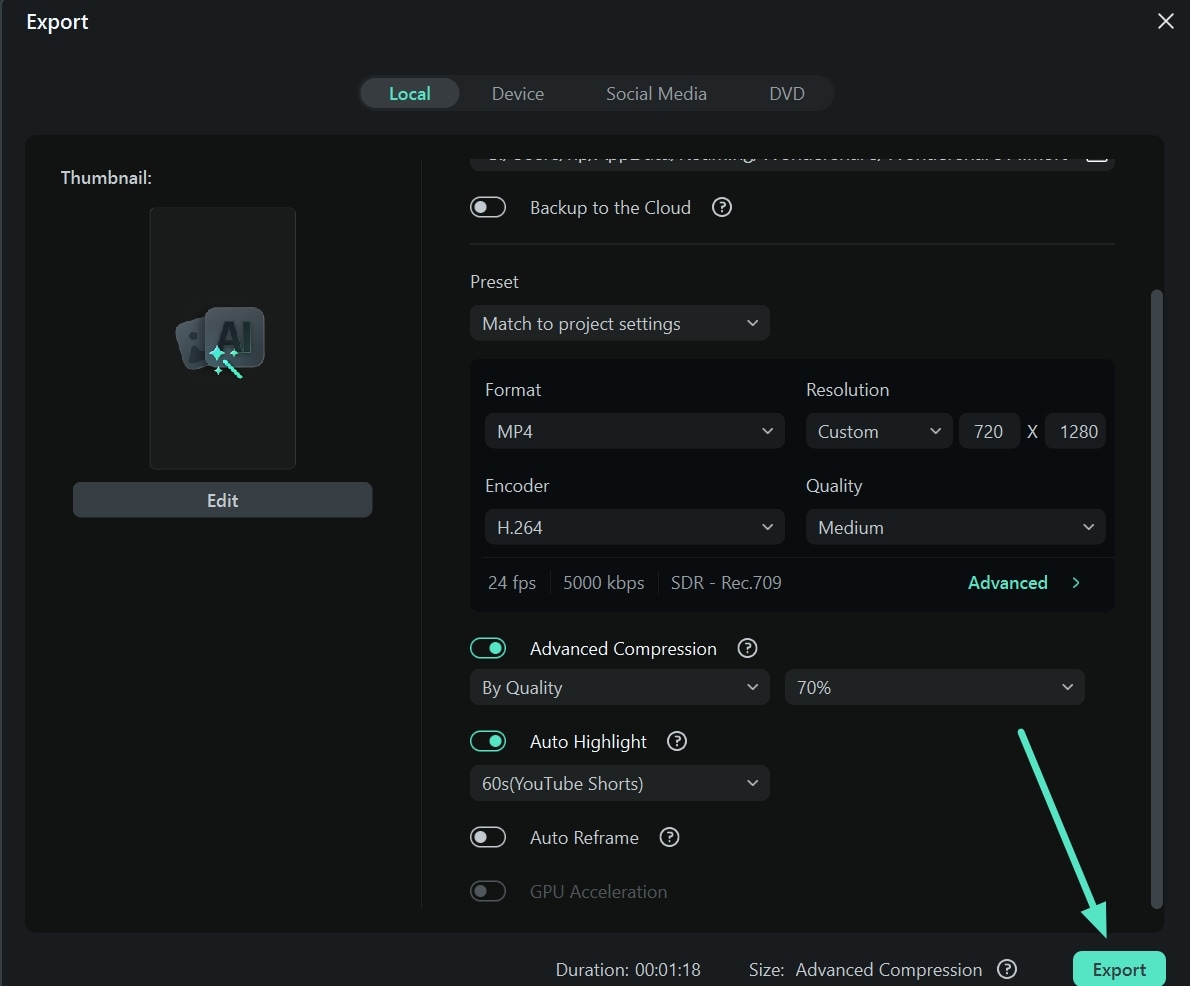
- Step 3. Customize Your Videos and Click Export. For further edits, locate the "Audio" panel on the right and adjust the volume of your recording. Preview your final output before hitting the "Export" button in the top right. Finally, configure resolution and format settings before you click the "Export" button from the dedicated window.
Method 4. How to Use Picture-in-Picture of Recorded Zoom Videos in Filmora App?
When editing the recorded Zoom meetings for online courses, the Picture in Picture feature of Filmora is frequently used by the creators. By overlaying the Zoom PiP on top of the main video, it acts as live feedback and also provides a tailored approach to creators. With Filmora's intuitive interface, users can resize, reposition, add motions, and use audio tracks to their overlays.
The app offers an exclusive Picture in Picture feature that seamlessly blends two videos to create a polished PiP effect, suitable for both novice and professional users. The following are steps demonstrating how you can easily add Picture in Picture mode to your recorded videos using Filmora App [Android/iOS]:
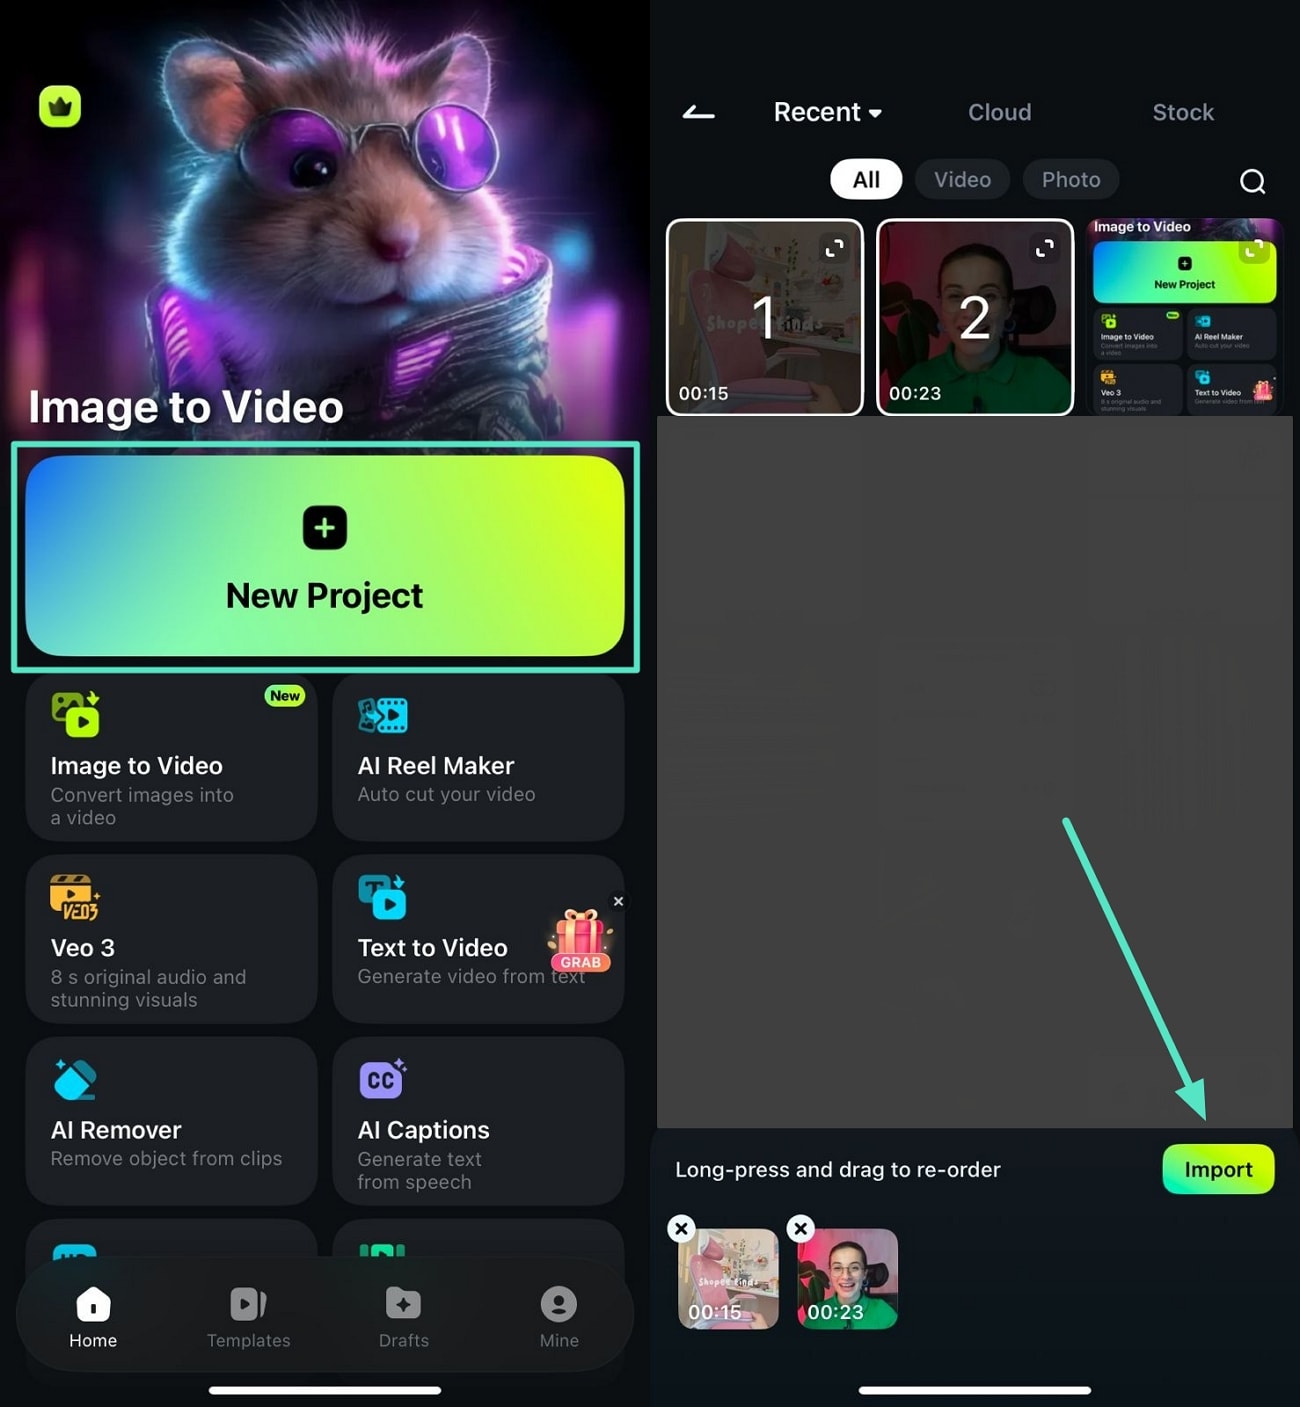
- Step 1. Open Filmora App and Import the Media File. In this step, open Filmora App, tap "New Project," and import your main video by pressing the "Import" button.
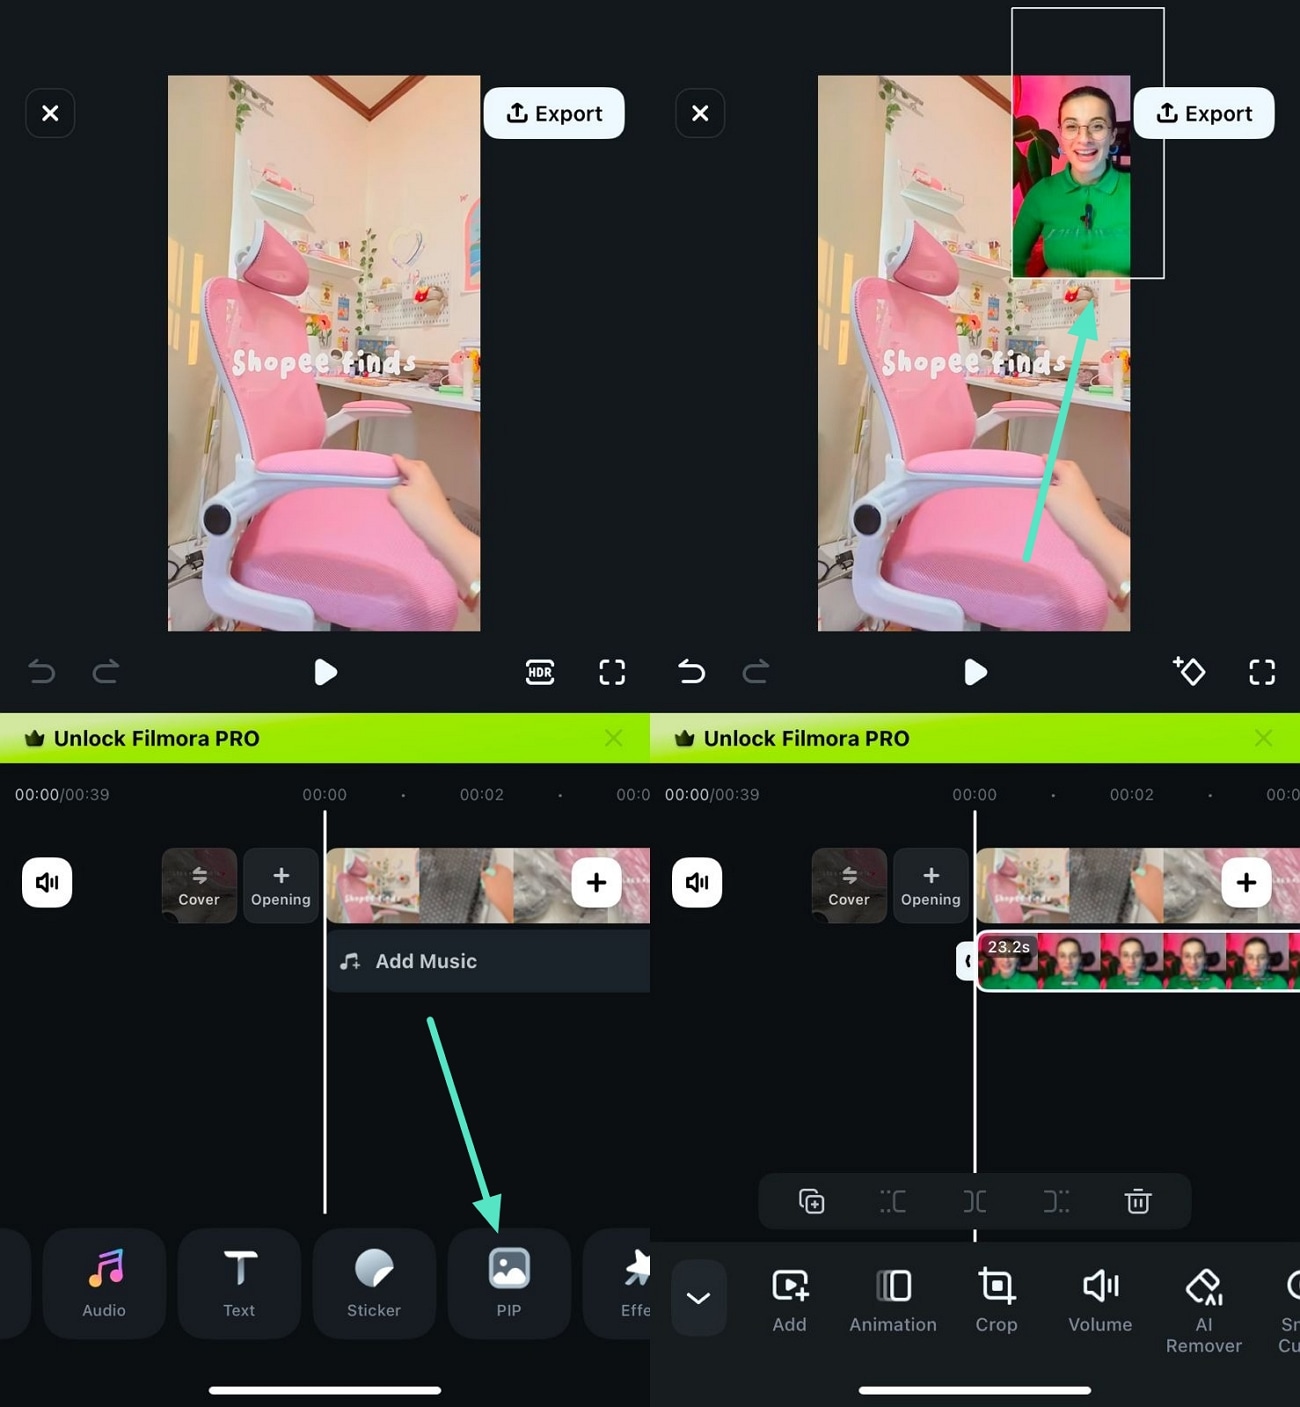
- Step 2. Navigate the PiP Feature from the Toolbar. Next, look for the "PiP" feature from the bottom toolbar and tap it to add the recorded Zoom video by pressing the "+" Add icon and the "Tick" icon. Finally, you can adjust the size of the added Picture in Picture Zoom video by dragging your finger to the top of the preview screen.
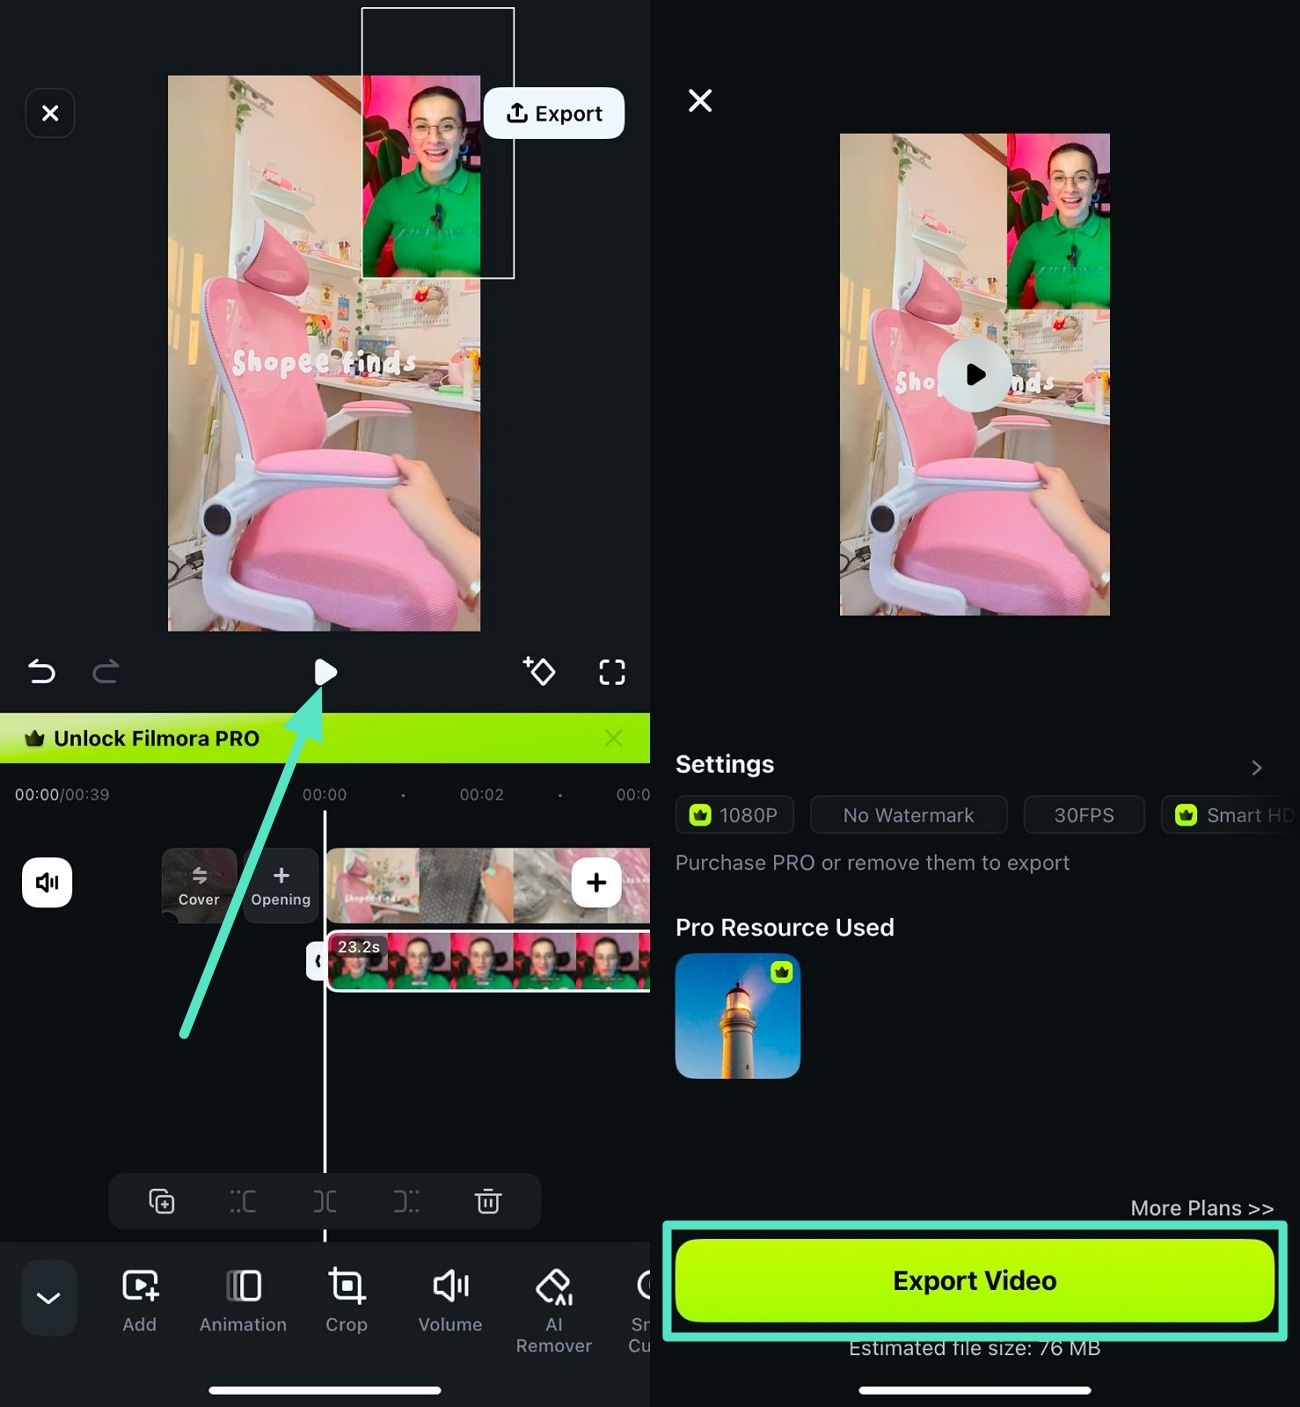
- Step 3. Resize and Adjust the PiP Video and Export. Now press the "Play" icon to preview your final output and tap on the "Export" button. After selecting the resolution of the output video, press the "Export" button again to save it in your phone's gallery.
Conclusion
To summarize, the Picture in Picture Zoom feature is designed for multitasking during meetings to address important emails mid-call. In this article, we have discussed how Filmora stands out as one of the best tools to create a PiP overlay for your recorded Zoom meetings. Additionally, Filmora mobile App PiP feature allows creators to integrate, resize, and position Zoom recordings over any video.


 100% Security Verified | No Subscription Required | No Malware


