- After Effects Tutorial
Top 10 After Effects Shortcuts in Video Editing

Jan 07, 2025• Proven solutions
Whilst there is no doubting the power and capability of After Effects for creating high quality, professional effects for any kind of video, one of the things that can seep up the process considerably is the use of keyboard shortcuts. Here I pick the top 10 most useful timesavers you can adopt in your After Effects workflow.
This is a basic tutorial about After Effects, professional video editing software. However, if video editing is new to you, consider Wondershare Filmora, which is a powerful but easy-to-use tool for users just starting out. Download the free trial version below.


Top 10 After Effects Shortcuts in Video Editing
1Layer Properties
My number one shortcut, simply because there isn’t a project that has ever been made where it could not be used, is the shortcuts for selecting a property from a layer without expanding it all fully.
This of course is rolling several keyboard commands into one entry, but I think separating these would be cheating a little, it really is only one shortcut. To use them, simply select the layer and press the appropriate button, that property will appear.
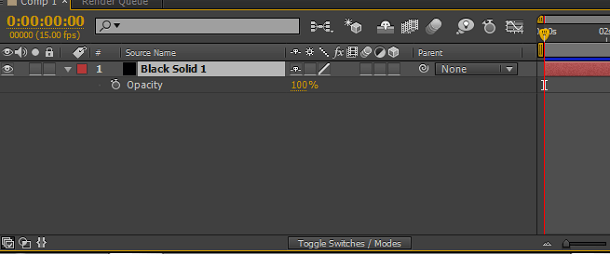
- A opens Anchor Point
- P opens Position
- S opens Scale
- T opens Opacity
- R opens Rotation
- U reveals all properties with a keyframe
- UU (double tap U) reveals all changed properties
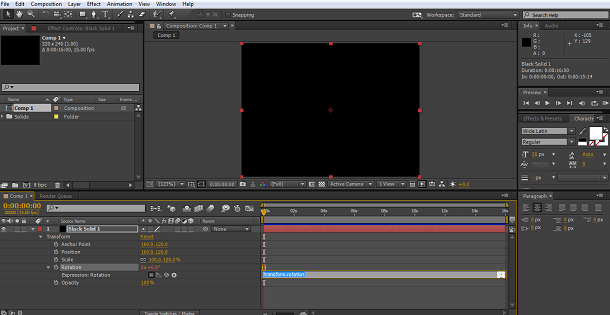
2Add Expression
This one is another that gets a lot of use and so appears here, it is also true that it does save a lot of time in the menu system as well. Alt for Windows, Option for Mac, and click on the stopwatch for the property you are after.
Nice and simple of course, extremely useful and a timesaver for those complicated animations. You can also use the same shortcut to remove an expression as well.
3Creating a new layer
You may be noticing a theme here, something that is used a lot has a shortcut to get there quickly, and it is these things that shortcuts were invented for.

As you can see there are shortcuts for all the common layer types to allow you to quickly add a new layer to a project. Because solids have so many uses, vignettes and so on, they are well worth remembering. These are of course, the windows shortcuts, replace Control with Command for Mac aficionados.
Also note the shortcut to add an adjustment layer with ease at the bottom, again use Command in place of Control for Macs.
4Scale and reposition selected layers to fit composition
A real boon if you are using a variety of footage and layers from different sources, this clever little shortcut resizes and centers layers to fit into their composition. Here I set up a layer purposely larger than the composition, as you can see.
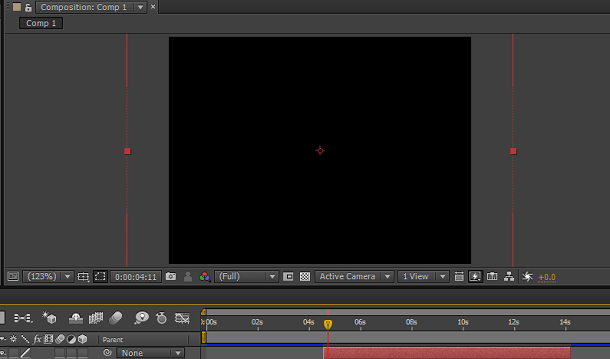
Simply pressing Control Alt and F (Command Option F for Macs) centers it on the composition frame and matches its size, all in one easy operation.
A great one, and as said, for those who regularly use a multitude of different types of sources a real help in the workflow.
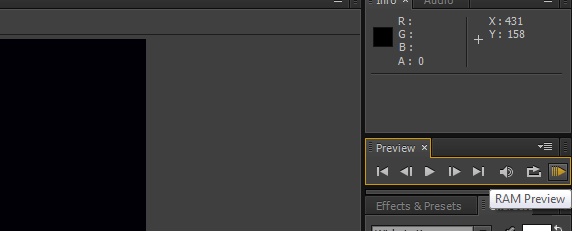
5RAM Preview
This one is probably one of the more well-known shortcuts, hitting 0 on the keypad to start a RAM preview whether on mac or Windows platforms. However, with the prevalence of those wireless Mac keyboards that do not have a keypad, Adobe have seen fit to add in an additional shortcut for Mac only to get around this, which is Control and Zero.
That perhaps isn’t so well known and well worth a mention here.
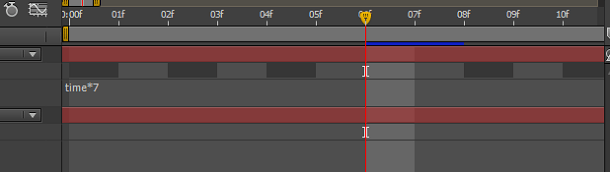
6Move Timeline one frame
This one is a great asset if you are setting out a mask, adding in a motion blur or other motion graphic into a video or similar operation. Being able to advance or regress the timeline a single frame at a time comes in handy in many situations. For me, it is the uninterrupted work flow that really makes this one so useful, a simple key press and I’m onto the next frame without thinking, and that is the essence of a useful shortcut.
An additional one here, but not really a separate shortcut, is moving forward or backwards 10 frames at a time, just as useful in some circumstances and worth including here.
Use Control and the right or left arrow on PC, Command and the right or left arrow on Mac for a single frame, add shift to the combination to move 10 frames.
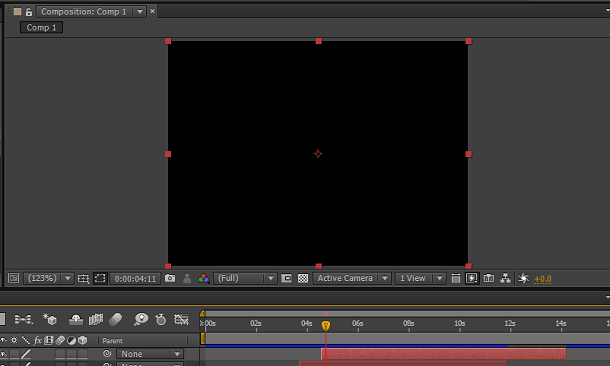
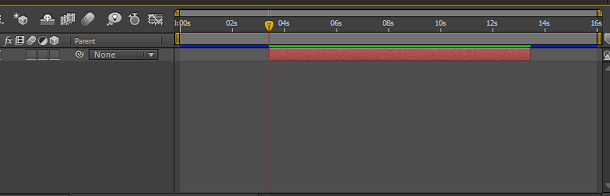
7Resize and reposition a layer
This is similar to the number four shortcut, in that it fits each layer into the composition, however this one maintains the original aspect ratio whilst it does it. This may not seem a big difference, but in terms of workflow for dealing with an array of input and output requirements, it really is.
If we go back to our previous situation with a layer that is bigger than the comp as we showed before.
Hitting Control+Alt+Shift+H (Command+Option+Shift+H for Mac) fits it to the comp but keeps the existing aspect ratio as we see here.
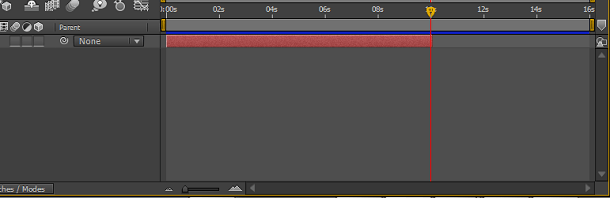
8Trim Layer
This is another simple action that can be done without interrupting a workflow by using the shortcut.
Trimming the layer to the timeline marker is a valuable editing tool when dealing with multiple layers designed to run concurrently rather than simultaneously.
This is very easy to do with this shortcut, you have your layer and you need it to stop at a certain time, simply set the timeline marker in the correct place
Then simply use Alt + [ or ] for windows, and Option +[ or ] on mac.
In this example I used the ] bracket to trim the end to the time marker, the [ would trim the beginning to that point.
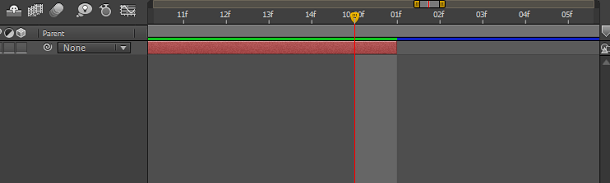
9Timeline Zoom to Single Frames
If you are anything like me, you are constantly wanting to ping back and forth between a single frame view in timeline and the broader view as I go along. Whilst the slider bar is never far away, being able to zoom right in to the single frame, and then right back out to the entire composition duration is a boon to any workflow.
You can achieve this by simply using the ; key, on both Mac and windows.
10Moving the Timeline Marker to the layer in and out points
Our final one, and again another extremely useful shortcut for manipulating multiple layers and footage sequences without interrupting the workflow, if you need to quickly advance to the out point of your current layer, simply press O, to go to the in point, press I, it is the same for Mac and Windows, an easy one to remember and well worth doing so.
Of course, there are many more, Adobe publishes a full list of them in their support section, and on top of that it is worth remembering that you can customize every single shortcut in the program to suit your own working style if you wish to.
If you are looking for free After Effects plugins, here we will list out top free 15 plugins for After Effects that come at the marvelous cost of nothing. Yes, they are all completely free. Check this
by Benjamin Arango Jan 07, 2025 19:30 PM
Benjamin Arango
staff Editor