
 100% Security Verified | No Subscription Required | No Malware

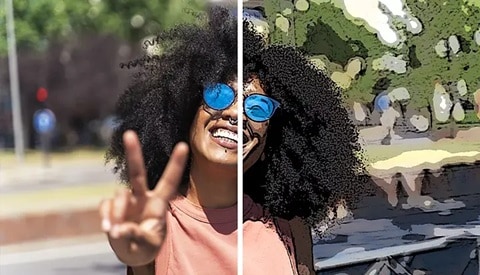
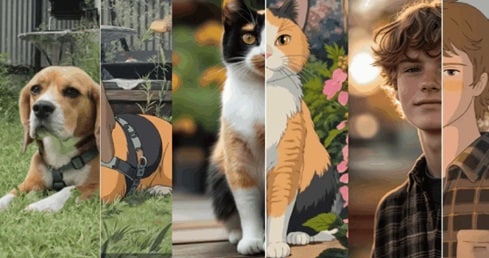
You must have wondered at least once what you’d look like as a cartoon character. And of course, as one of the most popular image manipulators, you quickly think of turning your photos into cartoons in Photoshop.
But for total beginners, turning an image into a cartoon in Photoshop might still seem like a lot, especially if you’ve never used the software before. No worries, though. That’s exactly why we’re here.
We’ll guide you step-by-step on how to convert an image to a cartoon in Photoshop with ease, using tools like the Photoshop cartoon filter and other creative tricks. Plus, we’ll also show you easier alternatives that are perfect if you just want quick results without all the layers.
Part 1. How to Convert an Image to a Cartoon in Photoshop Like a Pro
As one of the most sought-after photo editors in the world, Photoshop offers a wide range of creative tools—and yes, that includes the ability to turn your images into fun cartoon versions. Making an image cartoon in Photoshop requires a mix of filters, adjustments, and smart layering.
There are actually a few different ways to do this in Photoshop, depending on the style you want. But here, we will show you the easiest ways on how to convert an image to a cartoon in Photoshop.
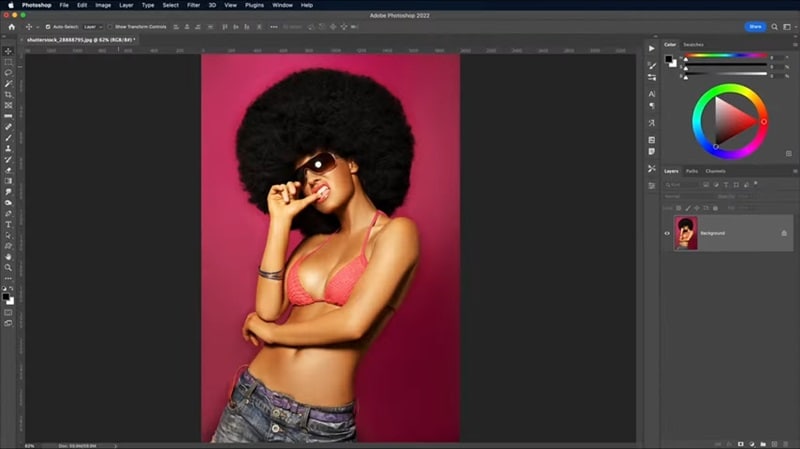
Step1Launch Photoshop and Import Your Photo
Start by opening the image you want to cartoon in Photoshop.
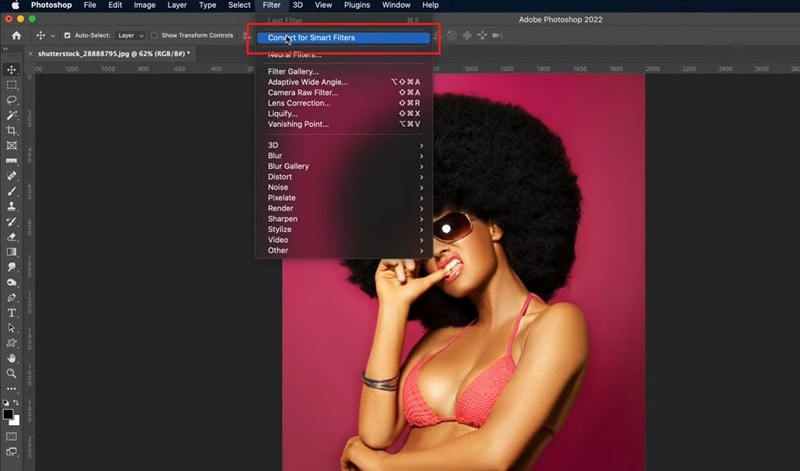
Step2Turn It Into a Smart Object
Head to the Filter menu and select Convert for Smart Filters. This lets you apply effects without permanently changing your original image.
Step3Use the Poster Edges Effect
Go to Filter > Filter Gallery and choose Poster Edges under the Artistic section. You can increase the Edge Thickness, keep the Edge Intensity soft, and lower the Posterization for a smoother result. Experiment with the settings after applying these filters or effects until you get the result you want.
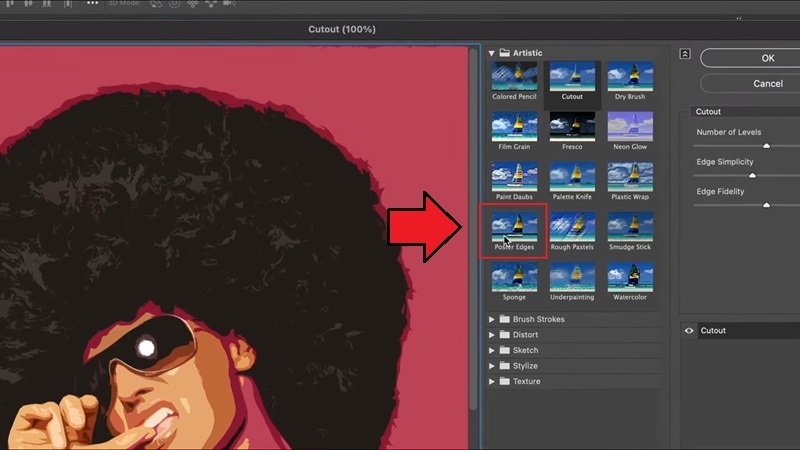
Other cartoon effects in Photoshop that you can try are:
- Cutout (under the Artistic section)
- Oil Paint (under the Stylize section)
Step4Export Your Final Cartoon Image
Once you're happy with how it looks, save your file in your preferred format, whether it’s JPG, PNG, TIFF, or anything else you need. Watch the full video tutorial below.
Part 2. Skip Complex Steps: Turn Photos into Cartoons Instantly with AI
Not quite happy with the results, or maybe the Photoshop steps felt a little too confusing? Although it’s possible to convert your image into a cartoon using Photoshop, it can be a bit complicated, especially if you’re new to editing.
If you're after something simpler and faster, there's an easier way. Wondershare Filmora comes with smart AI-powered tools like AI Image Stylizer that can instantly transform your photo into a cartoon with just a few clicks.


What makes it even better is that the AI Image Stylizer doesn’t just apply a generic filter. Instead, it actually turns your photo into a unique, stylized cartoon version of yourself. It’s not as technical or intimidating as making a cartoon in Photoshop, but the results are just as fun (if not more creative)!
Unlike the process to turn a picture into a cartoon in Photoshop, using Filmora is not complicated or time-consuming. There are a variety of templates to choose from that make the whole process incredibly easy. You don’t need to worry about layers, masks, or filters.
How to convert an image to a cartoon with AI
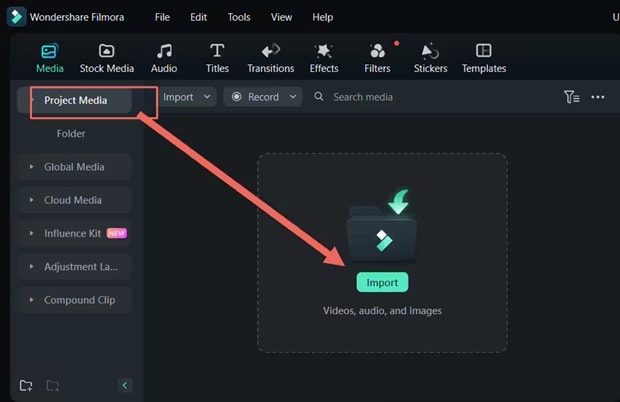
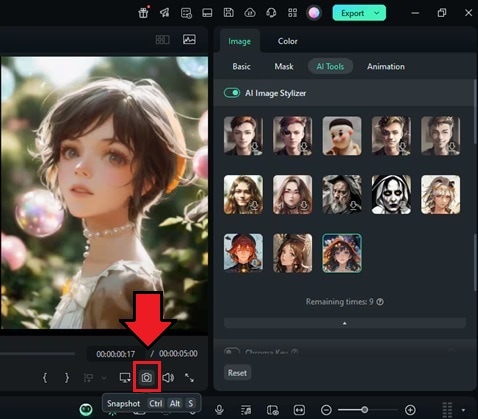
Step1Import Your Picture and Add It to the Timeline
Create a new project in Filmora. Then, click the Import button under the Media tab to add your photo, or drag and drop it onto the timeline.
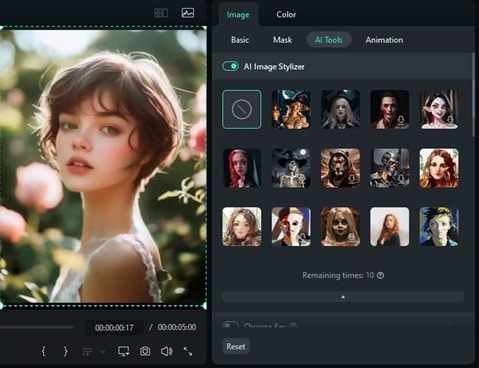
Step2Open the AI Image Stylizer
Click on the image track in the timeline to select it. Then go to the AI Tools tab and enable AI Image Stylizer. You’ll see various style templates you can choose from. Pick the one that you like.
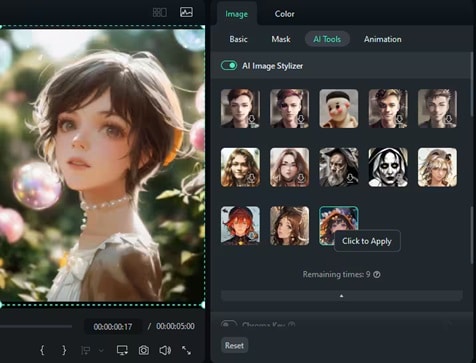
Step3Apply the Style and Generate
Click on your favorite template to apply the cartoon filter. Give it a moment to process the image.
Step4Save the Cartoonized Photo of Yourself
Once it’s ready, click the Snapshot button to save your cartoonized photo to your computer.
Part 3. Creative Ways to Use Your Cartoon Picture
Now that you’ve seen how easy it is to turn your photo into a cartoon in Photoshop and AI Image Stylizer in Filmora, you can create cartoon versions of yourself anytime you want. But then what? What can you actually do with your new cartoon creations?
We’ve got some fun and creative ideas to help you put those cartoon images to good use:
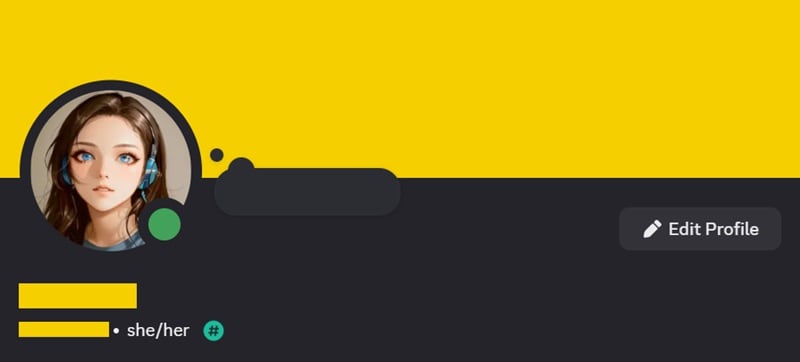
1. Make a Cartoon Profile Pic for Every Platform
If you’re bored with the same old profile photo, your cartoon version is the perfect way to freshen things up. You can even create different cartoon styles for each account—one for fun, one for work, and one just for laughs!
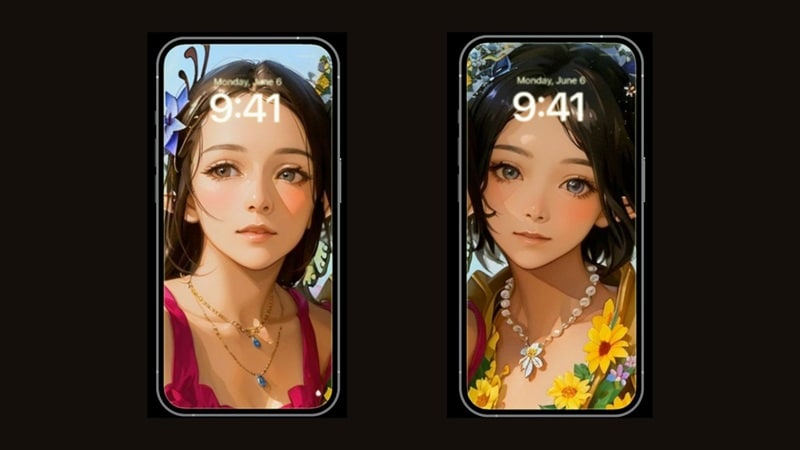
2. Turn It into a Custom Phone Lock Screen or Wallpaper
The cute result of your cartoon image in Photoshop is too good to keep hidden, so why not turn it into your phone lock screen or wallpaper? You can even customize it with colorful backgrounds, text, or patterns to match your vibe.
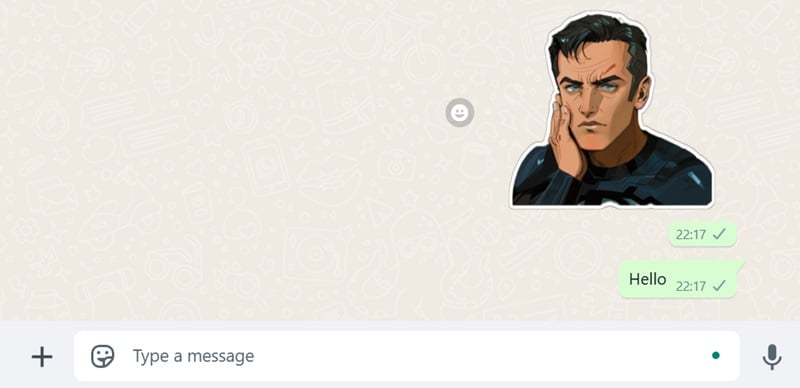
3. Create Your Own Sticker Pack
Take your cartoon face or your pets, add a few expressions, and you’ve got a sticker pack for WhatsApp, iMessage, or Telegram! These apps let you upload custom sticker packs.
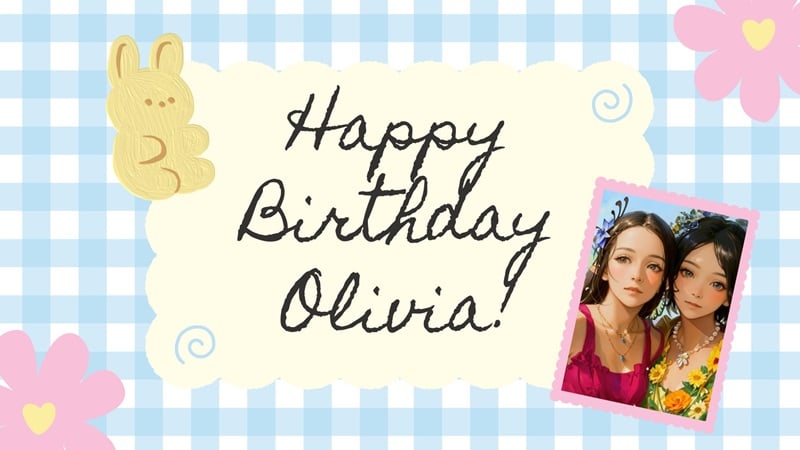
4. Make a Digital Birthday Card
When someone’s birthday comes around, surprise them with a digital card featuring their cartoon self! Add a sweet message, a funny caption, or even customize the cartoon with party hats, balloons, or cake. It’ll definitely make their day!
5. Create a YouTube or Twitch Banner
If you’re building a personal brand, a cartoon version of yourself makes a great addition to your channel banner or thumbnail art. It gives your content a friendly, creative vibe that helps you connect with your audience (and it looks super cool too!)

Conclusion
Now you know how to turn an image into a cartoon using Photoshop. And the easiest way to do it is by combining Smart Filters with fun effects like Poster Edges or Cutout to create that cartoon-style look.
However, creating a cartoon from a photo in Photoshop, while possible, is not for everyone. If it’s overwhelming for you, you can give Filmora a try instead. It comes with an AI Image Stylizer that instantly transforms your photo into a cartoon with just a few clicks.
FAQs About Turning Photos into Cartoons Using Photoshop
-
What version of Photoshop do I need to turn a photo into a cartoon?
You don’t need the newest version to change a photo to a cartoon using Photoshop. Any version of Photoshop that includes the Filter Gallery and Smart Filters will work just fine. But for access to all the latest effects, using the latest Creative Cloud version is recommended. -
Can I turn any photo into a cartoon, or are there specific requirements?
You can cartoonize almost any photo, but for the best results, choose images with good lighting, clear facial features, and minimal background distractions. High-resolution photos also help make the Photoshop cartoon effect more detailed and clean. -
Can I use Photoshop Elements to make a cartoon photo?
Yes, Photoshop Elements has several artistic filters like Cutout and Poster Edges that you can use to create a cartoon-style effect. It may not have all the advanced options of the full version, but it still gets the job done nicely.
