


 ChatGPT
 Perplexity
 Gemini
 Claude
 Grok
Grok
Are you annoyed that your iPhone camera is unable to capture what your eyes see? Well, no need to waste your energy. The iPhone camera offers just the perfect feature to counter this problem - the HDR feature.
Most people have to use photo editing software to fix the exposures of photos, but luckily for us, we don't need that.
In this article, we will give you a brief overview of HDR photography and then guide you on how to shoot HDR photos with an iPhone.
In this article
- Part 1: What is HDR Photography for iPhone?
- Part 2: When Should You Use HDR on iPhone?
- Part 3: How to take an HDR Photo with your iPhone Camera?

- Part 4: How Not to Have Two Same Photos When Shot with HDR on your iPhone?
- Part 5: iPhone Camera Smart HDR Not Working, Why?
- Part 6: Video Guide HDR on your iPhone device
Part 1: What is HDR Photography for iPhone?
HDR is short for High Dynamic Range, and it refers to a photography technique where multiple exposures of a scene are combined to create one well-lit picture. It captures a scene's darkest and lightest tone and shows them as such in the final photo.
Apple introduced the HDR feature back in 2010 on iPhone 4. It was a breakthrough for the company, further enhancing the iPhone camera. Since then, all the iPhone's succeeding models have had the HDR feature.
However, Apple has advanced its HDR technology with the passage of time. Before the release of the iPhone 12, Apple worked with HDR10. With the iPhone 12, Apple inculcated Dolby Vision HDR, becoming the first to roll out Dolby Vision in a mobile handset.
Without the HDR feature, your iPhone camera is not capable of capturing a high-contrast scene. This will lead you to having exposure problems in your pictures.
Your scene might have dark tones that are well-exposed with the right colors and details, but the bright areas might be over-exposed with no shade or detail.

On the other hand, your scene might have bright tones that are well-exposed with the right color and details, but the dark areas are too dark to show the details.
With the iPhone's HDR feature, you can get a perfectly exposed photo showing details simultaneously in light and dark tones.
Part2: When Should You Use HDR on iPhone?
When accurately used, a high dynamic range can elevate the overall outlook of your images. Therefore, you must know about the situations in which this specification must be used. It is especially helpful in situations where a single exposure would either overexpose the highlights or underexpose the shadows. Explore the following guide to see which situations call for HDR on your iPhone:
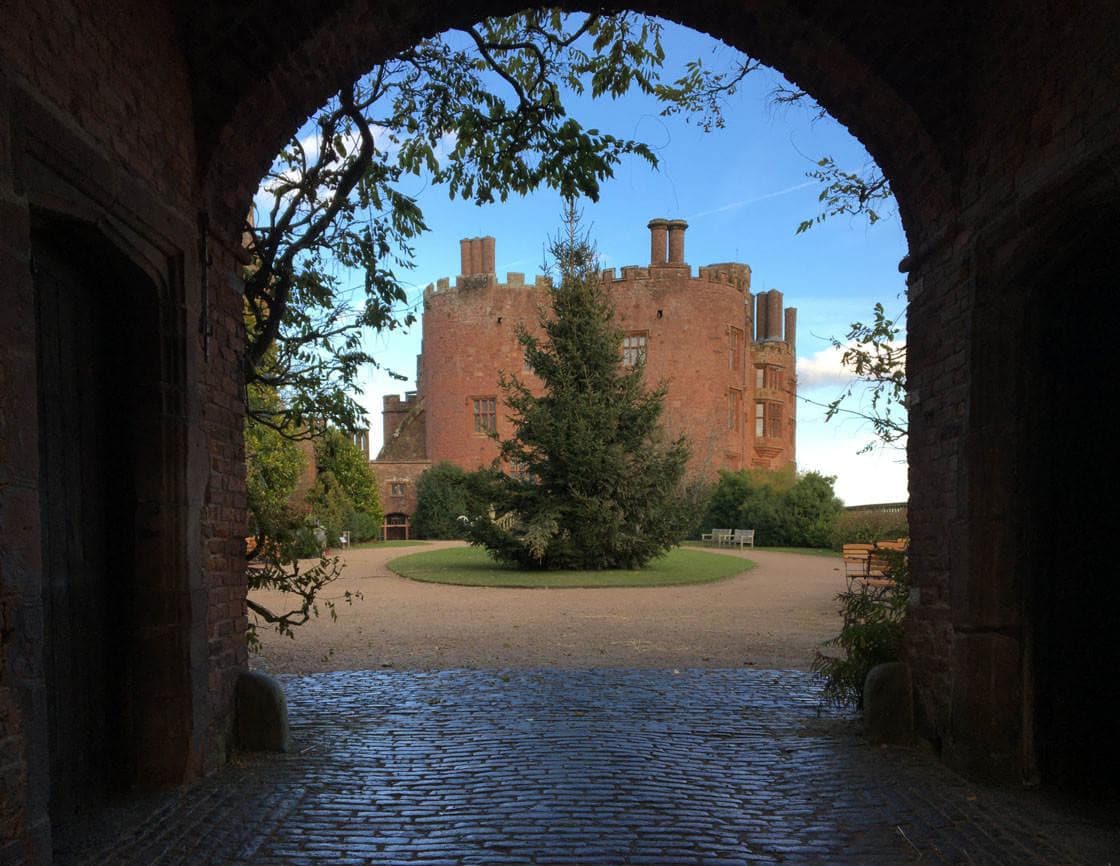
- High-Contrast Situations: In a photo with a bright sky and a dark foreground, this utility balances the exposure, capturing details in both the sky and the ground.
- Backlit Subjects: When the subject stands in front of a light, HDR prevents it from becoming a dark silhouette by adjusting for both the subject and the bright background.
- Scenes with Bright Highlights and Deep Shadows: During street photography on a sunny day or shadowed alleys, it ensures that neither the highlights are blown out nor the shadows lose detail.
- Outdoor Landscapes: The HDR I phone feature enhances the depth, color, and texture of the entire scene when shooting outdoor images.

- Low-Light Conditions: This specification captures subtle details in shadows without making bright areas too harsh in dark rooms with subtle lights.
Related Posts:
- Top 10 Websites for Sky HDR Images >>
- How to Fix the iPhone HDR Video Problem? >>
- What are Auto HDR, Smart HDR 3 & 4 Shooting Modes? >>
Part 3: How to take an HDR Photo with your iPhone Camera?
Now that we know how HDR helps make our pictures pop out let's look at how you can take an HDR photo with your iPhone camera.
How to take HDR photos on iPhone X, iPhone 11 models, and iPhone 12 models?
Here is a step-by-step guide for you to follow. This guide is applicable for iPhone XS, iPhone XR, iPhone 11 models, and iPhone 12 models.
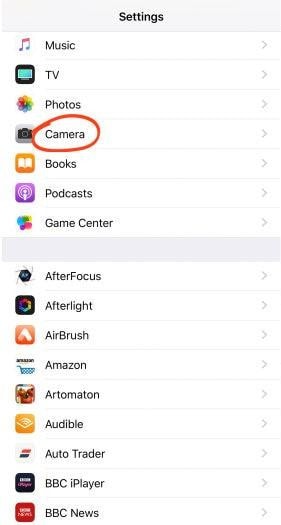
Step1Go to Settings
The first step for you is to go to your iPhone Settings. Here, click on the Camera app.

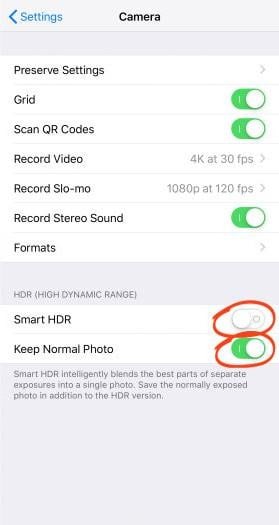
Step2Adjust the Settings
Here, ensure that the Smart HDR (or Auto HDR in iPhone 8, iPhone 8 Plus, and iPhone X) is toggled off. The HDR option will not be available in the camera if you do not switch this off.
Also, ensure that the "Keep Normal Photo" toggle is on. Having this enabled will let your camera save a non-HDR version of the photo as well as the HDR version.
Step3Head to the Camera App
Once you have adjusted the setting, open the Camera app.
Step4Enable HDR
At the top of the screen, you will see an HDR option. Tap on it to enable (or disable) it.
In older iPhones such as iPhone 7, iPhone 7 Plus, and earlier, you have the option to set it to Auto, On, or Off. Choose the "On" option.
You can now take HDR photos with your iPhone!
How do you take HDR Photos on an iPhone 13/14/15/16?
In the iPhone 13 models, the steps for taking an HDR photo are slightly different. The first few steps are the same. Go to Settings > Camera. Under the HDR section, find the "HDR" option and turn the toggle on.
Once the toggle is on, go to the Camera app. You will see the HDR option, which you can turn on/off or set to Automatic.
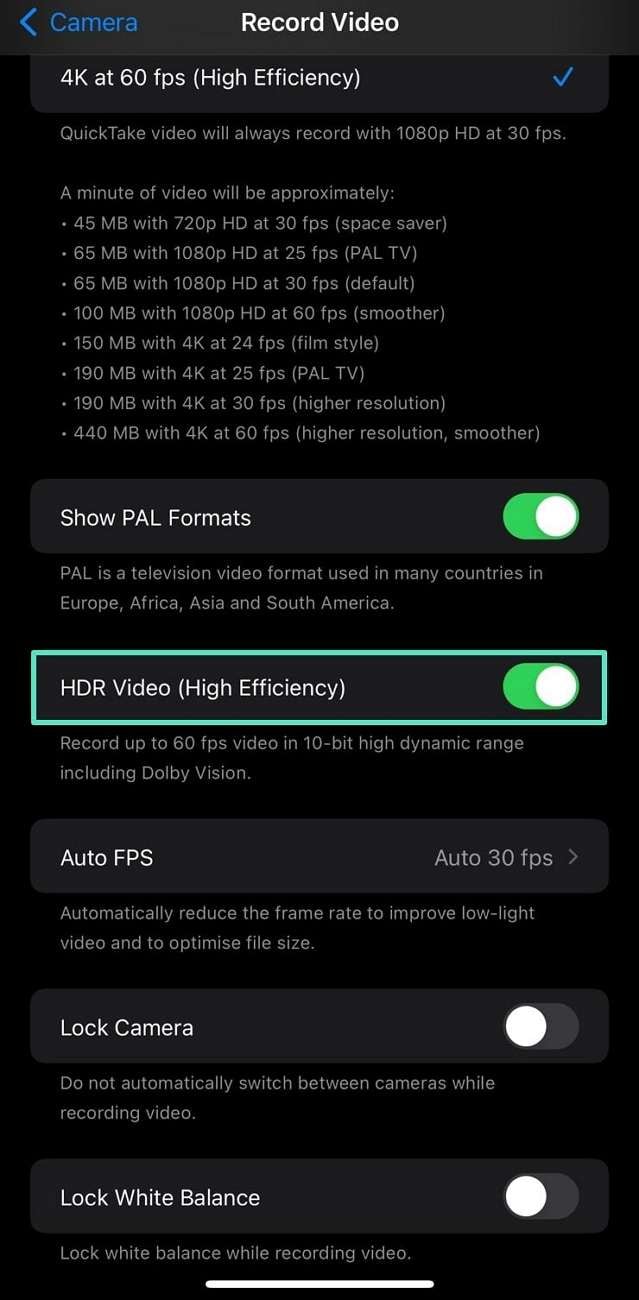
How do you turn on HDR For videos
Step 1. To enable HDR, open the "Settings" application on your device to find and tap "Camera" from the options. As you reach the camera settings, locate and press the "Record Video" option from the list.
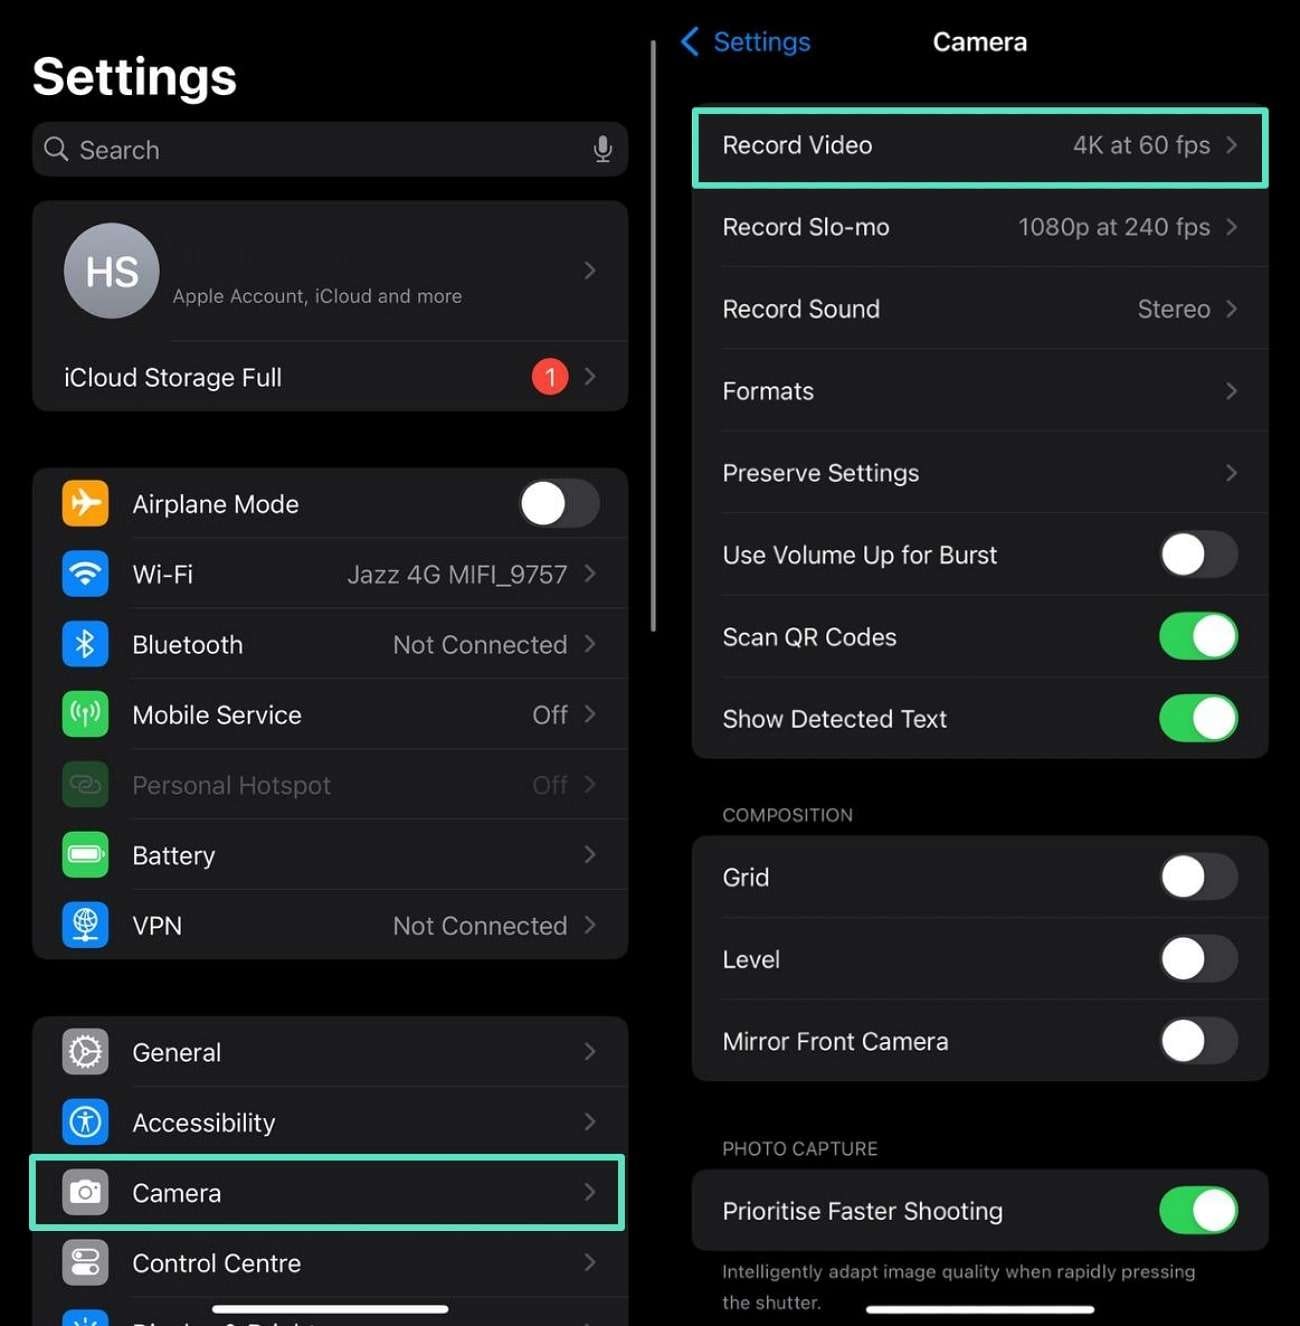
Step 2. Using the next interface, scroll to toggle the "HDR Video" option and turn it on.
Part 4: How Not to Have Two Same Photos When Shot with HDR on your iPhone?
You may notice that when you shoot photos with HDR on your iPhone, your camera roll shows two identical pictures. This happens when the "Keep Normal Photo" setting is enabled in the iPhone Camera Settings. This setting is only available on iPhone X and earlier.
For the latest versions, you can only see the Smart HDR option. By default, Smart HDR does not save the non-HDR version of the image.
The "Keep Normal Photo" option is helpful in instances where you might have to compare the HDR and non-HDR versions. You may even prefer the non-HDR version in some cases.
But the side effect of this feature is that it becomes a nuisance to delete the other versions, and it also takes up space.
Here is how you can disable this setting and avoid having two of the same photos.
Step1Go to Settings
Go to your iPhone Settings and tap on the Camera app.
Step2Disable the "Keep Normal Photo" Option
You will see a "Keep Normal Photo" toggle in the HDR panel. Turn the toggle off.
Once the toggle is off, you can go and take an HDR photo. The camera app will no longer save the non-HDR version of the image.
Part 5: iPhone Camera Smart HDR Not Working, Why?
The iPhone's HDR option enables you to get great shots. Apple introduced a "Smart HDR" option on iPhone where the camera shoots photos in HDR (when necessary) by default. This option ensures that users don't have to go to great lengths to get amazing shots.
However, there may be instances when you feel that the "Smart HDR" option is not working.
Problem 1. HDR Not Working on iOS 17
Users often complain that this specification does not work on iOS version 17. They cannot find the HDR option in their phone’s camera settings. Due to this reason, they fail to enable this utility during photography.
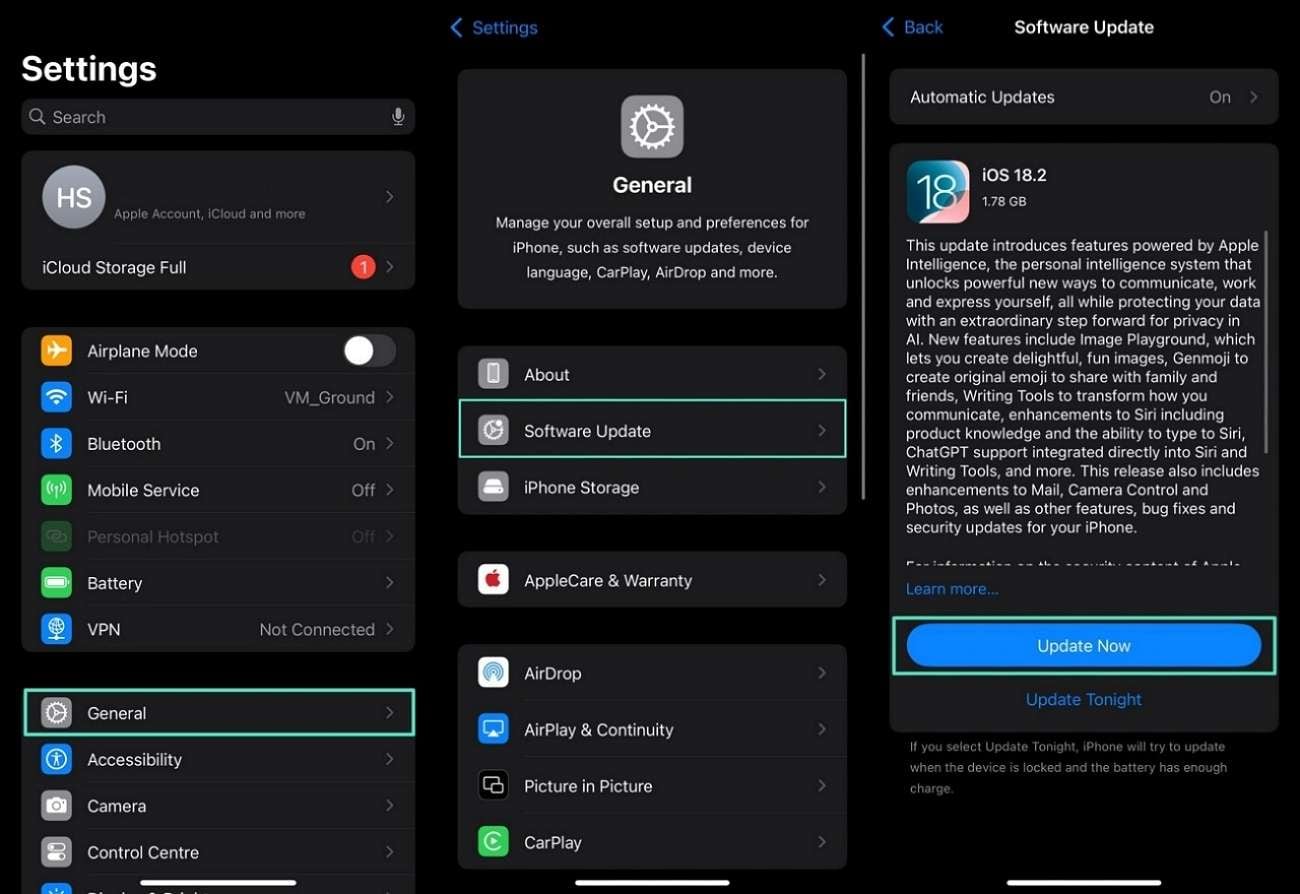
Solution 1. iOS Software Update
Instructions. To begin, access the "Settings" app on your iOS device to tap the "General" option. Next, press "Software Update," and you will be directed to the next screen, where you must hit the "Update" button to shift to the latest iOS version.
Problem 2. HDR Option Not Showing in the Camera App
Sometimes, while taking a picture, the HDR I phone option is not shown at the top of the screen. Many users think that happens when this utility is disabled. Therefore, it creates confusion among iOS users as to whether HDR is on or off.
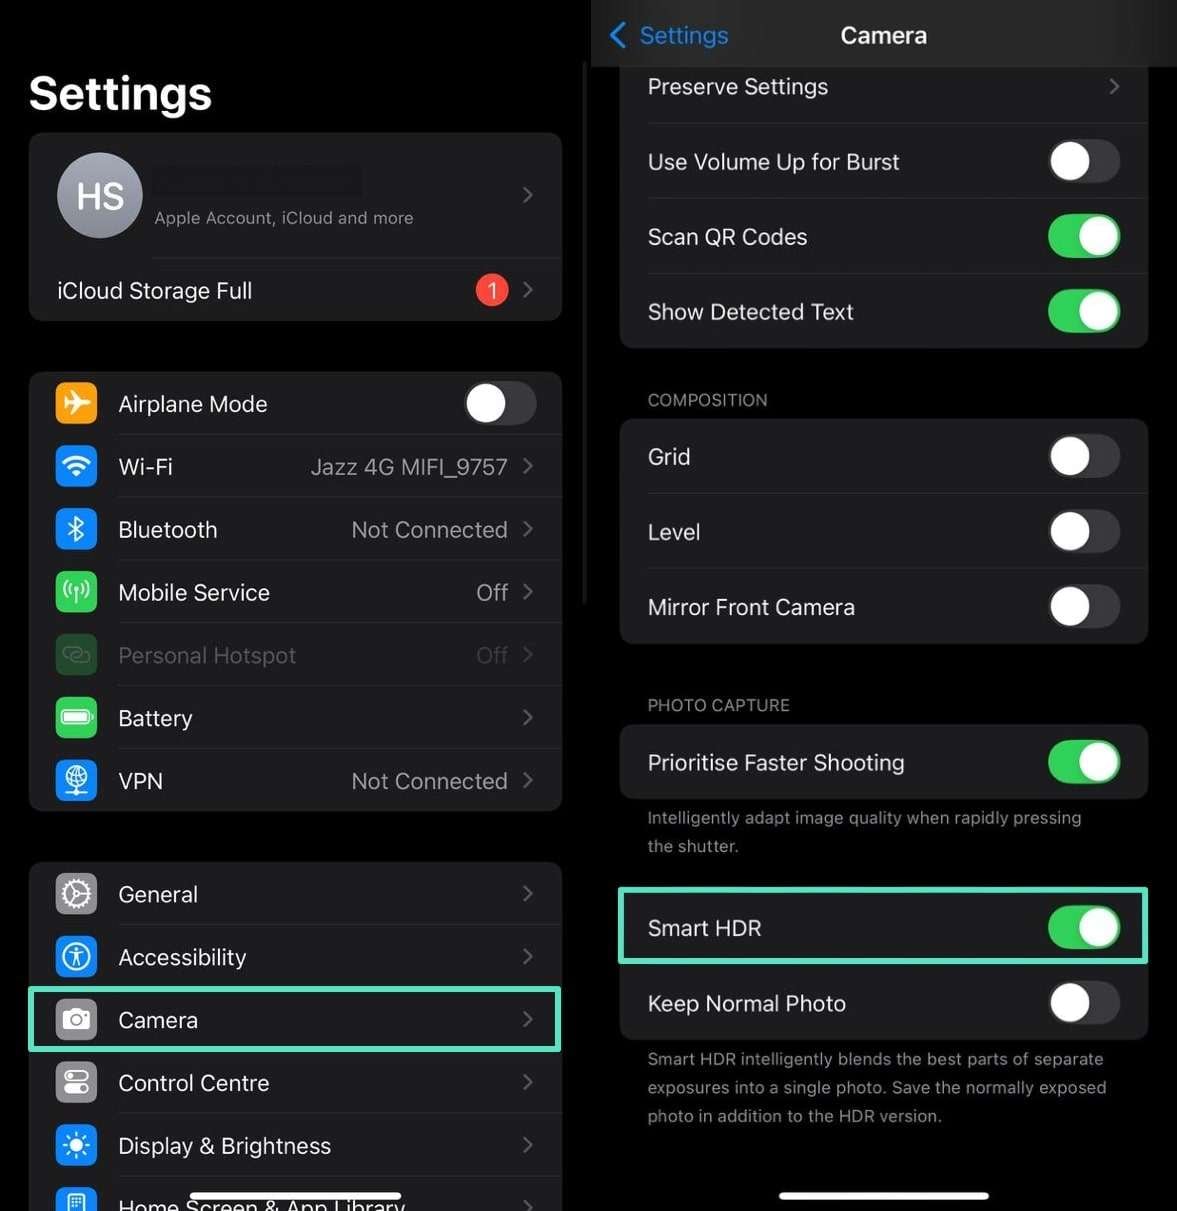
Solution 2. Make Sure That HDR is Enabled in the Settings
Instructions. First, go to your "Settings" app and find the "Camera" option from the list. On reaching the camera settings, scroll down and toggle the "Smart HDR" option to turn it on.
Problem 3. The Result Images Are Not Good Enough
According to some users, the images taken from HDR are not good enough and lack precision in light. The photos and videos are also blurred, with washed-out frames while capturing the moon. In dark light, the captured images are blended in the dark background and are indistinguishable.
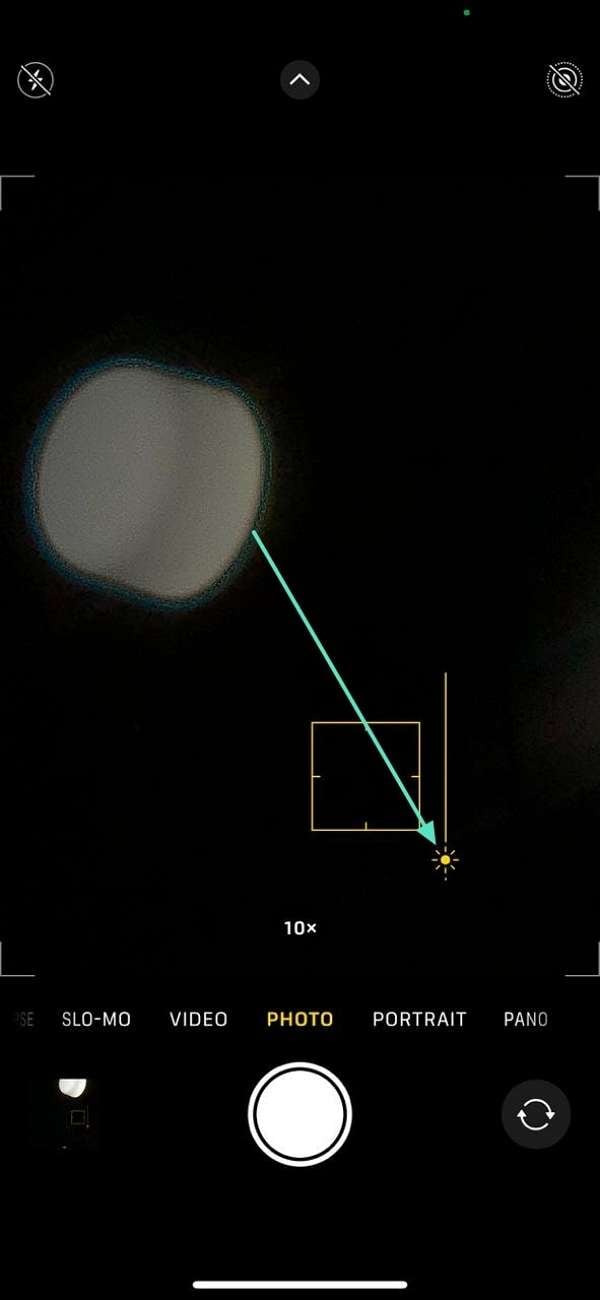
Solution 3. Make Sure That HDR is Enabled and Decrease the Exposure
Instructions. After opening the Camera app on your iOS device, focus on the moon or any illuminated object. As you focus, swipe down on the screen when you see the "Exposure" icon.
Part 6: Video Guide HDR on your iPhone device
HDR photography is a really cool technique that can really make your content more appealing. We have provided you with all the necessary information regarding HDR photography on your iPhone.
However, if you still have any queries, here is a link to a very useful video.
Final Words
iPhones all around the world are known for their fantastic camera results. With each new model of the iPhone, Apple tends to introduce some cool new features, such as the HDR feature.
Although iPhones have had the HDR feature for some time now, its usage has only increased recently as the trend of aesthetic photography has come forth.
This article perfectly sums up all the information you need in order to capture amazing HDR photos. So, go on and get shooting!
