Hard cuts between two video clips can sometimes disrupt the flow of your video, so in today’s tutorial, we are going to show how to apply transitions to the footage you’re editing on Filmora9’s timeline.
Using Video Transitions in Filmora9

The raw footage often contains shots you don’t want to include in the final version of your video. That’s why you need to cut the video clips and remove all of the segments you don’t want to use. The cuts between two video clips can sometimes be too rough or too sudden which can affect how smoothly your video runs.
A transition can make switching between two shots more gradual and indicate to the audience that a new scene or a sequence is starting. Transitions can also help you to keep your audience’s attention by concealing hard cuts that can take the viewer out of the story.
Before you add a transition to a project you’re working on, you should first make the cuts at the specific points where you want a video clip to end or start. Afterward, you should make sure that there are no gaps between the two video clips, and then click on the Transitions tab that provides over a hundred transitions that can be added to the editor’s timeline with a single click.
Adding Transitions
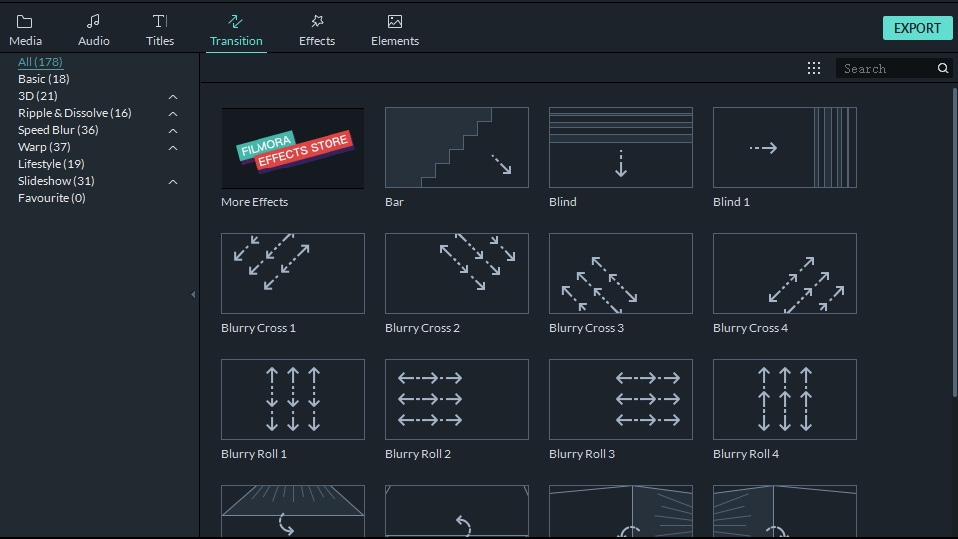
The transitions featured in the Filmora9 are divided into categories like Basic, 3D or Ripple & Dissolve. You can find the certain transition by typing keyword in the searching bar as well.
You can either position the playhead at the exact location on the timeline and click on the plus icon that is displayed over the Fade transition to add it to the timeline or you can drag and drop the transition at the beginning or the end of a video clip.
Adjusting Transitions
Double-click on the transition applied in the timeline to adjust its duration or switch between different transition modes. You can alter the duration of a transition by inserting the new value into the Duration box, and if you would like to set the same duration for all transitions you add to a project you should click on the Apply to All button.

There are three transition modes available, depending on where you want to place your transition. The Overlap mode enables you to start a transition in one shot and finish it in the second one. The Prefix mode places the transition before the cut, while the Postfix mode will position the transition after the cut.
The duration or the mode of a transition can also be adjusted by click-grabbing the transition or moving one of its edges to the left or the right.
Applying Transitions to Multiple Clips
Filmora9 also provides some efficient ways to apply transitions to multiple clips quickly.
To apply the same transition to all the cuts in your video, select them on the timeline by click-dragging your mouse over the portion of the timeline first. Afterward, you should right-click on the transition you’d like to add to the project, and then select the Apply to Selected Clips or Random to Select to apply.
