What is a Watermark?
Watermarks are visible stamps on media files i.e., pictures and videos, deliberately left by a company, a YouTuber, or a website to endorse themselves or their brand. Also, it’s an ingenious way to safeguard one’s copyright, simply by leaving behind a visible signature on demos, samples, or tutorials. On successfully embedding it, one can rest assured that it will prevent Netizens from unlawfully stealing one’s intellectual property. In simple words, it’s a mark that best differentiates a creator from the rest.
Benefits of Watermarks
As we all know, the clarity of a concept demands both definition and an example. In the absence of the later, the prior seems incomplete. Therefore, for the sake of precision, let us bring out an instance where watermark plays an important role.

Source: www.plagiarismtoday.com
In Hollywood, movies often embed a message, showing the date of projection and the beamer ID, much like the image above. This is just a trick to discourage the creation of pirated tapes of blockbuster movies. The watermark here helps Hollywood to catch the theatre, where such an illegal act of camcording a movie has been committed by pressurizing the authorities of the theatre to investigate into the matter. Such is the power of a watermark!
Now the question is – how to insert a watermark on your creation. If you have Wondershare Filmora9 at your disposal, you can effortlessly do so by following just a few simple steps. Let us enumerate the same for you to understand in the upcoming section.
How to Add a Watermark and Adjust its Opacity
All it takes is 4 easy steps to embed a video clip or an image to another video. Let’s take you to it step-by-step.


Step 1: Import the Video and the Watermark file to Filmora9

The foremost step is to trace the Import button on the interface and add files, i.e., the watermark video/picture and the primary video on which it is to be embedded. The best part is that Filmora9 supports almost all file formats, starting from PNG, JPG, MP4, AVI, BMP, WMV, etc. so you can easily pick one and add it to this video editor.
Step 2: Add both video and watermark Files to the Timeline
![]()
Now, make sure you have the background video on the first row of the timeline. Then, drag and drop the watermark file on the track just above the occupied timeline. The latter will appear short. So, you need to extend it to match the duration of the background video. To successfully do so, place the mouse pointer on the edge of the watermark file and wait for the double-arrow cursor to appear. On showing up, drag it along the duration of the background video.
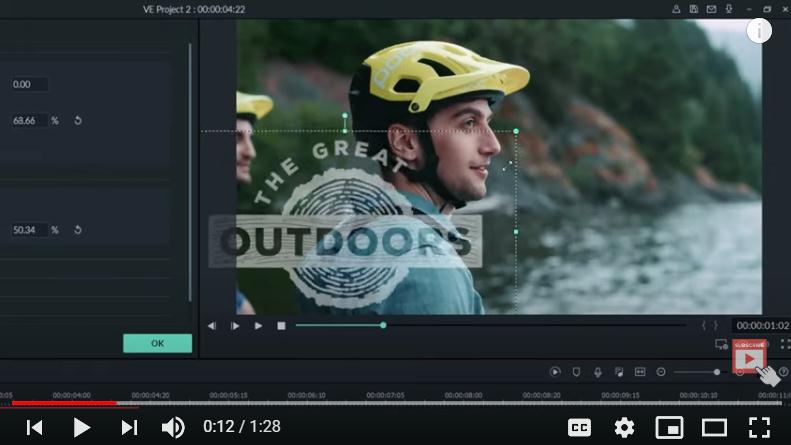
Step 3: Tweak the Watermark
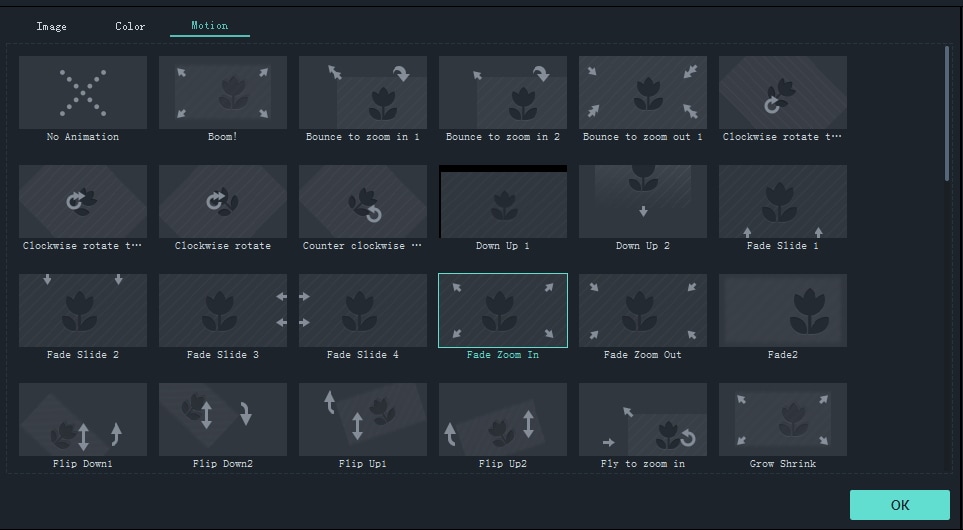
Now comes the most important part. Under this step, you will learn how to customize the watermark according to your needs using Transform, Compositing, Shape, Motion, etc. While Motion lets you select from 30 different effects to animate your watermark, Size will enable you to resize your embedded watermark.
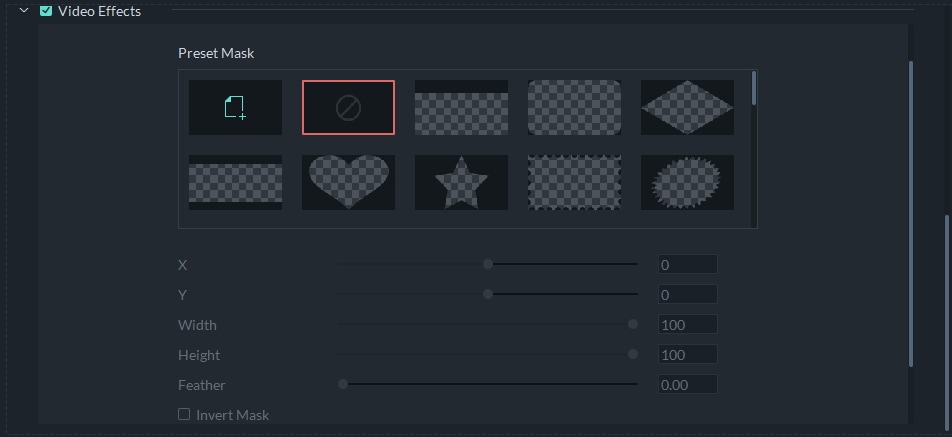
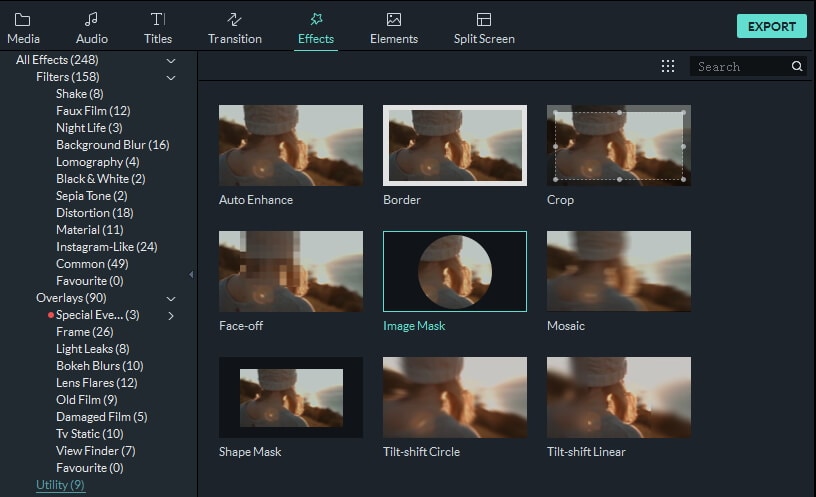
Similarly, Preset Mask will allow you to achieve the perfect guise. You can also shape up your watermark image by clicking on the Effects tab and selecting a desired one from plenty of them.
You can also adjust the Opacity of the watermark image by clicking on Compositing and tweak the percentage to either make the logo more visible or less visible.
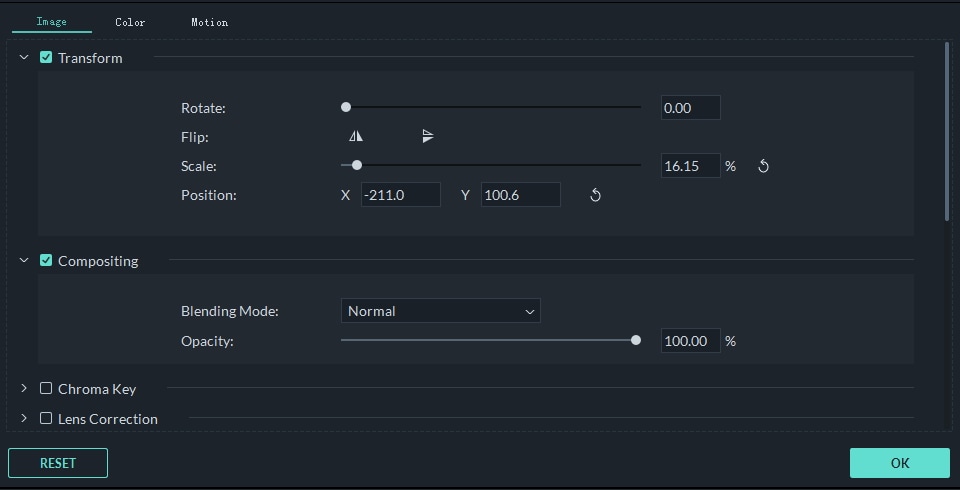
A word of advice would be to go for the latter so that you do not distract your audience with it. Also, an out of proportion logo appearing awkwardly on the center will not look decent. Therefore, it’s better to Scale it down to a size you are comfortable with using the slider and reposition it on one end of the screen.
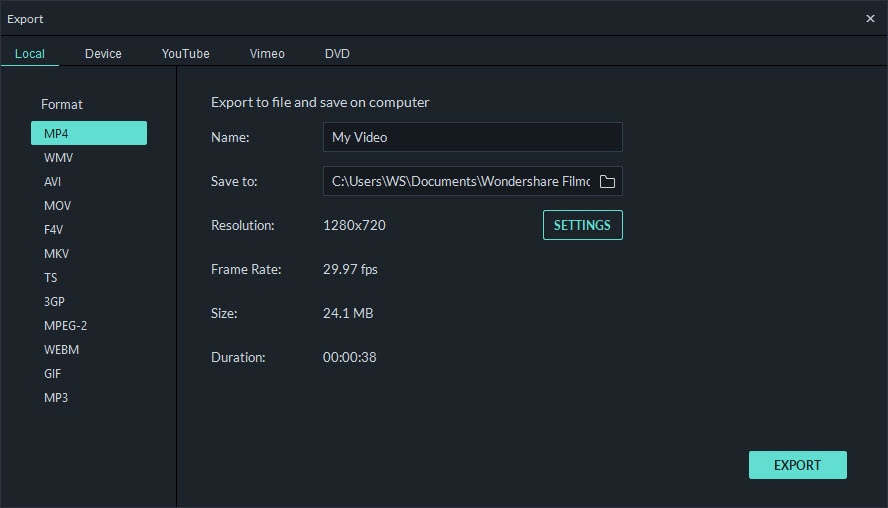
Step 4: Export the Saved Watermarked Video
Complete the process by clicking on Export and saving the watermarked video in a format of your choice. If you are an avid YouTuber, you can upload it directly over there or burn it to DVD to keep it as a backup.
Easy, isn’t it? Well, go ahead and try it out yourself. We bet you would enjoy embedding one to your created video and do not forget to take a cue from the enclosed video for clarity. Happy watermarking!
