This tutorial will show you how to import media, how to use the Filmora9’s Instant Cutter tool to import large files, and how to organize imported media in order.
Importing Media into a project
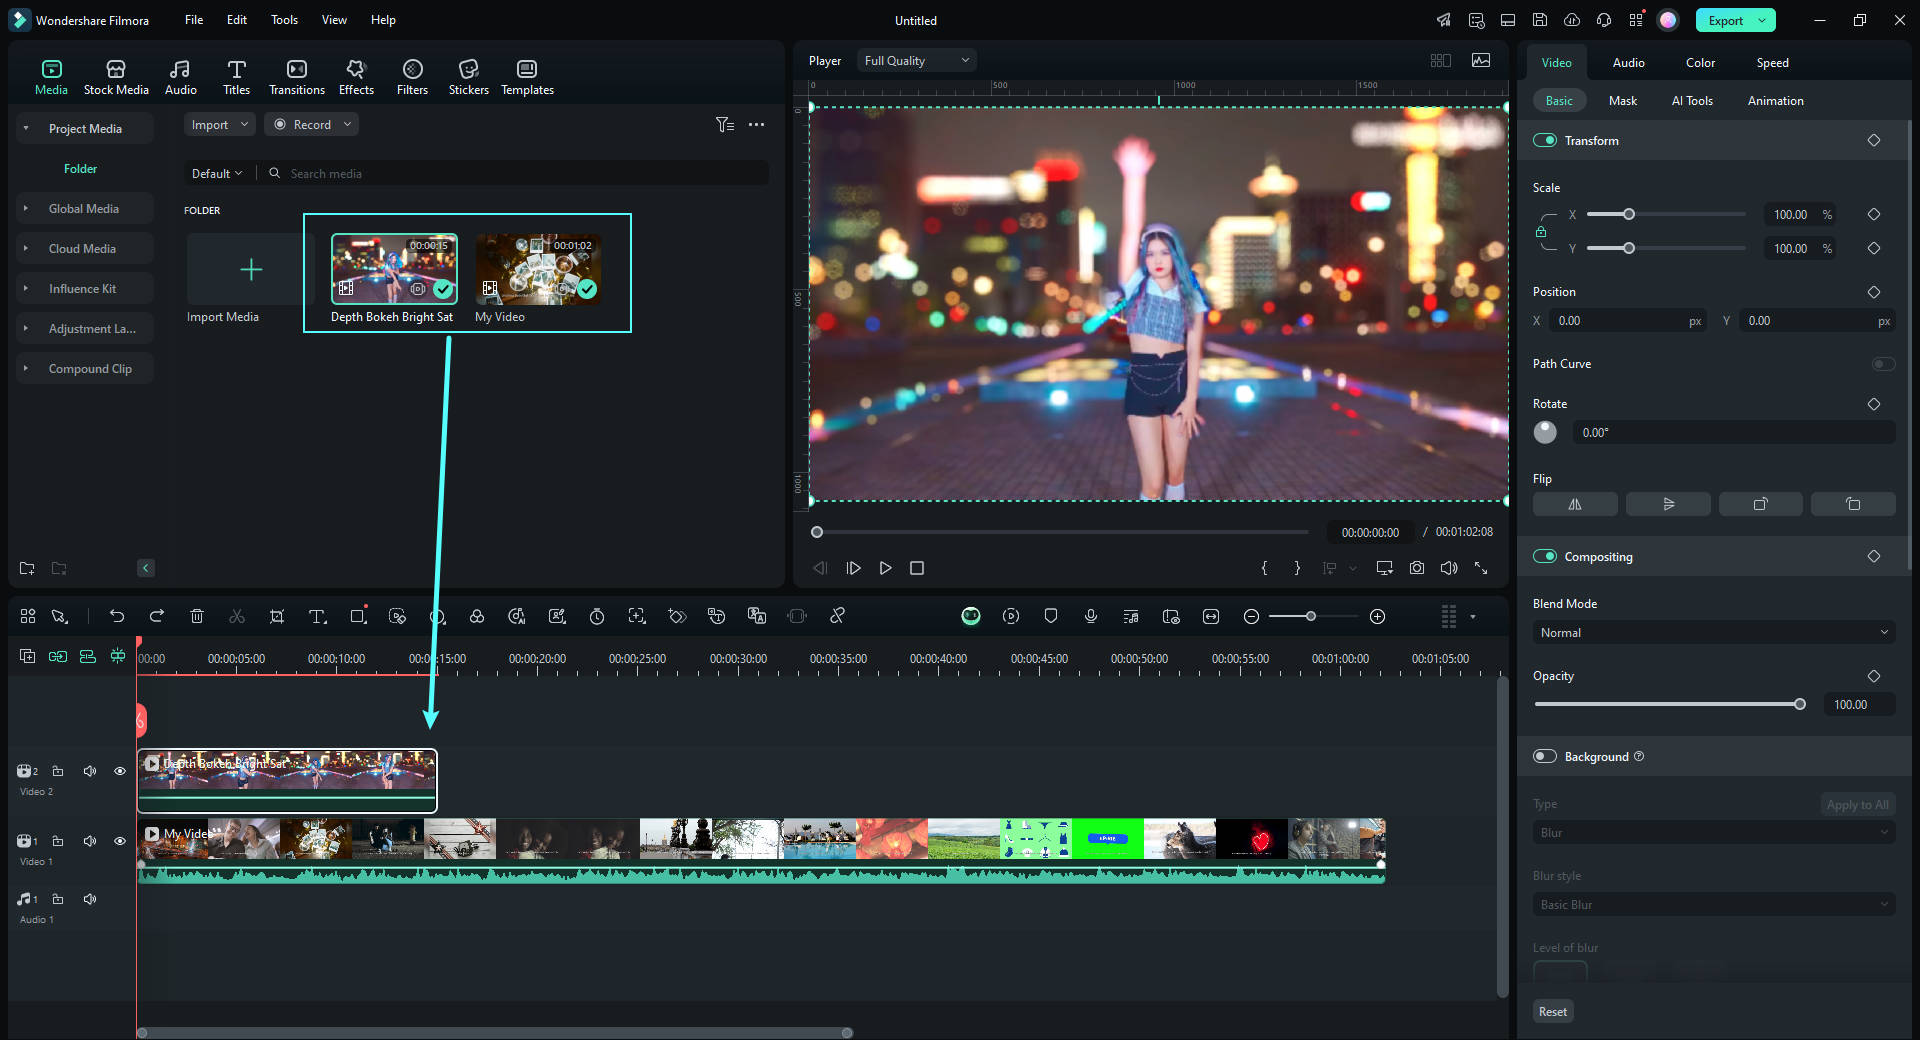
Filmora9 lets you add media files to a project in a variety of ways. Clicking on the Import Media Files Here button in the Media tab is probably the easiest way to import an audio or a video file to a project in Filmora9.
Afterward, you just have to navigate to the folder in which the media file you want to import is located, and click on the OK button. Go to the Import drop-down menu if you want to import media to Filmora9 directly from a camera, social media account or your phone.

Filmora9 also lets you import an entire folder into a project, which makes adding a large number of files to the Media tab much faster. Alternatively, you can import media assets by simply dragging them from a folder on your computer and dropping them to the Media tab.
Using the Instant Cutter Tool
Click on the Import With Instant Cutter Tool option in the Import drop-down menu if you want to render a video quickly.

After the Instant cutter appears on the window you can click on the Open File button that is located in the Trim tab in the upper right corner of the window. Select the MP4 files you want to import and click OK.
You’ll see the preview of your video on the right side of the Instant Cutter window. The timeline is located directly below the preview window and you can use the playhead to scrub through the video.
Click-grab one of the light blue handles at the ends of the timeline to trim the video clip and select which portion of it you want to remove.
Head over to the Merge tab if you want to edit and combine multiple video clips with Instant Cutter. Select the files you want to import and then proceed to arrange the order in which you want the clips to appear in the video. The clip at the top will appear first and the one at the bottom will be last.
Once you’ve arranged the videos, you should click on the Export button and use the Export window to change the file’s name or set a destination folder for the clip you’re creating.
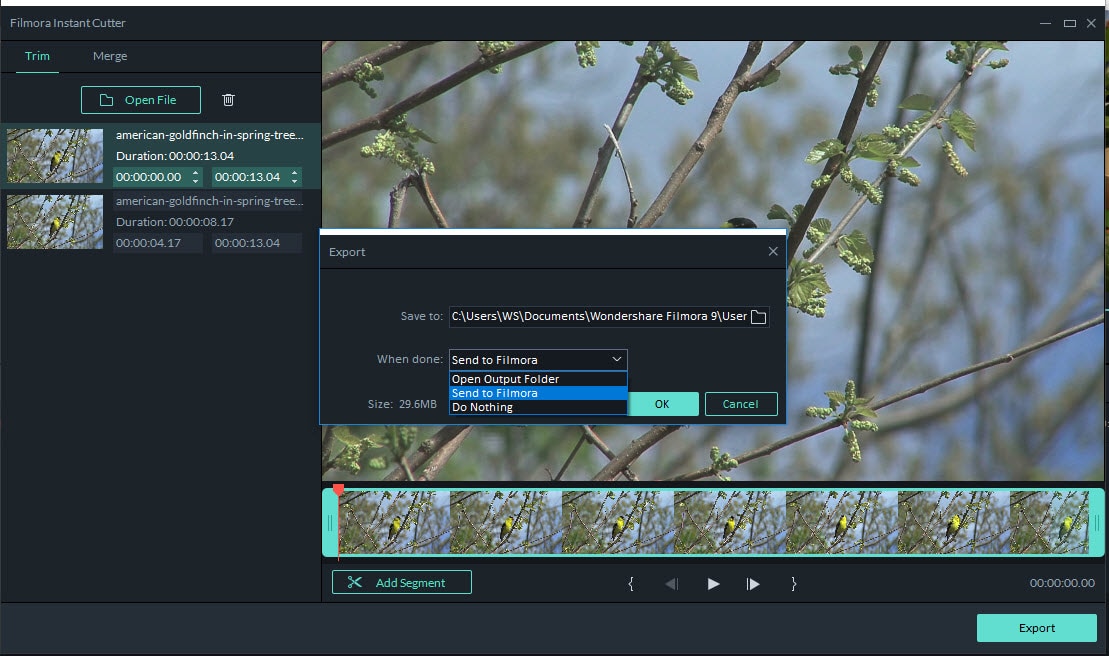
Go to the When Done drop-down menu and select Send to Filmora to send the clip into Filmora9, or select Open Out Put Folder to open the destination folder as soon as the video is exported.
Organizing Media Assets
On larger projects you’re going to be working with a lot of different media files. Filmora9 lets you organize those files efficiently so you don’t have to waste time searching for them. Click on the View options icon to access the View, Sort by and Group by submenus.
The icon is located next to the Search bar in the upper right corner of the Filmora9’s media tab. Go to the View submenu and select the List View option if you want to reorganize your media and see the Resolution, Frame Rate and other information about all video clips you import to a project.

The Filter by Type icon, that is located next to the View options icon lets you choose which type of files are going to be displayed in the Media tab, so you can view the image, audio and video files separately.
In the lower-left corner of the Media tab, you can find the Create a new folder and Delete folder icons. Placing footage into different folders can help you edit your videos more efficiently. Right-click on a folder you created to rename it, so you know which type of media files you added to it.

If at any point you no longer need a folder you created, you should select it and then click on the Delete folder icon.
