

 100% Security Verified | No Subscription Required | No Malware

 ChatGPT
 Perplexity
 Gemini
 Claude
 Grok
Grok
These Panasonic S9 LUTs-inspired filters are designed for hybrid creators who want fast, cinematic looks for their travel content without spending hours color grading.
Use these styles as a shortcut to match your Panasonic S9 footage and keep a consistent visual identity across reels, vlogs, and travel films.
In this article
Golden Hour Coastlines and Beach Escapes
Sunset Gold Glow
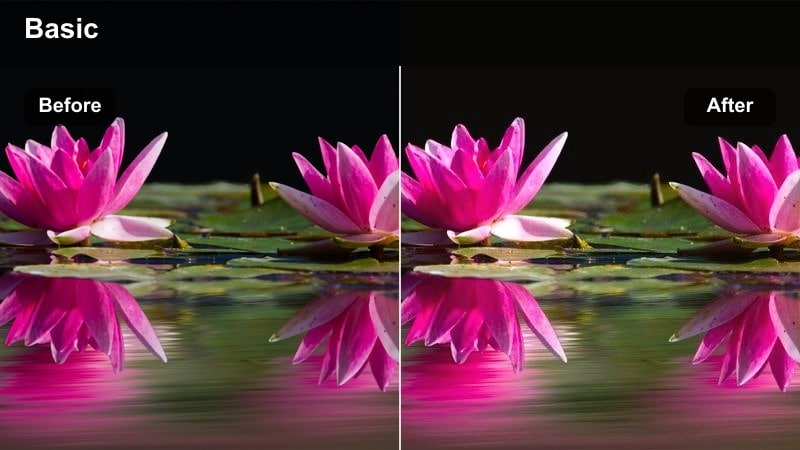
- Effect look: Warm golden tones with lifted shadows and soft roll-off in highlights.
- Best for: Beach sunsets, coastal walk-and-talks, and warm evening city waterfronts shot on the Panasonic S9.
- Editing tip: Dial back saturation on reds and oranges slightly to avoid clipping in intense S9 sunset scenes.
Sunset Gold Glow adds a rich, amber cast to Panasonic S9 travel footage, pushing the warm end of the spectrum while keeping highlights smooth and cinematic. In Filmora, this filter is ideal when your golden hour shots look a bit flat or neutral straight out of camera, especially if you are using a log or flat picture profile. The lifted shadows help preserve detail in darker foregrounds like railings and rocks, while the gentle highlight roll-off keeps the sun and sky from looking harsh.
To make the most of this look in Filmora, apply the filter on an adjustment layer above your entire sunset sequence, then fine-tune saturation and HSL for reds and oranges so skin does not overshoot into cartoonish territory. If faces become too orange, selectively reduce orange saturation and slightly boost luminance so your subject remains natural against a rich, glowing sky. Combine the filter with subtle speed ramps and slow push-ins for postcard-style travel reels that feel cohesive from clip to clip.
Match Panasonic S9 LUTs with AI Color Palette
Filmora's AI Color tools let you quickly sync your Panasonic S9 sunset hero shot with the rest of your timeline, without building complex grading nodes. Capture one frame where the Sunset Gold Glow look feels perfect, then use AI Color Palette to spread that same mood across your b-roll, cutaways, and talking-head shots.
This workflow is especially useful for hybrid creators who move between beaches, city waterfronts, and interiors in a single vlog and need the overall color story to stay consistent. Instead of grading each clip by hand, you establish one master look and let AI handle the heavy lifting.
 secure download

Preview Filters on Panasonic S9 Footage Instantly
Before committing to a full grade, you can drag different Filmora filters onto a short Panasonic S9 test clip to see how they respond to your real lighting and locations. This is perfect for comparing warm sunset looks, cool mountain grades, and neutral city tones side by side in the preview window.
Once you have a favorite, you can lock in that style and then batch-apply it to your main sequence using adjustment layers. This keeps your workflow fast and lets you refine just one layer instead of every individual shot.
secure download1000+ Video Filters and 3D LUTs
Beyond these Panasonic S9-inspired looks, Filmora includes a large library of filters, effects, and 3D LUTs that you can stack to create your own signature hybrid creator style. Start with a base filter that matches your scene, then refine color with HSL, curves, and split toning for precise control.
When you have dialed in a combination that works, save it as a custom preset so you can apply the same LUT-like grade to future trips, client projects, and social edits with a single click.
secure downloadPastel Coast Dream
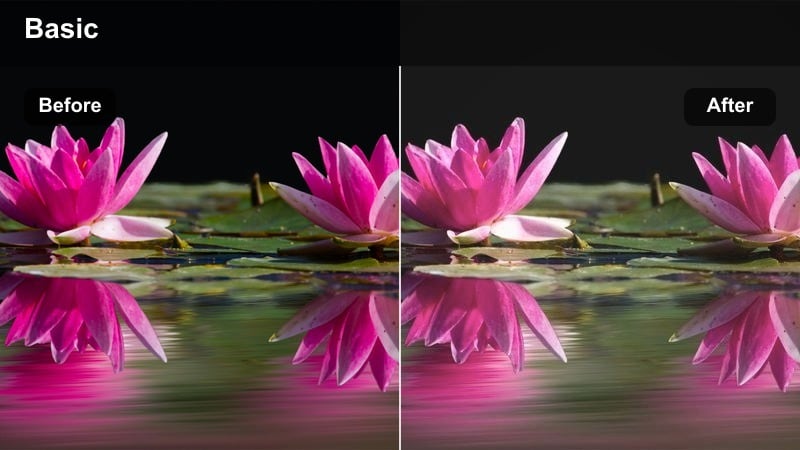
- Effect look: Soft pastel color shift with muted contrast and creamy highlights.
- Best for: Overcast beach days, pale blue seas, and relaxed coastal B-roll from the Panasonic S9.
- Editing tip: Pair this filter with slightly slower shutter and subtle motion blur to enhance the dreamy pastel feel.
Pastel Coast Dream is perfect when your Panasonic S9 beach footage feels gray and uninspiring under cloudy skies. In Filmora, this filter softens contrast, lifts blacks, and shifts colors into gentle pastel tones, turning flat boardwalks and pale blue oceans into airy, cinematic scenes. The creamy highlights help you avoid harsh edges, especially on white sand and light clothing.
For best results, apply this filter to clips that already have a soft, smooth motion, like slow pans or stabilized walking shots. You can slightly raise black levels and reduce clarity in Filmora to emphasize the milky pastel character even more. Avoid crushing shadows so the subtle color shifts remain visible, and use this look for slower sections of your travel edit such as intros, outros, or reflective montage moments.
Teal Surf Contrast
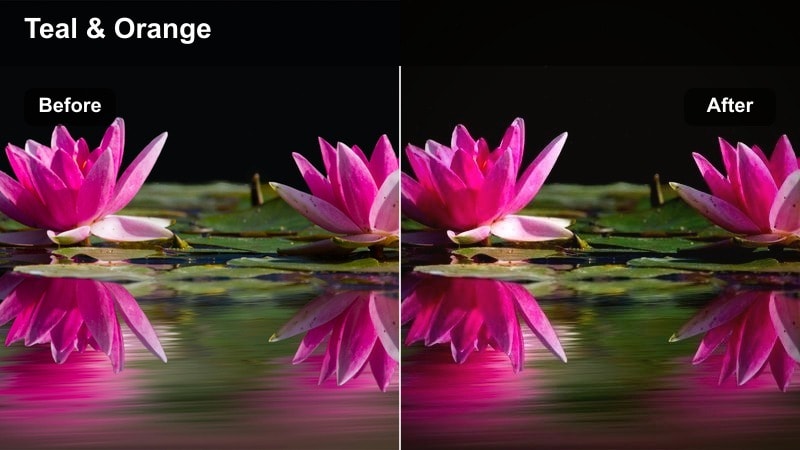
- Effect look: Punchy teal water, crisp whites, and deep cinematic contrast.
- Best for: Clear tropical water, cliff jumps, drone overlays, and surf shots on the Panasonic S9.
- Editing tip: Lower overall saturation by 5-10 percent if the teal starts overpowering skin tones and sand details.
Teal Surf Contrast brings out the intense blues and teals in your Panasonic S9 ocean footage, giving tropical locations a high-energy, cinematic punch. In Filmora, it increases local contrast and clarity so wave textures, cliffs, and rock details pop while whites in foam and clouds stay bright and clean. This makes it an excellent choice for drone passes, action-heavy surf shots, and cliff-diving sequences.
Because the teal emphasis can overpower skin tones, use Filmora's HSL controls to selectively protect oranges and yellows, keeping faces and sand more natural. Apply the filter to an adjustment layer covering your ocean sequence, then reduce overall saturation slightly if you notice color banding in skies or water, especially with 8-bit S9 clips. Pair this look with faster cuts, dynamic sound design, and speed ramps to create energetic travel reels that showcase the power of coastal locations.
City Nights and Street Neons
Neon Cyber Trails
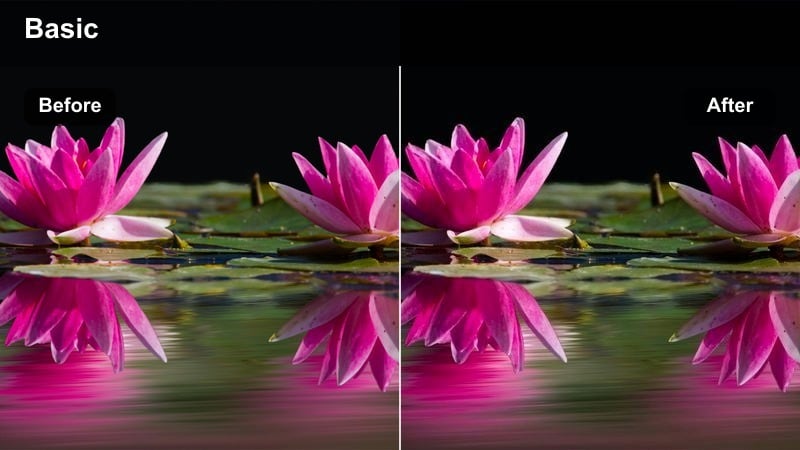
- Effect look: Cyberpunk-inspired teal and magenta shift with boosted neon signs and deep blacks.
- Best for: Night markets, neon-lit alleys, and rainy city streets captured with the Panasonic S9.
- Editing tip: Add a subtle glow or bloom effect around neon lights to enhance reflections and atmosphere.
Neon Cyber Trails transforms ordinary city night footage from your Panasonic S9 into a stylized, cyberpunk-inspired world. In Filmora, this filter pushes blues toward teal and reds toward magenta, amplifying the color of neon signs, LED billboards, and shop fronts while sinking shadows into rich blacks. Reflections on wet pavement and umbrellas take on a dramatic, futuristic character that works well for energetic street sequences and night markets.
To keep noise under control, expose your S9 footage slightly to the right in camera using the higher native ISO, then apply the filter and gently add contrast in Filmora. You can layer on a light glow or bloom effect and a subtle vignette to pull attention toward your subject. Finish the look with quick handheld cuts or gimbal tracking shots synced to music for night vlogs and reels that feel like scenes from a neon-drenched film.
Amber Street Haze
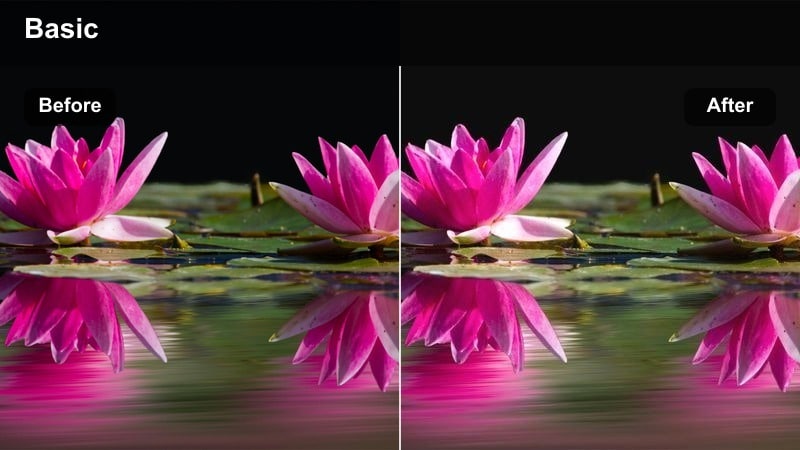
- Effect look: Warm amber glow on streetlights with softened contrast and gentle film-like grain.
- Best for: Handheld street walks, cafe exteriors, and bus stops lit by sodium lamps on the Panasonic S9.
- Editing tip: Lower clarity slightly to make the haze feel more cinematic and less digitally sharp.
Amber Street Haze leans into the warmth of sodium-vapor and tungsten city lights, giving Panasonic S9 night footage a nostalgic, filmic glow. In Filmora, this filter softens contrast, adds warmth to midtones, and introduces a subtle grain texture that helps digital clips feel more organic. It works especially well for slow handheld walks past cafes, crosswalks, and bus stops where practical lights and signage are your main sources.
After applying the filter, slightly reduce clarity or sharpness so the haze feels intentional and cinematic rather than like lens fog. If skin tones shift too far toward pink or orange under mixed lighting, nudge the global tint slightly toward green and use HSL to refine oranges. This look pairs beautifully with slower pacing, ambient street sounds, and voiceovers in your travel films, giving your night sequences a warm, reflective mood.
Urban Chrome Noir
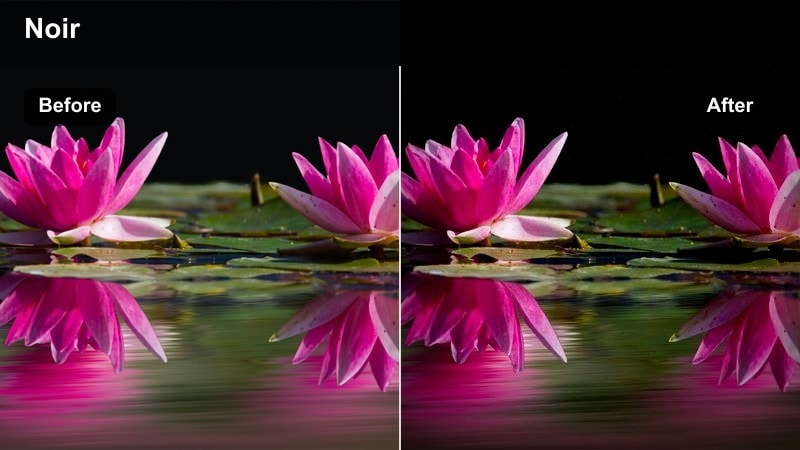
- Effect look: High-contrast monochrome with silver highlights and inky shadows.
- Best for: Architectural details, silhouettes, and moody backlit streets from the Panasonic S9.
- Editing tip: Expose slightly to the right in-camera, then pull down shadows when grading for a cleaner noir look.
Urban Chrome Noir strips color away and focuses your Panasonic S9 city footage on light, shape, and contrast. In Filmora, this filter pushes blacks deep while keeping highlights bright and silvery, ideal for backlit streets, silhouettes, and strong architectural lines. Reflections on wet roads, glass, and metal become more graphic, making your travel b-roll feel like frames from a classic noir film.
For the cleanest results, shoot slightly brighter in camera, then use Filmora to bring shadows down until you reach the desired level of drama without crushing detail. Add a subtle vignette around your subject to guide the viewer's eye and emphasize streetlights or windows as key light sources. This look is great for chapter breaks, openers, or moody interludes in city-focused travel edits where you want a strong stylistic contrast to your colorful daytime footage.
Mountain Trails and Epic Vistas
Alpine Clean Cinema
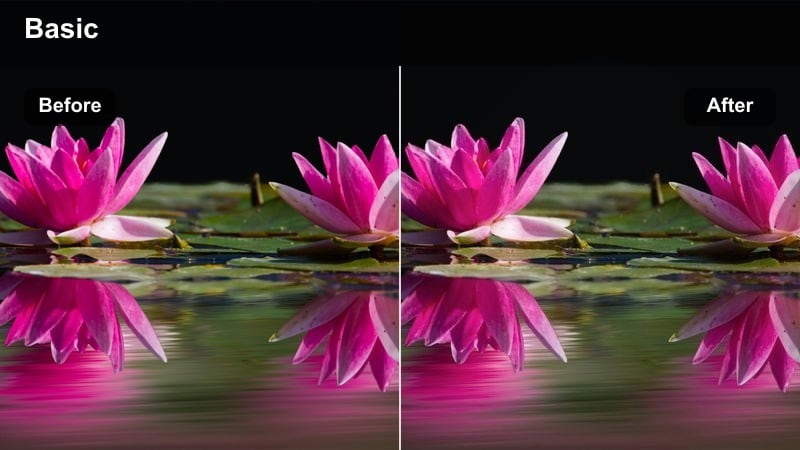
- Effect look: Cool, clean tones with gentle contrast and crisp detail in clouds and ridgelines.
- Best for: High-altitude hikes, ridgeline drone passes, and wide establishing shots on the Panasonic S9.
- Editing tip: Pull back vibrance slightly while keeping clarity high to preserve a natural, documentary feel.
Alpine Clean Cinema is built for big mountain landscapes where you want realism with a subtle cinematic polish. On Panasonic S9 footage, this Filmora filter gently cools the overall image, adds moderate contrast, and enhances fine detail in rocks, snow, and clouds without making the scene look overly stylized. It is excellent for establishing shots, drone passes along ridgelines, and trekking sequences where the environment is the star.
To keep the documentary feel, slightly reduce vibrance while leaving clarity and sharpness relatively high so textures remain crisp. Apply the filter consistently across your mountain sequences, and use Filmora's scopes to ensure clouds and snow stay just under clipping, especially if you shot in a log profile. This creates a clean, cohesive outdoor look that transitions seamlessly into more stylized filters for cities or coasts later in your travel edit.
Wanderer Film Fade
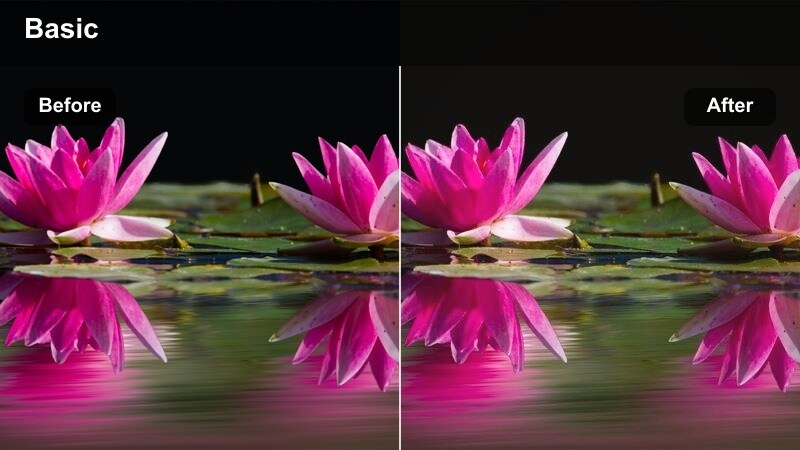
- Effect look: Soft faded contrast with slightly lifted blacks and subtle warm highlights.
- Best for: Story-driven hiking sequences, campsite scenes, and reflective travel voiceovers using the Panasonic S9.
- Editing tip: Cut between close-ups and wides while keeping the filter consistent to create a cohesive filmic narrative.
Wanderer Film Fade gives your Panasonic S9 mountain and campsite footage a gentle, nostalgic character perfect for reflective storytelling. In Filmora, this filter slightly lifts blacks, softens contrast, and adds a hint of warmth to highlights, making dusk, dawn, and overcast shots feel like scenes from an indie travel film. It shines when you are building emotional sequences around voiceovers, journal entries, or quiet moments on the trail.
Apply Wanderer Film Fade across both wide landscapes and close-up details to keep your narrative visually unified. You can add a light film grain layer in Filmora for extra texture, but keep the strength low so it complements rather than distracts from the scenery. This look works especially well when you mix slow motion, gentle camera moves, and longer cuts that give the viewer time to absorb the environment and your story.
Peak Punch Vivid
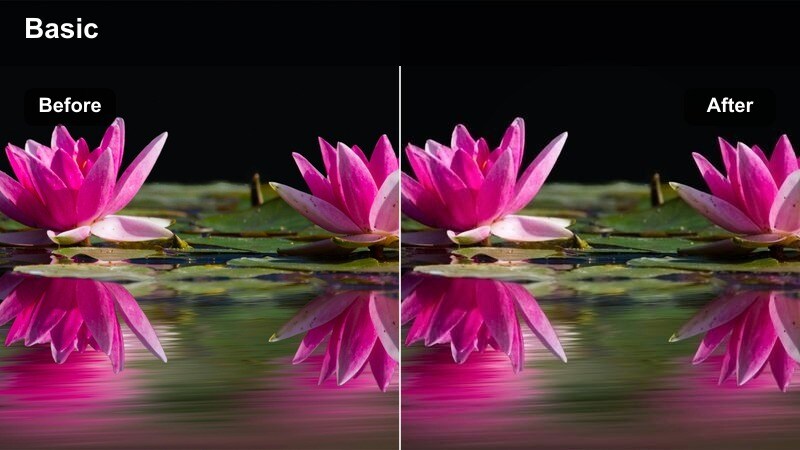
- Effect look: Vibrant greens and blues with strong midtone contrast and crisp micro-detail.
- Best for: Daytime summit views, ridgeline reveals, and fast-moving hiking B-roll shot on the Panasonic S9.
- Editing tip: Use this filter sparingly on close-up skin shots to avoid oversaturated faces under bright sun.
Peak Punch Vivid is designed for those triumphant summit moments when you want the landscape to explode with color. On Panasonic S9 footage, this Filmora filter boosts saturation in greens and blues, adds firm midtone contrast, and enhances micro-detail, making rocks, grass, and distant peaks appear crisp and energetic. It is ideal for hero shots, quick ridgeline reveals, and dynamic B-roll that marks key milestones in your hike.
Because the look is intense, reserve it for wide scenes and avoid applying it heavily to close-ups of faces in harsh sunlight. In Filmora, you can tame highlights and cool the white balance slightly before applying the filter to prevent clipped skies and shiny skin. Mix Peak Punch Vivid with smoother, more neutral looks in the rest of your edit so the most dramatic summit scenes really stand out when they appear.
Urban Daylight and Travel Transitions
City Roam Neutral
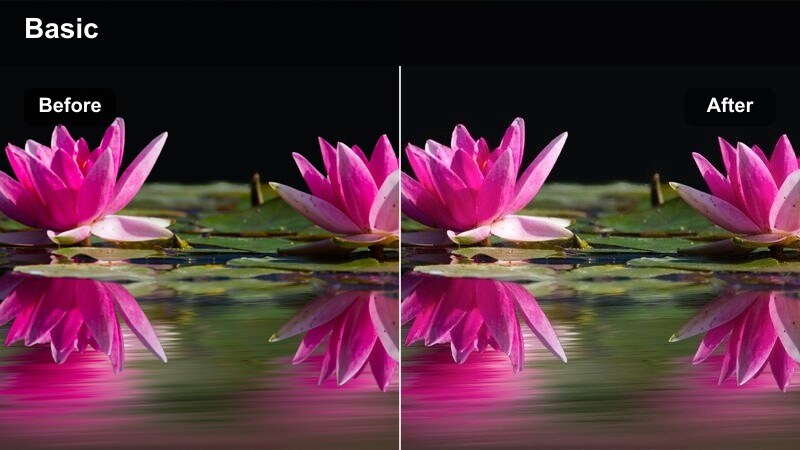
- Effect look: Balanced neutral color grade with mild contrast and slightly softened highlights.
- Best for: Daytime city walks, metro entrances, and wide street scenes for hybrid creators on the Panasonic S9.
- Editing tip: Use this as a base filter, then add speed ramps and whip pans for snappy social edits.
City Roam Neutral is a versatile everyday look for Panasonic S9 city footage, giving you a clean foundation that works across many lighting situations. In Filmora, it gently corrects color, adds mild contrast, and softens highlights to keep buildings, streets, and crowds looking natural without harsh edges. This makes it ideal for walk-and-talk vlogs, B-roll of intersections, and general coverage around metro stations and plazas.
Use City Roam Neutral as your base layer across an entire city sequence, then build stylistic elements like speed ramps, transitions, and overlays on top. Saving this setup as a custom preset in Filmora means you can quickly reapply the same neutral city look for every trip, giving your channel a recognizable style. When you want more drama, you can stack a stronger creative filter on selected hero shots while leaving the rest of the timeline in this clean, flexible grade.
Transit Motion Matte
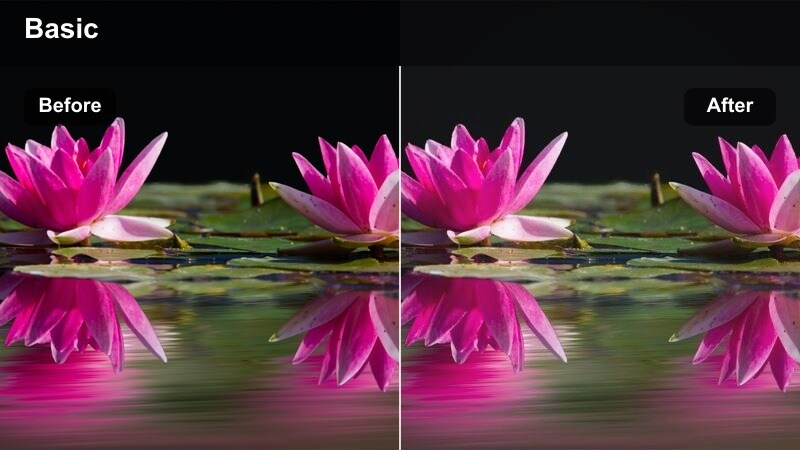
- Effect look: Soft matte blacks with slightly desaturated colors and gentle motion-friendly contrast.
- Best for: Metro rides, airport walkways, train windows, and any moving shots captured with the Panasonic S9.
- Editing tip: Combine with motion blur or speed ramp effects to accentuate the sense of travel and movement.
Transit Motion Matte is tuned for those in-between travel moments filmed on the Panasonic S9, like train rides, escalators, and airport corridors. In Filmora, this filter raises black levels for a matte finish, gently lowers saturation, and keeps contrast smooth so motion blur and reflections feel cinematic rather than harsh. It is perfect for bridging your main travel chapters with atmospheric transit sequences.
Apply this filter over clips that already contain motion, then layer in Filmora's motion blur or speed ramp tools to emphasize the feeling of time passing and distances covered. For reflective voiceovers or slower montages, keep playback at real-time or light slow motion; for energetic montages, increase cut frequency while keeping the same matte look for continuity. This approach helps unify your transitions stylistically so the audience always knows they are moving from one place or story beat to the next.
Rooftop Cinematic Pop
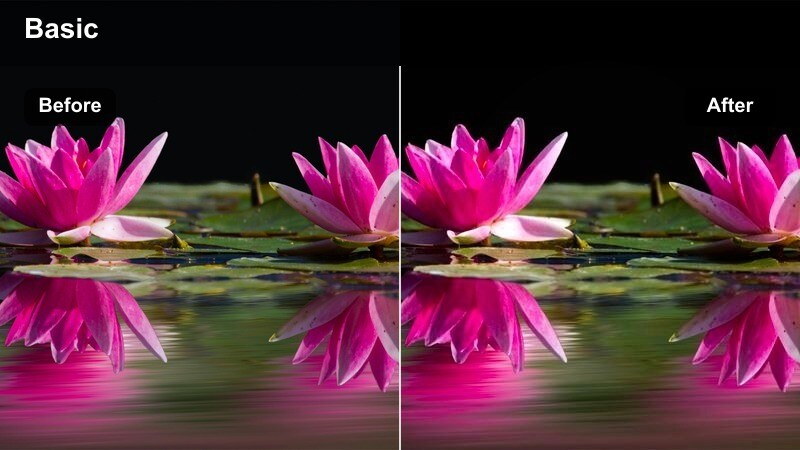
- Effect look: Warm midtones, cool shadows, and strong contrast for a cinematic split-tone feel.
- Best for: Rooftop overlooks, skyline reveals, and time-lapse sequences using the Panasonic S9.
- Editing tip: Add a gentle push-in or parallax move in post to complement the strong cinematic contrast.
Rooftop Cinematic Pop gives Panasonic S9 skyline footage a bold, modern movie look by combining warm midtones with cool, deep shadows. In Filmora, this split-tone style makes your subject stand out against skyscrapers and cityscapes, with strong contrast that works well for golden hour and blue hour shots. It is ideal for rooftop overlooks, drone-to-ground transitions, and time-lapse sequences that introduce a new city in your travel films.
To enhance the cinematic punch, apply the filter and then add a slow digital zoom, push-in, or parallax move using Filmora's keyframing tools. Make sure to stabilize handheld rooftop shots using both the Panasonic S9's in-body stabilization and Filmora's post-stabilization so the strong contrast does not accentuate camera shake. Used on key establishing shots, this filter can become a signature look that anchors your urban travel series visually.
Tips for Using Panasonic S9 Filters in Filmora
- Shoot in a flat or log profile on the Panasonic S9 to give these Filmora filters more room to shape color and contrast without clipping highlights or crushing shadows.
- Set white balance manually on location so your filters behave consistently across multiple Panasonic S9 shots filmed in the same scene.
- Create a base correction layer for exposure and white balance in Filmora before adding any stylized filter or Panasonic S9 LUT-inspired preset on top.
- Use adjustment layers to apply a single filter across entire sequences instead of clip by clip, speeding up your Panasonic S9 travel workflow.
- Keep an eye on skin tones when pushing teal, magenta, or strong split tones, using Filmora's HSL and scopes to keep faces natural.
- Export short test clips to your target social platforms to confirm that compression does not break gradients or oversaturate your chosen look.
- Use waveform and vectorscope in Filmora to monitor exposure and color balance while applying strong Panasonic S9 filters, especially in high-contrast scenes.
- Organize your favorite coast, city, and mountain presets into clearly named folders so you can quickly pick the right look for each new Panasonic S9 trip.
With the right combination of Panasonic S9 LUTs-inspired filters, you can turn raw travel footage into cohesive, cinematic stories in just a few clicks. Dial in a handful of go-to looks for different environments, then apply them consistently using adjustment layers and presets in Filmora.
Experiment with a few signature styles for coastlines, cities, and mountains, then refine them into custom presets that define your hybrid creator brand. Over time, this Panasonic S9 workflow lets you spend less energy on repetitive grading tasks and more on storytelling, pacing, and on-location creativity.
