

 100% Security Verified | No Subscription Required | No Malware


 ChatGPT
 Perplexity
 Gemini
 Claude
 Grok
Grok
These Filmora filters are curated to emulate popular Canon EOS RP LUTs, giving videographers and creators quick, cinematic color grades that match the camera's clean, neutral look.
Use this collection as a starting point for your Canon EOS RP footage, then fine-tune exposure, white balance, and contrast to maintain natural skin tones and consistent color across your edit.
In this article
Golden Hour Street Portraits
RP Soft Sunset Portrait
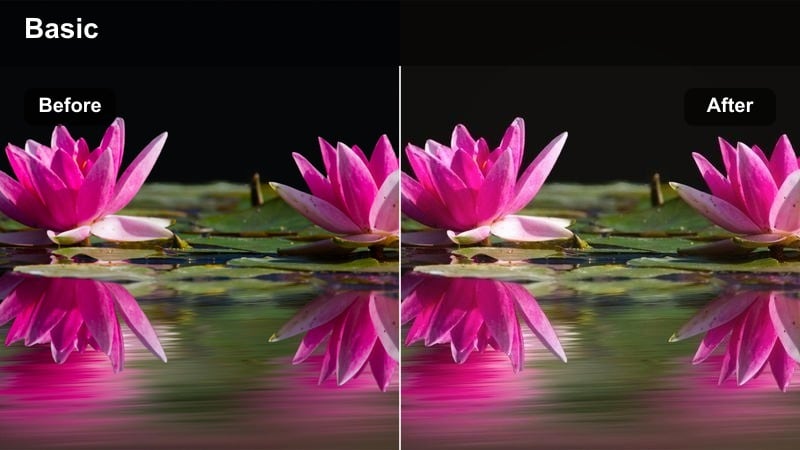
- Effect look: Warm, soft-contrast filter that gently lifts shadows for flattering Canon EOS RP portraits shot at sunset.
- Best for: Golden hour walk-and-talks, handheld EOS RP street portraits, and backlit vlog intros.
- Editing tip: Lower highlights slightly to protect the sky and boost vibrance instead of saturation for smoother Canon skin tones.
RP Soft Sunset Portrait is designed to match the Canon EOS RP clean sensor with a cinematic golden-hour glow. By lifting shadows and softening contrast, it keeps facial features flattering while preserving the subtle color shifts in the sky and background. The warm toning adds a gentle sunset wash without making the image look overly orange or artificial.
In Filmora, apply this filter to your EOS RP clips when you are working with backlit or side-lit portraits. Start by dialing in exposure so that skin is correctly lit, then slightly trim highlights to keep the sky and bright rims under control. Use vibrance adjustments to enrich colors in clothing and the environment while keeping saturation modest so skin tones remain believable and easy to match from shot to shot.
Match Canon EOS RP LUTs with AI Color Tools
Filmora AI color tools help you quickly shape Canon EOS RP footage into consistent, LUT-style looks. After applying a warm portrait filter, you can use AI to balance exposure and white balance so different angles and takes cut together smoothly.
Apply a filter like RP Soft Sunset Portrait as your base, then open the AI color tools to fine-tune tone curves and global balance. This workflow keeps skin tones stable while still giving you room to push creative color contrast when needed.
 secure download

Preview Filters on Canon EOS RP Footage
Filmora live preview lets you scroll through filters on your Canon EOS RP clips and instantly see how each option changes mood and contrast. This makes it easy to audition several looks before committing to a full grade.
Drop a few key shots onto the timeline and toggle different filters, comparing how skin tones, skies, and street colors respond. Once you find a direction that fits your story, you can lock it in and refine the details with standard color tools.
secure download1000+ Video Filters and 3D LUTs
Filmora includes an extensive library of filters and 3D LUTs that pair well with Canon EOS RP footage. You can combine these with the looks in this guide to build signature grades for commercial work, vlogs, and narrative projects.
Mix cinematic LUTs with subtle HSL and contrast changes to maintain a professional, broadcast-ready finish. The wide variety of presets gives you a fast starting point, especially when you need to grade large batches of shots on tight deadlines.
secure downloadRP Urban Gold Glow
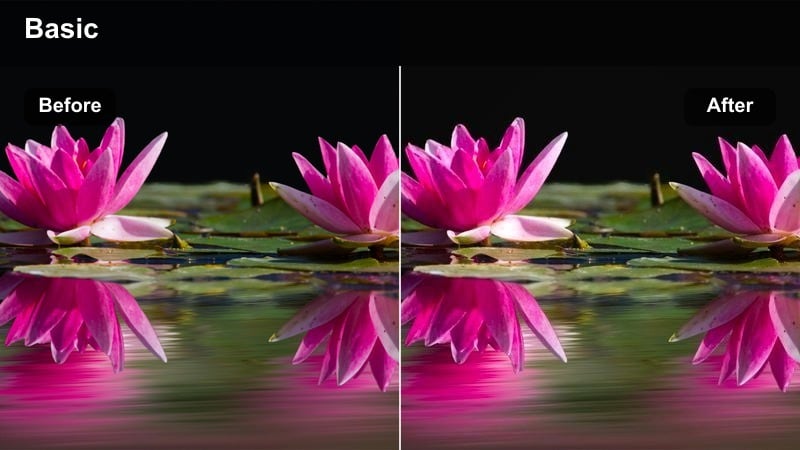
- Effect look: Golden warmth in highlights with clean mids and slightly cool shadows to add depth to EOS street scenes.
- Best for: Canon EOS RP city streets, storefront B-roll, and urban lifestyle portraits shot at dusk.
- Editing tip: Use a subtle vignette to guide the eye to faces and brighten midtones if the street background feels too heavy.
RP Urban Gold Glow brings a stylized but controlled split-tone look to your Canon EOS RP street footage. By emphasizing warm highlights and cooler shadows, it adds three-dimensional depth to buildings, signs, and skin without crushing detail. This works especially well around dusk when streetlights and window reflections start to mix with ambient daylight.
In Filmora, apply this filter and then fine-tune midtone exposure to keep your subject legible against darker backgrounds. Add a soft vignette to push attention toward faces and key details, and use gentle adjustments in the color wheels if the cool shadows feel too strong. This approach preserves the EOS RP natural color while giving your city sequences a cinematic, editorial finish.
RP Creamy Skin Pop
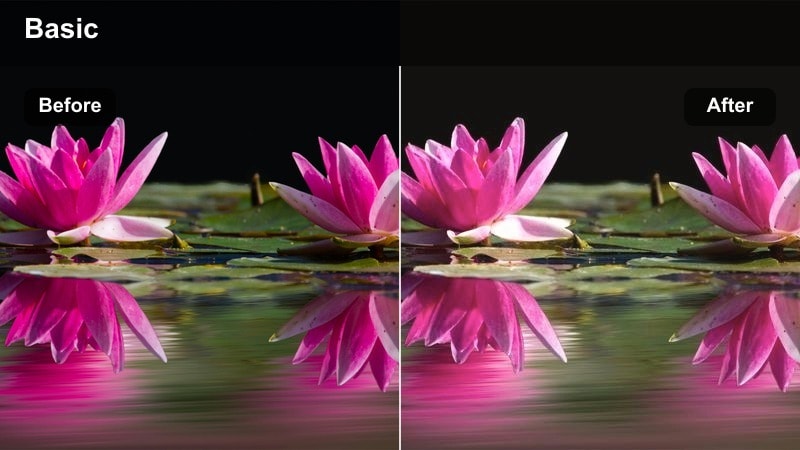
- Effect look: Soft contrast, slight clarity on edges, and gentle pastel warmth for creamy, flattering Canon EOS RP skin.
- Best for: Sit-down EOS RP interviews, beauty content, and close-up street portraits with shallow depth of field.
- Editing tip: Keep sharpening low and rely on micro-contrast; this prevents Canon footage from looking overly digital.
RP Creamy Skin Pop is tuned for interviews and beauty shots where skin tones must look smooth and premium. Its soft contrast curve and subtle warmth help minimize minor blemishes while still keeping eyes, lashes, and hair details crisp. The pastel palette keeps backgrounds gentle so the viewer stays focused on the subject.
Inside Filmora, use this filter on EOS RP clips that feature close-ups or mid-shots of people. Rather than increasing sharpness, lean on the filter s micro-contrast to bring out facial structure. If needed, refine exposure around the face with local adjustments so it remains the brightest and cleanest part of the frame, matching the polished feel of brand or creator content.
Daytime City B-Roll
RP Clean City Neutral
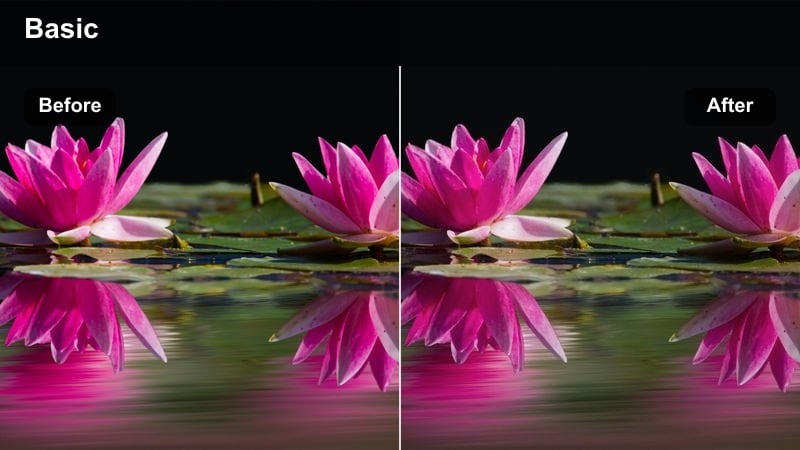
- Effect look: Neutral, low-contrast filter inspired by flat Canon EOS RP LUTs for maximum flexibility in bright city scenes.
- Best for: Daytime EOS RP B-roll of buildings, crosswalks, and establishing shots where you want a natural baseline look.
- Editing tip: Expose slightly to the right in-camera and then pull contrast back in Filmora for cleaner highlights and shadows.
RP Clean City Neutral mimics a flat Canon EOS RP LUT, giving you a soft, low-contrast base that is ideal for further grading. It keeps colors realistic and dynamic range wide so details in skies, glass, and pavements stay intact. This is perfect for establishing shots and coverage where you may later stack additional creative looks.
In Filmora, apply this filter first to normalize your EOS RP daytime footage, especially if you shot using a neutral or flat profile. From there, gradually add contrast, saturation, or additional filters depending on the project. Monitoring scopes while you work ensures that whites stay near pure white without clipping and blacks do not get crushed, maintaining flexibility for future edits.
RP Chrome City Contrast
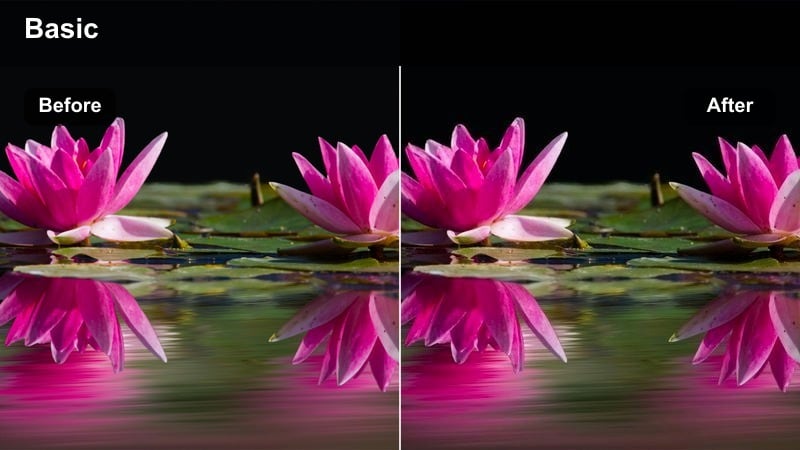
- Effect look: Punchy contrast with a subtle chrome-like coolness in shadows and crisp whites for dynamic city motion.
- Best for: Canon EOS RP gimbal shots of traffic, time-lapse rush hour, and architectural B-roll under clear skies.
- Editing tip: Dial back saturation in bright reds and yellows to keep signs and cars from dominating the frame.
RP Chrome City Contrast gives your Canon EOS RP city footage a polished, high-energy edge. Deep but controlled shadows and crisp highlights add impact to moving traffic, crowds, and modern glass buildings, while a slight cool tone in the shadows reinforces a sleek, urban feel.
After adding this filter in Filmora, fine-tune HSL settings to restrain oversaturated primary colors that can draw too much attention. Slightly reducing saturation in reds, yellows, and blues keeps the overall image clean and cinematic. This approach lets you enjoy strong contrast and clarity without turning your shot into a distracting collage of bright signage and vehicles.
RP Soft Documentary Day
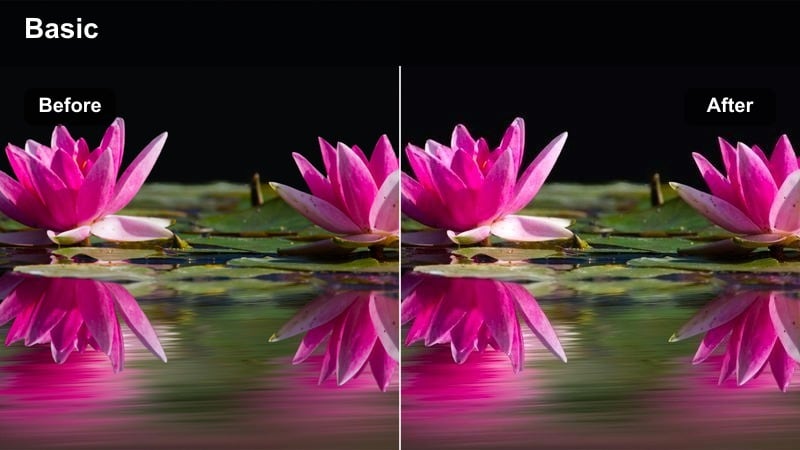
- Effect look: Gentle contrast, slightly muted saturation, and subtle warm mids for a calm documentary feel.
- Best for: Canon EOS RP walk-throughs, casual city documentaries, and travel logs filmed mid-day.
- Editing tip: Use this filter when the sun is harsh, then soften highlights and open shadows to reduce hard edges.
RP Soft Documentary Day is built for story-driven city and travel pieces where the goal is realism with a touch of warmth. Its muted saturation and lowered contrast help soften the look of harsh midday sun, which can otherwise make EOS RP footage feel too sharp or unforgiving on faces and concrete.
Inside Filmora, combine this filter with gentle highlight reduction to tame bright skies and reflective surfaces. Open up the shadows just enough to keep detail in faces and architecture while still preserving shape. This balanced approach results in a relaxed, watchable look that works well for long-form vlogs, interviews on the move, and observational B-roll.
Indoor Vlog and Studio Setups
RP Clean Desk Vlog
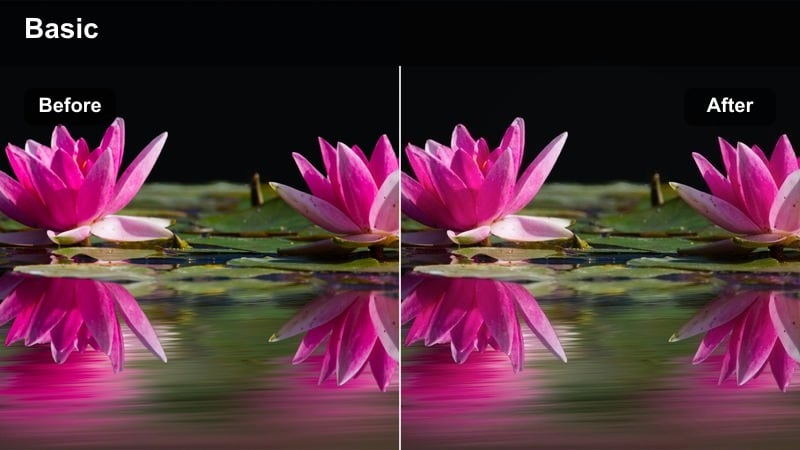
- Effect look: Bright, clean filter with slightly lifted blacks and neutral color for crisp Canon EOS RP desk vlogs.
- Best for: YouTube desk setups, talking-head tutorials, and webcam replacement shots with the EOS RP.
- Editing tip: Set white balance using your desk or wall, then apply this filter and only adjust exposure to taste.
RP Clean Desk Vlog enhances the natural clarity of the Canon EOS RP in controlled studio spaces. By lifting blacks and keeping color neutral, it produces a modern, crisp image that is ideal for tutorials, reviews, and any content where graphics or on-screen text share the frame with the creator.
When editing in Filmora, start by using the white balance picker on a neutral surface, such as your desk or wall, to get an accurate baseline. After applying this filter, fine-tune exposure so that your face is the brightest element in the frame. Because the look is intentionally simple and clean, it is easy to reuse across episodes and playlists without heavy extra grading.
RP Warm Home Vlog
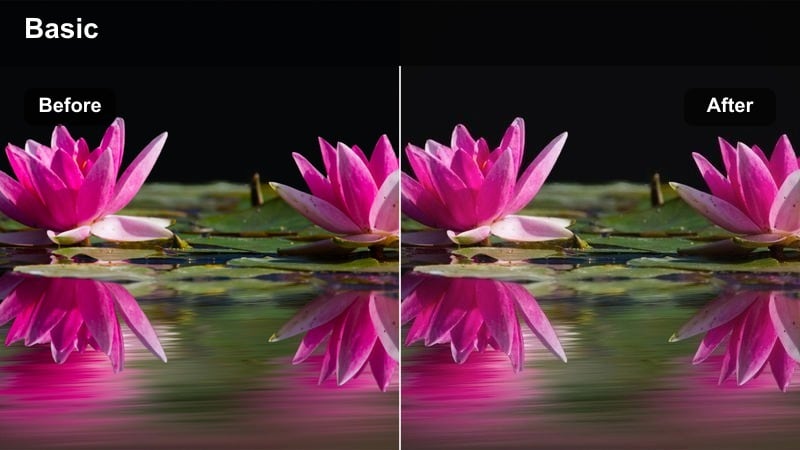
- Effect look: Cozy, warm midtones with a slight fade in blacks for casual Canon EOS RP home vlog scenes.
- Best for: Living room EOS RP vlogs, behind-the-scenes clips, and relaxed creator updates.
- Editing tip: If tungsten lights are strong, lower orange saturation slightly to keep walls and skin from looking too yellow.
RP Warm Home Vlog brings a comfortable, intimate feeling to indoor EOS RP footage. Its warm midtones and gentle fade in the blacks make living rooms, bedrooms, and casual spaces feel inviting, while keeping contrast mild enough for handheld or run-and-gun shots.
In Filmora, this filter works best after you have corrected for extreme color casts from lamps and windows. Once applied, check orange and yellow channels and pull their saturation back slightly if skin or walls look overly yellow. This keeps your warm vibe intact while preserving natural skin tones and a clean, watchable image for long home vlog episodes.
RP Tech Setup Cool
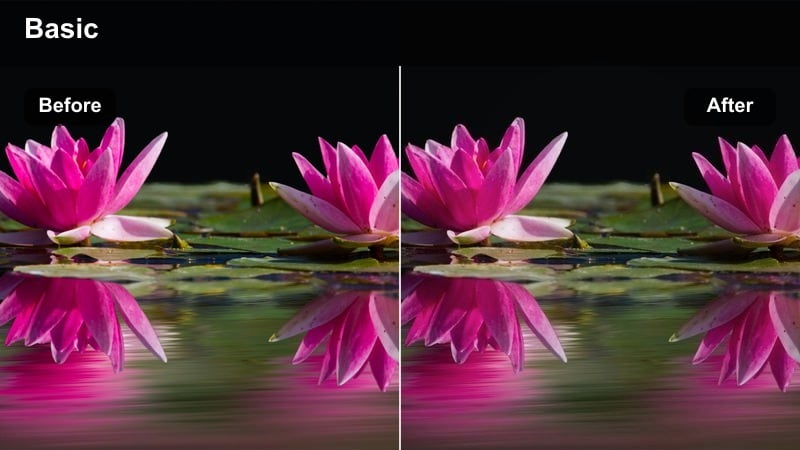
- Effect look: Cool, modern filter with crisp highlights and subtle saturation that emphasizes tech gear and RGB accents.
- Best for: Canon EOS RP gaming or editing setups, product desk shots, and gear B-roll.
- Editing tip: Lift shadows slightly so darker areas of your desk and PC case keep detail for product callouts.
RP Tech Setup Cool brings out the futuristic character of gaming rigs and editing desks shot on the Canon EOS RP. Its cool bias and controlled saturation help RGB lighting pop without overwhelming the frame, while crisp highlights keep monitors, keyboards, and tower cases looking sharp and premium.
When grading in Filmora, pair this filter with a small lift in the shadows to prevent deep blacks from hiding important details like logos or ports. You can then boost local contrast around specific products to make them stand out in B-roll or review segments. The result is a polished, tech-oriented aesthetic that feels right at home on YouTube and social platforms.
Night City and Neon Scenes
RP Neon Noir
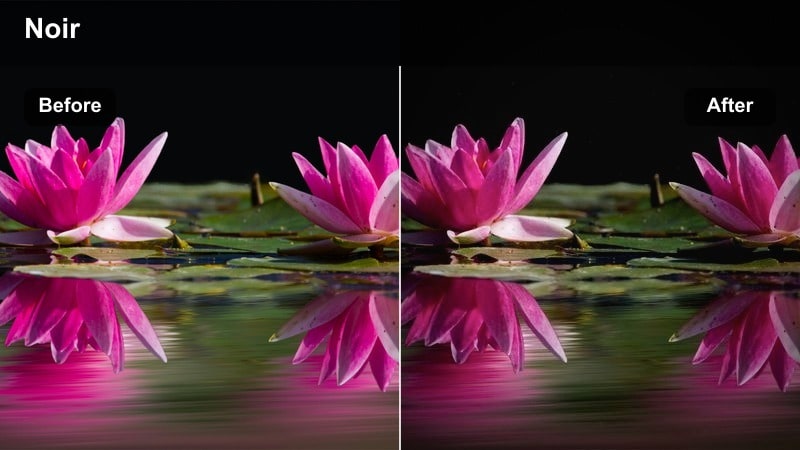
- Effect look: High-contrast night filter with deep blues and magentas, inspired by stylized Canon EOS RP LUTs for neon streets.
- Best for: EOS RP night walks, neon shop signs, and cinematic B-roll in busy nightlife districts.
- Editing tip: Reduce luminance in blues slightly to deepen the sky and keep highlight roll-off soft for signs and windows.
RP Neon Noir is built for stylized night sequences filled with signs, billboards, and colorful reflections. The filter pushes blues and magentas while keeping contrast bold, giving Canon EOS RP footage a moody, cinematic energy reminiscent of neon-heavy thrillers and music videos.
Use this filter in Filmora on night walks or alleyway scenes, then refine intensity so details are not lost in crushed shadows. Slightly lowering blue luminance deepens skies and asphalt, while gentle highlight adjustments prevent neon and windows from clipping. This balance helps you maintain a dramatic mood without sacrificing key information in faces and surroundings.
RP Moody Rain Street
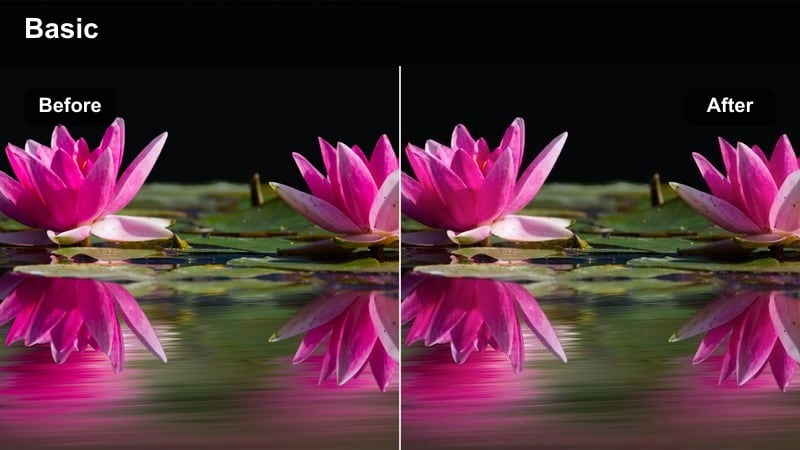
- Effect look: Cool, moody toning with lifted blacks and soft halation feel on highlights for rainy Canon EOS RP city streets.
- Best for: Night EOS RP B-roll with wet pavement, reflections, and slow-motion walks under streetlights.
- Editing tip: Increase contrast in the midtones only so faces stay readable while highlights on pavement stay smooth.
RP Moody Rain Street takes advantage of wet pavement and reflective surfaces to create a cinematic, atmospheric look. The cool color palette, lifted blacks, and gentle glow around highlights emphasize reflections from streetlights and signage while keeping the frame soft and immersive.
After adding this filter in Filmora, focus on midtone contrast to keep your subject clear against the softer background. You can selectively increase contrast and clarity in reflection areas to turn them into secondary light sources that guide the viewer s eye. If the frame starts to feel too busy, reduce saturation in background elements and leave only a few accent colors strong for a refined, moody composition.
RP Night Vlog Balanced
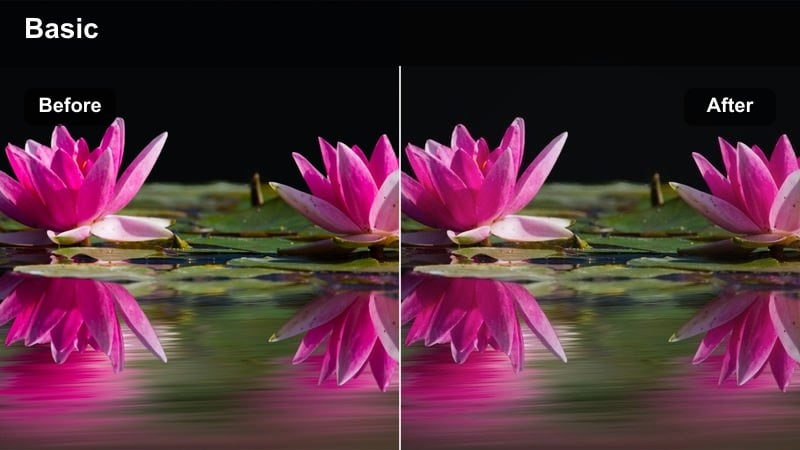
- Effect look: Balanced, low-noise night filter that gently lifts shadows and keeps color natural under mixed street lighting.
- Best for: Canon EOS RP handheld night vlogs, walk-and-talks under streetlights, and low-light city updates.
- Editing tip: Add a touch of warm temperature to faces while leaving the background slightly cooler for separation.
RP Night Vlog Balanced is optimized for handheld EOS RP content shot under streetlights and storefronts. It lifts shadows just enough to reveal facial features and surroundings, while preserving a natural, realistic color balance that is easier on viewers during longer videos.
In Filmora, use this filter as a fast baseline for all your night vlog clips. Then, slightly warm the temperature on your face using local corrections while keeping the background a bit cooler to separate subject from environment. Avoid heavy sharpening on high ISO material; instead, let the lifted shadows and controlled color carry a clean, watchable night look across your entire timeline.
Tips for Using Canon Eos Rp Luts Filters in Filmora
- Shoot a custom white balance on your Canon EOS RP before applying filters so skin tones remain accurate and easy to match across scenes.
- Keep sharpening low in Filmora and rely on local contrast to avoid a harsh, overprocessed look on EOS RP footage, especially at higher ISOs.
- Save your favorite filter plus minor tweaks as a custom preset so you can apply the same Canon EOS RP style across an entire series or client project.
- When stacking filters with Canon EOS RP LUTs, always check waveform and vectorscope to prevent clipped highlights and crushed shadows.
- Normalize footage with a neutral filter or base LUT before adding more stylized looks for consistent results in mixed lighting conditions.
- Record a short reference clip in each location and test several Filmora filters on it before committing to a full shoot in that lighting.
- Adjust vibrance instead of global saturation to keep Canon EOS RP skin tones smooth while still enriching skies, buildings, and clothing.
- Use subtle vignettes with these filters to guide attention to faces and key subjects without making the grade look artificial.
These Filmora filters give videographers and creators a fast way to replicate and enhance Canon EOS RP LUTs across street, studio, and night scenes. Each look is tuned to respect the camera s natural color while pushing mood and style where it matters most.
Use them as flexible starting points, then refine exposure, color balance, and contrast inside Filmora so every EOS RP project maintains a consistent, cinematic identity from the first frame to the final export.
secure downloadNext: Fujifilm XT5 Film LUTS
