

 100% Security Verified | No Subscription Required | No Malware

 ChatGPT
 Perplexity
 Gemini
 Claude
 Grok
Grok
These free LUTs for content creators are designed to give your videos a polished, cinematic look in seconds, whether you are shooting vlogs, client projects, or short-form social content.
Browse the scene-based packs below, pick the mood that fits your footage, and drop the LUTs into Filmora to create consistent, professional color across your entire channel.
In this article
Bright Daylight and Travel Adventures
Sunlit Travel Boost
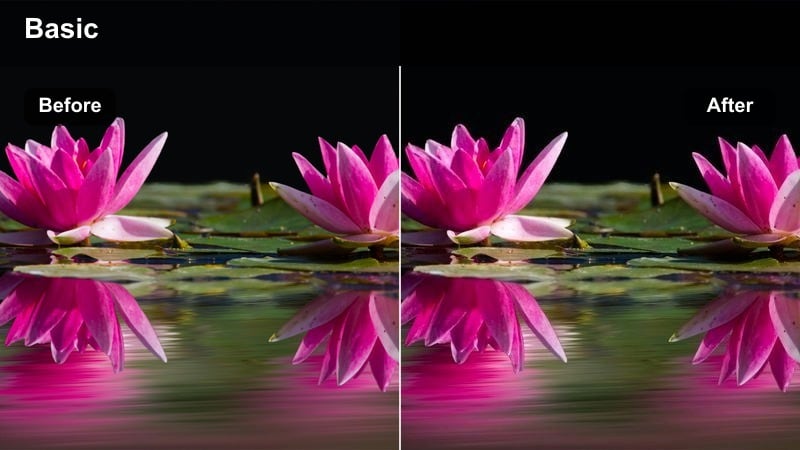
- Effect look: Clean, bright daylight pop that makes outdoor scenes feel crisp and inviting.
- Best for: Travel vlogs, city walk-throughs, vacation montages, and B-roll of landmarks shot in midday sun.
- Editing tip: Reduce highlights slightly after applying the LUT to keep clouds and bright buildings from clipping.
Sunlit Travel Boost is ideal when you want your travel footage to feel fresh and high-energy without blowing out your highlights. It adds a subtle clarity increase, lifts exposure, and keeps skin tones looking believable so your face stays natural even in direct sun.
In Filmora, apply this LUT first, then fine-tune highlight and white sliders to protect details in skies and white buildings. If your camera profile is very contrasty, gently pull down the highlights curve and add a small S-curve for a punchy but controlled daytime travel look.
Match LUTs to Your Brand Colors with AI
Use Filmora AI Color Palette to analyze your favorite reference images or brand assets, then sync these free LUTs for content creators to that palette. This gives you a consistent channel identity even when you shoot in different locations or lighting setups.
Once your brand colors are locked in, you can drop Sunlit Travel Boost or any other LUT on top, then make minor HSL and saturation tweaks instead of rebuilding your grade for every new project.
 secure download

Preview Filters and LUTs in Real Time
Filmora lets you hover over LUTs and filters in the Effects panel to instantly preview how each look will affect your clip. This is especially helpful when you are choosing between several free LUTs for content creators that are all designed for similar scenes.
Load a representative clip from your travel or lifestyle project, then quickly cycle through LUTs to lock in the one that best matches your story, platform, and audience, without committing until you are ready.
secure downloadStack Filters and LUTs for Unique Creator Styles
Filmora includes 1000 plus video filters and 3D LUTs, so you can combine downloaded LUTs with built-in effects for a signature creator style. Start with a base LUT that matches your scene, then layer vignettes, film grain, and light leaks for extra depth and personality.
When you find a combination that fits your brand, save it as a custom preset so you can recreate the same look in a single click across future travel, lifestyle, or studio projects.
secure downloadCoastal Escape
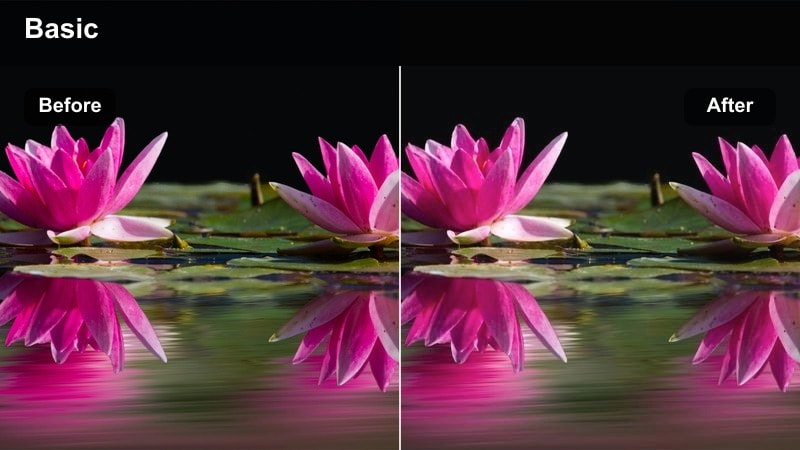
- Effect look: Cool, airy colors that emphasize teal water and soft skies without oversaturating the scene.
- Best for: Beach trips, seaside drone shots, harbor walks, and coastal road-trip footage filmed in bright light.
- Editing tip: Lower saturation on blues if your water or sky starts to look too neon after applying the LUT.
Coastal Escape is tuned to make ocean and seaside scenes feel modern, clean, and cinematic by nudging blues toward teal and keeping highlights smooth. It is perfect when you want your beach or harbor content to match popular travel aesthetics on Instagram, TikTok, and YouTube.
In Filmora, drop this LUT onto your clips, then open the HSL controls to refine blue and cyan channels if your footage is already heavily saturated. A small reduction in blue saturation and a touch of clarity can keep your water, sky, and skin tones balanced across your entire coastal sequence.
Urban Hike
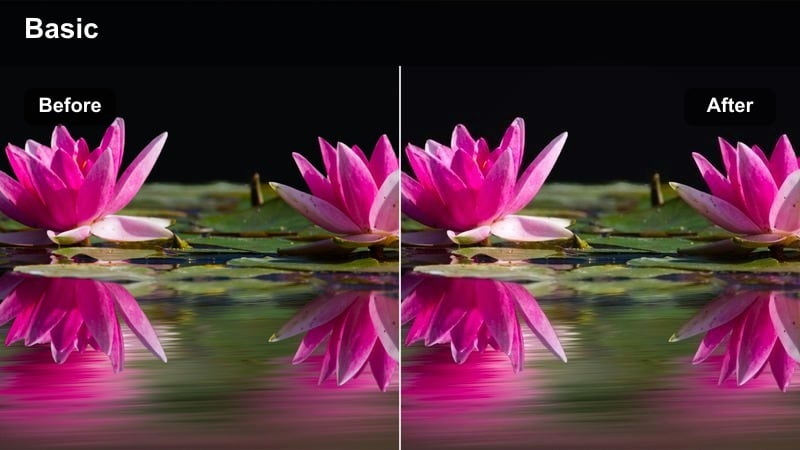
- Effect look: Neutral, slightly warm tones with gentle contrast to keep city streets looking realistic yet polished.
- Best for: Handheld walk-and-talk vlogs, city exploration videos, and casual lifestyle B-roll filmed on sidewalks and parks.
- Editing tip: Boost midtones slightly if your face is in shadow from tall buildings or trees around you.
Urban Hike gives your everyday city footage a subtle upgrade without making it look too stylized or artificial. It warms up skin tones slightly, evens out contrast, and keeps greenery, buildings, and pavement looking natural so your viewers stay focused on your story.
After applying the LUT in Filmora, use the tone controls or curves to lift midtones if your face falls into shade. You can then add a light vignette and a tiny bump in saturation to bring attention to your subject while still preserving the realistic, documentary-style feel of street vlogs.
Lifestyle, Home, and Aesthetic Influencer Content
Soft Home Aesthetic
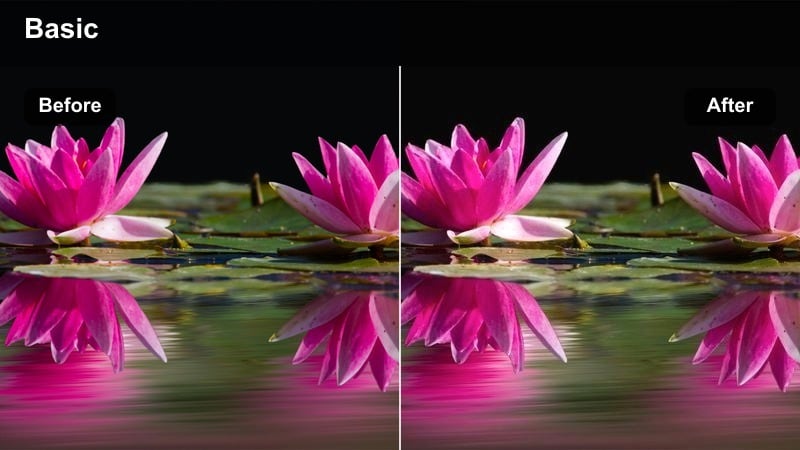
- Effect look: Low-contrast, creamy whites with gentle warmth for cozy, minimal lifestyle scenes.
- Best for: Home vlogs, desk setups, aesthetic routines, room tours, and cozy living room talking-head shots.
- Editing tip: Lower clarity or add a slight blur vignette at the edges to reinforce the soft, dreamy vibe.
Soft Home Aesthetic smooths contrast and slightly desaturates harsher colors to make interiors feel airy, inviting, and on-trend for lifestyle content. Whites become creamier, shadows lift a bit, and overall warmth increases so your space looks intentionally styled rather than flat.
Apply this LUT in Filmora, then gently reduce sharpness or add a subtle blur at the frame edges to enhance the dreamy look. You can also lift blacks a touch and lower highlights to avoid clipping bright walls or windows, keeping your home shots clean and comfortable on any device.
Creator Desk Clarity
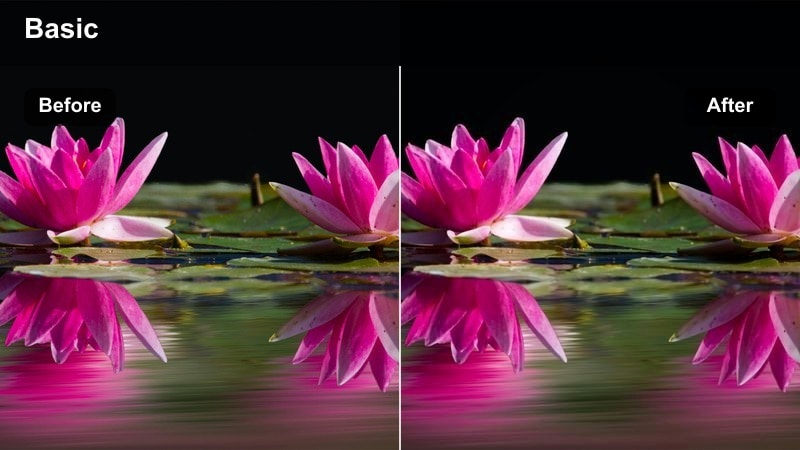
- Effect look: Neutral, crisp tones that highlight screens, gear, and workspace details without oversharpening.
- Best for: Tutorials, productivity videos, desk tours, and any content focused on gear or tech setups.
- Editing tip: Pair this LUT with a subtle vignette to draw the viewer's eye to the center of the frame and your subject.
Creator Desk Clarity is tuned for productivity and tutorial content where you want your gear, monitors, and workspace to look clean and sharp. It enhances micro-contrast and detail while keeping colors neutral so your overlays, screen recordings, and UI elements remain readable.
In Filmora, apply this LUT to your A-roll and B-roll, then add a small vignette and adjust exposure to ensure your face is slightly brighter than the background. If your screens appear too bright, lower highlight levels or mask them for local adjustments so both you and your tech setup look professional and easy to follow.
Neutral Brand Ready
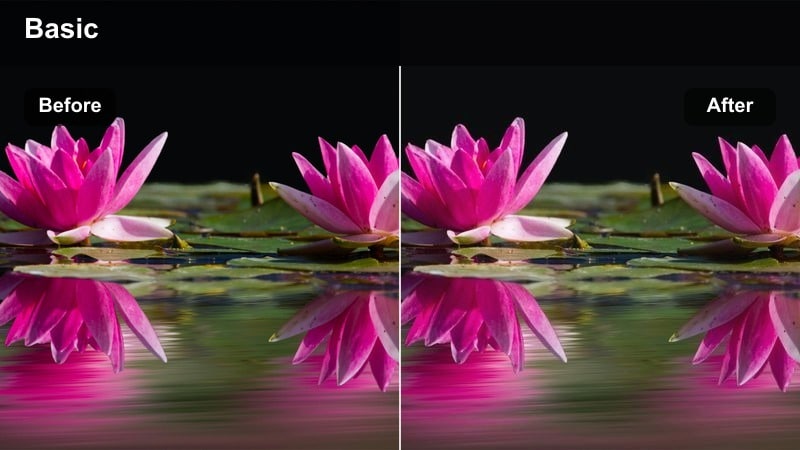
- Effect look: Balanced color with mild saturation and soft contrast to keep brand collabs looking versatile and polished.
- Best for: Sponsored content, product showcases, UGC clips for brands, and multipurpose influencer campaigns.
- Editing tip: Avoid heavy color shifting after this LUT so product packaging and brand colors stay accurate.
Neutral Brand Ready is designed for client work where accurate product and logo colors matter as much as flattering skin tones. It applies gentle contrast and a touch of saturation, creating a polished yet flexible base that works for many different brands and campaign types.
Use this LUT as your starting point in Filmora, then make small exposure and white balance adjustments per clip to keep packaging and brand assets true to life. Once you have a look you like, save it as a custom preset so you can deliver consistent, on-brief visuals across all your UGC and sponsored videos.
Studio, Talking-Head, and Educational Videos
Crisp Studio Talk
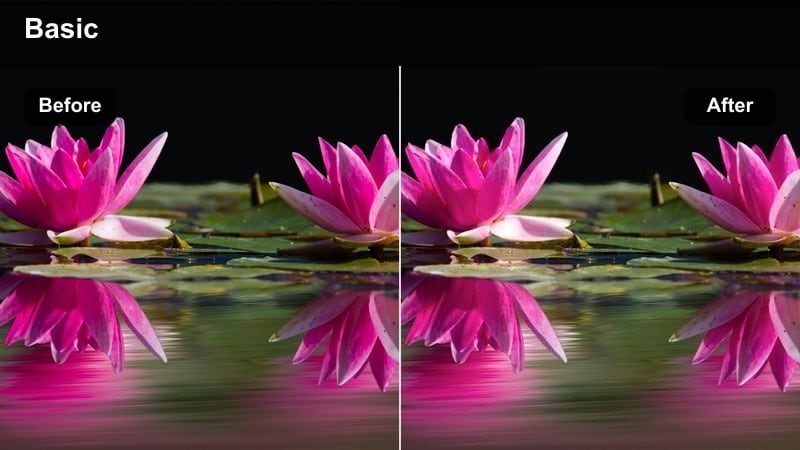
- Effect look: High clarity with natural color and medium contrast that keeps skin tones balanced under soft lights.
- Best for: YouTube explainers, tutorials, commentary videos, and course content filmed in a controlled studio space.
- Editing tip: Add a small amount of skin smoothing only if needed; this LUT already keeps details flattering for faces.
Crisp Studio Talk enhances sharpness and contrast just enough to make your talking-head content look professional without feeling harsh. It keeps skin tones realistic under softbox or LED lighting while maintaining readable details in your background shelves and decor.
After applying the LUT in Filmora, check exposure on your face and ensure you are slightly brighter than the environment. You can add minimal skin smoothing using Filmora beauty tools if necessary, then finish with a light vignette or background blur effect to keep viewer attention centered on your message.
Creator Course Neutral
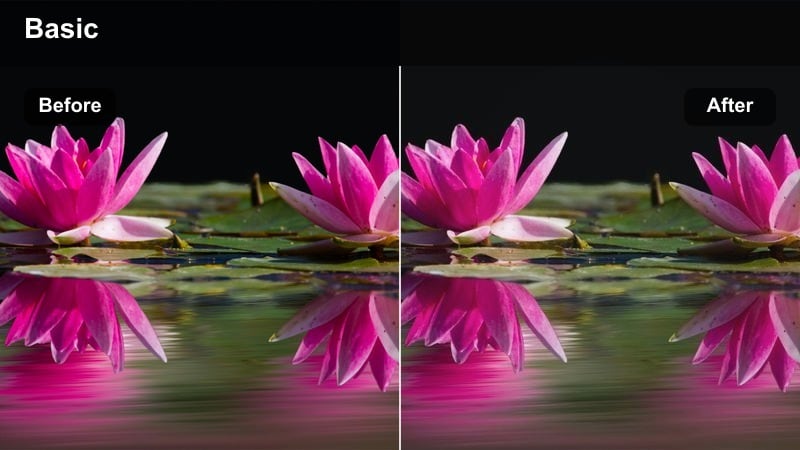
- Effect look: Even, low-contrast color that stays consistent across long videos and multi-camera course recordings.
- Best for: Online classes, tutorials with screen recordings, and long-form educational series with multiple sessions.
- Editing tip: Match contrast across cameras first, then apply this LUT to all clips for a seamless series look.
Creator Course Neutral focuses on stability and comfort for viewers who will watch your lessons for long stretches of time. It dials back strong contrast and aggressive saturation so slides, screen recordings, and A-roll blend together smoothly without visual fatigue.
In Filmora, first standardize exposure and contrast across all cameras and sessions, then apply this LUT as your universal grade. You can create one preset that includes the LUT plus minor tweaks, then paste or batch-apply it across entire timelines so every module in your course feels cohesive.
Podcast Duo Focus
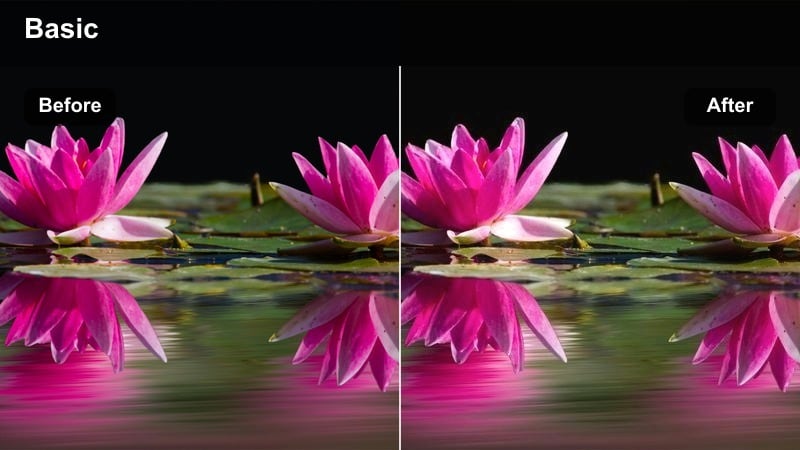
- Effect look: Warm, inviting tones with gentle contrast that flatter multiple faces in the same frame.
- Best for: Video podcasts, interview-style content, and panel discussions recorded in a studio or living room setup.
- Editing tip: Use Filmora's color corrections to balance each camera angle, then apply this LUT for a unified show feel.
Podcast Duo Focus is built to handle multiple skin tones and faces in one frame while maintaining a warm, inviting atmosphere. It applies soft contrast and a subtle warmth boost that looks great under practical lamps and studio lights commonly used in podcast and interview sets.
In Filmora, color-correct each camera input individually for exposure and white balance, then apply this LUT across all tracks to tie the show together. Use scopes to ensure both hosts or guests sit at similar brightness levels, and consider adding a slight vignette for extra focus on the conversation.
Night Cityscapes and Cinematic B-Roll
Neon City Pop
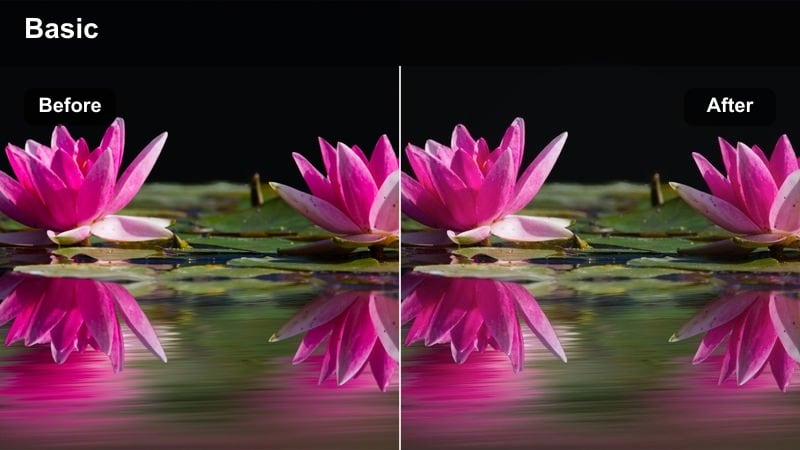
- Effect look: High-contrast, colorful night look that pushes neon signs and city lights while keeping shadows deep.
- Best for: Night street walks, cyberpunk-style edits, rain reflections, and neon-lit storefront B-roll.
- Editing tip: Lift shadows slightly if noise becomes too visible in darker parts of your frame after applying the LUT.
Neon City Pop amplifies colorful signage, reflections, and practical lights to give your night footage a bold, stylized edge. It deepens shadows and enriches saturated hues like magenta, blue, and cyan, making it ideal for cyberpunk-inspired edits and kinetic city sequences.
When you apply this LUT in Filmora, enable noise reduction before grading to keep shadow noise under control. Afterward, make small adjustments to the shadows and black levels, and if highlights feel overpowering, reduce saturation in specific color channels using HSL for a cinematic, not cartoonish, neon look.
Moody Street Cinema
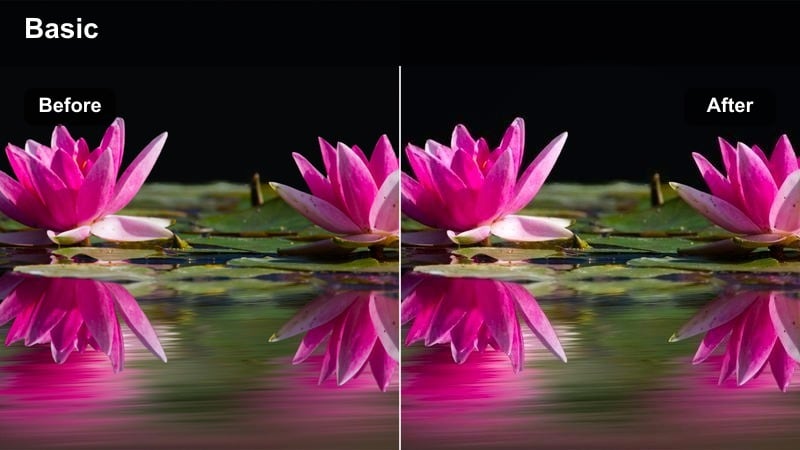
- Effect look: Desaturated backgrounds with warm skin tones and strong contrast for dramatic street narratives.
- Best for: Short films, storytelling B-roll, alleyway walks, and reflective monologues shot in urban streets.
- Editing tip: Add a slow push-in or subtle handheld movement to pair with this moody grade for extra cinematic depth.
Moody Street Cinema pulls saturation out of your environment while preserving warm, cinematic skin tones, creating a focused, story-first aesthetic. It increases contrast to carve out strong highlights and shadows, perfect for emotional monologues or narrative B-roll sequences in city alleys and side streets.
In Filmora, apply the LUT, then fine-tune contrast using curves so you retain enough detail in dark areas without flattening the mood. Combine the look with slow push-ins, speed ramps, or stabilized handheld shots, and consider adding letterbox bars for an instantly cinematic presentation on YouTube or social platforms.
City B-Roll Gold
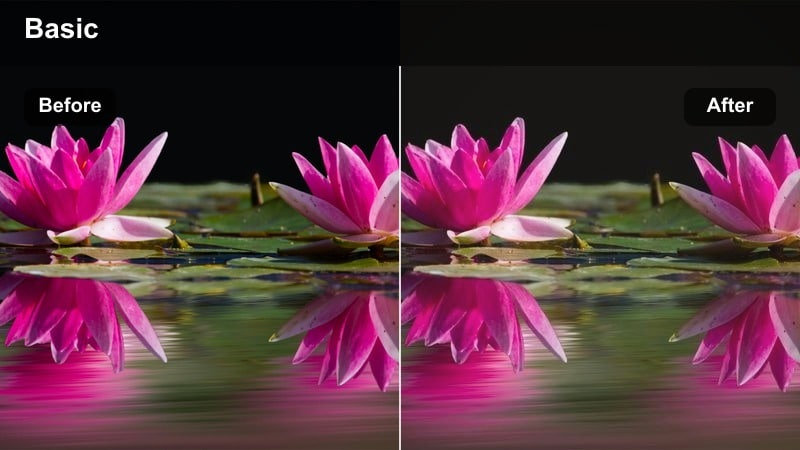
- Effect look: Warm golden highlights with gentle fade in blacks for dreamy, cinematic slow-motion city B-roll.
- Best for: Elevated train shots, skyline pans, pedestrian crosswalks, and slow-motion lifestyle B-roll in city centers.
- Editing tip: Combine this LUT with 60 or 120 fps slow motion and smooth transitions for a polished B-roll sequence.
City B-Roll Gold gives your urban sequences a romantic, golden-hour-inspired glow, even if they were not filmed at perfect sunset. It warms highlights, slightly lifts blacks, and softens contrast to create a dreamy, filmic feel that works beautifully with slow motion and parallax moves.
In Filmora, apply this LUT to your best B-roll shots, then add stabilization and speed adjustments such as 50 percent or 25 percent slow motion for a premium, cinematic vibe. You can finish the look with smooth transitions, subtle motion blur, and a touch of film grain to tie your entire sequence together.
Tips for Using Free Luts For Content Creators Filters in Filmora
- Shoot a short test clip for each recurring setup and save your favorite LUT and adjustment combo as a reusable preset in Filmora.
- Keep your in-camera exposure slightly flatter so free LUTs for content creators have room to add contrast and saturation without clipping.
- Use waveform and vectorscope tools in Filmora to check for crushed blacks, blown highlights, or oversaturated skin after applying strong cinematic looks.
- Organize your LUTs into folders by scene type such as travel, lifestyle, studio, and night to speed up your editing workflow.
- Always correct white balance before adding a LUT to avoid color casts that are harder to remove once the grade is applied.
- For mixed lighting setups, color-correct each clip individually before applying your chosen LUT so the final look stays consistent.
- Experiment with stacking subtle filters like vignettes and grain on top of LUTs, then save your favorite combinations as Filmora presets.
With the right free LUTs for content creators, you can transform raw footage into a cohesive, cinematic brand in just a few clicks.
Import these LUTs into Filmora, refine them with simple adjustments, and build a visual style your audience recognizes instantly across every platform.
secure download