

 100% Security Verified | No Subscription Required | No Malware

 ChatGPT
 Perplexity
 Gemini
 Claude
 Grok
Grok
These free LUTs high contrast style filters are built for creators and editors who want sharp definition, deep blacks, and standout highlights in just one click.
Use this collection to give your footage a bold, cinematic punch, whether you are shooting street visuals, moody portraits, or polished product shots.
In this article
High-Contrast Looks for Urban Streets and City Nights
Neon Noir
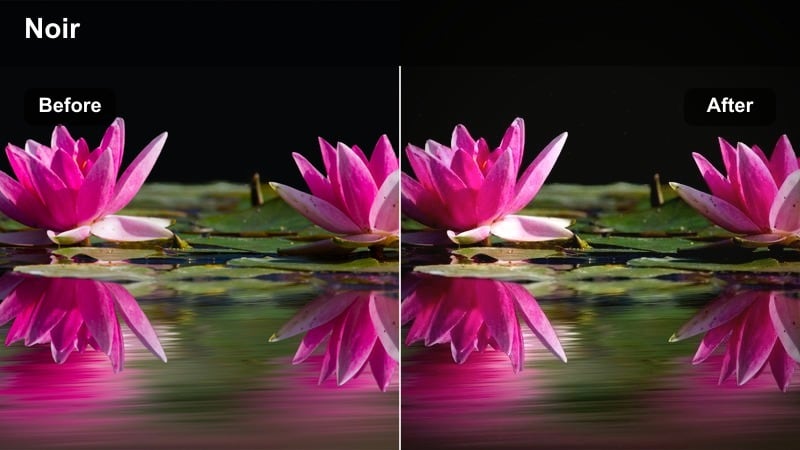
- Effect look: Hard high contrast with deep blacks and glowing neon highlights.
- Best for: Night city b-roll, cyberpunk edits, neon-lit streets.
- Editing tip: Lower saturation slightly to keep skin tones natural while letting the neon colors pop.
Neon Noir pushes contrast hard, locking in deep blacks while amplifying bright signage and neon strips so your city nights feel graphic and cinematic. In Filmora, it is ideal for handheld street sequences or stylized cyberpunk edits where you want the lights to define the frame and turn even simple roads into moody, noir-inspired scenes.
Apply this look to your night footage, then slightly tame overall saturation and fine-tune exposure with Filmora scopes so highlights do not blow out. Use masks to keep faces balanced, preserving detail in skin while the filter lets neon signage, reflections in puddles, and window glows become the visual anchor of your high-contrast grade.
Dial in Perfect Contrast with Filmora's AI Color Tools
Filmora's AI-powered color correction analyzes your footage to balance exposure, contrast, and white balance before you drop in any free LUTs high contrast filters. Starting from a clean, corrected base gives you more room to push blacks and highlights without introducing banding or strange color shifts.
Run AI color tools on your clips, then stack your favorite high-contrast LUTs or presets to keep city lights, skin tones, and shadows controlled but punchy across the entire timeline.
 secure download

Preview High-Contrast Filters in Real Time
With Filmora's real-time preview, you can hover over different high-contrast filters and instantly see how they transform the same clip. This makes it easy to compare several free LUTs high contrast styles without rendering or committing to a look too early in the edit.
Audition multiple presets on your urban or night footage, then tweak intensity and exposure sliders so the chosen filter fits your pacing, transitions, and overall mood.
secure download1000+ Video Filters and 3D LUTs
Filmora includes an extensive library of over a thousand filters, overlays, and 3D LUTs, so you can combine high-contrast looks with stylized color palettes for a truly custom grade. Whether you want gritty urban contrast, glossy commercial shine, or soft cinematic tones, there is a preset combination that fits your project.
Use high-contrast filters to sculpt light and shadow first, then layer creative LUTs to lock in your final color mood and keep all your videos on-brand.
secure downloadGrit and Glow
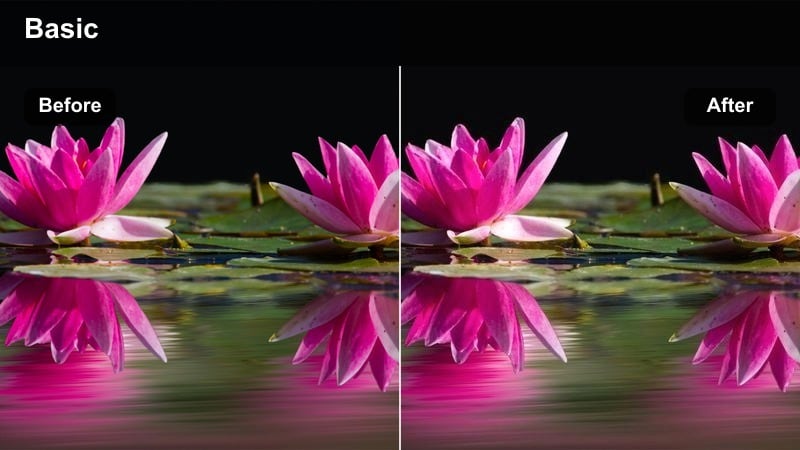
- Effect look: Crunchy contrast with textured shadows and bright midtones.
- Best for: Urban documentaries, handheld street sequences, skate edits.
- Editing tip: Add a subtle grain overlay to enhance the gritty feel and hide minor noise in darker areas.
Grit and Glow accentuates rough textures like concrete, brick, and asphalt while keeping midtones bright enough for energetic street edits. In Filmora, it gives skate lines, BMX clips, and documentary-style city walks a snappy, lived-in feel that emphasizes movement and environment.
Drop this filter onto your timeline and then introduce a light film grain layer to unify shots and conceal minor noise in the shadows. Adjust contrast and blacks on a per-clip basis so your subject stays readable even when backgrounds are pushed into deep, crunchy tones that suit fast-paced montages.
Steel Skyline
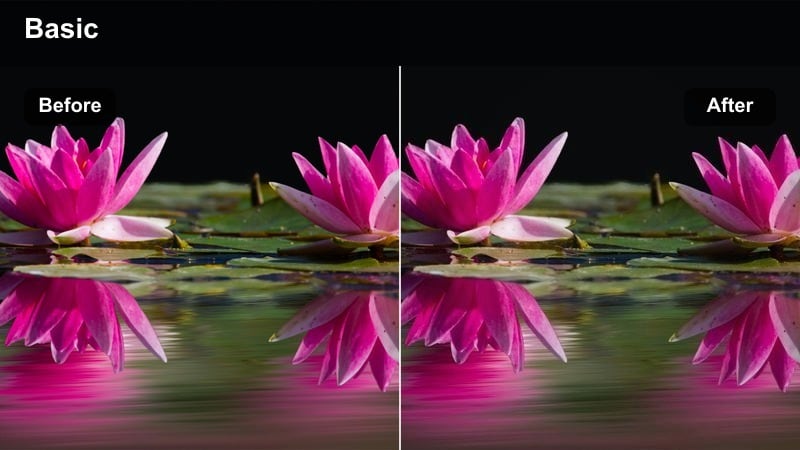
- Effect look: Cold, punchy contrast with desaturated tones and strong edges.
- Best for: Cityscape timelapses, architectural b-roll, drone passes.
- Editing tip: Boost clarity moderately but avoid over-sharpening to prevent halos along building edges.
Steel Skyline delivers a cool, industrial mood with crisp edges that make towers, bridges, and skylines stand out against dramatic skies. It works especially well on drone reveals and timelapses in Filmora, where you want a defined separation between glass, steel, and cloud layers.
Apply the filter, then fine-tune white balance cooler and lightly lift clarity or sharpness until lines look precise but natural. Use Filmora's tone curve to protect highlight detail in the sky, and if halos appear around buildings, back off global sharpening and rely on the filter's inherent high contrast to keep your cityscapes bold.
Punchy Contrast for Portraits and Lifestyle Moments
Shadow Burst
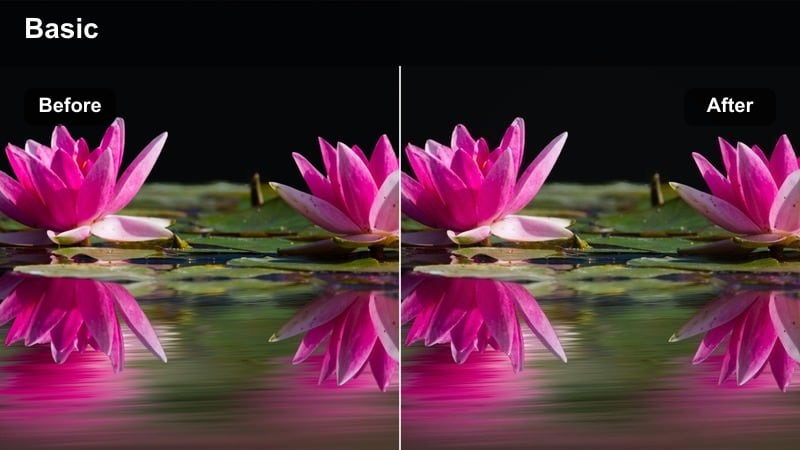
- Effect look: Deep shadows with vivid midtones and crisp micro-contrast on faces.
- Best for: Moody lifestyle portraits, character-driven storytelling, dramatic close-ups.
- Editing tip: Use the filter at 60–80% intensity for portraits to keep skin texture flattering while still punchy.
Shadow Burst digs into shadows to create strong separation around cheekbones, jawlines, and clothing folds, adding drama to portrait and lifestyle footage. It is perfect in Filmora for character-driven sequences where you want emotion to read clearly under contrasty window light or street lamps.
Apply the look to your portrait clips, then lower the effect opacity or intensity slider until skin remains flattering and not overly harsh. Use Filmora's masking tools to slightly soften contrast on skin while leaving eyes, hair, and wardrobe at full strength so expressions are emphasized without losing natural texture.
Street Character
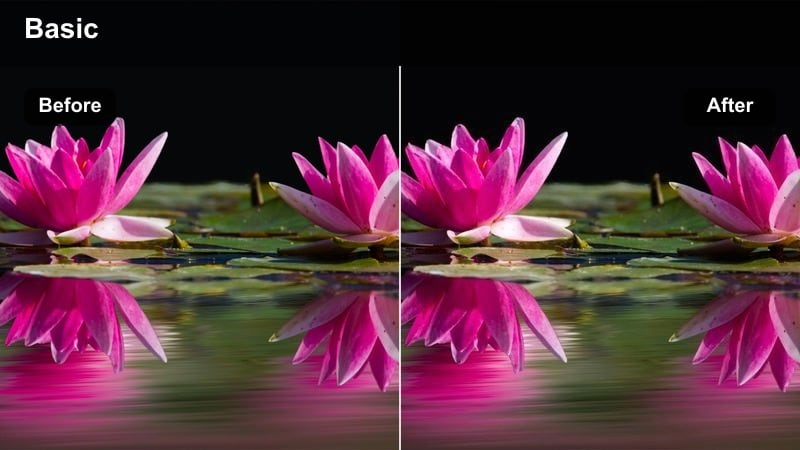
- Effect look: Hard-edged contrast with slightly warm highlights and rich midtones.
- Best for: Street portraits, character studies, environmental shots with people.
- Editing tip: Raise shadows very slightly if you lose detail in dark clothing or hair.
Street Character mixes strong contrast with a touch of warmth in the highlights, giving skin and sunlit edges a subtle glow while keeping the scene gritty. In Filmora, it is a solid choice for environmental portraits and lifestyle b-roll where walls, alleys, and signage frame your subject.
Once applied, check dark clothing, hair, and background elements on Filmora's scopes and gently raise the shadows slider if details are disappearing. Combine the filter with directional lighting in-camera, then use local exposure masks around faces to keep expressions at the center of attention against richly textured city surroundings.
Film Frame
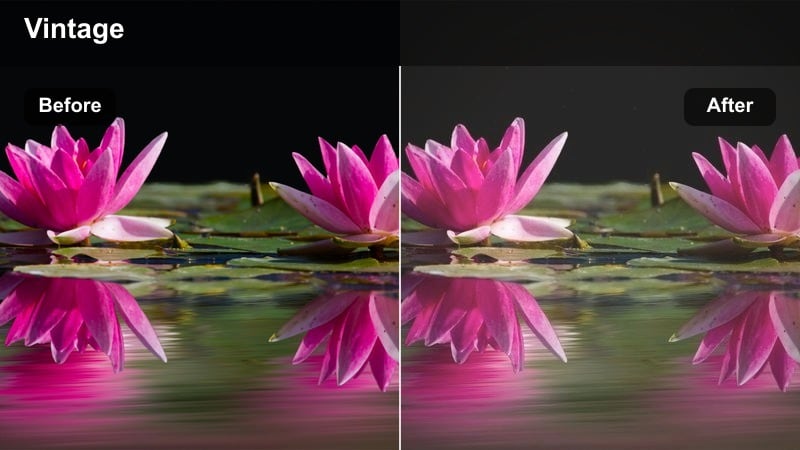
- Effect look: Vintage-inspired high contrast with subtle fade in the deepest blacks.
- Best for: Narrative scenes, short films, nostalgic lifestyle sequences.
- Editing tip: Add a 2.35:1 letterbox and a bit of film grain to complete the cinematic storytelling feel.
Film Frame combines bold contrast with a gentle lift in the deepest blacks, giving your images a slightly vintage, filmic softness while preserving punch. It is great in Filmora for narrative shorts, moody vlogs, and sequences that need to feel like frames from a movie rather than raw video.
After applying the filter, add cinematic black bars and a subtle grain overlay to enhance the analog mood. Use adjustment layers in Filmora to apply Film Frame across entire scenes, then fine-tune contrast and exposure shot by shot so all your angles share a consistent, story-focused high-contrast look.
Bold Contrast for Sports, Action, and Movement
Impact Punch
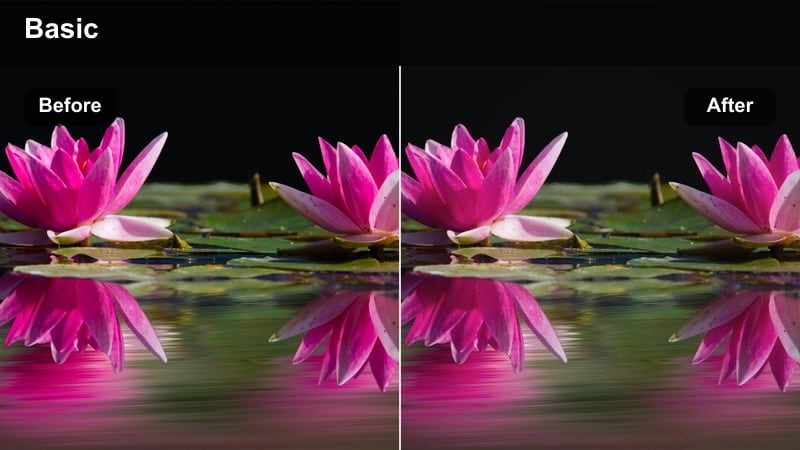
- Effect look: Explosive contrast with bright highlights and deep, snappy blacks.
- Best for: Sports reels, fitness content, high-energy action edits.
- Editing tip: Use faster cuts and tighter sound design to match the aggressive visual intensity of this filter.
Impact Punch is built to make muscles, sweat, and motion pop off the screen with bold highlights and dense shadows. In Filmora, it brings drama to gym sessions, competition reels, and high-energy montages where you want each frame to feel intense and powerful.
Apply the filter to your action clips, then pair it with quick cuts, rhythmic music, and impactful sound effects so the audio and pacing match the contrasty visuals. If moving limbs vanish into dark areas, lift blacks slightly and use Filmora's keyframed exposure or masks to keep athletes readable during the most dynamic moments.
Street Runner
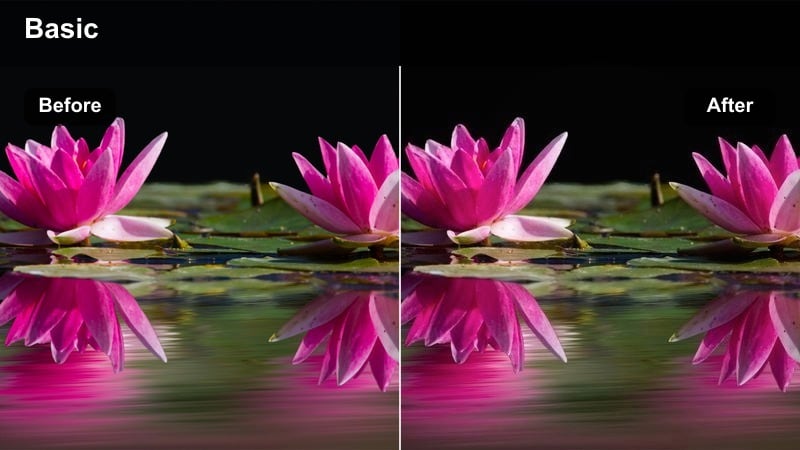
- Effect look: Cool-toned contrast with bright pavement highlights and defined edges.
- Best for: Running montages, city fitness, urban park workouts.
- Editing tip: Stabilize handheld shots and then add a tiny bit of motion blur for a polished but energetic feel.
Street Runner emphasizes cool tones and hard-edged shadows, making runners, cyclists, and urban athletes stand out against bright sidewalks and streets. It gives outdoor fitness content in Filmora a sleek, modern aesthetic with clearly defined silhouettes and motion paths.
Once applied, run Filmora's stabilization on shaky handheld footage and optionally add a touch of motion blur for a refined, energetic finish. Use speed ramping and cut on strides or impact points so the strong contrast of Street Runner reinforces the directional flow of your subject through the city environment.
Arena Spotlight
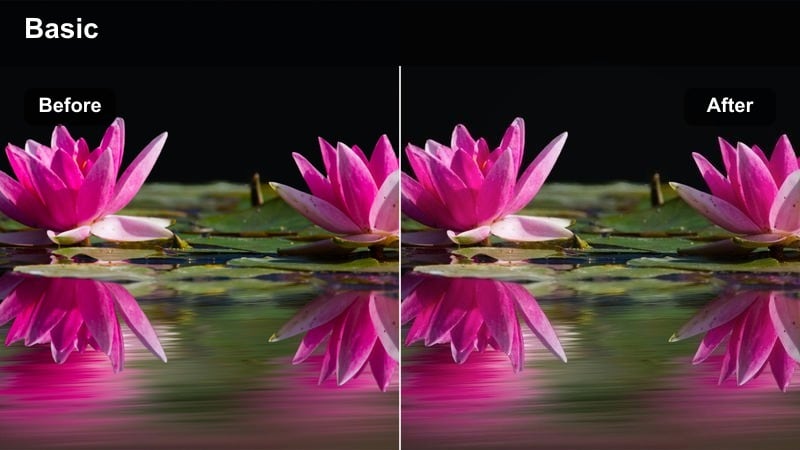
- Effect look: Stage-like contrast with glowing highlights and nearly black backgrounds.
- Best for: Indoor sports, stage performances, spotlight interviews.
- Editing tip: Use masks to brighten faces if arena lights are uneven across your frame.
Arena Spotlight mimics a theatrical stage look, pushing backgrounds toward near-black while letting subjects under bright lights glow with intensity. In Filmora, it works well for basketball games, indoor courts, concerts, and interviews where a spotlight or key light should isolate the subject.
After applying the filter, use masks or regional adjustments to lift faces and key details if the arena lighting is inconsistent. Monitor your blacks in Filmora's scopes so you do not lose important context, and slightly reduce the effect strength on clips where you need to preserve audience reactions or environmental detail around the main action.
High-Contrast Filters for Products and Detail Shots
Edge Define
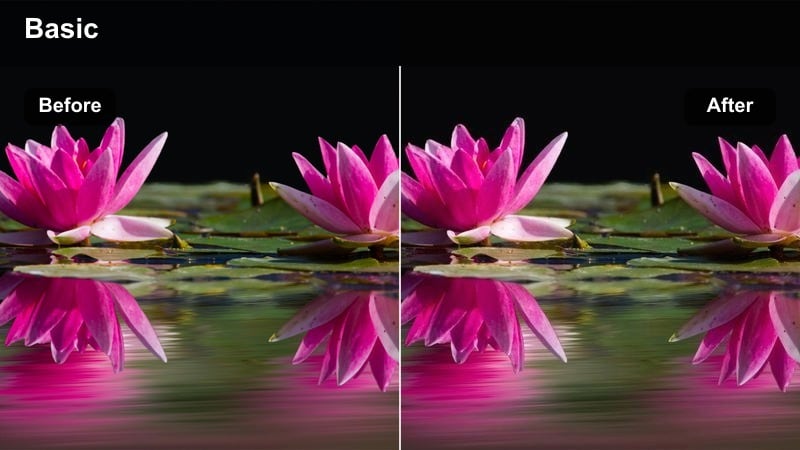
- Effect look: Clean, studio-style high contrast with crisp edges and neutral color.
- Best for: Product close-ups, tech gear, tabletop demos.
- Editing tip: Pair this look with a simple background to keep focus on the product's shape and logo.
Edge Define is tailored for studio-style product visuals, creating clear outlines, strong shadows, and neutral color that makes logos and shapes instantly readable. In Filmora, it gives your tech gear, unboxings, and tabletop demos a professional, catalog-ready look.
Apply the filter to your product shots, then keep backgrounds uncluttered and exposure balanced so the contrast can do the storytelling. Use Filmora's vignette and masking tools to subtly darken surrounding areas, guiding the viewer's eye toward the product center while maintaining sharp, high-contrast edges around important details.
Specular Pop
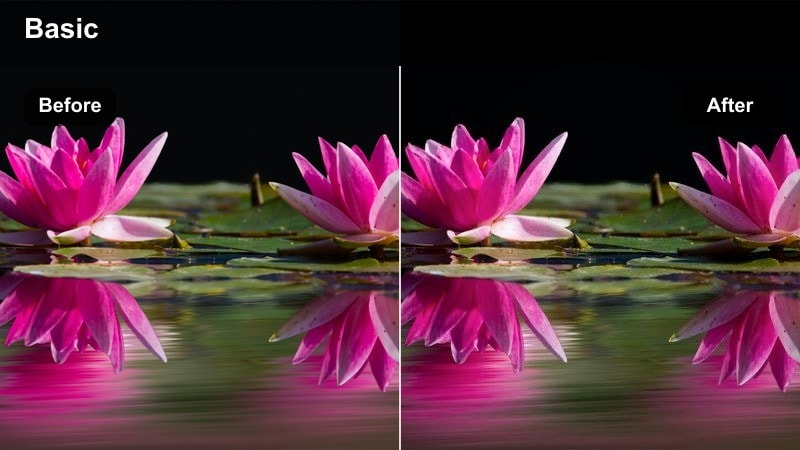
- Effect look: Glossy contrast that boosts reflections and shine on surfaces.
- Best for: Shiny packaging, glass, metal products, premium items.
- Editing tip: Angle your lights to create defined reflections that this filter can exaggerate cleanly.
Specular Pop enhances reflections and highlights, making glass, metal, and glossy packaging look more premium and eye-catching. In Filmora, it is ideal for product ads, close-up hero shots, and luxury items where you want controlled shine to communicate quality.
After you apply this filter, adjust your footage's exposure and highlight roll-off so reflections remain bright but not blown out. Use Filmora's local adjustments to shape where the brightest speculars fall, dialing down contrast slightly in overly reflective areas while keeping mids and blacks strong for a polished, commercial-ready finish.
Detail Etch
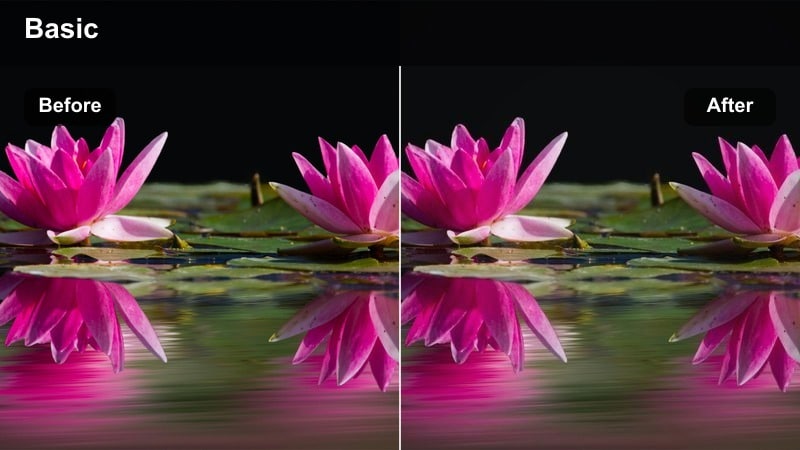
- Effect look: Micro-contrast boost that engraves fine lines and textures into the frame.
- Best for: Macro shots, texture demos, product materials like fabric or metal.
- Editing tip: Avoid stacking too much sharpening on top of this filter to prevent noisy edges.
Detail Etch focuses on micro-contrast, carving out fine textures in fabric, metal, plastics, and other materials so viewers can almost feel the surface. It is a strong choice in Filmora for macro b-roll, product breakdowns, and texture showcases used in promotional or educational videos.
Once applied, keep additional sharpening modest and check darker areas for noise, especially if the footage was shot at higher ISOs. Use Filmora's noise reduction and selective adjustments to smooth noisy regions while allowing the filter to emphasize the important grooves, seams, and patterns that sell the quality of your product.
Tips for Using Free Luts High Contrast Filters in Filmora
- Shoot slightly flatter in-camera so your free LUTs high contrast filters have more latitude to push shadows and highlights.
- Always check scopes in Filmora to avoid clipping whites or crushing blacks when stacking multiple high-contrast effects.
- Reduce filter intensity for skin tones, interviews, and talking heads to keep faces natural while backgrounds stay bold.
- Use adjustment layers in Filmora to apply the same high-contrast LUT across sequences, then refine individual clips with local corrections.
- Combine high-contrast filters with Filmora's AI color tools to correct exposure first and keep your final grade clean and controlled.
- Export short test clips and review them on a phone, laptop, and TV to confirm that your high-contrast look holds up everywhere.
- Keyframe contrast or filter intensity through a clip if lighting changes, so shadows and highlights stay consistent from start to finish.
High-contrast filters and free LUTs give creators and editors a fast way to turn flat footage into bold, cinematic visuals with deep blacks and striking highlights.
Start by choosing a preset that fits your scene, fine-tune exposure and intensity in Filmora, and then explore more free LUTs for product video to expand your style library.
secure download