The internet’s been buzzing lately with viral videos of people hugging their favorite idols, popping up all over social media feeds. If you're wondering how everyone managed to create videos like that, it’s all thanks to Vidu Studio!
This AI-powered video generator is changing the game. Beyond the famous “hugging” videos, Vidu Studio lets you create videos in all kinds of fun, creative styles—perfect for social media, personal projects, or just having fun.
But does Vidu Studio really live up to the hype? In this review, we’ll break down its features, limitations, and guides for using it to create different kinds of video magic, plus an alternative for some fresh perspective. Let’s dive in!
In this article
Part 1: Comprehensive Overview of Vidu Studio
Even though it just launched this year, Vidu Studio is already making waves as a video-making tool that goes way beyond basic editing. Packed with a unique set of features, this AI-powered platform offers advanced video creation tools that really set it apart from the usual video makers out there. Here’s a closer look at what makes Vidu Studio special.
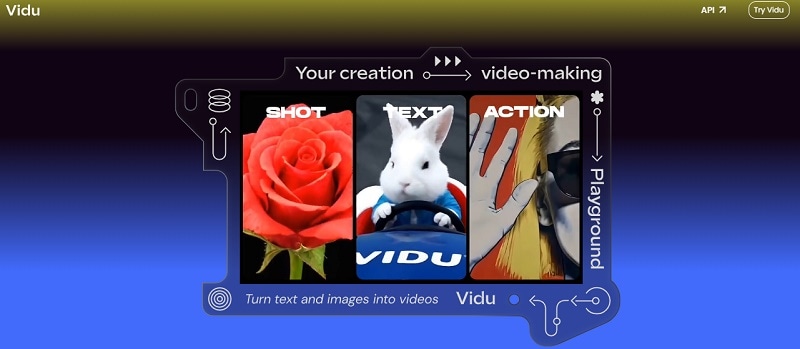
Core highlights of Vidu Studio over other video makers:
- Text-to-Video Conversion: Quickly turn text into a video with visuals that match your story.For example, you can make AI kiss video with it.
- Image-to-Video Conversion: Transform images into animated clips in a few clicks.
- Realistic Physics Simulation: Add natural-looking movement, like falling objects or character actions, for a lifelike feel.
- Character-to-Video Conversion: Upload character designs and watch them come to life on screen with customizable animations.
- Variety of Genres: Create videos in various genres—Sci-Fi, Romance, Cartoon, Western, and more—to add a creative touch.
Limitations:
- The generated videos are only 4 seconds long.
- Video quality can be quite poor.
- The realism of the video can be hit or miss.
- Customization options still lack precision for detailed editing.
- Being web-based, it needs a steady internet connection to work smoothly.
Target audience: Content creators, filmmakers, and marketers looking to make unique videos with AI.
System requirements and supported devices: Works on any device with internet access and a modern browser.
Price: Vidu Studio offers flexible plans—$9.99/month (Standard), $29.99/month (Advanced), and $99.99/month (Premium). For more details, check out their payment page.
Part 2: How to Create Trending Types of AI Video Using Vidu Studio
Now that you know a little bit more about Vidu Studio, it's time to learn how to actually use it. Like we mentioned, Vidu Studio lets you create videos of people hugging or kissing their idols. Plus, you can make animations and even cinematic-style clips!
So, check out this step-by-step guide for each type. Just follow along, and you’ll be creating trendy AI videos in no time!
AI Hug Videos
Beforehand, you’ll need to make a side-by-side collage photo of you and the person you want to "hug". You can edit these photos using apps like Picsart or even Instagram—just make sure they’re set up in a side-by-side collage like shown in the image below. Once your photo is ready, follow these simple steps!

Step 1. Visit Vidu Studio and log in
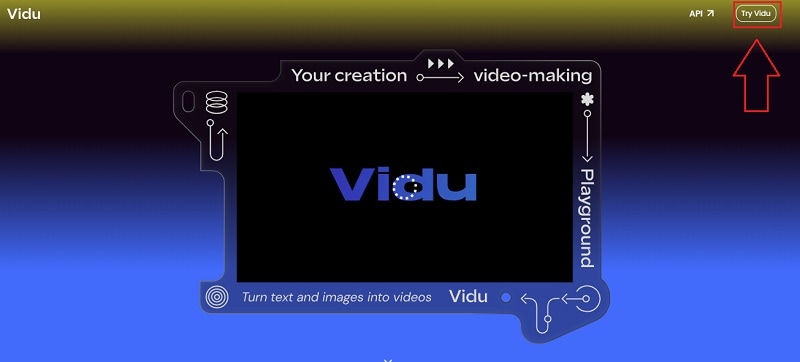
Go to Vidu Studio’s official website and click on "Try Vidu" in the top right corner. From there, just sign in or create an account if you haven’t already.
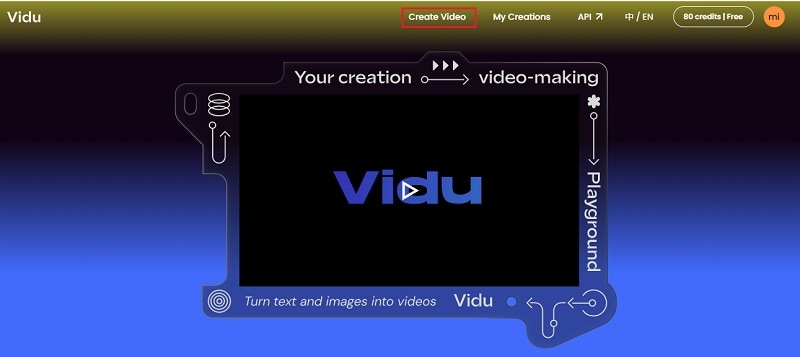
Once you’re logged in, you’ll notice you start with 80 free credits to use. If you need more, just click on the credits and choose a subscription plan that works best for you. To start making a video, click on “Create Video” to begin the process.
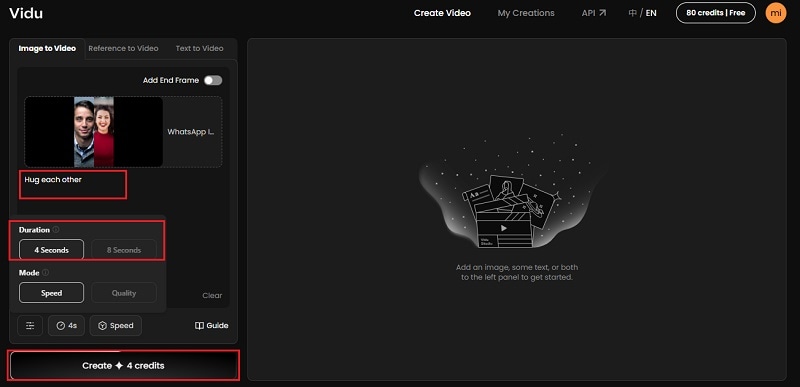
Step 2. Upload your image and write your prompt
Choose the “Image to Video” option and upload the collage photo you edited earlier.
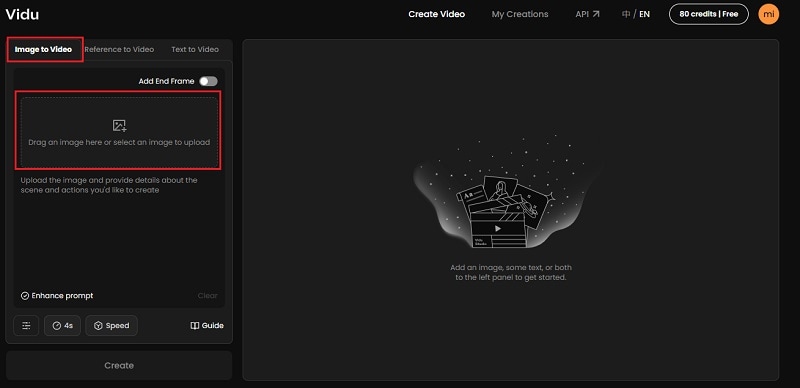
Next, type in a prompt like “Hug each other”. You’ll see the video is set to 4 seconds by default, but you can extend it to 8 seconds if you want (just keep in mind it’ll use more credits). Once everything looks good, click “Create” to start generating your hug video!
Step 3. Preview and upscale
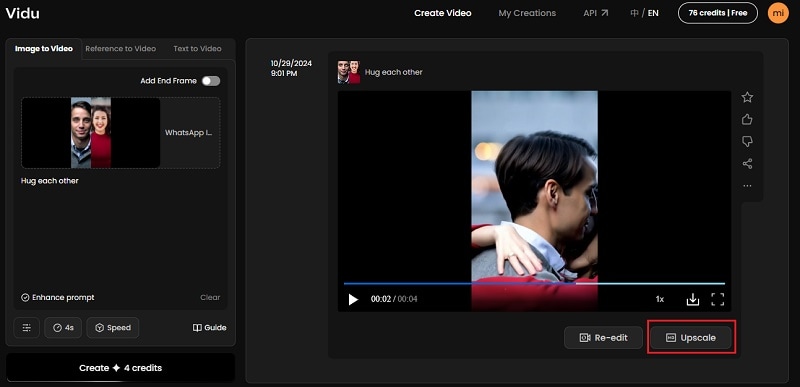
Give Vidu Studio a few seconds to work its magic, and once it’s done, click play to see your video! If you’re not totally satisfied with the quality, you can click “Upscale” to improve it—just keep in mind it’ll cost 4 extra credits.
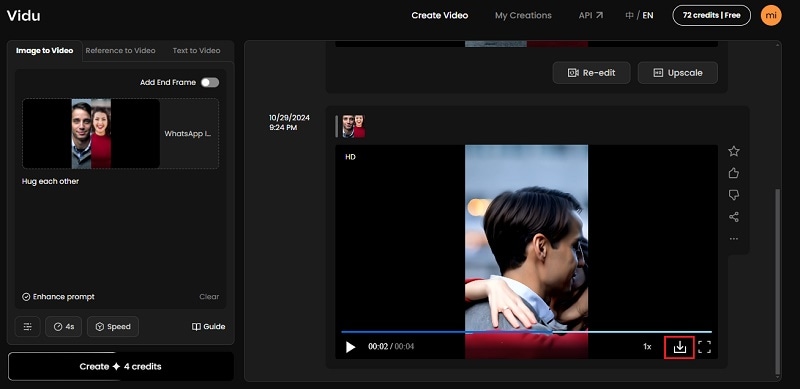
And finally, if you want to save the video, just click the download arrow.
AI Kissing Videos
Just like with hugging videos, you’ll need to prepare a side-by-side collage photo. Keep in mind that the quality of your collage can affect how realistic the “hugging” or “kissing” looks. So, let’s try using a different photo this time and follow these steps!
Step 1. Upload your photo and write a prompt
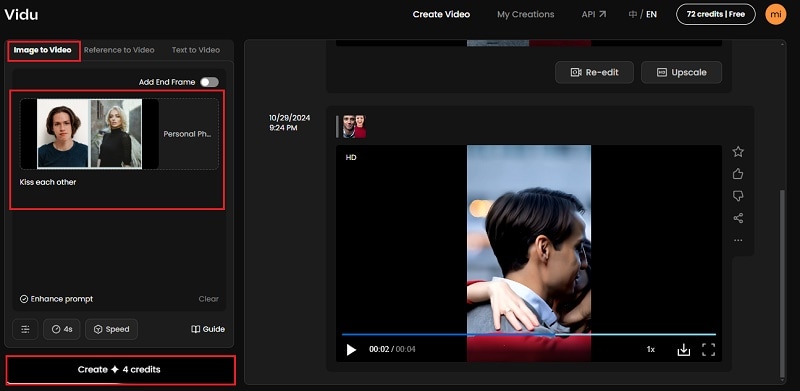
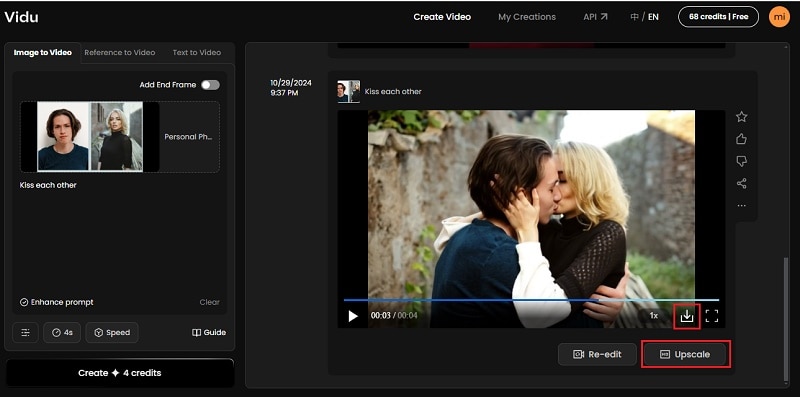
Just like with the hugging videos, choose “Image to Video” and upload a new collage photo. Type in a prompt like “Kiss each other” and hit “Create” to start generating your video.
Step 2. Preview and download
When it’s done processing, click play to check out the results. You’ll notice this video looks more realistic than previous ones, so paying attention to your prompt and the quality of your collage really helps. If you’re happy with it, you can download it right away—or choose “Upscale” to boost the quality even more!
Animations
To make animation videos with Vidu Studio, you don’t need to prepare a collage photo beforehand, which makes it a lot easier. Just follow these simple steps!
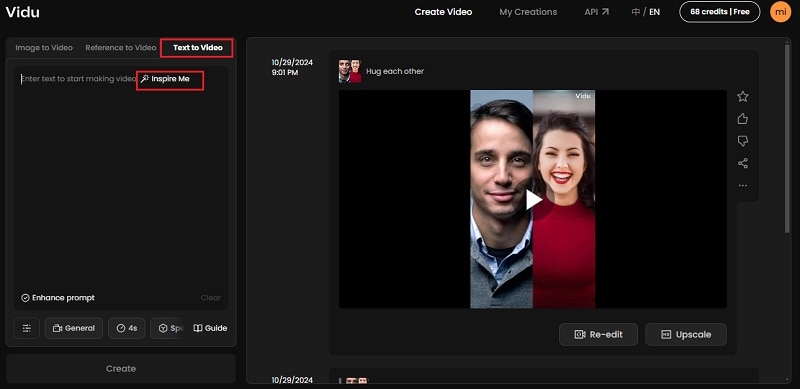
Step 1. Select Text to Video and write your prompt
This time, select the “Text to Video” option and type in a description of the video you want to create. If you’re out of ideas, just click “Inspire Me”, and Vidu Studio will write it for you with details.
Step 2. Select animation styles
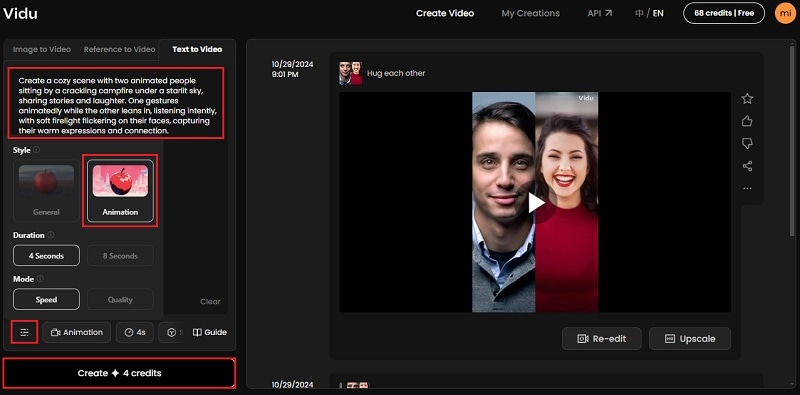
When you’re satisfied with your prompt, go to settings and choose “Animation” under the “Style” option. Then, click “Create” to start generating your video!
Step 3. Preview and download
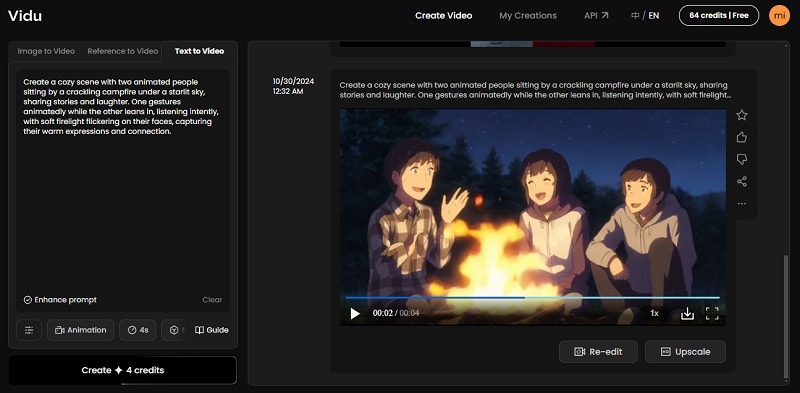
When it’s done generating, press play to see the results. Just like that, your animation video is ready! If you’re pleased with how it looks, go ahead and download it. But if you still want to improve the quality, click “Upscale” (it’ll cost 4 more credits) to make it even better.
Cinematic Video
Vidu Studio’s official guide says that the key to making a great cinematic video is to write a detailed, descriptive prompt. This helps capture the cinematic vibe of the specific genre you’re going for. To do that, follow these steps!
Step 1. Select Text to Video and write your prompt
Once again, select the “Text to Video” option and type out a detailed description of the video you want to create. This time, skip the “Inspire Me” option and focus on being as specific as possible. For instance, if you’re aiming for a sci-fi cinematic video, try using the example prompt shown in the image below.
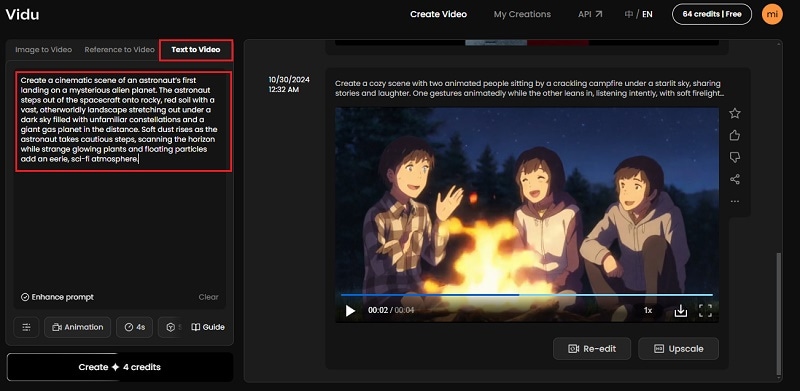
Step 2. Select general styles
This time, choose the “General” option from the “Style” menu. Then, click “Create” to let Vidu Studio generate the video.
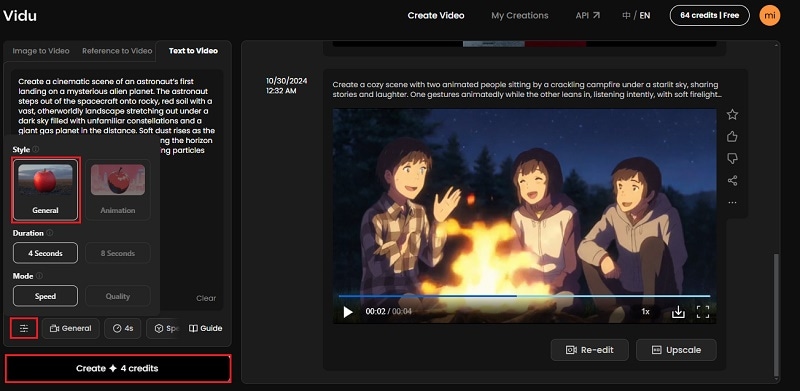
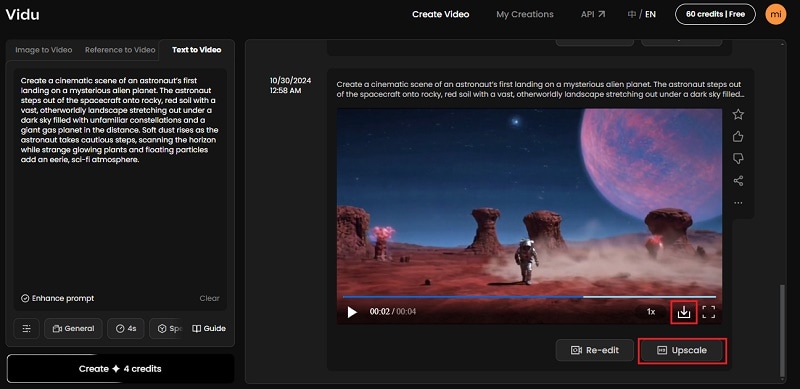
Step 3. Preview and download
When it’s done, press play to see how it turned out. Just like that, your cinematic video is complete! If you’re satisfied, go ahead and download it. If you’d like to enhance the quality, you can click “Upscale” for an even sharper look.
Part 3: More Precise Manual Customization for Vidu Studio Generate AI Video
As you can see from our guide above, using Vidu Studio creating videos is quite effectively. But since the videos are AI-generated, the quality can sometimes be hit-or-miss, and you can’t fully customize it to your liking. If you’re finding Vidu Studio’s automation a bit limiting, Wondershare Filmora is a great option for more hands-on editing.
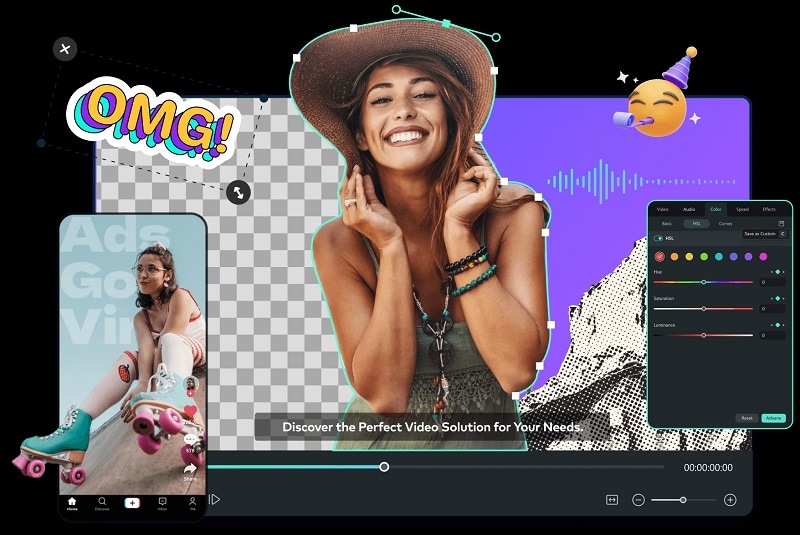
- Vast video/audio effects and creative assets.
- Powerful AI for effortless content creation.
- Intuitive, professional yet beginner-friendly.
- Works on Mac, Windows, iOS, and Android.

With Filmora, you can tweak every part of your video manually, letting you fine-tune details and add unique effects that make your videos truly stand out. Here are a few features in Filmora that can take your AI videos to the next level:
- Title and Text Effects: Choose from a wide range of animated titles and text effects to add custom, professional-looking text to your videos.
- Video and Sound Effects: Add dynamic video effects and high-quality sound effects to make your video feel more polished and immersive.
- AI Color Palette and LUTs Resources: Access an array of color palettes and Look-Up Tables (LUTs) to set the mood of your video with cinematic color grading.
- AI Voice Cloning: Clone voices for narration or character dialogue, adding a personalized touch to your videos.
With these powerful tools, Filmora lets you fine-tune and personalize your AI videos, helping them really stand out! Even better, Filmora is affordable, with flexible pricing plans and a free trial so you can test it out before buying.
To learn how to use Filmora for your projects, just follow this simple guide:
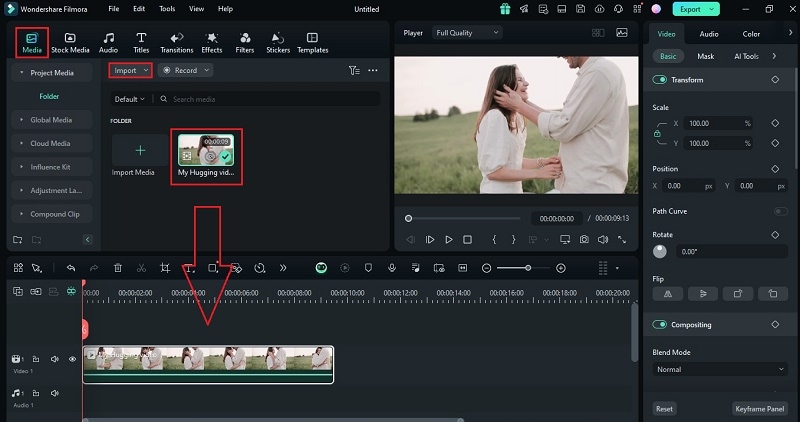
Step 1. Open Filmora and upload your Footage
Before we begin, make sure you have the latest version of Wondershare Filmora. If you haven’t got it yet, you can download it here. Once it’s installed, open Filmora by double-clicking the icon, then select “New Project” to begin.
Then, head over to the “Media” tab, import the video you want to edit, and drag it down to the editing timeline to get started.
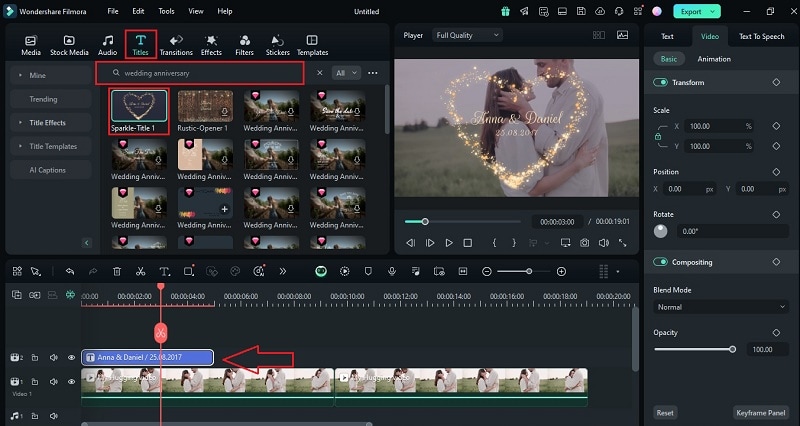
Step 2. Add title text and customize it
You can start the video by adding romantic text since the video is about a couple hugging for their anniversary. Go to the “Titles” tab and type something like "Wedding Anniversary", choose a style you like, and drag it onto the timeline above your video.
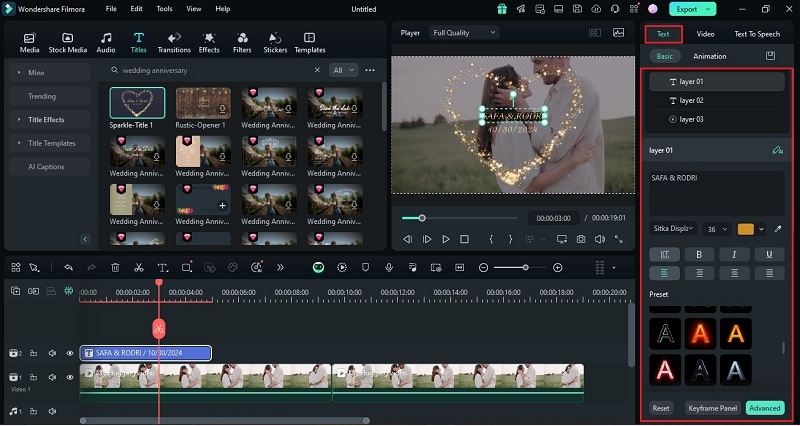
Then, double-click the text box to customize the font, color, size, and animation to match the vibe of your video!
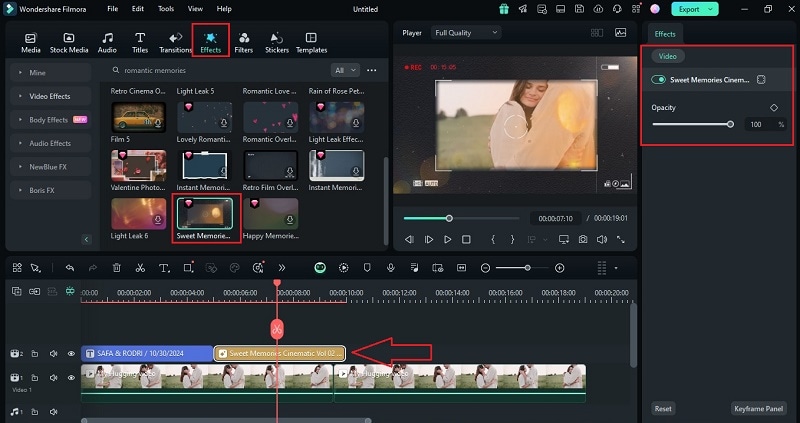
Step 3. Add video effects
Next, further enhance your video by heading to the “Effects” tab, where you’ll find tons of cool options. Pick an effect you like and drag it onto your clip in the timeline. You can adjust the effect settings to make it as subtle or bold as you want.
Step 4. Create custom stickers
Add a personal touch to your video by going to the "Stickers" tab and selecting "AI Stickers". Just type in the kind of sticker you want in the description box, pick a style, and click "Generate".
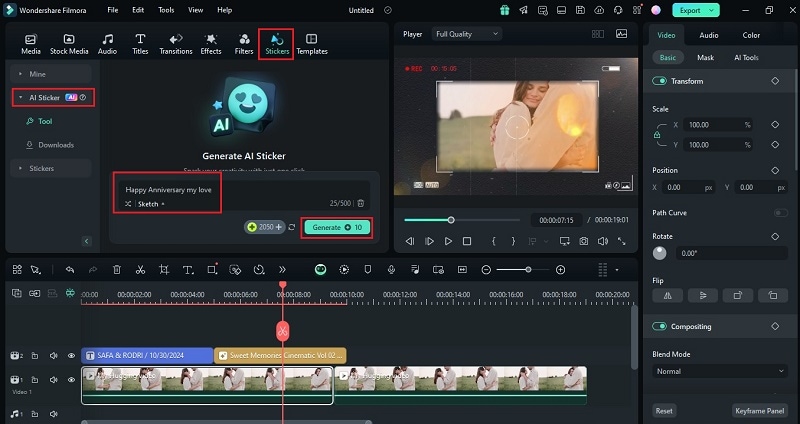
When your sticker is ready, download it and place it wherever it looks best in your video!
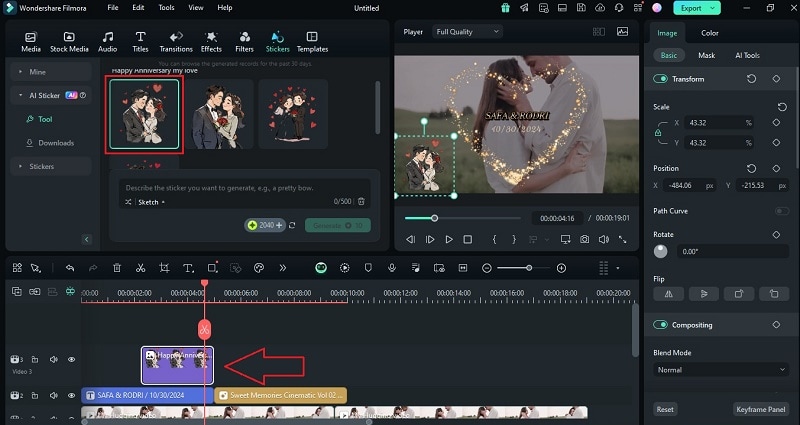
Step 5. Color your video with LUT
To add a cool look to your video, double-click the video clip in your timeline and go to the "Color" tab on the right side. Turn on the "LUT" (Look-Up Table) filter, which instantly gives your footage a cinematic or artistic vibe. Try a few options and see which one fits your video best!
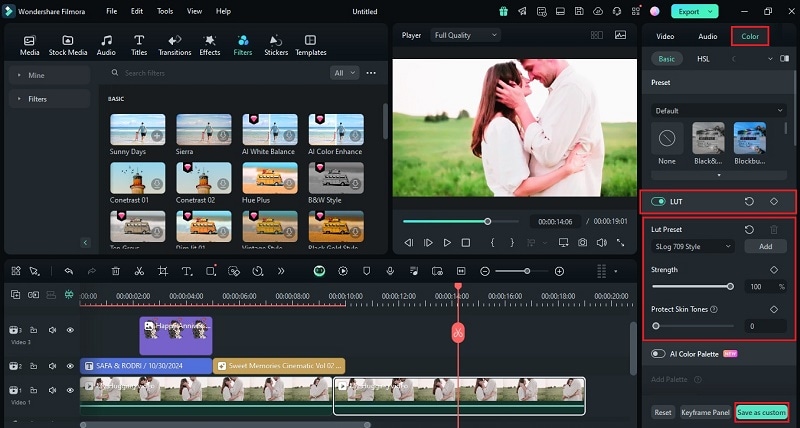
Step 6. Add romantic music
To set the mood and make your video more fun, click on the “Audio” tab and choose some romantic music from Filmora’s library. Drag it down to the timeline, and you can trim or adjust the volume to fit the video just right.
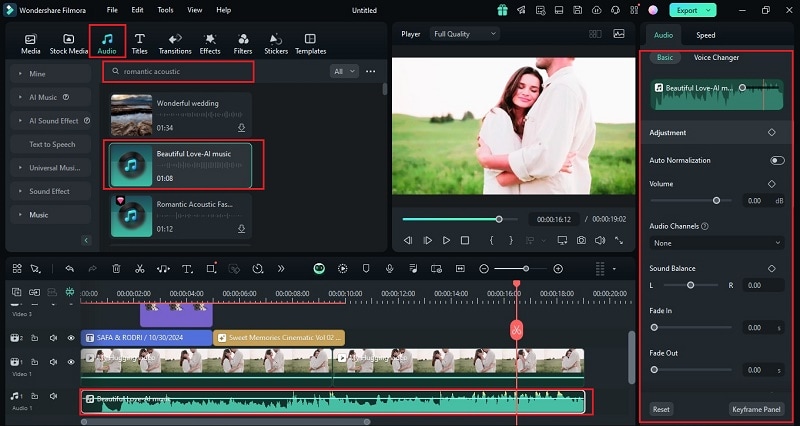
Step 7. Save and share
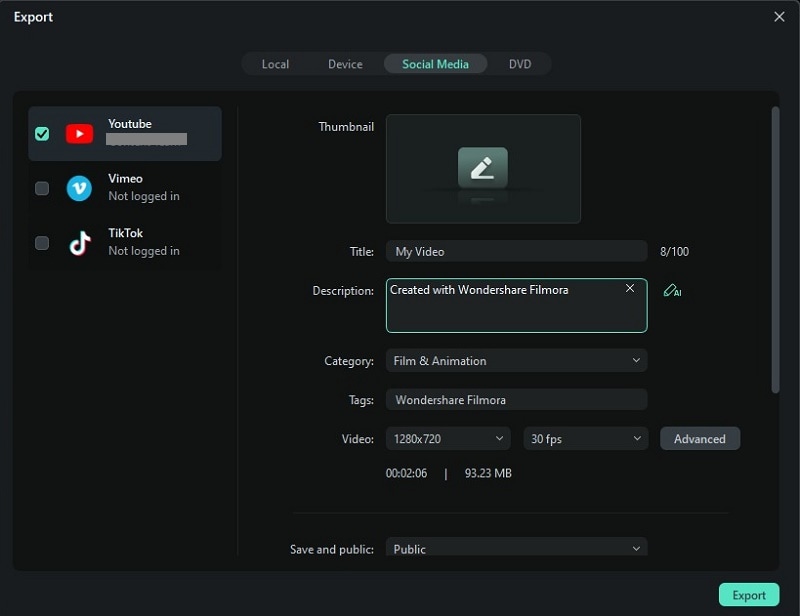
Once your video looks perfect, click “Export". In the pop-up window, go to “Social Media” and choose the platform you want to upload it to. You can also adjust the title, description, category, resolution, and other details to make it just right!
Vidu Studio vs. Filmora: A Balanced Workflow
After looking at how Vidu Studio and Filmora operate on video creation, both of them bring something unique to the table. Vidu Studio is all about speed and simplicity, using AI to generate videos quickly with minimal input. On the other hand, Filmora offers more manual editing tools, perfect for those who want to dig deeper into details and get creative.
So, let's take a look at when to use each tool and how they can work together for a smooth, efficient process.
Use Case Scenarios:
- When to Use Vidu Studio: Perfect for when you need fast, AI-generated videos. If you’re working on a short deadline or want a quick social media post or promotional clip, Vidu Studio helps you get it done in a snap.
- When to Use Filmora: Perfect for in-depth editing where you want full control over details. Use it when you’re looking to fine-tune your video with effects, transitions, audio tweaks, and custom color grading—ideal for when you want to polish your video or add a personal touch.
- How They Can Work Together: If you want the best of both, you can create your base video in Vidu Studio, and then export it to Filmora for those final touches. This way, you get the speed of AI with the customization of advanced editing, giving you professional-looking results faster.
Conclusion
Vidu Studio has been trending thanks to those viral AI videos of people hugging their idols on social media. So, this article tried to see what the hype is about by breaking down its features and guiding you through using Vidu Studio to create videos such as: hugging videos, kissing videos, animation videos, and cinematic videos.
While Vidu Studio makes AI video creation fast and easy, it does lack options for deeper customization—especially since each video is only 4 to 8 seconds long. That’s where Wondershare Filmora comes in! Filmora lets you take your AI video further with detailed, hands-on editing and a wide range of powerful features to truly personalize your content.
In the end, combining Vidu Studio for fast AI generation and Filmora for editing gives you a perfect balance of speed and flexibility for high-quality videos.


