LumaFusion is one of the most complex iPad and iPhone video editing apps. Many of its customers adore it, and it has some incredible capabilities that you'd find incompetent editing software. They've effectively opened up the realm of LUTs to iPhone and iPad users.
LumaFusion LUTs are individual files that act as containers in LumaFusion. This container file includes standard LUT data as well as LumaFusion-specific color preset data. A LumaFusion LUT Preset file is similar to a Super LUT. LumaFusion can only employ one standard LUT at a time; however, LumaFusion LUT presets enable simultaneous Color Grading and Color Corrections.

In this article
Part 1. How Will LUTs Help With Color Correction in Lumafusion
Having LUT presets is great for users looking for speedy workflows and consistent results. The following list breaks down the detailed significance of using LumaFusion’ s LUTs in color correction:
- Color Precision: LUTs mathematically remap the colors in your videos to ensure accurate transformations. This benefit comes in handy when you want to match footage from different sources.
- Log-to-Rec709 Conversion: Many professional cameras record videos in flat and desaturated log profiles. Using LumaFusion LUTs, you can convert this log profile into Rec.709 for a natural look.
- Creative Stylization: Unlike manual grading, LUTs can be used creatively to give cinematic, and vintage looks to your videos. Besides, they can also be used to complement your stylized aesthetics for science fiction movies.
- Baseline for Manual Grading: Since LUTs follow automated processes of changing video colors, they can be used as a baseline for further editing. After applying a color preset, users can adjust the video exposure, contrast, and more settings.
Filmora now offers 800+ top-quality 3D LUTs cover a broad range of scenarios. Transform your videos with Filmora's powerful 3D LUTs.

Part 2. How To Use LUTs in Lumafusion?
When looking for a video editing app for iOS, LumaFusion is a prominent mention. With its flexible functionality, it allows you to import LUTs from your device and enhance the video. Users can import .cube and .3dl LUTs from their iPhones and apply them to their videos.
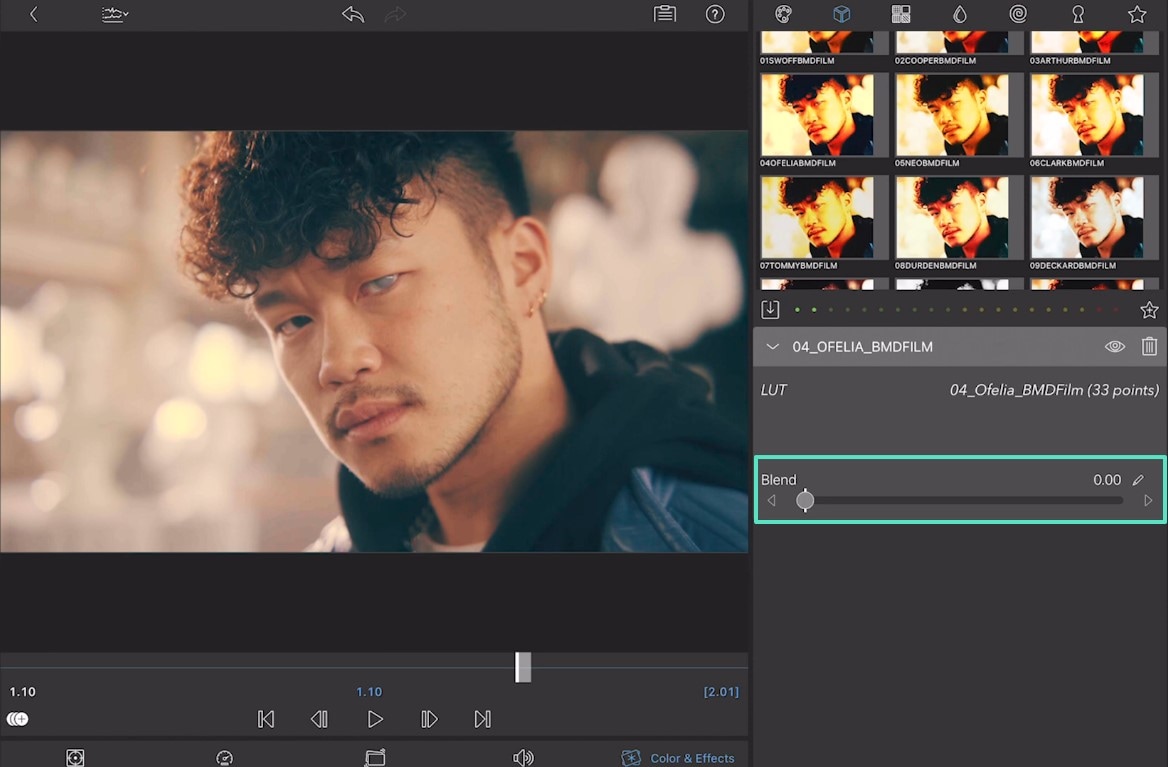
Once you have applied a free LumaFusion LUT, you can customize its blending percentage to make the change look natural. Follow the guide below and learn how to use these LUT presets on a video:
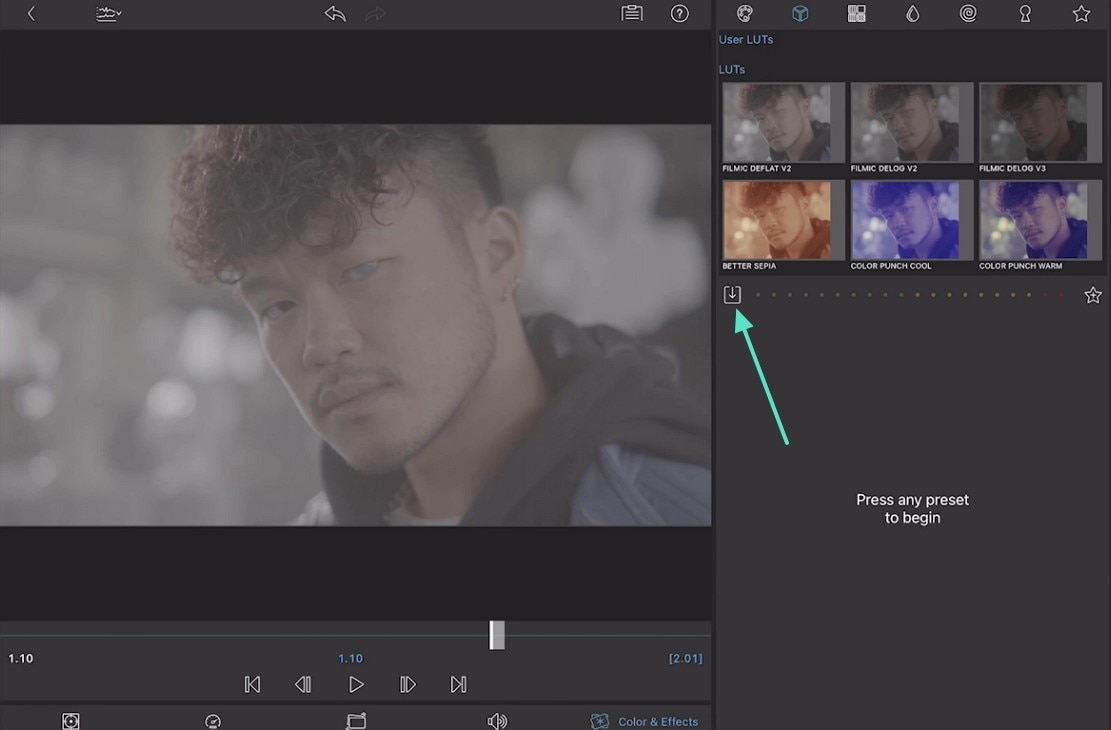
Step 1. To start, import a video clip to LumaFusion and tap on the video timeline to access the built-in LUTs on the right. If you do not like any built-in presets, press the "Download" icon to import the desired LUT presets from your device.
Step 2. Now, apply your desired LUT preset and adjust its "Blend" percentage to customize the appearance.
Part 3. Free LUTs Resource for Lumafusion\
As mentioned before, LumaFusion allows users to outsource LUT presets. There are many sites that offer free LUTs for LumaFusion, some of which are mentioned below:
1. Shutterstock
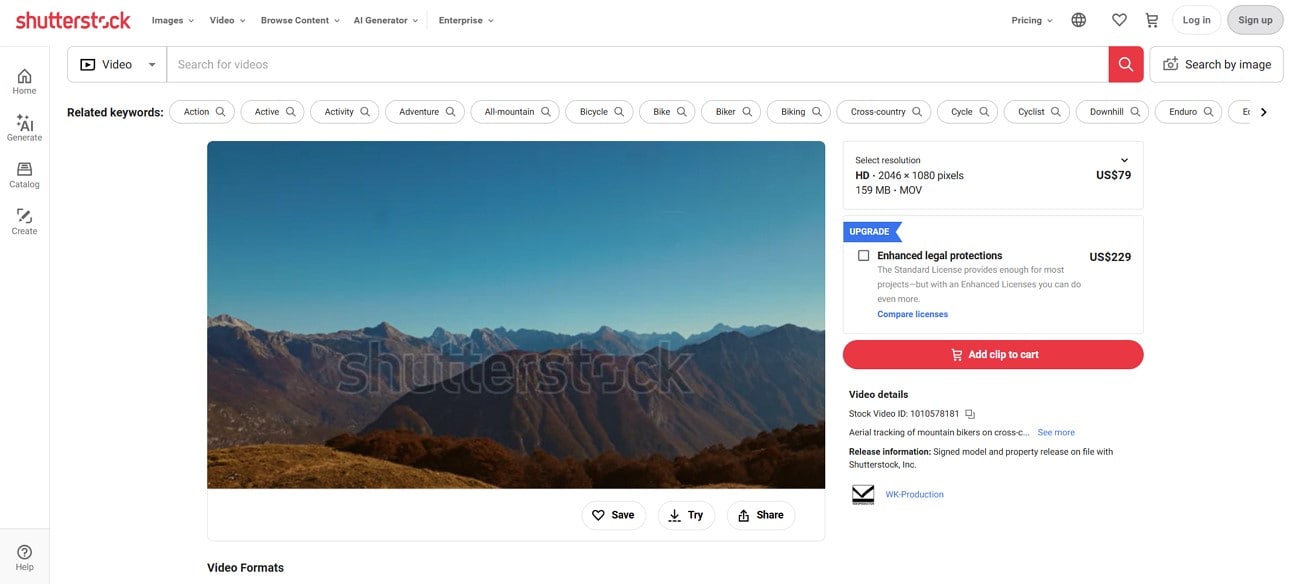
When looking to download multiple color presets with a single click, Shutterstock is the right place to be. It offers LUTs in .cube format, which means they are LumaFusion supported. This platform has a preset suite of every color, fitting the vibe of every video type. Being an advanced library, Shutterstock supports major editing programs like LumaFusion, Premiere Pro, Final Cut Pro, and DaVinci Resolve.
2. freshLUTs
This website provides a complete breakdown of information on each LUT preset present on this site. Before downloading a pack, you can make up your mind by viewing the color, style, and key. If you like an asset of freshLUTs, you can download it or leave a like to support the creator. Users can pick presets of all types, including cinematic LUTs for LumaFusion.

3. tdcat
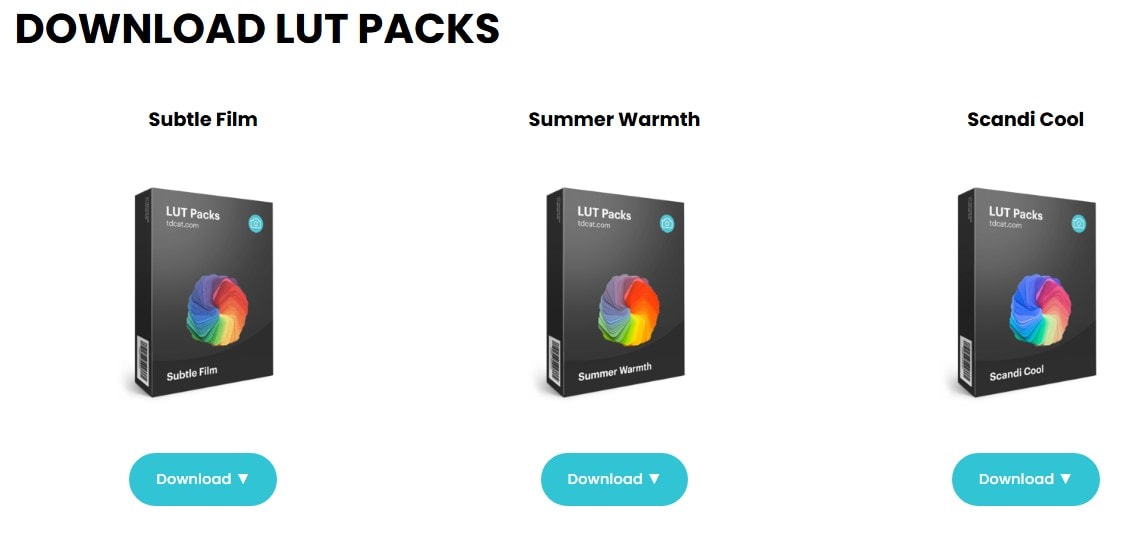
If you are looking for high-quality presets, this library is a decent resource choice. With its diverse LUT collections, it changes the entire outlook of your videos. The free LUTs LumaFusion on this platform are fit for every vibe, from summery colors to classic black and white. The presets are downloaded with .cube extensions, making them perfectly compatible with LumaFusion for color grading.
4. On1
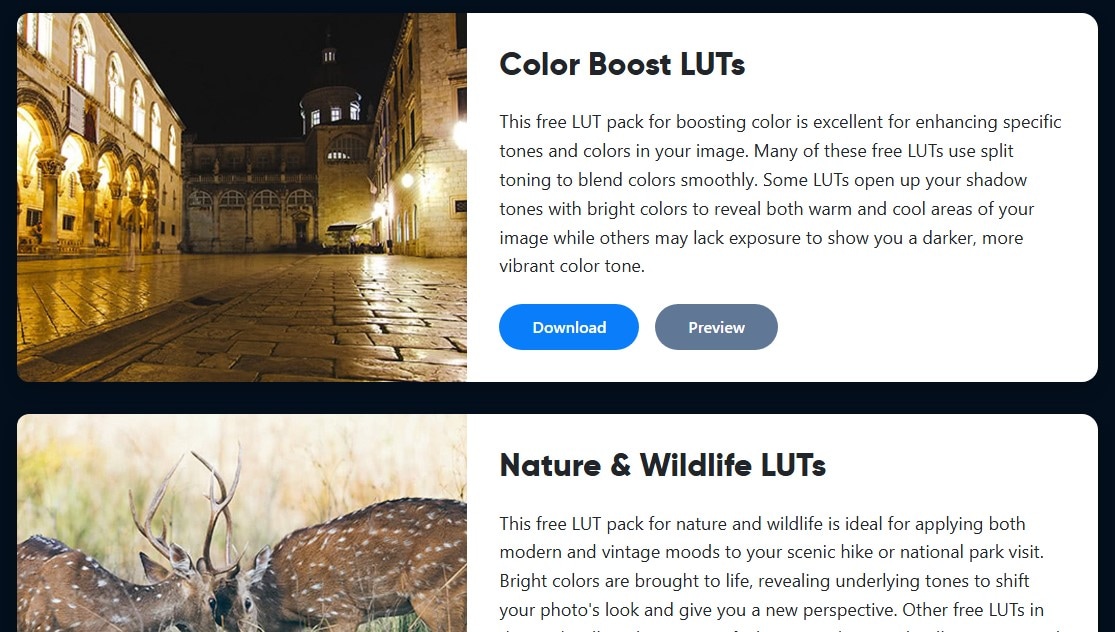
On1 is a reliable platform to get your hands on your favorite LUTs for LumaFusion. This website allows you to preview the presets before you download them to your device. Whether you are looking to refine your wildlife videos or landscape content, this site has all you might need. In addition to free LUTs for LumaFusion, On1 offers an array of paid assets as well.
5. Motion Array
With platform-specific assets, Motion Array allows you to captivate your audience by adding attractive colors to your videos. This resource library has a collection of downloadable presets that are saved in .cube format. Due to this versatile format, it supports various editing tools, like Adobe Premiere Pro, After Effects, and the best LUTs for LumaFusion.

Part 4. Using Wondershare Filmora for Advanced Color Corrections
Although LUTs LumaFusion is useful, you have to outsource the LUTs as the default library of presets has just a few options. Wondershare Filmora is an effective replacement for this app as it offers an extensive color preset collection. This tool offers a desktop and a mobile version for color adjustment, for which the details are given below:
Using the Desktop Version
The desktop version of Wondershare Filmora offers an extensive color correction facility, replacing the need for built-in filters. The LUT preset collection is diverse and does not necessarily require its outsourcing. However, you can still import third-party resources if the built-in collection does not satisfy you.
Once you have applied the presets, they can be customized by adjusting their strength. The following instructions are a comprehensive guide on using Filmora for color correction:
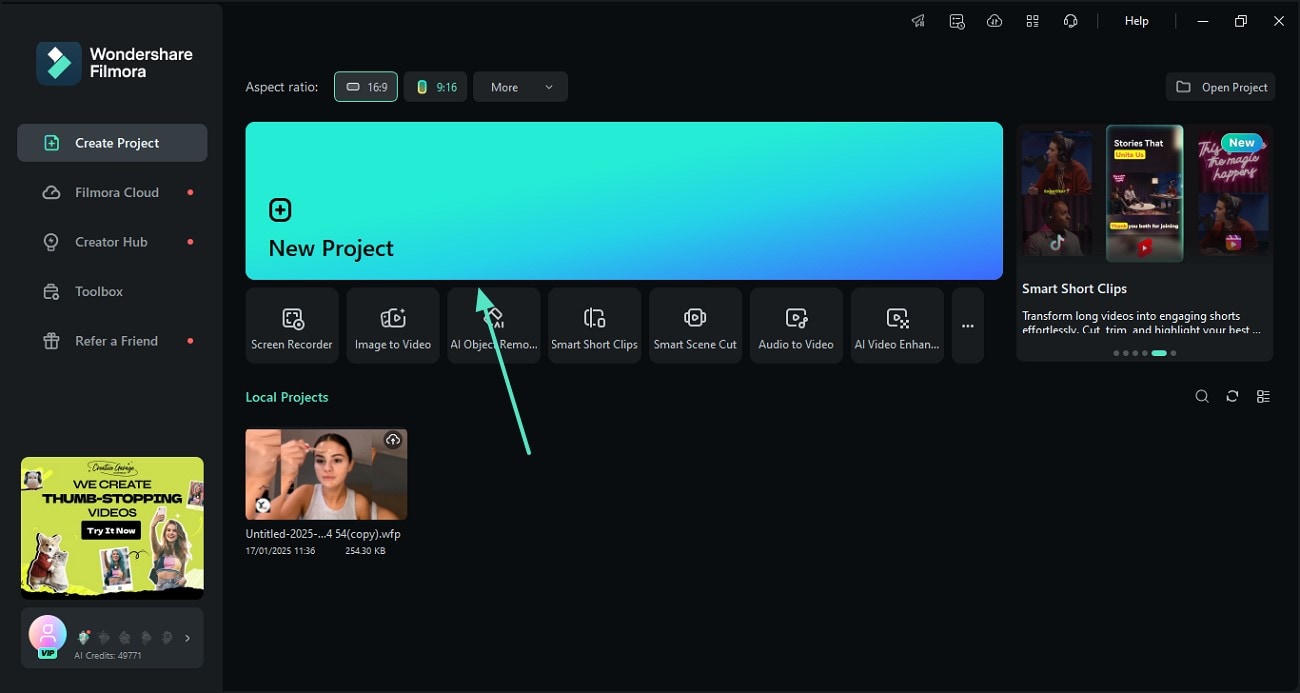
- Step 1. Import a Video in the New Project. Firstly, open Filmora on the desktop and start a "New Project" to import a video from your device.
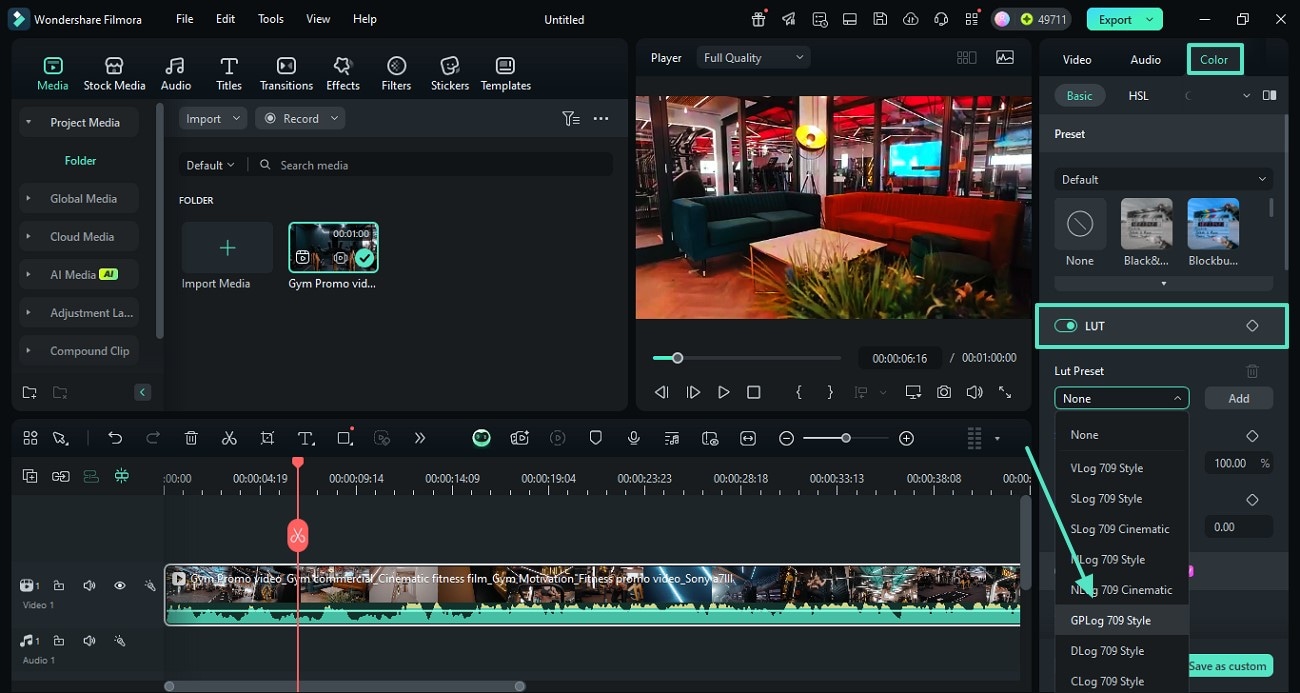
- Step 2. Apply a LUT Preset to Begin. Now, navigate to the "Color" adjustment panel and enable the "LUT" option to apply the desired preset.
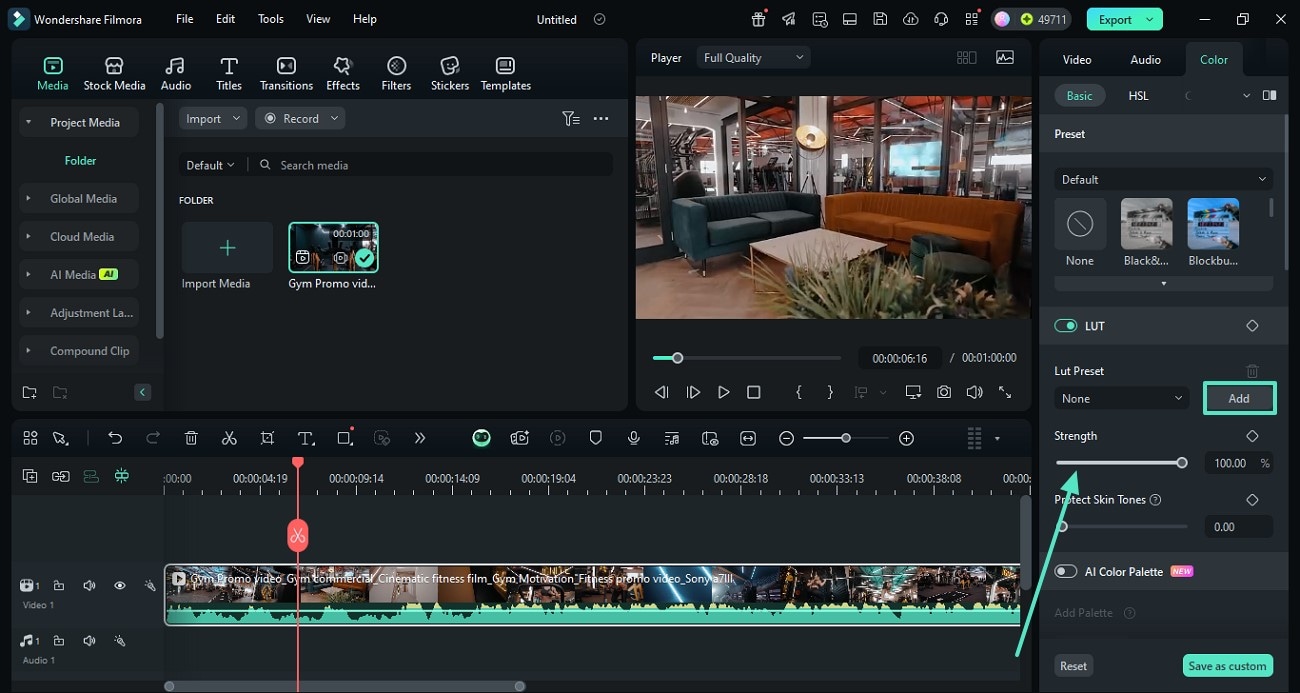
- Step 3. Adjust the Preset’s Strength or Import an LUT Preset. To customize the preset, drag the "Strength" slider with your cursor. If you want to import a third-party LUT, press the "Add" button.
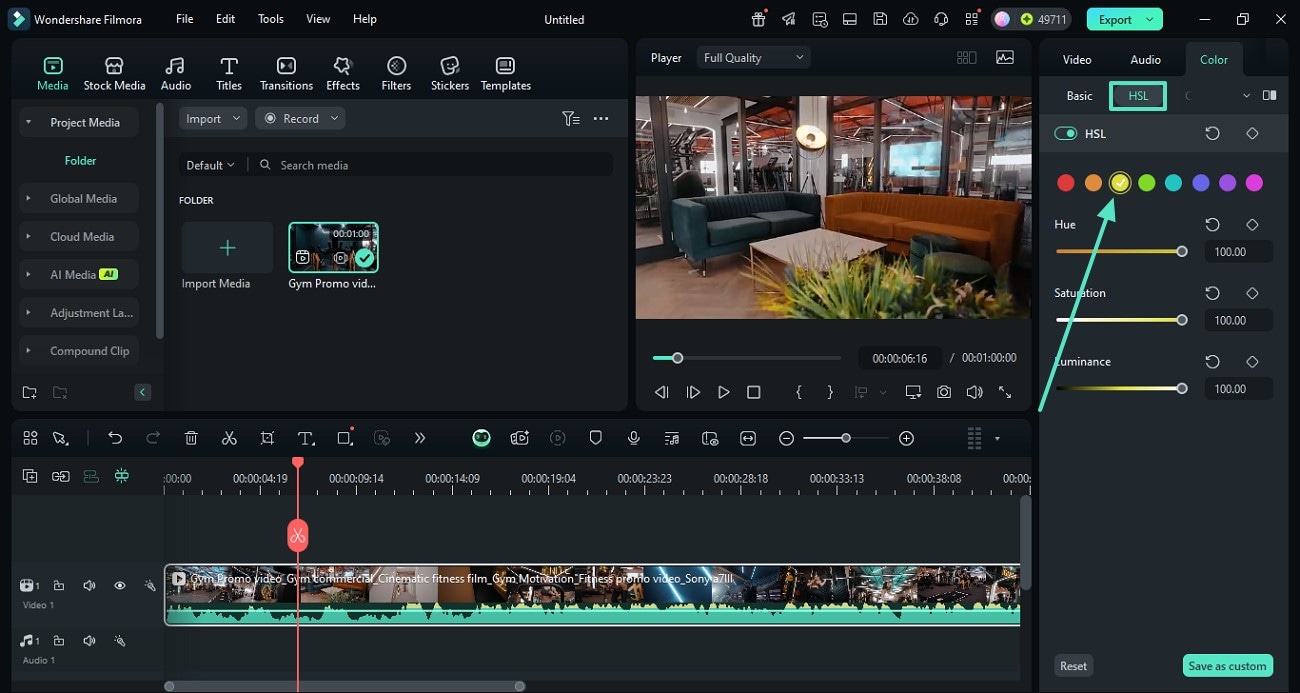
- Step 4. Adjust the Hue, Saturation, and Lightness. To make seamless changes in the colors, access the "HSL" section from the right panel. Here, select the color you want to fix and use the designated sliders to customize it.
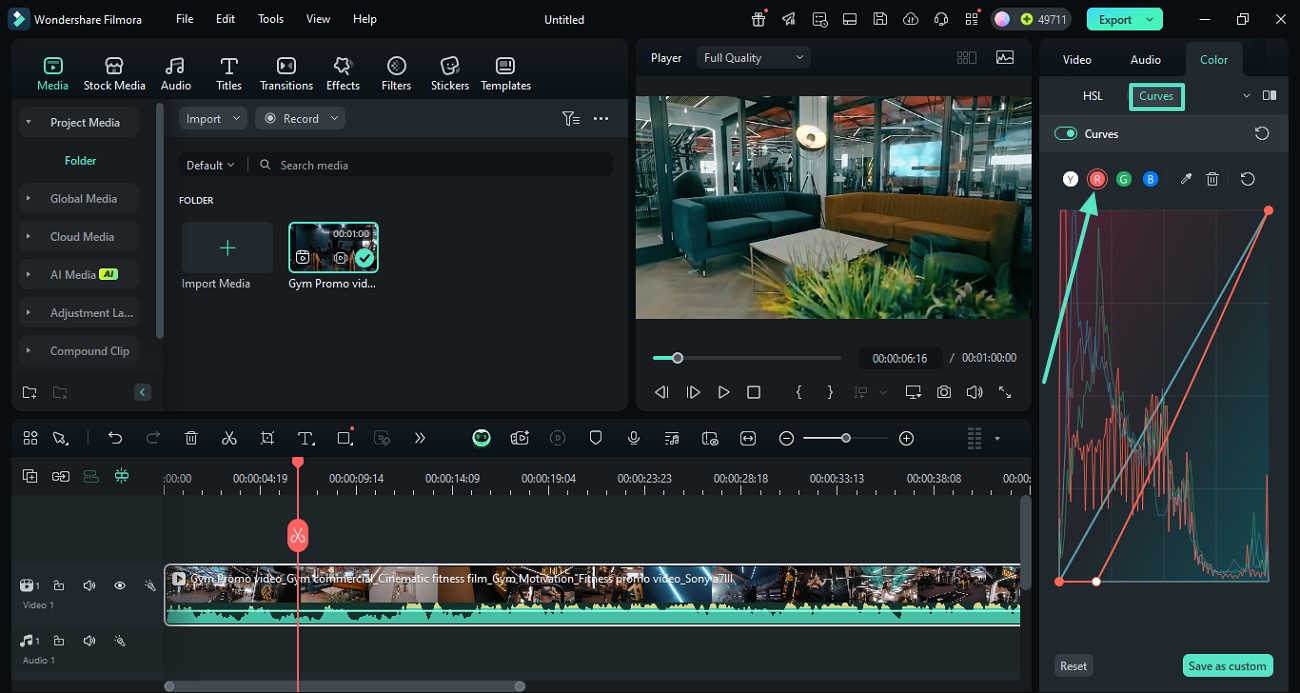
- Step 5. Enable the Curves and Make Personalized Color Changes. For personalized color correction, enter the "Curves" tab and select the desired color to adjust it using the curve below.
- Step 6. Enter the Color Wheels Tab for Advanced Adjustments. When looking for advanced color adjustments, enter the "Color Wheels" tab and set the highlights and midtones to perfection.

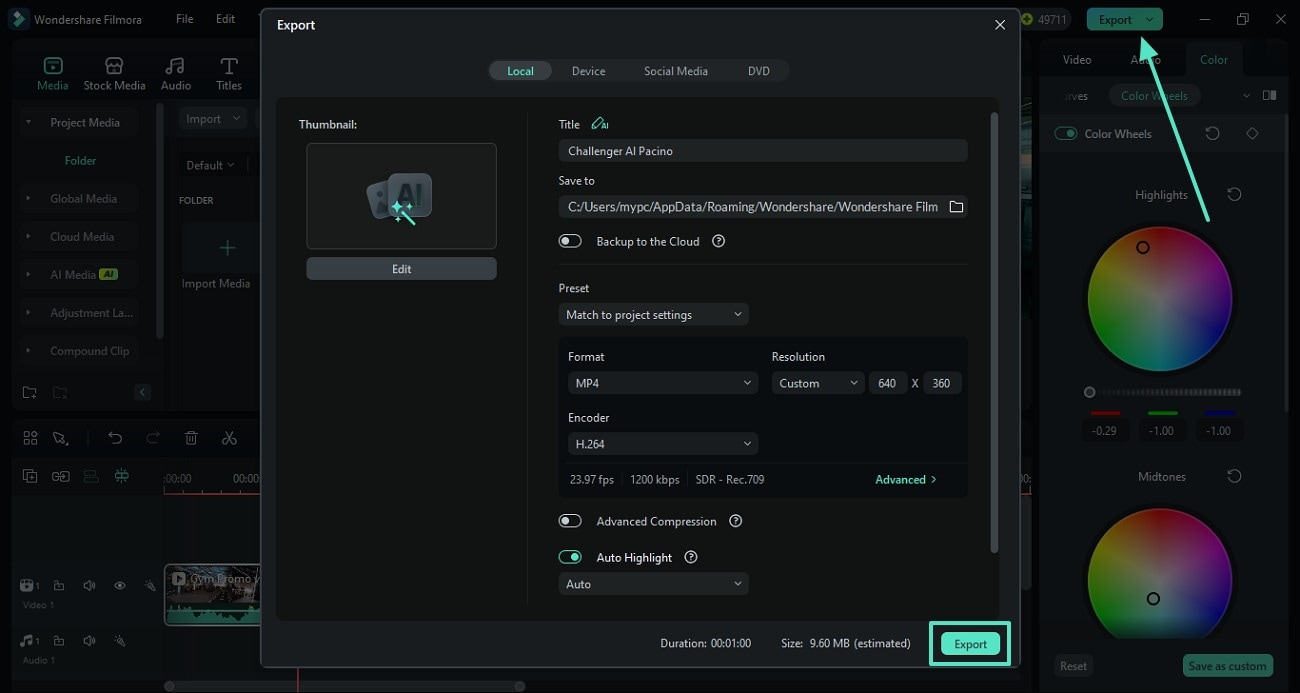
- Step 7. Export the Edited Video to the Device. When you are done fixing the color of your video, press the "Export" button from the top right to save the video in your desired settings.
Using the Filmora App
Users who want to add quick color changes to their videos can use the Filmora App [iOS/Android]. This app is an effective alternative to cinematic LUTs for LumaFusion as it provides numerous color adjustment options.
Besides the HSL settings, you can adjust the brightness, saturation, and other color options in this app. The following guide must be followed to learn how to use these presets using the Filmora App:
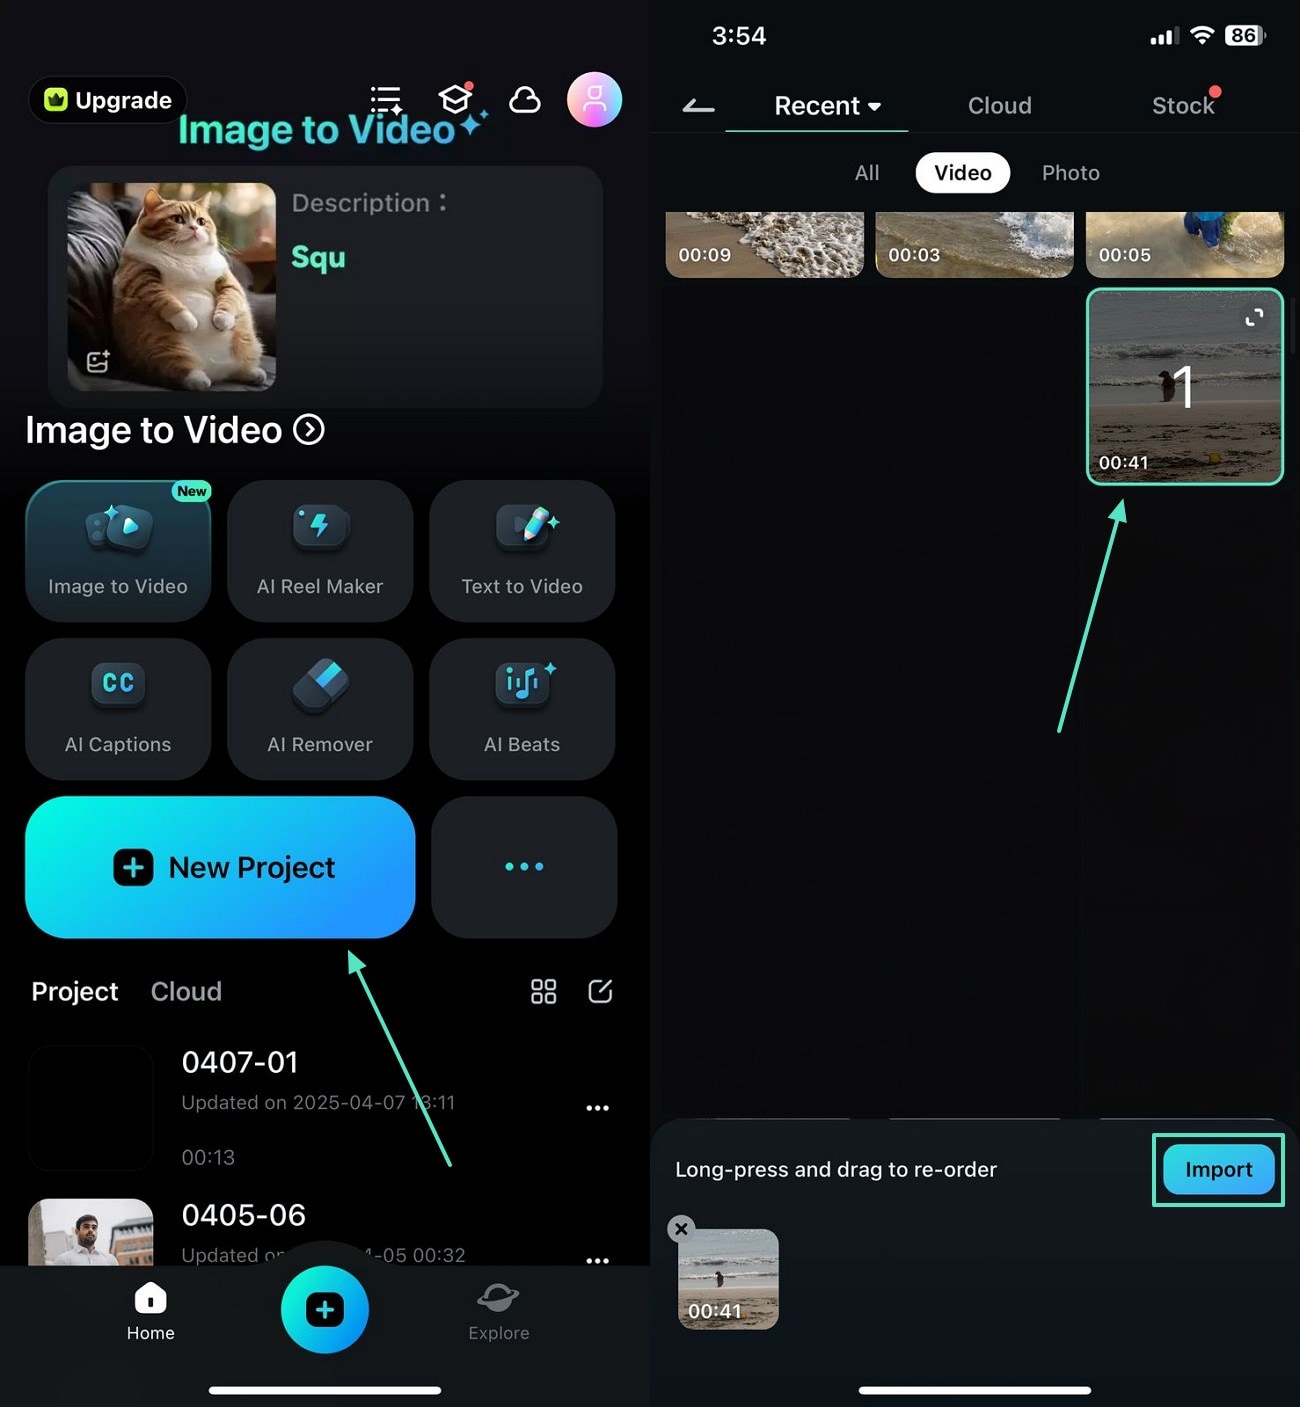
- Step 1. Import a Video in Your New Video Project. To start, open the Filmora App and start a "New Project" to import the video that needs color correction.
- Step 2. Adjust the Video’s Exposure to Fix the Light. From the bottom toolbar, access the "Adjust" toolbar and set the video’s "Exposure" by using the designated slider.
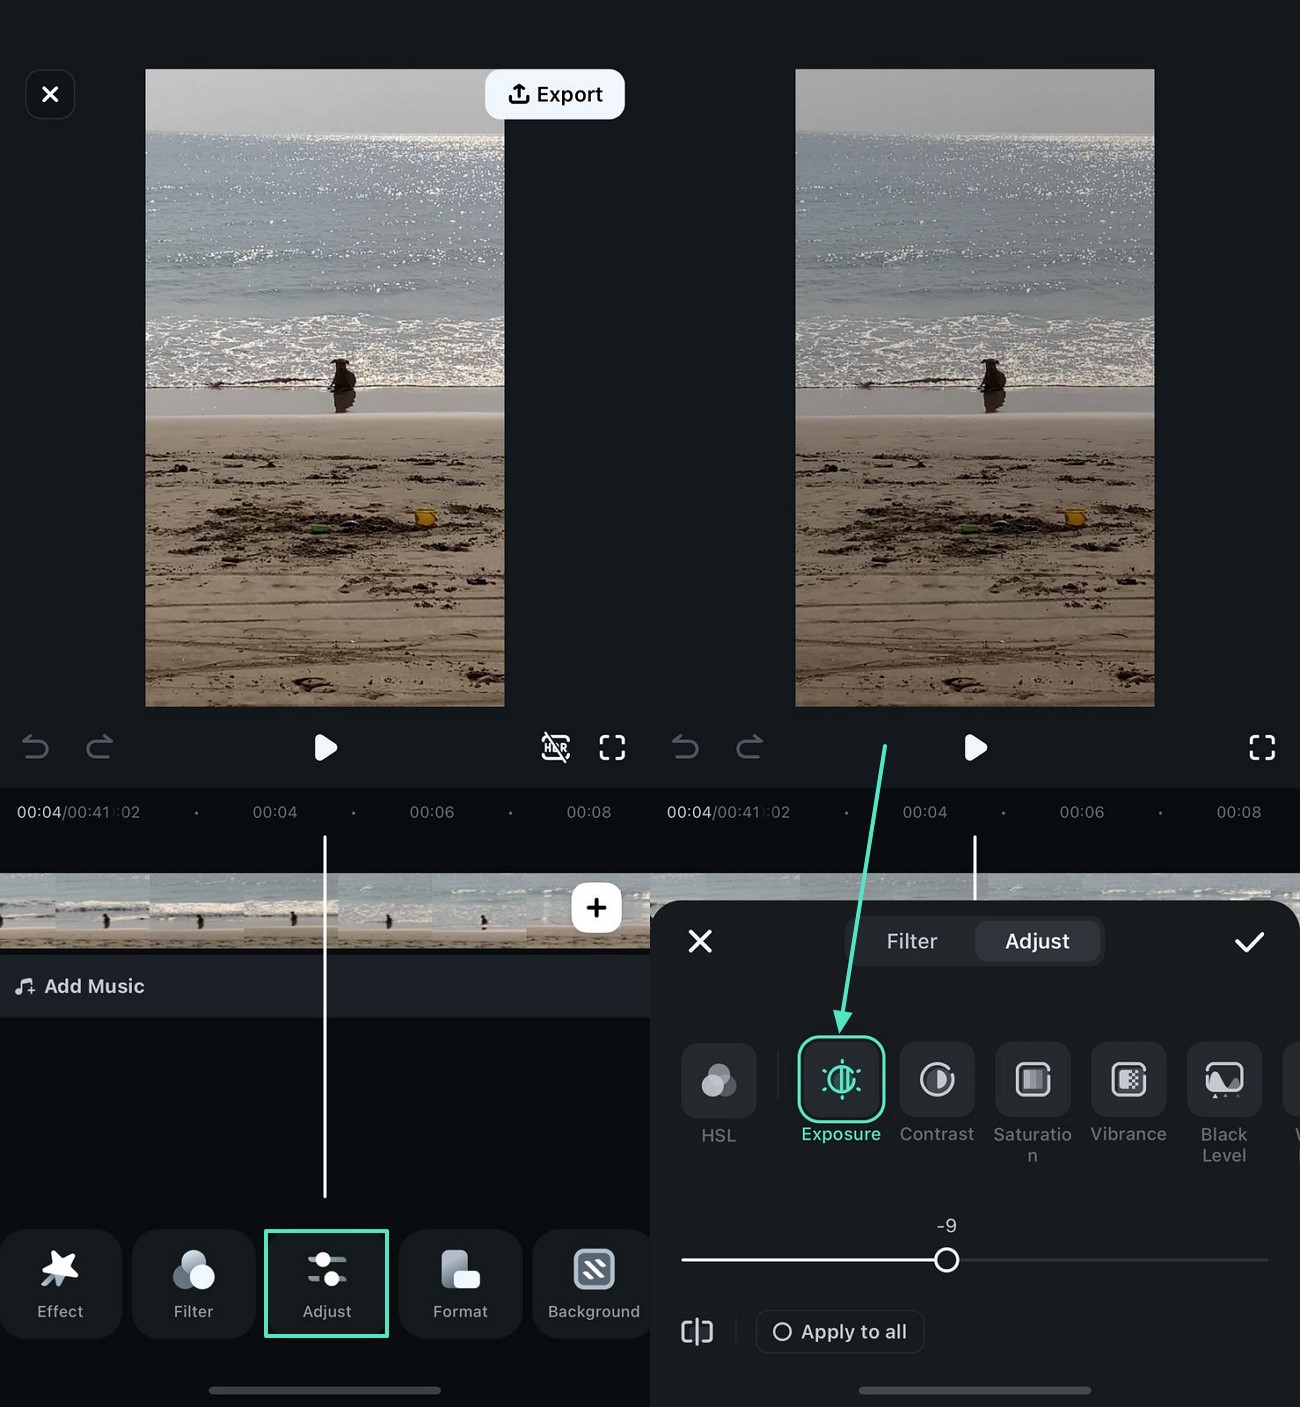
- Step 3. Make More Settings to Fix the Saturation, Contrast, and Vibrance. Now, swipe to adjust the video’s "Saturation," "Contrast," and "Vibrance" by dragging their respective adjustment sliders.

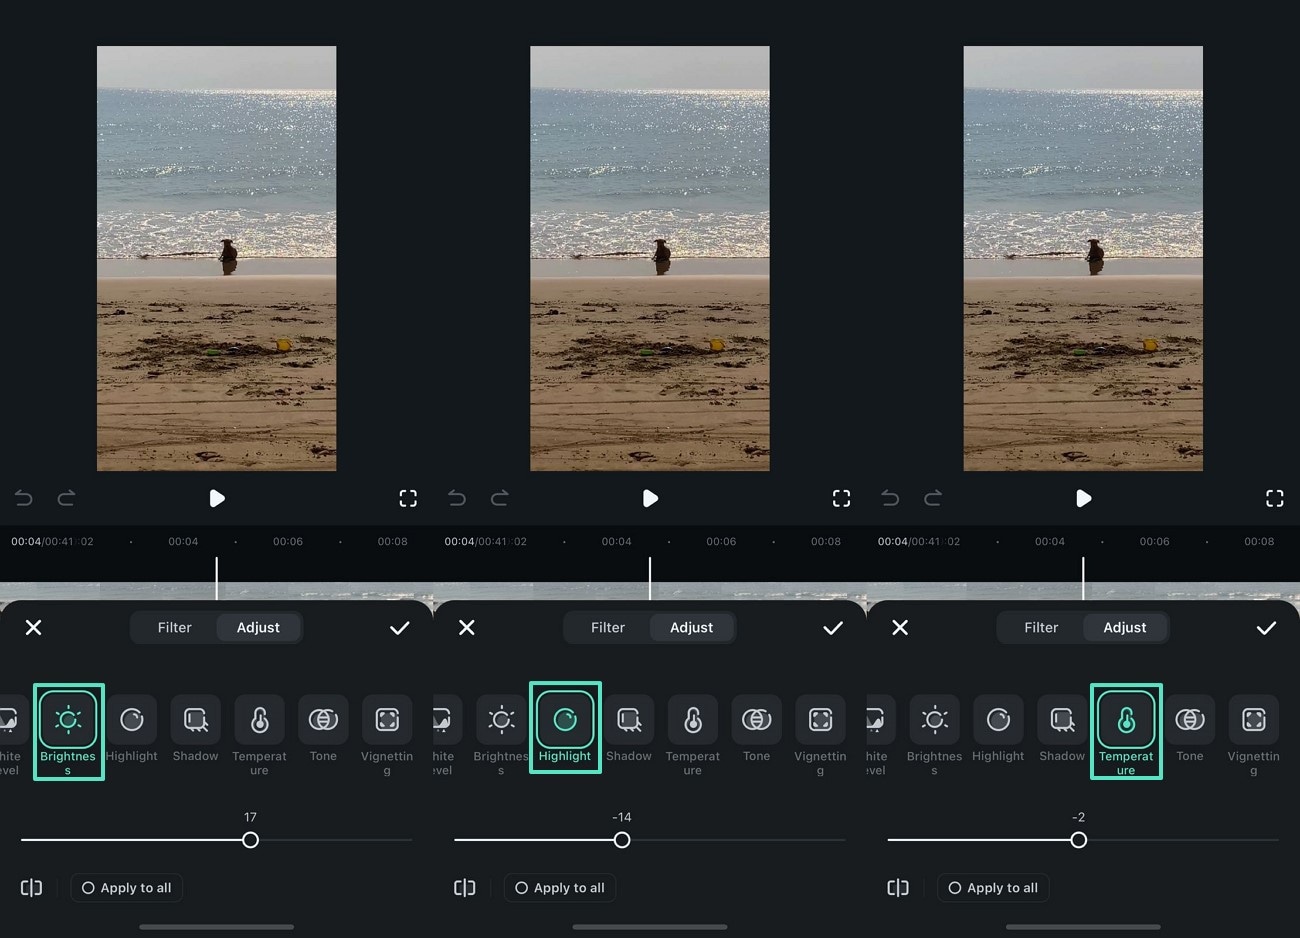
- Step 4. Set the Brightness, Highlight, and Temperature of the Video. For quick adjustment of the video’s "Highlight," "Temperature," and "Brightness," set their values.
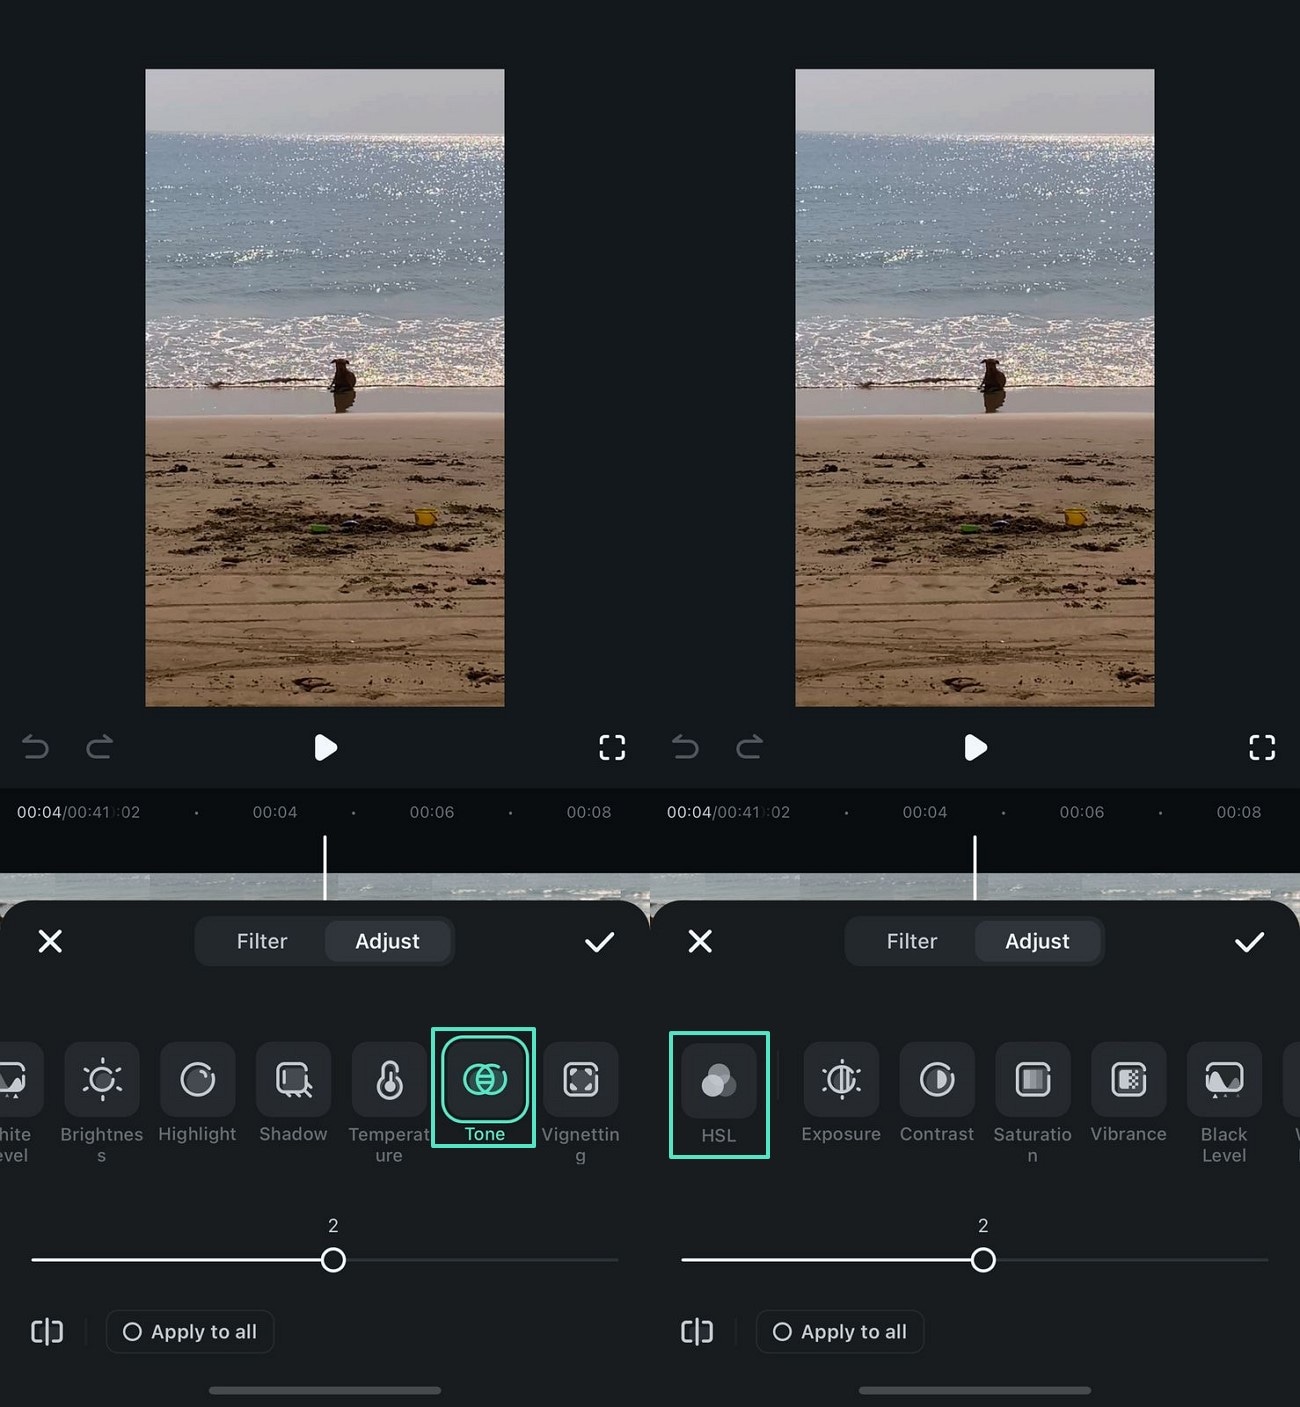
- Step 5. Set the Video’s Color Tone and Head to the HSL Settings. From the "Tone" tab, use the slider to adjust its value as you need. Now, press the HSL option and head to the next interface for detailed settings.
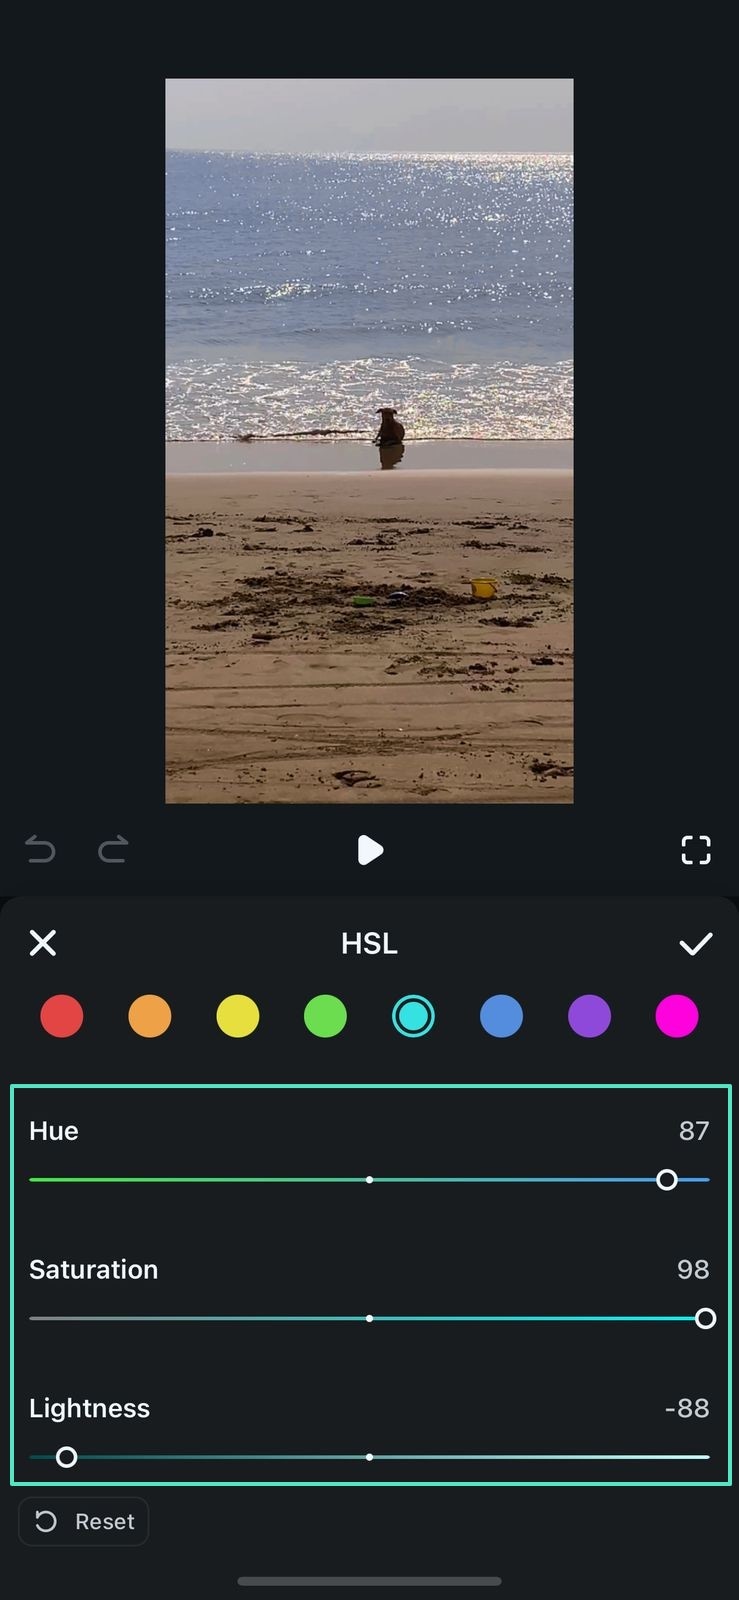
- Step 6. Make HSL Adjustments to Proceed. From the next screen, use the HSL sliders to adjust the desired color tones and press the Tick to save the changes.
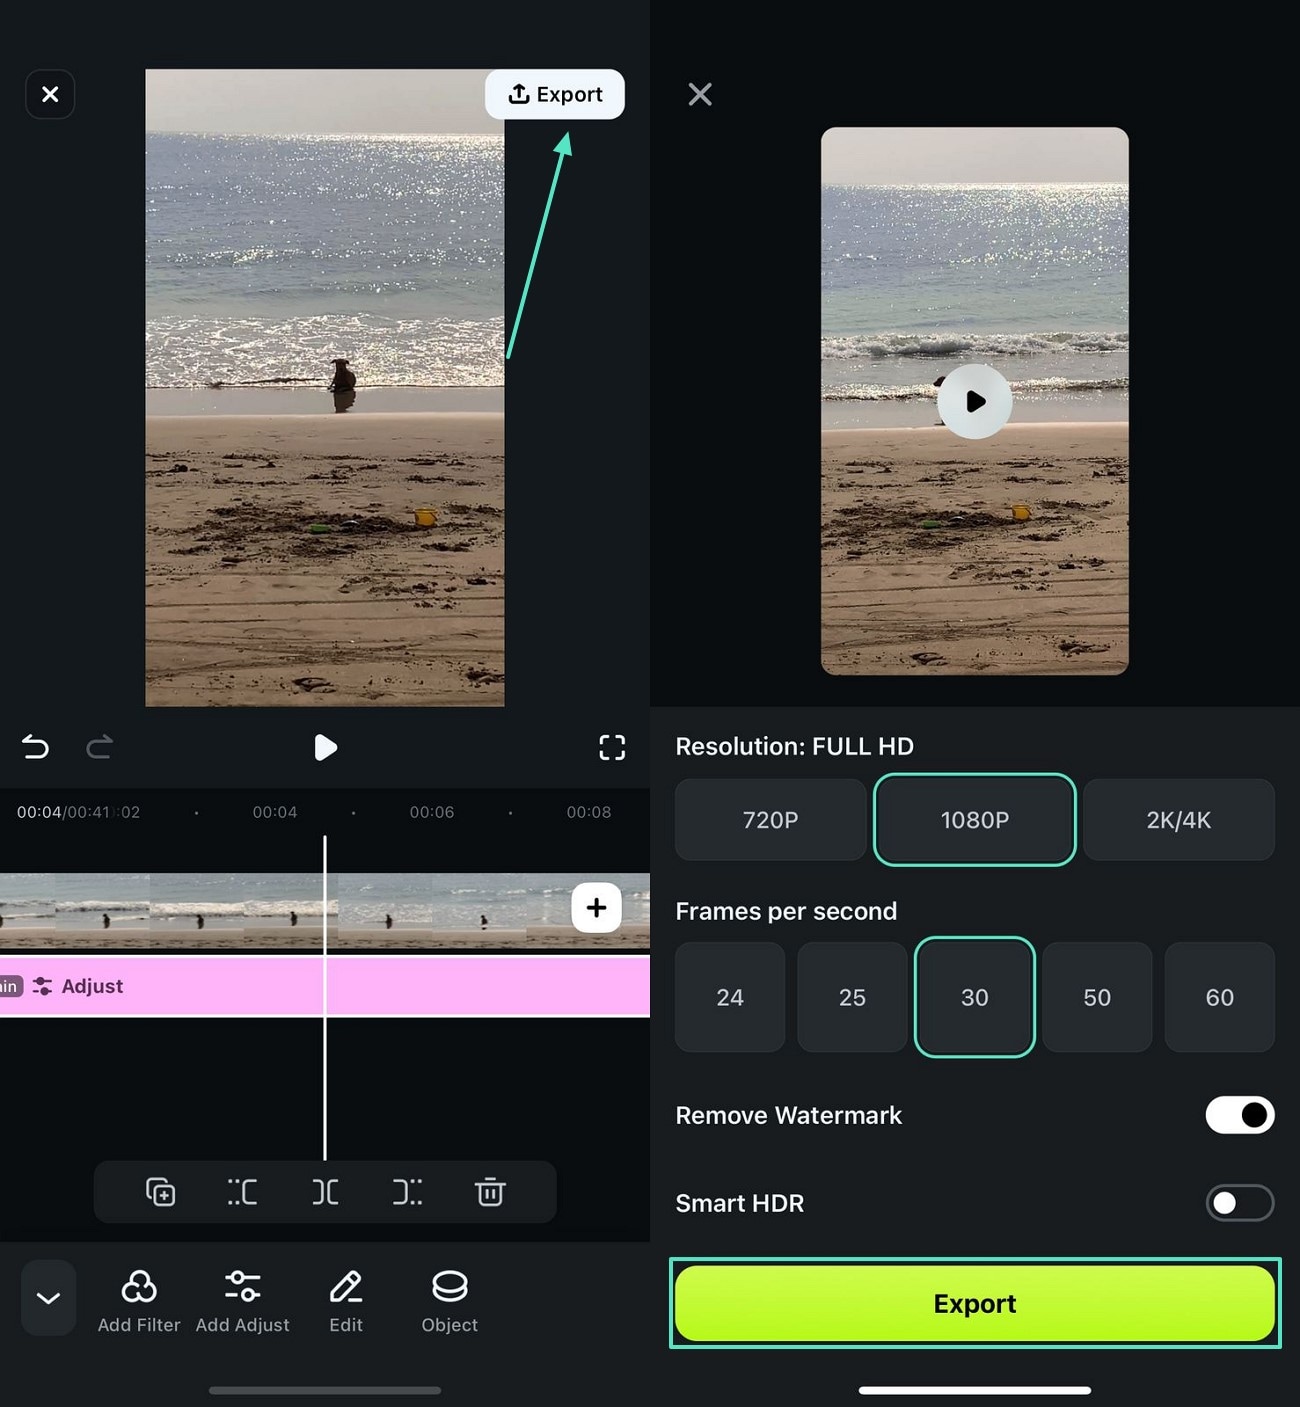
- Step 7. Export the Video to Your Device. When you are done editing the video, head to the top right to "Export" the file in your desired resolution and framerate.


 100% Security Verified | No Subscription Required | No Malware


