
 100% Security Verified | No Subscription Required | No Malware


 ChatGPT
 Perplexity
 Gemini
 Claude
 Grok
Grok
Ever wondered how people bring photos to life and make them feel more real? With AI tools becoming more accessible, photo animation is trending across social media.
If you've been curious about how to bring a photo to life but aren't sure where to start, you're not alone. It might seem confusing at first, but AI makes it simple; no advanced editing skills are needed.
This blog will show you how to bring your photos to life using AI tools. You'll learn what it means to animate a photo, how to do it, and tips to get realistic results. Let's get started.

Part 1. What It Means to Bring a Photo to Life
When people bring photos to life, they use animation tools or AI technology to add motion to still images. This motion can include subtle eye blinks, smiles, head tilts, or even hair movement. It gives your pictures a sense of motion, personality, and emotion.
Here are some common ways people use to animate photos:
- Nostalgic family portraits
Many people bring a photo to life to revive memories of loved ones. They often add subtle movements (like a gentle smile or blink) to turn old portraits into tribute videos.
- Social media content
Many creators bring pictures to life as part of short-form videos like Reels, TikToks, or YouTube Shorts. This adds subtle movement and emotion to their social media content.
- Artistic creation
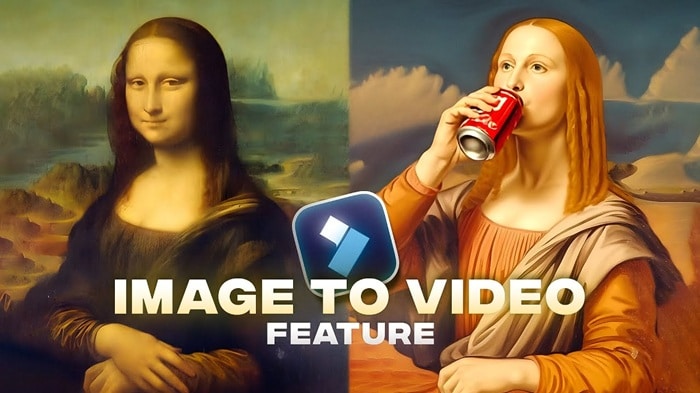
Some people animate classic paintings or vintage portraits. These animations, like a blinking Mona Lisa, often go viral on social media, giving old art a fresh, modern twist.
- Education and presentation
Educators and speakers animate photos to make lessons, history timelines, or slideshow presentations more engaging. A moving image can help capture attention and enhance storytelling.
Animated photos can make your content more engaging and memorable. It's not just about movement, it's about adding emotion. Now that you know what it means to bring a photo to life, let's try it yourself.
Part 2. How to Make Your Pictures Come to Life Using Wondershare Filmora
You can bring your photos to life in just a few clicks using Wondershare Filmora. With its AI Image to VideoAI Image to Video feature, you can turn any still image into a short animated video with smooth animation. Filmora is available on both desktop and mobile, so you can choose the method that works best for you.
This feature uses AI to automatically animate your photo, so you don't need to keyframe anything manually. You can also enhance the final result with music, text, transitions, and even sound effects, all within the same platform.
Key Features
- One-click photo animation
Upload a single image and turn it into a moving video instantly using AI, no manual editing is needed.
- Ready-made motion templates
Choose from styles like flying, walking, transforming, or dancing to quickly make photos come to life.
- Custom motion using text prompts
You can type a short instruction like “smile and look left” to let the AI animate your photo with more control.
- Visual enhancements
Add music, sound effects, text, and filters to give your animated photo more mood, emotion, or storytelling power.
Here's how you can make pictures come to life using Filmora, on both desktop and mobile.
Method 1. Using Desktop Software
If you're using Filmora on your desktop, here's how you can bring images to life with the AI Image to Video tool. Just follow these simple steps:


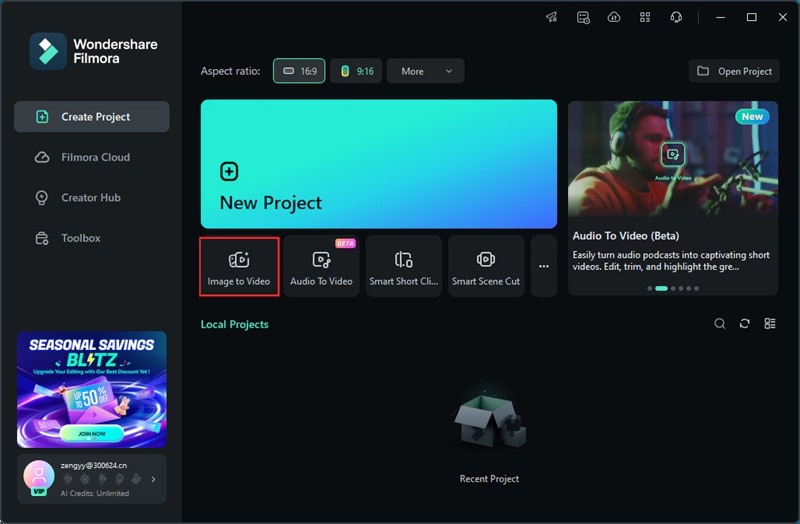
Step1Open the Image to Video Tool
After installing the latest version of Filmora, launch the app. On the main screen, go to the Create Project tab and click on the Image to Video.
Or, you can start a New project and head to the Media tab. Then, go to AI Media > Image to Video to browse available animation templates.
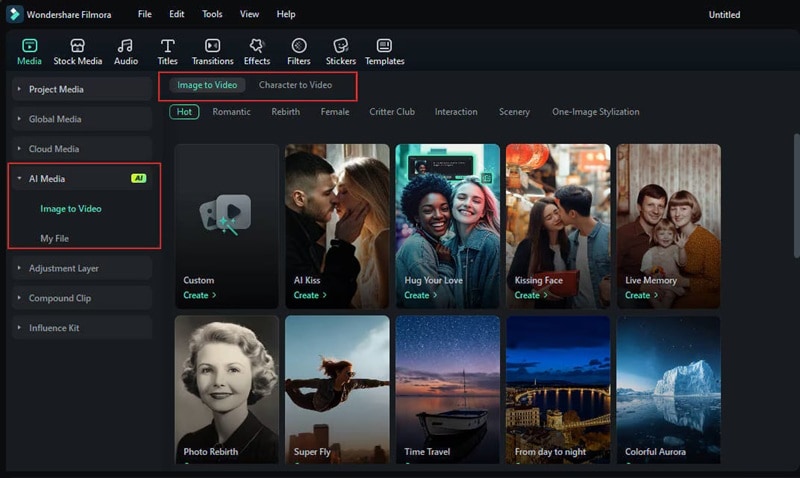
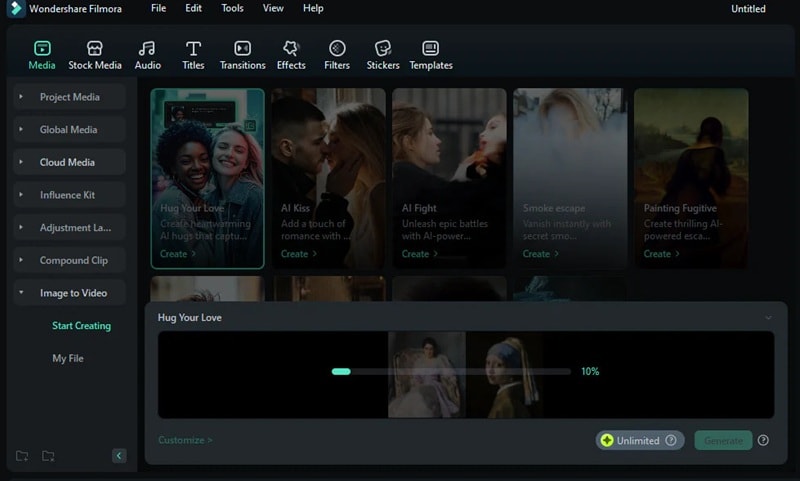
Step2Choose a Template That Matches Your Vision
Filmora includes a wide selection of animation templates to bring your photos come to life. Each one creates a different type of movement or scene, you'll have many options to choose from:
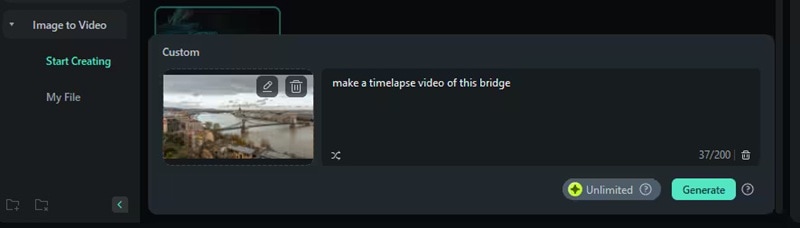
- Custom: Upload your image and use a text prompt to define the animation style.
- AI Kiss: Create a romantic scene with two characters leaning in for a kiss.
- Hug Your Love: Add a warm, emotional hug animation.
- AI Fight: Animate two characters in a bold, action-style fight pose.
- Struck by Lightning: Add a dramatic lightning strike effect for high energy.
- And many more templates available.

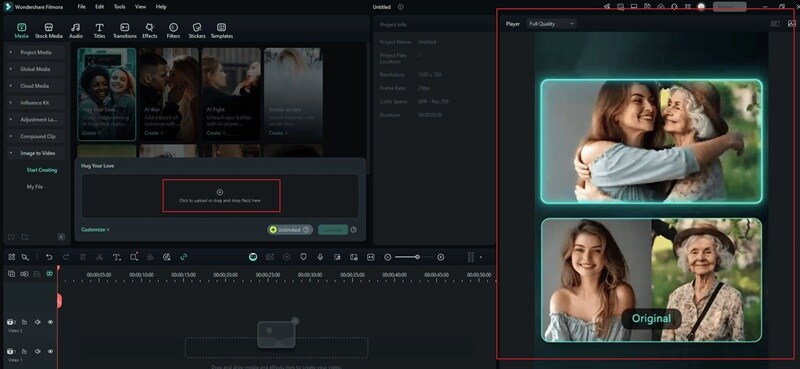
Step3Upload Your Image and Preview the Effect
Once you select a template, Filmora shows a preview of how the animation will look. Then:
- Drag your photo into the upload area,
- Or click Browse to choose a file from your computer.
For Custom mode, type in a short prompt that describes how you want the image to move.
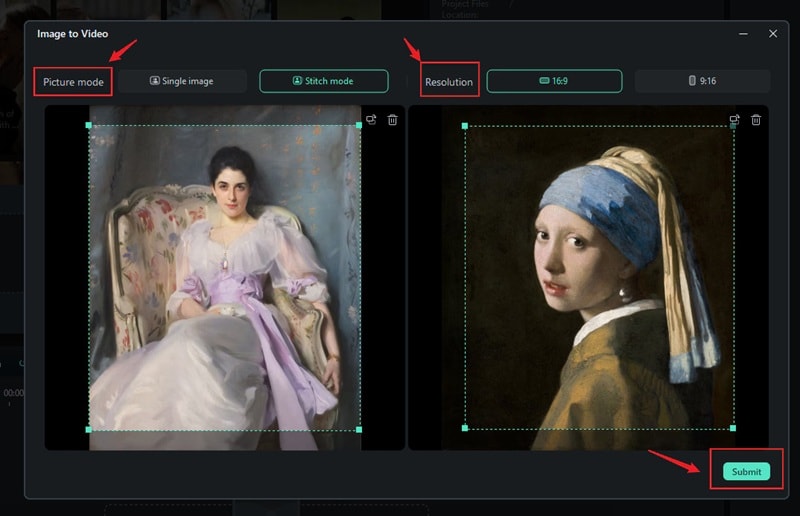
Step4Set Your Preferences
Now choose how you want the animation to be generated:
- Single Image Mode: Animate one image with effects and movement.
- Stitch Mode: Combine two photos into a short animation.
You can also select resolution (landscape or portrait) and other settings. Once ready, click Submit to proceed.
Step5Let AI Handle the Animation
Click Generate and let Filmora's AI do the work. It'll automatically bring your photos to life. The process takes just a few minutes, depending on your settings.
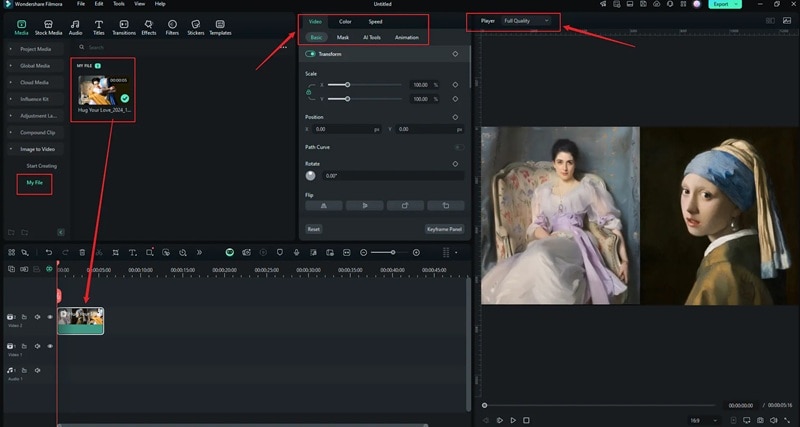
Step6Edit and Export Your Animated Photo
Once the animation is ready, it will appear in Media > AI Media > My Files. Click to preview it.
To edit further, drag the clip into the timeline. From there, you can trim, add music, titles, effects, and more. When you're happy with it, click Export to save and share your new animated photo.
Method 2. Using a Mobile App
Want to bring a picture to life right from your phone? Use Filmora Mobile's Image to Video feature. This App that brings pictures to life provides ready-to-use video templates that turn still images into animated videos.
 secure download
 Here's how to get started on mobile:
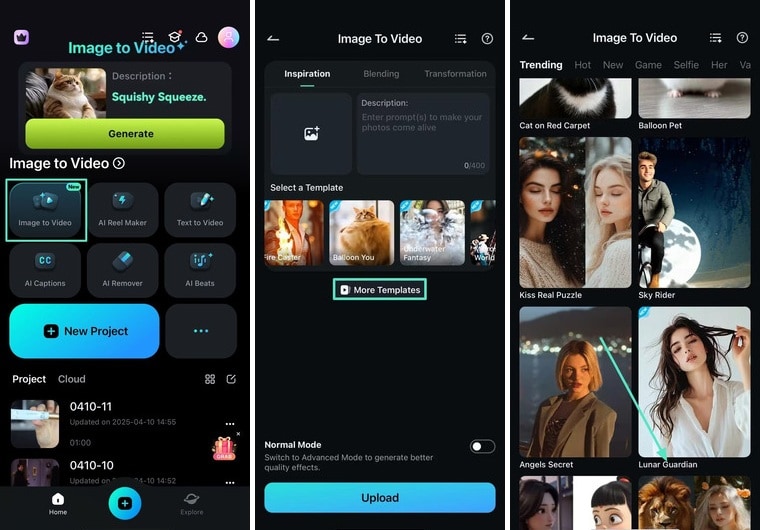
Step1Access the Image to Video tool
Open the Filmora Mobile app and tap the Image to Video button on the home screen.
Step2Explore the template designs
Select the Inspiration mode, and tap More Templates to access a wider selection of available presets.
Step3Pick a template that fits your style
Browse through different categories, and tap on a template to preview the animations. Select the template that best matches the tone or mood you're going for.
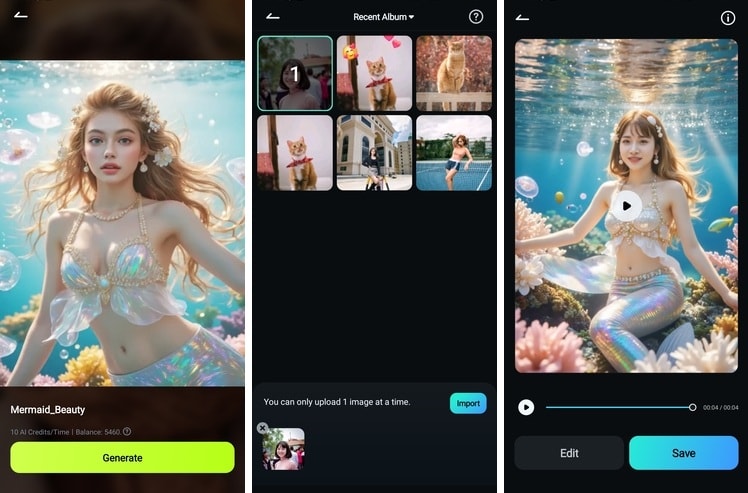
Step4Let Filmora bring your photo to life
Tap Generate to continue the process. Then, select the photo you want to animate and tap Import to upload it.
Step5Save and share your animated photo
Once the video is ready, tap Save to download it directly to your phone. You can now post it to Instagram, TikTok, or anywhere you share content.
Bonus Tip. Use Nano Banana Pro Templates
Want to bring your photos to life with Nano Banana Pro? Within Filmora, simply tap Templates at the bottom, switch to the Trending tab, and select Nano Banana Pro to use ready‑made templates powered by Nano Banana Pro.
secure download Part 3. How to Animate Your Photos Using Deep Nostalgia
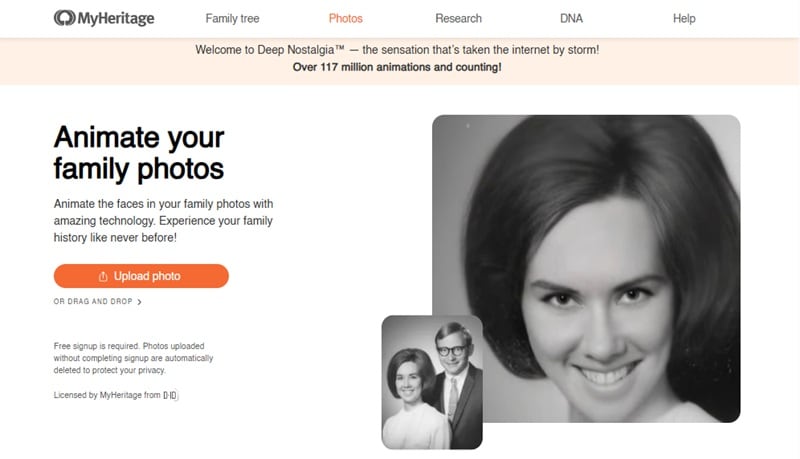
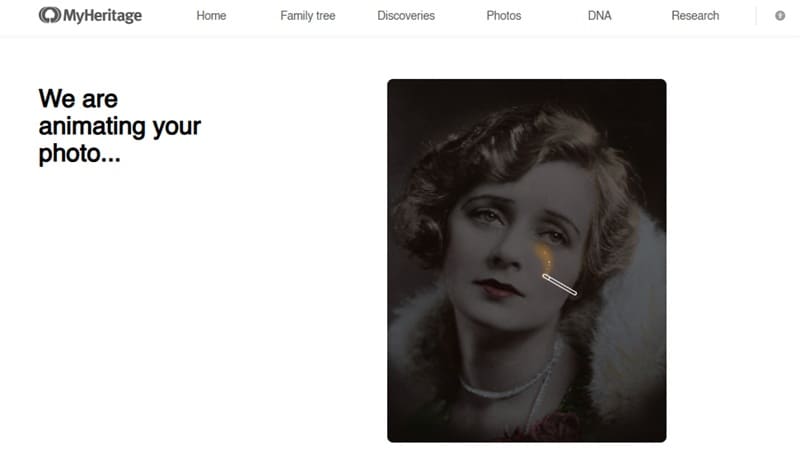
If you're looking for a straightforward way to make a photo come to life, there's an online tool for this. One of them is Deep Nostalgia by MyHeritage, which offers an online solution that animates faces in still images.
This tool creates realistic animations of faces in still photos by applying pre-recorded sequences of human gestures. The technology enhances the photo's resolution before animating it, ensuring optimal results.
Key Features
- Realistic Facial Animations
Deep Nostalgia animates the faces in still photos with subtle, lifelike movements. These movements include blinking, smiling, and turning the head.
- Automatic Photo Enhancement
To ensure better results, the tool automatically enhances low-resolution or blurry images. This is especially helpful when working with old family photos that may have faded over time.
- Multiple Animation Options
You can choose from several animation options, each designed to bring out different emotions or gestures. For example, you might pick a gentle smile, a thoughtful gaze, or a cheerful nod.
- Easy Sharing
After generating the animation, you can instantly share the result on social media platforms. You can also download it as a short video clip, making it easy to show your creation to friends and family.
How to Use Deep Nostalgia to Bring Your Photos to Life
Step1Access Deep Nostalgia
Visit the Deep Nostalgia page on the MyHeritage website.
Step2Upload Your Photo
Click the Upload Photo button to select an image from your device. Or, you can drag and drop your photo into the designated area.
Step3Sign In or Create an Account
You'll be prompted to sign in or create a free MyHeritage account to proceed with the animation.
Step4Select a Face to Animate
If your photo contains multiple faces, choose the one you'd like to animate. The system will automatically enhance the image for better results.
Step5Generate the Animation
The AI will process the image, applying the selected animation sequence. This process typically takes between 10 to 20 seconds.
Step6Preview, Download, and Share the Result
Once the animation is ready, preview it directly on the website. You can then download the video or share it via social media platforms.

Note: While Deep Nostalgia is free to use for a limited number of animations, additional features and unlimited access may require a subscription.
By following these steps, you can easily bring your photos to life online with Deep Nostalgia by MyHeritage.
Part 4. Tips to Get the Best Results When Bringing Photos to Life
To bring photos to life and make them feel as natural as possible, a few simple tips can make a big difference. Before you start animating, keep these tips in mind to get the best possible results, no matter which tool you use.
- Choose a High-Quality, Well-Lit Photo
The clearer the photo, the better the animation. Blurry or low-resolution images can lead to awkward movement or distorted results. Try using photos with good lighting and visible facial details.
- Use Photos with a Centered Face or Subject
AI tools work best when the subject's face is clear and centered. Avoid side profiles or photos where the face is partially covered, as this can confuse the animation process.
- Enhance the Photo Before Animation
Before uploading your image, consider enhancing it with brightness, sharpness, or basic touch-ups. Some tools can auto-enhance your image, but manual adjustments can still improve the results.
- Add Audio or Music After Animation
To boost emotional impact, pair your animated photo with music, narration, or sound effects. This makes it feel more like a story than just a visual, especially when creating tributes, social content, or video reels.
FAQs
-
Q: Do AI tools work better with modern photos or vintage ones?
A: Both work, but modern high-resolution images tend to deliver smoother, more natural results. Vintage photos may need slight enhancements first for the best outcome. -
Q: Is it safe to upload personal photos to AI animation tools?
A: Most reputable platforms follow privacy standards. But, it's always a good idea to check the platform's privacy policy and avoid uploading sensitive images. -
Q: Can we bring animation work on cartoon or illustrated images to life?
Some tools may work on drawings or illustrations, but results vary. For best performance, use realistic photos with clear facial features. -
Q: What video format will the animated photo be exported as in?
Most tools export in standard video formats like MP4. This format is compatible with many social media platforms and editing software. -
Q: Can I use these animations commercially or for content creation?
It depends on the tool's licensing terms. Filmora allows commercial use for paid users, while others may limit it to personal use. Always double-check usage rights before publishing.
Conclusion
There are many creative ways to bring photos to life, and thanks to AI, it's now accessible to everyone. From nostalgic family portraits to fun social media edits, animated photos can add motion and emotion to your content.
If you want to bring a photo to life, you don't need complex skills. Tools like Filmora and Deep Nostalgia make it simple to animate and personalize any still image.
Now it's your turn! Try these tools and bring your photos to life with just a few clicks. Add your own music, style, and story to make every image feel more alive.
