
 100% Security Verified | No Subscription Required | No Malware


 ChatGPT
 Perplexity
 Gemini
 Claude
 Grok
Grok
If you've been struggling with uneven scenes, shifting characters, or unpredictable details when generating AI videos, OpenAI finally delivered something we've all been waiting for. The new Storyboard mode in Sora 2 gives creators a more guided way to shape each scene and keep everything consistent, bringing the control they've long been missing.
It feels a lot closer to real directing, but simplified for AI. You can use it to plan shots, control continuity between the frames, and build sequences with more intention and intricate details. Since this feature is still new, we've put together everything you need to get started with Sora Storyboarding and make the most of it.
In this article
Part 1. Learn About the New Storyboard Update in Sora 2
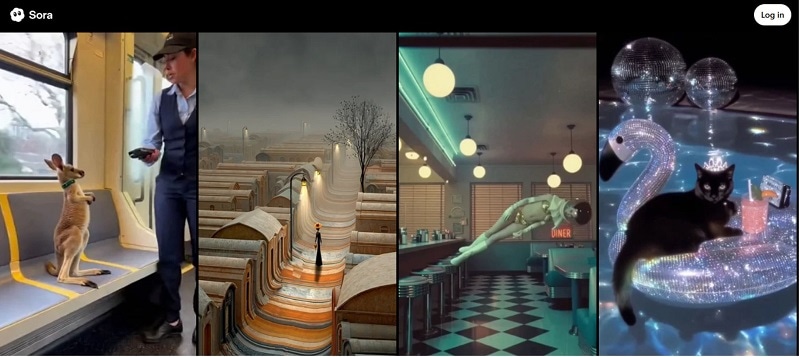
What does "storyboarding" mean for Sora? In OpenAI's Sora, "storyboarding" is a specific feature that allows its users to plan and structure a video as a sequence of distinct scenes or keyframes before the AI generates the final video.
There are some things to note, though, about the Sora 2 Storyboard update:
- Still in Beta version, so there may be ongoing improvements and adjustments.
- Technically not a completely new feature, as Sora's previous version also included a Storyboard feature.
- Allows you to outline your video on a second-by-second basis.
The main differences in Sora 2 Storyboard mode compared to the previous version lie in video duration and quality.
| User Type | Default Duration | New Duration Options | Available Platforms |
| All Users | 10 seconds | 15 seconds | Web |
| Pro Users | 10 seconds | 25 seconds | Web |
As for the quality, videos generated with Storyboard in Sora 2 have been significantly improved. They give sharper visuals and more detailed results compared to earlier versions.
What You Can Do with Sora 2 Storyboard Mode
- Frame-by-frame creation: With Sora 2's Storyboard Mode, you can plan your video scene by scene, even breaking it down frame by frame.
- Reference images/videos: You can add reference images or videos to each scene in the storyboard to help guide the AI.
- Narrative continuity: Sora 2's Storyboard Mode ensures your video flows smoothly from one scene to the next.
This Storyboard update builds on other upgrades introduced in Sora 2, including the notable Cameo feature, which allows you to insert yourself into the video and interact with the scene naturally.
Part 2. How to Use Sora Storyboard to Make Your Story Flow Better
Using the Storyboard feature in Sora is quite simple. You only need to prepare your scenes and any reference images or clips you plan to include. Below, we've put together a simple step-by-step guide on how to use Sora 2 Storyboard.
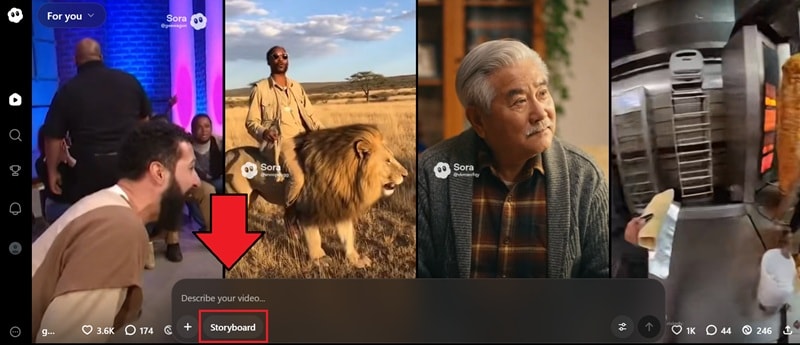
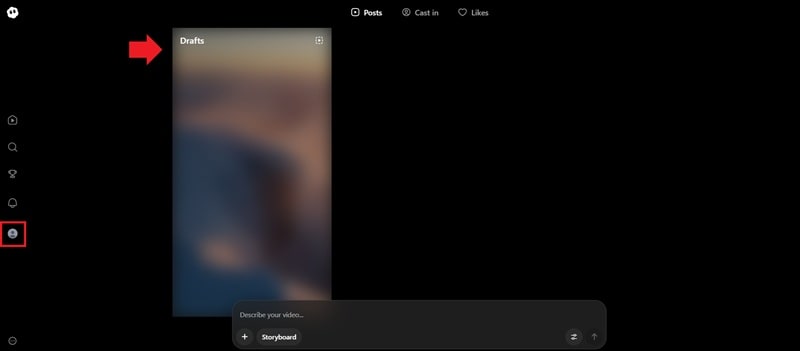
Step 1Access Storyboard Mode
Go to the Sora website and open the storyboard editor by choosing "Storyboard" from the options in the Sora composer.
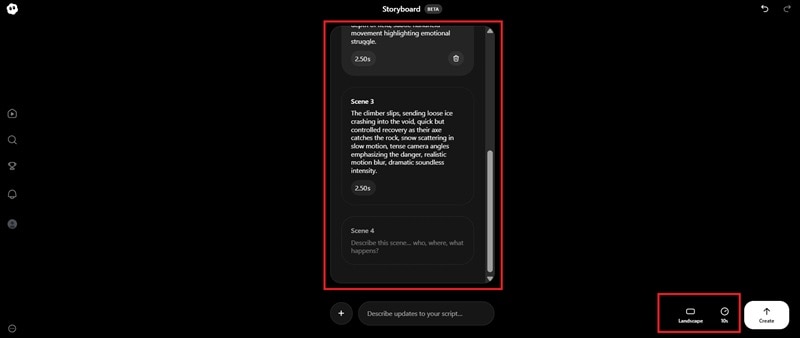
Step 2Enter the Prompt and Start Generating
Set your video's duration and orientation, then add a prompt to each scene card to outline the setting, characters, and actions happening in that moment. Hit Create to generate the video.
Step 3Refine and Download the Generated Video
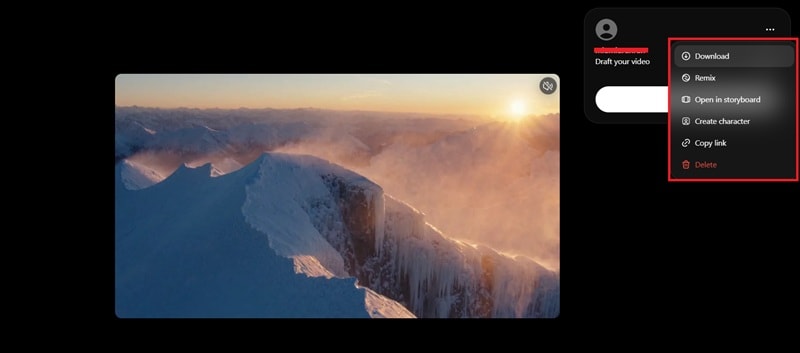
Your generated video will appear in your Drafts.
From there, you can download it, remix it (to make changes), create a character based on the clip, or reopen the Storyboard to adjust specific scenes. You can also post the final version on Sora.
Limitations of OpenAI Sora Storyboard
Although the OpenAI Sora Storyboard now provides creators with a guided way to build scenes, it still has limitations that you may want to consider:
- Duration Constraint: As you already know, Sora 2 can currently generate up to 25 seconds only, even for Pro users. Generating a fuller sequence becomes a challenge since you don't have a traditional timeline to manage longer transitions.
- Unplanned details: Large gaps between scene notes can lead the AI to fill in missing parts on its own. As a result, unexpected details or shifts you didn't intend may appear in the final video.
- Limited Fine-Tuning: Since Sora doesn't offer a frame-by-frame timeline, you can't make micro-adjustments to specific moments. If one part feels off, you often need to revise the prompt or the scene card and regenerate the entire sequence.
Part 3. Enhance and Extend Sora 2 Videos Beyond the App
Since Sora 2 is still limited to select access and the platform doesn't yet offer deeper editing tools, those who want to experiment or push their ideas further can try Wondershare Filmora.
Filmora now has integrated Sora 2 in its Image to Video and Text to Video features — giving you the freedom to edit beyond Sora's interface and bring your creative vision to life.
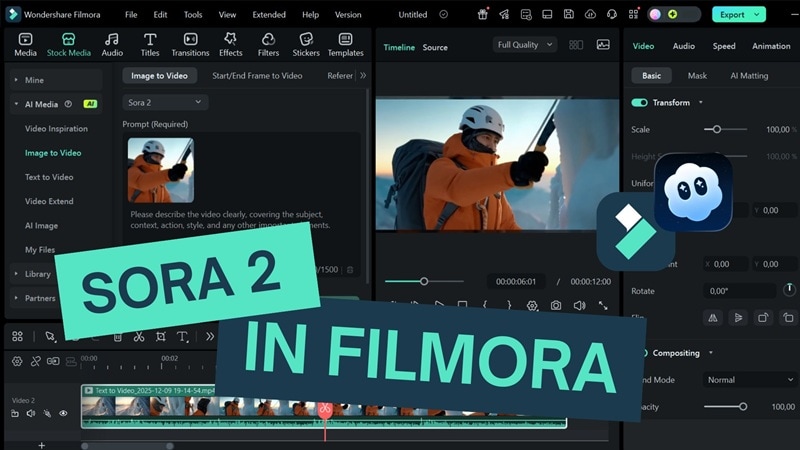
You can create your scenes with Sora 2 inside Filmora, place them on a full editing timeline, adjust pacing, add music or sound effects, and layer multiple scenes into a longer video. This setup gives you more freedom to polish your clip and build extended sequences that go beyond what Sora alone can do.
 secure download

Why You Need Filmora in the Sora Storyboard Workflow

- Since Sora has duration limits and no timeline, Filmora gives you the flexibility to combine multiple clips, merge shots, rearrange scenes, and build a fully unified video.
- You can clean up visual and audio artifacts using Filmora's AI tools, like AI audio denoise, video enhancer, and object remover.
- Rebuild smooth transitions between Sora scenes with Filmora's wide range of built-in transition effects.
- With the Replace Clip feature inside Text-to-Video Sora 2, you can remake and swap specific scenes while keeping the rest of your edits untouched.
- Add final touches such as color grading, titles, overlays, and sound design before exporting your finished video.
- Extend your generated clips from Sora with Filmora's AI Extend to add a few extra seconds and avoid an abrupt ending.
Note: Filmora's Sora 2 integration currently supports up to 12-second videos per generation. Besides Sora 2, you can also select other models, such as Veo 3.1 and Keling 2.5 (for text-to-video generation).
Part 4. How to Generate and Combine Sora 2 Clips in Filmora
To start using Filmora for generating, editing, and extending Sora 2 clips, make sure you have the latest version of Filmora installed to enjoy all the new features and improvements.
01of 03Access the AI Text to Video Feature
Open Filmora and go to Stock Media > AI Media > Text to Video to access the Text-to-Video feature. Set the model to Sora 2.
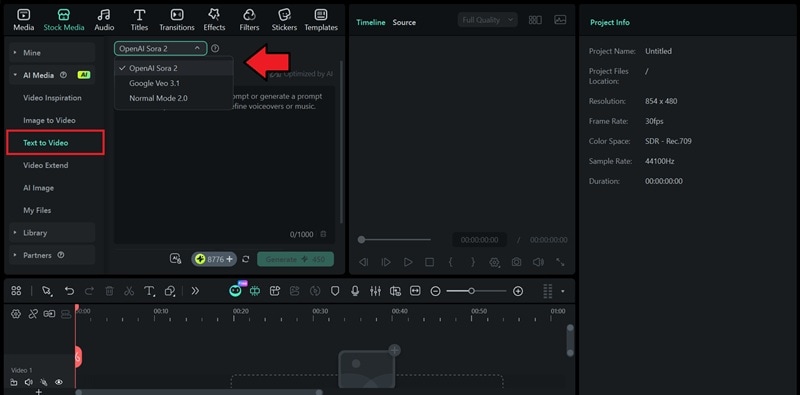
Note: If you want to include an image reference, select Image to Video instead to upload your photo and guide the generation.
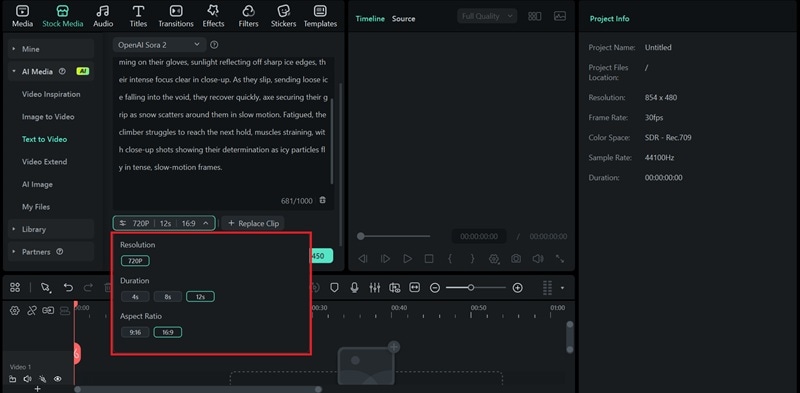
02of 03Enter Your Prompt and Adjust the Settings
Type your prompt into the text box. Then, open the settings to set the resolution, duration, and aspect ratio. Click Generate to start creating your Sora 2 clip.
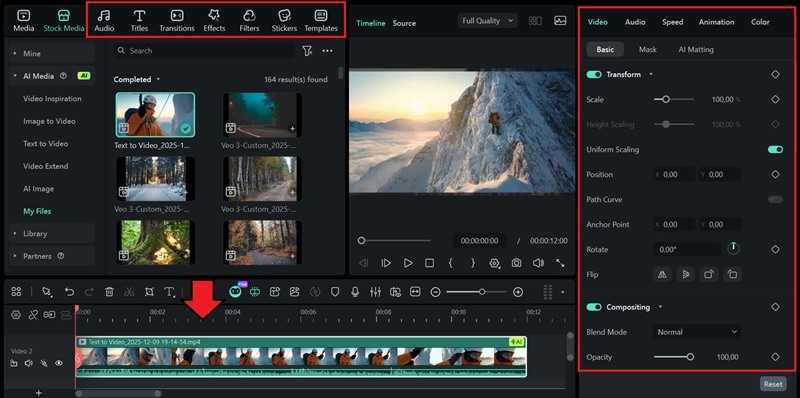
03of 03Combine and Enhance Your Clips
Generate several videos and add them to the Filmora timeline to build a cohesive video. You can enhance everything using Filmora's editing tools, such as transitions, color adjustments, and audio refinement.
Extend Your Sora Clips Naturally Using AI Extend
If you want to make your Sora clips a little bit longer, you can use AI Extend to generate a few extra seconds before or after your Sora storyboard video while keeping the style consistent.
Benefits of AI Extend in Filmora:
- Add more frames without losing the original visual style.
- Maintain the natural motion and direction of the scene.
- Extend conversations, environments, or camera movements naturally.
How to Access & Use AI Extend in Filmora
Step 1. Choose the AI Extend Tool
Open the Stock Media panel. Find the Video Extend section and select either Extend Forward or Extend Backward.
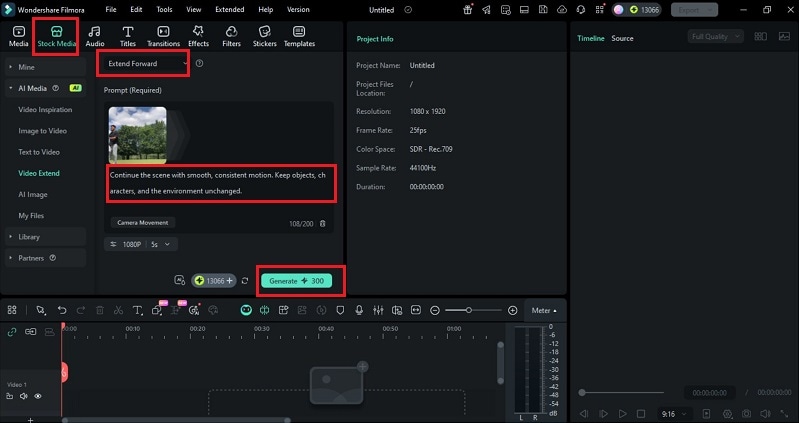
Step 2. Set Duration and Quality
Add a brief prompt to guide the extension, then select the desired duration and output quality. Pick a camera movement preset to control the scene's flow. Click Generate to create the extended clip.
Part 5. Troubleshooting Sora Storyboard Issues
Even with the improved Sora 2 Storyboard mode, AI videos may show occasional issues.
1. Character Inconsistency Across Shots
Sora can sometimes change a character's hair, clothing, or lighting between storyboard cards.
Try keeping your prompts consistent, using reference images, and saving a character profile once you finalize a look.
If you still need a more uniform sequence, tools like Filmora's Reference-to-Video can help generate short, consistent filler shots when certain frames break continuity.
2. Flickering or Blurry Frames
Fast motion or complex textures may cause subtle flickering or blur.
Regenerating the imperfect storyboard card can often fix it.
For already-exported clips, you can use Filmora's AI Video Enhancer or stabilization to clean up rough sections without regenerating the whole scene.
3. Sudden Motion Jumps
Large differences between storyboard cards can lead to abrupt motion changes.
Adding more in-between actions in Sora usually smooths things out.
If only a small segment feels too jumpy, you can refine the flow in post by inserting micro-transition clips or adjusting speed curves in Filmora.
4. Missing or Noisy Audio
Sora's audio generation is still experimental, so noise, distortion, or silent clips can occur.
You can regenerate the sound or replace it with clearer prompts if audio is essential.
For polishing the final mix, Filmora's tools like Voice Enhancer, Noise Reduction, Loudness Normalization, or royalty-free music can fill in the gaps easily.
Conclusion
The Sora storyboard workflow gives creators a clearer path for shaping AI videos, turning loose scenes into a guided sequence with stronger timing and continuity. Each part of the process brings more control. Moreover, Storyboarding also supports deeper expression as ideas move from planning into full motion.
The Sora 2 storyboard mode still has limits, but they do not block creative progress. Many creators strengthen their results by using an editor that can extend clips, smooth transitions, and repair visual or audio issues. Filmora fits naturally into that workflow, offering simple tools that help your Sora clips reach a more polished and finished form.
secure download 