- Explore user-friendly tools for seamless video editing.
- Enhance your footage with effects, transitions, and more.
- Transform your videos with Filmora's AI-powered features.

 100% Security Verified | No Subscription Required | No Malware
How to Edit Videos: The Ultimate Guide for Beginners

Feb 11, 2026• Proven solutions
Learning video editing can be overwhelming at first. There is a lot to wrap your mind around. But becoming proficient in video editing is definitely an achievable undertaking.
Even though the video editing equipment is largely available, unraveling all the video editing tricks and tips in one guide would be next to impossible.
However, after reading this ultimate guide, you'll learn:
how to choose a video editing software,
how to edit your first video in a video editing software you can use on PC and Mac computers, and
the resources to study video editing to achieve video editing mastery on your own.
Since this is an ultimate guide about how to edit videos, it may take a few minutes to read. I've summarized the informaiton in the following three parts.
- Part 1: Before Deciding to Learn How to Edit Videos
- Part 2: How to Edit Videos With Filmora[Step by Step Tutorial]

- Part 3: Learning Resources for Video Editing
Latest News: We have released Filmora video editor for all creators
 secure download

For users who wants to edit a video fast and fun, try the Filmora editor. From the video above, you can see Filmora is suitable for creating videos for almost all scenarios. Even you shoot a video by entry-level camera, you can still import it to Filmora. Keep reading as we will show you more details about how to edit videos step by step, especially in Filmora. Download the trial version to make a video today.
Part 1: Things You Should Consider Before Deciding to Learn How to Edit Videos
Approaching the post-production process requires you to be prepared and to know exactly what you want to do, with the footage you've captured. Sometimes the camera or a computer, if you were capturing a screencast, can influence your choice of the video editing software, because if the footage you are editing is in the format your video editor won't recognize, you'll have to find another software. Let's have a look at some other aspects of video editing process, you will have to consider before starting to work on your first video.
1. What type of videos do you want to make?
Do you want to create a short movie or a movie that lasts more than twenty minutes? Is it a gaming video, a tutorial or an experimental art movie? Knowing exactly what kind of video you want to make will help you narrow down the search for the video editing software, and enable you to know in advance which editing tools you are going to need before you start editing.
2. System Requirements you are going to need for video editing
The performance your computer is capable of can severely limit the range of video editing software options you have at your disposal. All professional video editing suites, such as Final Cut and Adobe Premiere have a demanding list of technical requirements your computer has to meet if you want to use them to edit your videos.
1. Windows PC or Mac?
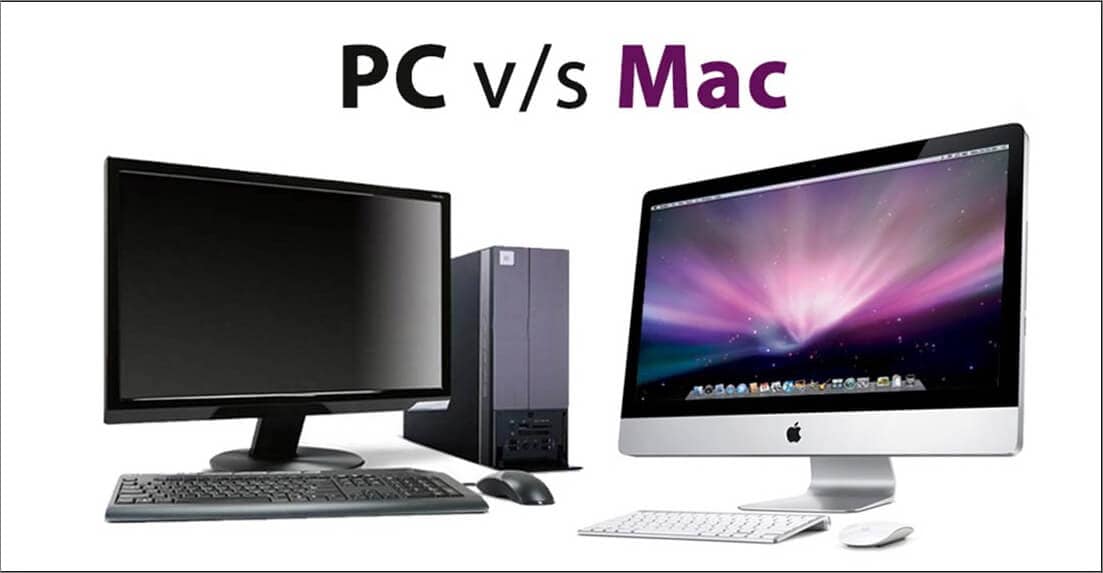
Image from Internet
Desktop configurations for PC computers have gotten more powerful over the years, but Mac computers are still a much better option for video editing because the Mac OS is optimized to enhance the performance of the computer's hardware components. The 2017 Mac Pro, while expensive, is one of the top choices for a video editing computer.
However, these differences matter only to professional video editors who work on demanding projects. Inexperienced video editors can use PC and Mac computers, equally effectively to edit their videos. If the software of your choice has a demanding list of tech specs, you'll just have to make sure that your device meets each and every one of them.
2. CPU capabilities
The video rendering process is one of the most demanding tasks on any computer, which can last for hours. A powerful CPU can shorten the video rendering time, and enable your video editing software to run faster. Intel's processors from the i5 and i7 series are widely accepted as the best CPUs for video editing, since they make adding transitions to videos, applying filters and effects or video rendering much smoother. If you would like to edit videos on a constant basis make sure to get the best processor you can.
3. RAM Memory
Most video editing software products don't require more than 4 or 8GB of RAM memory to run properly. However, working with large video files can slow down your computer considerably and even make it crash at the decisive moment, so in order to avoid losing hours of work you should get as much RAM memory as you can possibly get. Most Mac and PCs have a 32GB RAM memory limit, but if you are just starting to learn video editing you won't need that much RAM memory.
4. Hard drive space
Sometimes a single video file can have more than a couple of gigabytes and the videos you export from the video editing software require a proper storage space. Most experienced video editors use an external hard drive that has several terabytes of storage space for their video editing projects. Furthermore, you will need from 2 to 4 GB of free space on your computer's hard drive to install a video editing software.
5. The graphics card
At first, you won't be able to notice how important the graphics card is for the video editing process, because you won't be performing the graphically demanding video editing tasks. Even if you don't have any intention of creating 3D or special effects, you have to pay attention that the computer you're working on has a graphics card capable of high-end performances. Pairing a graphics card with a powerful processor and having more than 16GB of RAM memory will ensure that you are ready for virtually any video editing task.
6. Monitor:
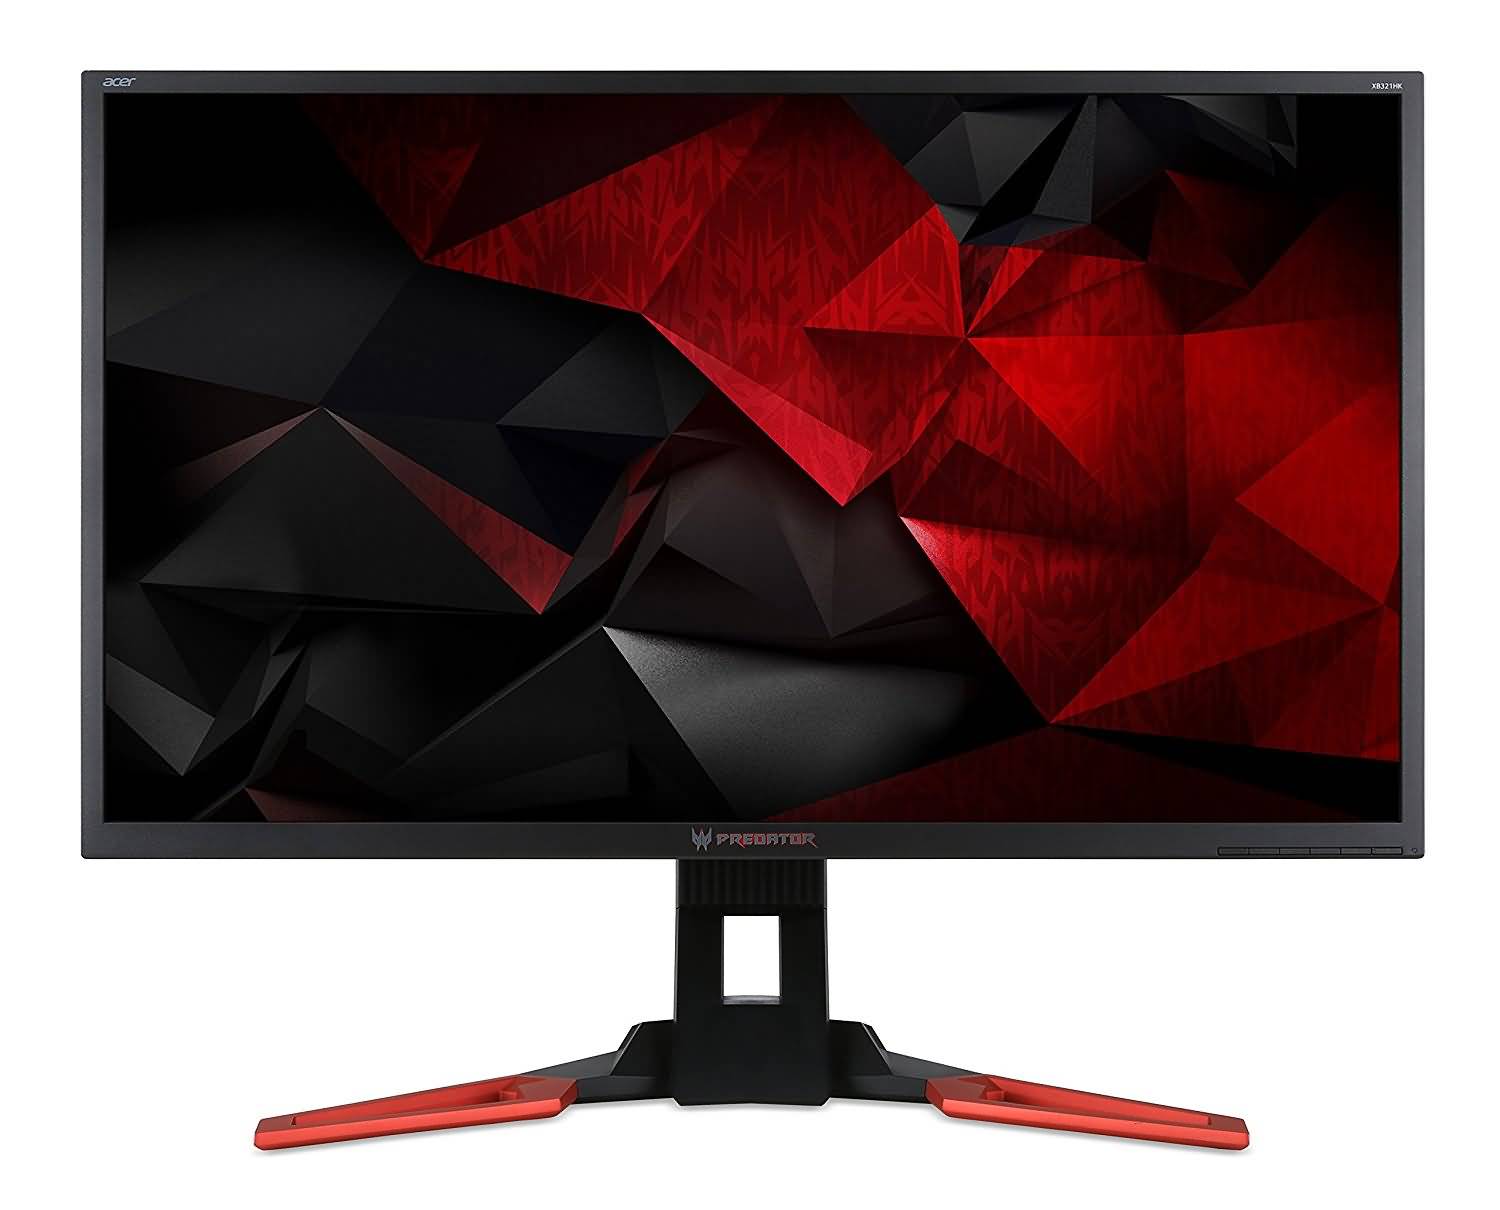
Being able to see the video files on a large screen can help you spot even the tiniest mistakes. Professional video editors frequently use two monitors when they are working on a project, but people who are just learning the ropes of the trade need just one high definition display. The size of the monitor is also important, so using monitors that have more than twenty inches may enable you to make better videos.
Focusing on 4K video editing? Check the list of Best Monitors for 4K Video Footage Editing
Summary
Performing the basic video editing actions such as trimming or cutting videos, adding music or applying transitions between the shots doesn't require you to have a computer that has high-end components. As you mature as a video editor you should strive to get better equipment, but until you master the basic video editing techniques you can use any consumer level PC or Mac computer to edit your videos.
Skilled video editors who work on demanding projects need every bit of CPU power or RAM memory they can muster in order to maximize their efficiency and to create the videos that inspire and move the boundaries.
Besides the technical requirements, your video editing skills are the second most important thing you should consider before purchasing a video editing software.
3. Things to Consider Before Choosing a Video Editor
1. Your Budget and Editor’s Price
We know some tools are free to download. But, unfortunately, you can’t rely on them for high-quality editing. Contrarily, we will never recommend going above your budget, especially when you’re the new kid on the block. Therefore, you must decide how much you are ready to pay to get a great video editor.
Inexperienced video editors usually have no need for advanced video editing features, which is why there is no point in investing hundreds of dollars into a software that provides the video editing tools you will never use. You can find some of the best entry-level, as well as professional video editing software products, for Mac and PC computers featured in the table below.

All the above tools in the table are cost-friendly. Or, in other words, you don’t have to pay a fortune to get them. Nevertheless, the professional category could be expensive, but guess what? There are some great alternatives, such as Filmora.
2. User-Friendly Interface
When selecting a video editor, make sure you know if it has an easy interface or is extremely difficult with lots of hidden features. Trust us; if you’re new, you’ll regret buying a tool with greater difficulty.
Therefore, find software with simple video editing options. It would be better to get the one with loads of presets, effects, and features. Moreover, try to look for an editor with a clean timeline that allows adding multiple tracks.
Likewise, you should look for a drag-and-drop option to import videos to the software’s library and apply effects to your video. This drag-and- drop feature will save your time and allow you to learn the tool as quickly as possible.
3. Learning Resources
Another important factor is the availability of learning material. If the software you choose has fewer learning blogs and videos, you will get badly stuck later and won’t find a way out. On the other hand, a video editor with lots of information and tutorials over the internet is a boon. All the stuff will not just help you overcome a challenge in your video editing journey, but you will also be able to polish your skills.
You can be your own judge and try looking for learning resources for your preferred software. If you think there’s enough material to learn from, you can list the tool in your favorites.
But don’t be so quick because there are a few more factors left that you should know.
4. Supported Video Formats
This is a really important factor. So before opting for a video editor, ensure it supports all video formats. And if not all, then at least the widely used ones.
We have seen editors that only allow you to import and export videos in two or three formats. In the same way, some tools are good for nothing as they allow editing in old formats, which people don’t even use in 2022.
Look for a video editor that supports MP4, AVI, MOV, ASF, WMV, F4V, TS, 3GP, FLV, F4V, DIVX, MPEG-2, GIF, MP3, and WEBM. A video editor supporting all these input and output, and providing merging, combining, and resizing these formats, will make video editing easier and more satisfying.
5. Advanced Features
Fall for a video editor that equips the latest features. It will scale your editing to the next level and help you make attractive and catchy videos.
For instance, the editor you are considering should have the Chrome key effect. It should contain a built-in screen recorder if you’re making a tutorial video for your YouTube subscribers. It should have 3D effects, great color grading tools, and more.
6. Media Library
There’s no time to look for music and videos from third-party sites. Therefore, make sure the software you choose has a built-in media library with lots of royalty-free videos and music so you can use it on your project.
7. Customer Support
Last but not the least, if you’re buying a video editor, you should check the customer support reviews before going ahead. Why? Because sometimes, you do need assistance from the company to upgrade your account information or simply retrieve a lost password. If customer support is unresponsive, it’s better to look for another tool.
Filmora Gives You All
Our recommendation to all newcomers to the world of video editing and to semi-professionals in need of a powerful and easy to use video editor is to purchase Wondershare Filmora because it can be utilized for video editing purposes on both Mac and PC computers.
The software allows you to perform all basic video editing actions, effortlessly, while it also offers advanced video editing features such Chroma Key Effect, image stabilization or Time-lapse. In addition, Filmora offers a rich effects library that is constantly updated and which already contains more than 300 beauty and fashion filters that can be added to the video in just a few clicks.Tips: You can check the intro and review for each software mentioned above in our picks of best video editors for all platforms
Additionally, Filmora has a vast media library and supports all the essential video formats. It is also extremely easy to use and budget- friendly. Furthermore, you can find tons of tutorials on Filmora’s official website and YouTube, so you can always do the best editing job.
Part 2: How to Edit Videos with Filmora [Wins/Mac/iOS/Android]
You never know what you are going to need in the video editing room, which is the reason why you have to be well prepared for all the challenges you will have to face during the video editing process. The post-production can take days, sometimes even months, so arm yourself with patience, and remember you are not in a race, allow yourself to work slower.
Below is a simple tutorial about How to Make Your First Video with Filmora, check it out and download the free trail version of Filmora to follow.
secure download
A few notes before you start editing
Preparation for the video editing process starts long before you launch the software, so here are a few tips that might assist you in making the post-production process more efficient.
- Take several shots of the same scene, while you are on the set because you will have more options in the editing room.
- Know every second of the footage you are working with, so you can easily pick the best shots.
- Use visual effects in moderation and for a good reason.
- Learn how to step back and see the project from the fresh perspective.
- Keep your materials organized.
The Step by Step Guide to Video Editing
The basic video editing techniques are the same in all video editing suites. In this guide, we are going to show you how to edit videos in Filmora, but you can apply the skills you will learn here in other video editing programs. If you don't have Wondershare Filmora installed on your computer, you click the button below to download the trial version of the software .
secure download
1. Launch Filmora and select the aspect ratio [Optional]

Double-click on Filmora's desktop icon, whenever you are ready to start working on a new video. The software's welcome screen will appear on the screen asking you to create a new project or open project . Besides that, you can choose the aspect ratio here to save time in editing.
2. Create a new project and import the footage
Click New Project in the software's welcome screen, and wait for the editor to load. Once you gain access to Fillmora's video editor, you should proceed to register the product by clicking on the Register button.
Head over to the File menu and click on the Project Settings option, and select the aspect ratio the final cut your video will have. You will be able to choose between several different options, including the standard 16:9 or 4:3 aspect ratios, but also less common 9:16 aspect ratio for vertically oriented videos as well as the 1:1 aspect ratio for square-shaped videos. You can also custom the aspect ratio per your need.

Filmora, as well as all other video editing software we mentioned in this guide support nearly all types of video files, from videos captured with Smartphones and webcams to footage the was recorded with professional video making equipment.

In the upper left corner of the video editor you'll be able to see the Import button, click on it and select the Import Media Files option and then navigate to the location on your hard drive where the footage you want to edit is stored. Select the video, audio or photo files you want to use in your project, and click on the Import button.
Filmora offers many creative assets for you to choose from. For example, after selecting a suitable template, you can customize the template elements.

3. Organize the material you are using in your project
The files you import into the editor will be stored in Filmora's Media tab, below the Import button. Working with a lot of different files in a single project is much harder if you have to look for the video clips you want to add to the timeline. To avoid mess and confusion, you can use the My Album option that enables you to create folders and to sort out your files.

Click on Add a New Folder icon, located at the bottom of the My Project tab in the upper right corner of the editor's screen, to create and name a new folder. You can organize the footage alphabetically or in any other way that increases your efficiency and reduces the amount of time you have to spend browsing through files.
4. Place the video and audio files on the timeline to remove the redundant parts
Raw footage often contains mistakes or parts that simply don't belong in your video, so if you would like to cut or trim your videos, simply drag them from the Media tab, and drop them on the timeline. You can add as many video clips as you want, but each new file you add will be placed after the previous one, and in order to rearrange them, you have to drag the files to the desired position on the timeline.

Press Play or hit the Spacebar to start previewing the video clips you've added to the timeline or use the playhead to jump to a certain point in the video. You should place the playhead in the exact position where the part of the video you'd like to cut starts and then perform the same action at the other end.

Filmora enables you to trim your videos by simply dragging the end of a video clip left or right. If you still find trimming and cutting videos confusing, here is a video tutorial that will help you master these simple tools quickly.
5. Apply visual effects to the footage
Now that you removed all the unwanted parts from your video clips, you proceed to detach the audio and video files, add music, insert transitions between the clips or use some of many visual effects Filmora offers.

Click on the Text /Credit icon if you want to add opening titles, end credits or subtitles to a video. The software offers a lot of different text templates you can use for a wide range of purposes. Drag and drop the template you selected to the desired location on the timeline, and proceed to insert the appropriate text in the software's preview window. You can also add borders to the video to get a more funny effect.

Learn more details about how to add Title/Text Effects to Video
The Transitions icon, that grants you access to hundreds of options is located next to the Text/Credit icon in the editor's toolbar. Follow this video tutorial to learn more about video transitions and how to use them in Filmora.
secure download
6. Go through the color correction process
The Effects icon offers over several hundred filters and overlays effects you can use in your projects, in order to make the colors in the video look more vivid. Click on the icon and select the filter you'd like to use, and then drag and drop it wherever you want on the timeline. The duration of the filter can be adjusted by simply moving either end of the filter.
Besides filters, Wondershare Filmora also offers advanced color correction tools, which allow you to fine-tune the color values in your videos. The Advanced Color Tuning option enables you to use color correction presets or 3D LUTs to add more vibrancy to the colors in your videos. Mastering the color correction process requires time and dedication, since learning to find the right amount of reds, blues, and greens in every shot you include in a video is as difficult as it sounds.

7. Export and Share
When you are absolutely sure that there is nothing more you'd like to add or remove from your project, you should click on the Export button. In the Output window, you can easily select the video file format in the Format menu, and optimize the video for Smartphones, iPads or gaming consoles such PS4 or Xbox One.
When you're done editing, click the Export button. You can optimize the video for smartphones, iPads, or gaming consoles. If you need to edit videos on Android later, you can easily transfer your video and continue editing on your mobile device.

Filmora users who don't want to save a video file to their hard drives can export their videos to Vimeo or YouTube. This method of exporting videos allows you to save time on waiting to upload the video online since the rendering and uploading processes happen simultaneously. You will need a YouTube channel or a Facebook account in order to successfully share your videos on these social media networks.
When you use the Smart Short Clips feature, the export supports direct distribution to platforms like YouTube, and you can schedule posts and monitor subsequent data.
secure download
How To Edit Videos With Filmora Mobile
Filmora’s mobile app is best for beginners who want to create scroll-stopping content anytime. You can edit social media reels, TikTok, and Instagram stories on your phone. Trim clips, add trendy effects, and layer in music without a laptop. The app has filters, transitions, and ready-to-use templates that make it easy to create eye-catching videos in minutes.
It works for making travel vlogs, adding text to Facebook posts, or jumping on the latest TikTok trend. Filmora for Android and iOS turns your phone into a portable editing studio.
Filmora for Mobile Filmora for Mobile Filmora for Mobile Filmora for Mobile Filmora for Mobile
Boost Your Video Editing for Viral Success
- • Powerful Brand New AI Features.
- • User-friendly video editing for beginners.
- • Full-featured video editing for professional.


Here’s how to use Filmora for editing videos on your smartphone:
Step 1: Create a Project and Import Media
Open Filmora Mobile and tap the + icon or New Project. Select the photos and videos you want to edit and click Import. You can import clips from your gallery or use Filmora’s built-in stock media for extra footage.
Step 2: Use Built-In Editing Tools
Once your clips are on the timeline, use the basic editing features to refine the video:
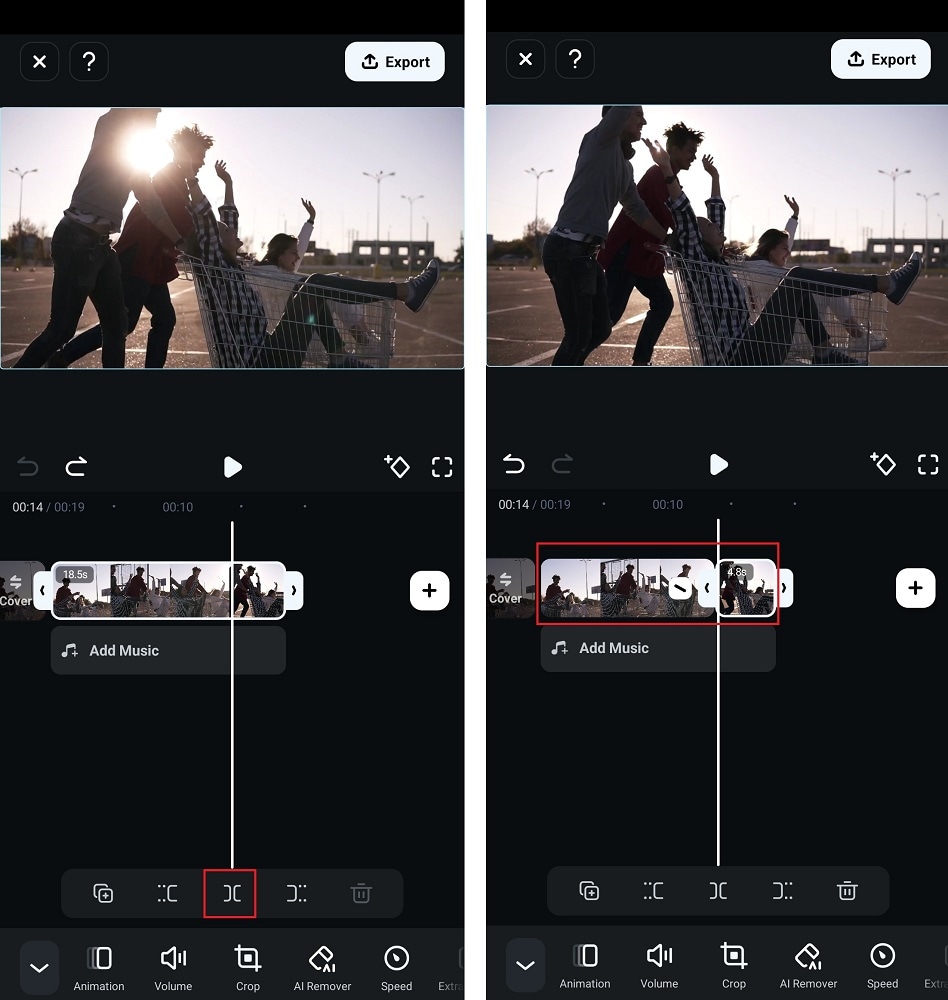
- Trim: Select the video track in the timeline. Drag the clip’s edges to adjust the length, or place the playhead where you want to trim. Use the split handles in the bottom menu to cut or shorten the clip instantly.
- Split: Select the video track, then tap the split icon marked on the bottom menu to cut clips into smaller sections.
- Rearrange: Long-press a clip to move it to a different position on the timeline.
Step 3: Apply Effects and Enhance Video
Make your video more engaging with Filmora’s built-in effects.
- Filters: Tap Filter and browse color filters to set the mood.
- Transitions: Tap the transition icon between clips to add smooth scene changes.
- Animations: Select the video track, then tap Animation on the bottom menu. Add animations to highlight key moments.
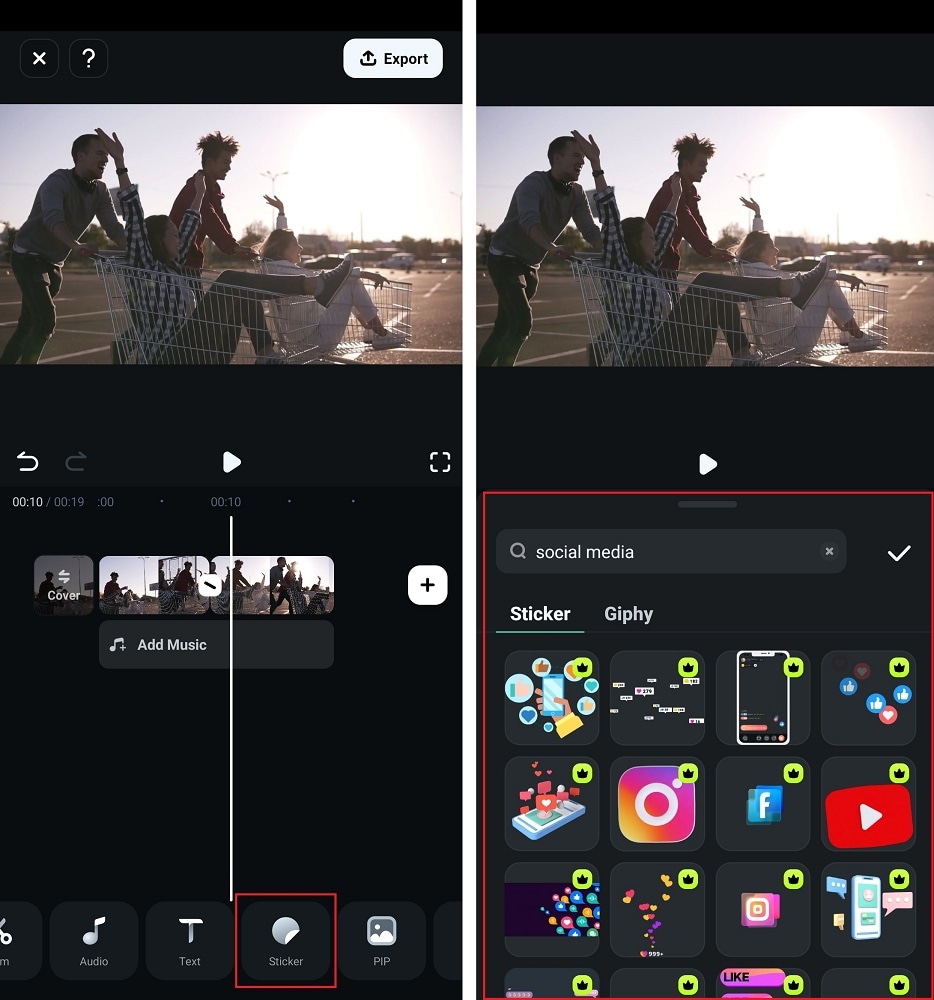
- Stickers: Tap Sticker on the bottom menu to insert fun icons or emojis that complement your video.
Step 4: Adjust the Audio
Enhance your video with background music or sound effects.
- Tap Audio, then select Music or Sound FX. Next, choose from Filmora’s library or import your tracks.
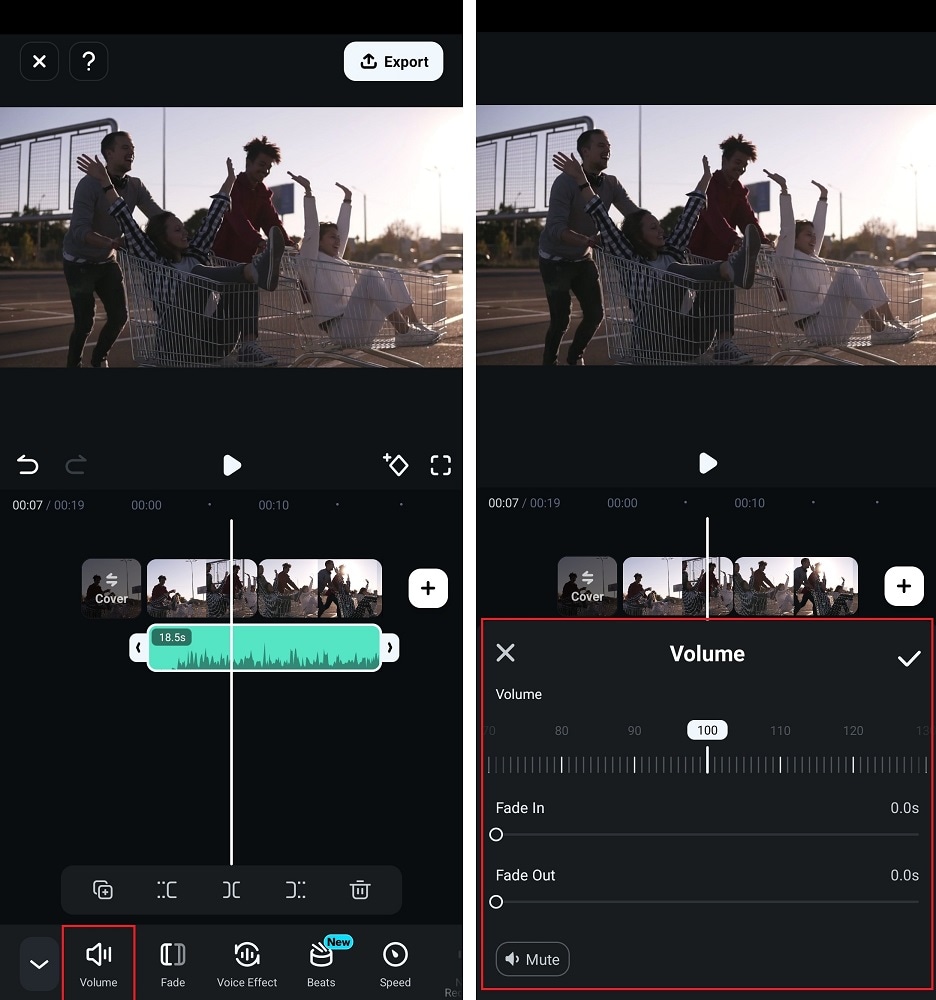
- Adjust volume: Select the audio clip, tap Volume, and use the slider to increase or lower the sound.
- Trim audio clips: Use the trim handles or split handles on the bottom menu to cut or trim background music for better timing.
Step 5: Export and Share Your Video
Once you’re happy with your edits, tap Export and choose the best resolution for your video. Filmora supports up to 4K and 60FPS settings.
secure download
Part 3: Online Video Editing Learning Resources
Regardless of how skilled you are as a video editor, there are always new tricks you can learn. Most information about the video editing process can be found on the Internet, so if you would like to improve your command of the video editing techniques, you can visit these online learning resources and upgrade your skills.
1. Online video courses for Video Editing
1. Lynda.com
Lynda.com is one of the Internet's most famous websites dedicated to learning. The platform hosts tutorials and courses for Final Cut Pro, Adobe Premiere Pro, Adobe After Effects, and a number of other less powerful video editing software products. In order to gain access to over 10.000 eLearning courses, you will have to set up an account and pay the monthly fee for the service.
2. Udemy
Udemy grants you access to thousands of tutorials that cover anything from IT and software to video editing. Finding courses that show you how to use professional video editing software shouldn't be too hard since the platform offers lessons to beginners and skilled video editors.
3. InsideTheEdit
If you want to learn from the video editing industry's leading experts then this online resource is the best choice for you, because the knowledge it offers goes beyond simple explanations about how to properly use video editing tools. InsideTheEdit is not free and you must pay a monthly fee in order to gain access to everything the platform has to offer.
4. RippleTraining
Creating an account on RippleTraing is free, but attending courses or accessing tutorials must be paid for. You can find valuable information about video editing software like Motion, Adobe Premiere Pro as well as audio editing software that might help you produce videos with impeccable soundtracks.
5. LarryJordan
This platform offers learning materials for all Adobe's products designed for video editing as well as for other professional video editing suites. Creating an account and becoming a member is mandatory, which means that you won't be able to start learning new things until you pay a monthly subscription.
6. Premiere Gal Media
Premiere Gal Media is a production company that creates YouTube video editing tutorials, motion graphics and entire courses that cover different aspects of the video editing process. However, only the YouTube tutorials can be accessed for free while all other services the company offers must be paid.
2. Online Video Editing Communities
Talking to people who share your passion for video editing may help you discover new things or to perfect the skills you already have. Here are a few of the most popular online video editing communities that might be useful to aspiring video editors.
1. Spiceworks
Finding solutions to the problems you encounter during the video editing process is easy on Spiceworks because the platform allows you to post new topics and ask any questions that prevent you from finishing your project. Anyone can use this forum for free, and as your level of knowledge about video editing grows over time you can also become a member and help inexperienced video editors overcome technical and creative problems.
2. CreativeCow
CreativeCow hosts hundreds of forums so you can post questions and participate in discussions in those that match your interests. The Tutorials and Features menu allows you to research any topic related to video editing, for free, which makes it a great learning tool for video editors who don't want to spend money on eLearning courses.
3. Videomaker
This is a good old-fashioned forum where you can find topics related to film, video editing, video cameras, and camcorders or subjects related to structuring videos or writing for the screen. The Videomaker platform is free to use, and it should be used as an extra source of information since you won't be able to find step by step tutorials here.
Summary
Video editing is a craft that takes years to master, but after only a few short months you can learn enough about the process to start editing videos on your own. Becoming a skilled video editor requires determination and an endless will to learn new things and discover new ways of assembling video clips into narratives that grab the viewer's attention. Wondershare Filmora is the best video editing software on Mac and PC for all novice and semi-professional video editors because it provides tools and features that enable you to create videos of all genres.
secure download
Let us know which video editing software you like to use the most in the comments section and make sure to share this guide with your friends who are just starting the discover how magical the world of video editing really is.
In this post, we've reviewed all popular video editing software in the market, and come out with the best video editors for Windows/Mac/iOS/Android/Linux for you.
by Liza Brown Jun 15, 2026 15:10 PM
Liza Brown
chief Editor
