For the Best Results, Use the Latest Version.
-
Preparations for Mac
-
Account (Mac)
-
Get Started & Basic Settings (Mac)
- Release notes for Mac
- Latest Versions and Features for Mac
- Get Started on Mac - Full Guide
- Download/register/uninstall on Mac
- Panel Layout on Mac
- Keyboard shortcuts on Mac
- Touchbar on Mac
- Change playback quality on Mac
- Render preview files on Mac
- Manage timeline on Mac
- Media for use on Mac
- Logo Reveal For Mac
- Marked Favorites for Mac
-
Compatibility & Tech Specs (Mac)
-
Performance Settings (Mac)
-
-
Creating Projects - Mac
-
Creating New Projects (Mac)
-
-
Importing & Recording - Mac
-
Importing (Mac)
-
Recording (Mac)
-
-
Video Editing for Mac
-
Basic Video Editing for Mac
- Edit Live Photos on Mac
- Enable/Disable Clip for Mac
- Magnetic Timeline For Mac
- Select All Clips on Timeline for Mac
- Auto Ripple for Mac
- Split & cut videos on Mac
- Compositing on Mac
- Crop and zoom on Mac
- Playback Zoom Level for Mac
- Change speed on Mac
- Play video in reverse on Mac
- Mark In and Mark Out for Mac
- Markers for Mac
- Group clips on Mac
- Customized Backgrounds for Videos and Images in Mac
- Video snapshot on Mac
- Freeze frame on Mac
- Auto enhance on Mac
- Applying Drop Shadow for Mac
- Adjustment Layer for Mac
- Mark clip on Mac
- Video Editing Ruler – Mac
- Apply Transforming for Mac
-
Advanced Video Editing for Mac
-
AI-Powered Video Editing for Mac
- Smart Scene Cut for Mac
- Smart Short Clips for Mac
- Image to Video for Mac
- AI Idea to Video for Mac
- AI Text-to-Video for Mac
- Instant Cutter Tool on Mac
- AI Face Mosaic for Mac
- Keyframe Path Curve for Mac
- Planar Tracking for Mac
- AI Extend For Mac
- AI Script-to-Video for Mac
- AI Text-Based Editing in Mac
- Create With Instant Mode on Mac
- ChatGPT Plugin - AI Copywriting on Mac
- AI Smart Cutout for Mac
- Auto reframe on Mac
- Lens correction on Mac
- AI Portrait Cutout on Mac
- Scene detection on Mac
- AI Smart Masking for Mac
- AI Mate Editing for Mac
- Motion Tracking on Mac
- Stabilize video on Mac
- AI Object Remover For Mac
- AI Smart Search for Mac
- AI Skin Tone Protection for Mac
- Green screen on Mac
- Super Slow Motion with Optical Flow for Mac
- AI stylizer on Mac
- Video Denoise for Mac
-
-
Audio Editing for Mac
-
Basic Audio Editing for Mac
-
Advanced Audio Editing for Mac
-
AI-Powered Audio Editing for Mac
- Audio To Video for Mac
- AI Sound Effect for Mac
- Smart BGM Generation for Mac
- AI Voice Enhancer for Mac
- Audio Stretch for Mac
- AI Audio Denoise for Mac
- Auto synchronization for Mac
- AI Vocal Remover for Mac
- Auto Beat Sync on Mac
- AI Music Generator for Mac
- How to Perform AI Voice Cloning in Wondershare Filmora?
- Silence detection on Mac
-
-
Text Editing for Mac
-
Basic Text Editing for Mac
-
Advanced Text Editing for Mac
-
AI-Powered Text Editing for Mac
-
-
Video Customizations for Mac
-
Video Effects (Mac)
-
Audio Effects (Mac)
-
Transitions (Mac)
-
Stickers (Mac)
-
Filters (Mac)
-
Color Editing (Mac)
-
Animations (Mac)
-
Templates (Mac)
-
Asset Center (Mac)
-
-
Exporting & Share & Cloud Backup - Mac
Export Selected Clips and Multi-Track Video for Mac
There are various occasions when you edit multiple clips in a timeline and need to export any of them, and Filmora offers this functionality. Users can optimize the editing process with its export option for selected clips and even export videos with multiple audio tracks in a few clicks.
If you are interested in knowing more about exporting selected clips or videos with multiple audio tracks through Filmora, follow this step-by-step procedure:
Exporting the Selected Clips
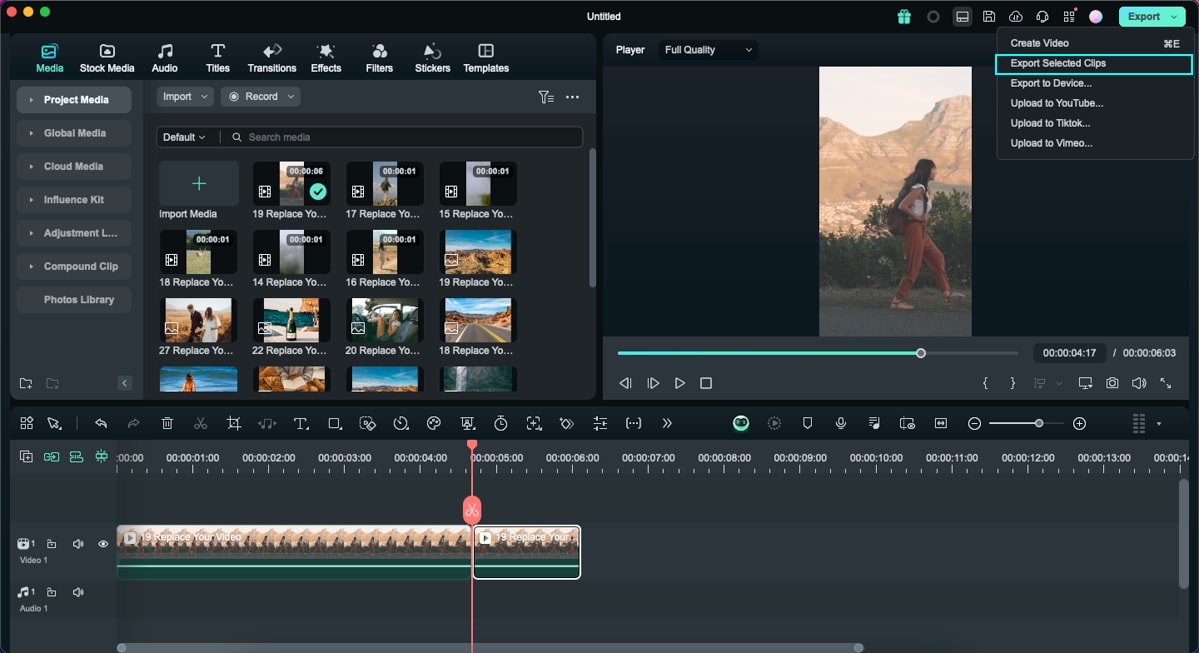
Step 1: Activate the Export Functionality
If you wish to export a selected clip out of many, then select that clip in the timeline and navigate towards the "Export" button. Afterward, expand the navigation arrow on this button and select the "Export Selected Clips" option from the expansion menu.
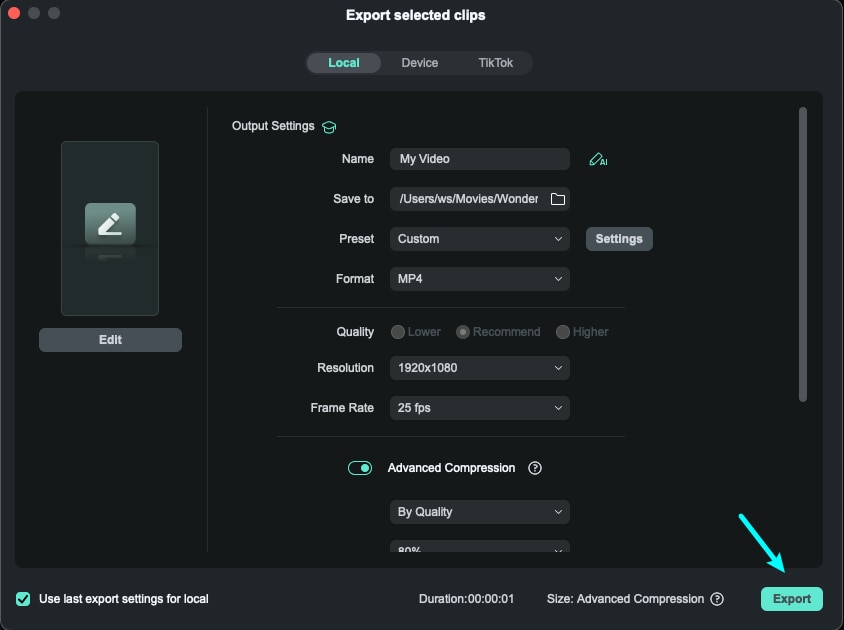
Step 2: Personalize the Export Settings
As the new window appears, adjust for file name, storage location, frame rate, resolution, and other settings. End the process by clicking the "Export" button and save the selected clip to your device.
Export Clip Range
Filmora enables users to define a specific range within an existing video clip and export it. This feature not only ensures a streamlined workflow but also eliminates the need for trimming before exporting. To delve into the efficient and time-saving features of Filmora, pay attention to the detailed guide below:
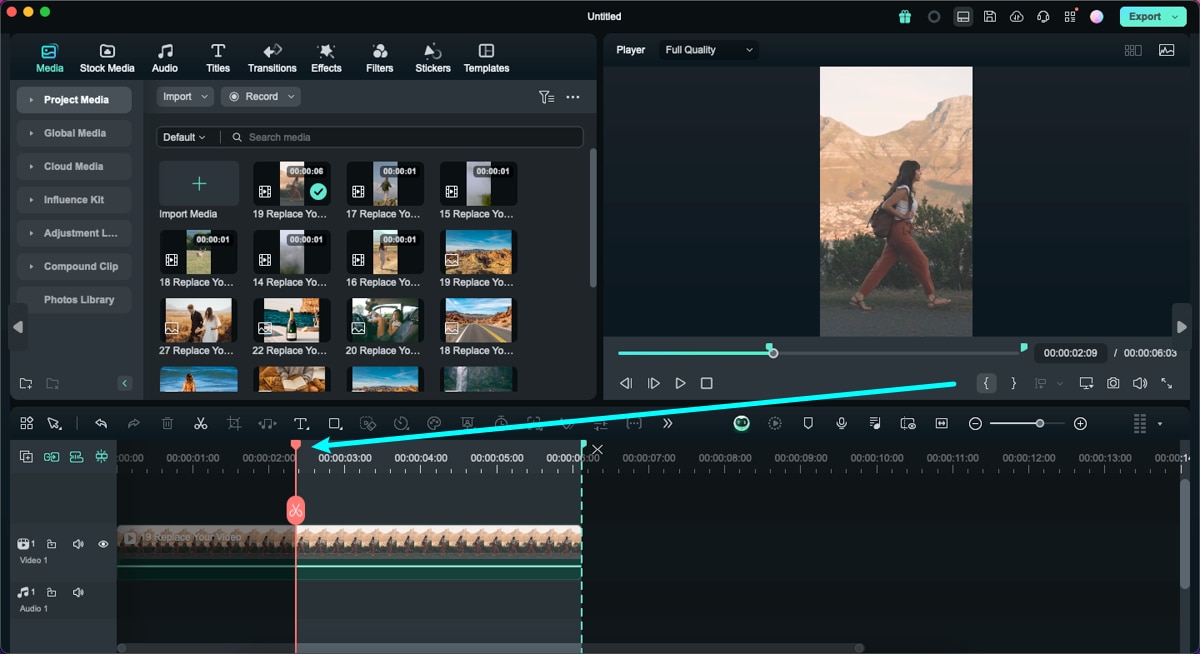
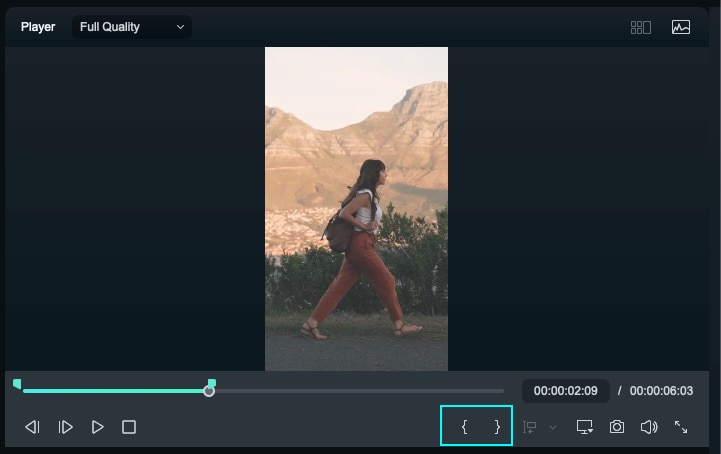
Step 1: Selection of the Clip's Starting Point
Once your chosen clip is in Filmora's timeline, direct your attention towards the "Preview" section. Click the "{" icon to invoke a slider that enables precise adjustment of the starting point of the clip.
Step 2: Designate the Clip's Ending Point
For setting the end point of this clip range selection, repeat the process; however, this time, engage the "}" icon.
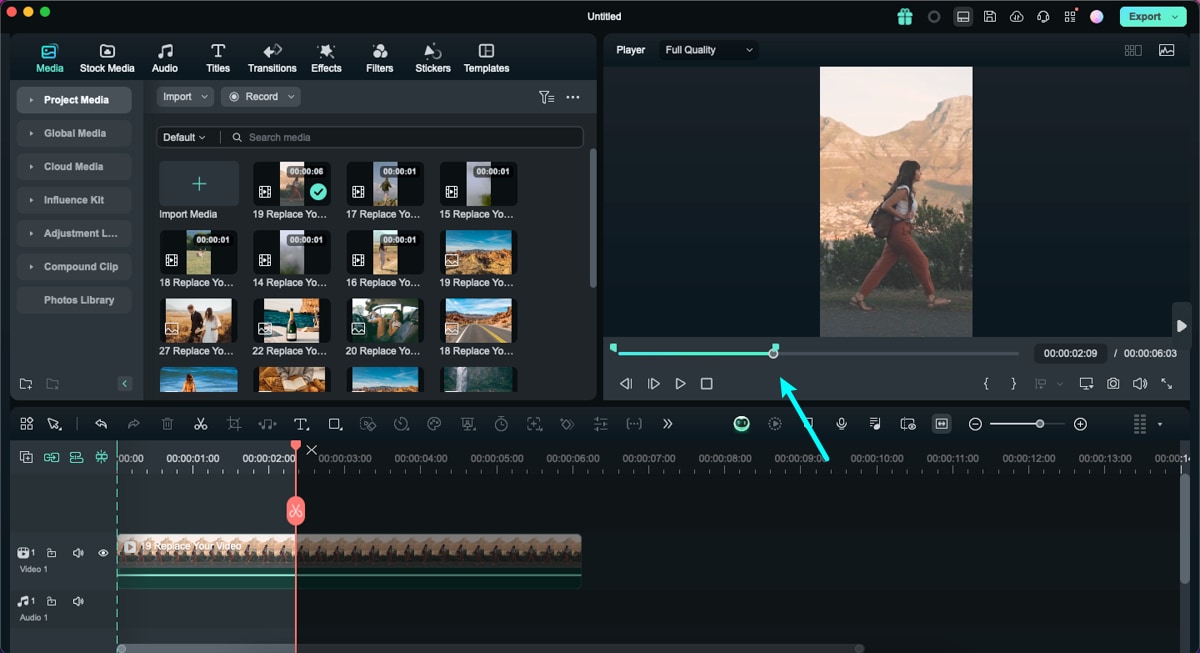
An alternative method for commencing the same action involves using the "I" key to specify the starting point and the "O" key to specify the endpoint.
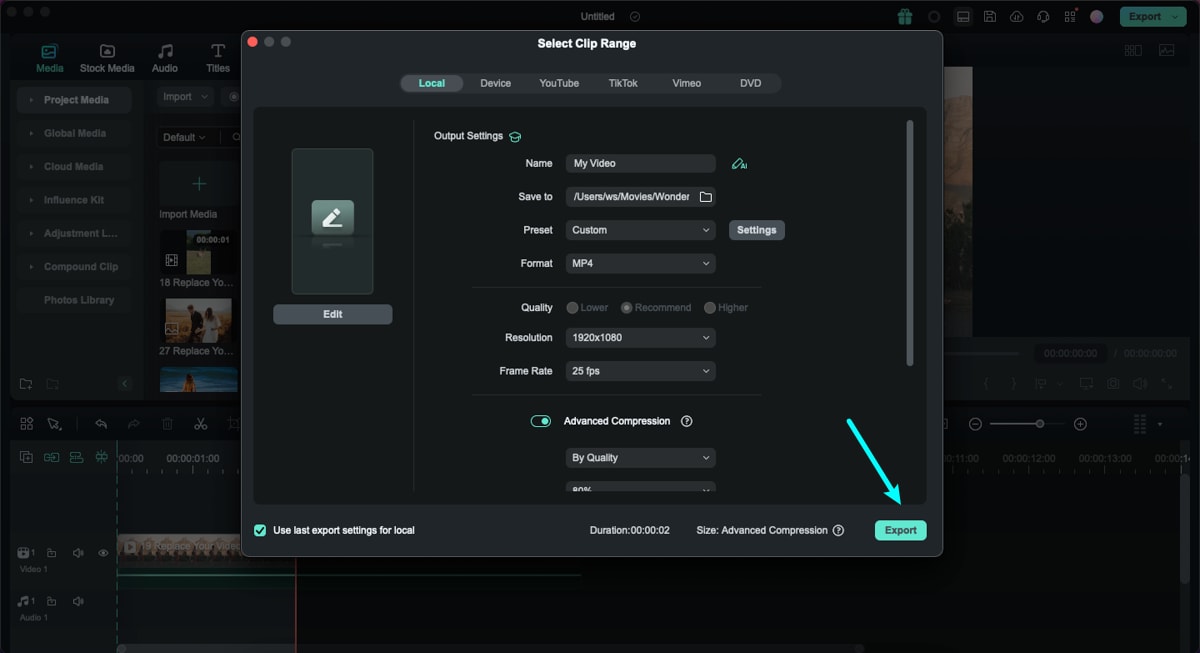
Step 3: Exporting the Defined Clip Range
After establishing the clip range using the previous method, navigate to the "Export" button and click it. A "Select Clip Range" window will emerge where you can adjust the settings, including the folder location for your clip, its name, and additional parameters. Upon setting all these parameters, finalize the process by choosing the "Export" button.
Export Video With Multiple Audio Tracks
This advanced functionality of Filmora allows you to export a video with multiple audio tracks effortlessly. You can export video files in MP4 or MOV formats to edit and save them with your desired audio. You get the ability to save a video with as many as 10 audio tracks, each of which can be individually configured to suit your needs.
You can find and enable this option within the Advanced Parameters section of the export panel, giving you greater control over the audio elements included in your final output. To learn how to use this utility, read the steps mentioned next:
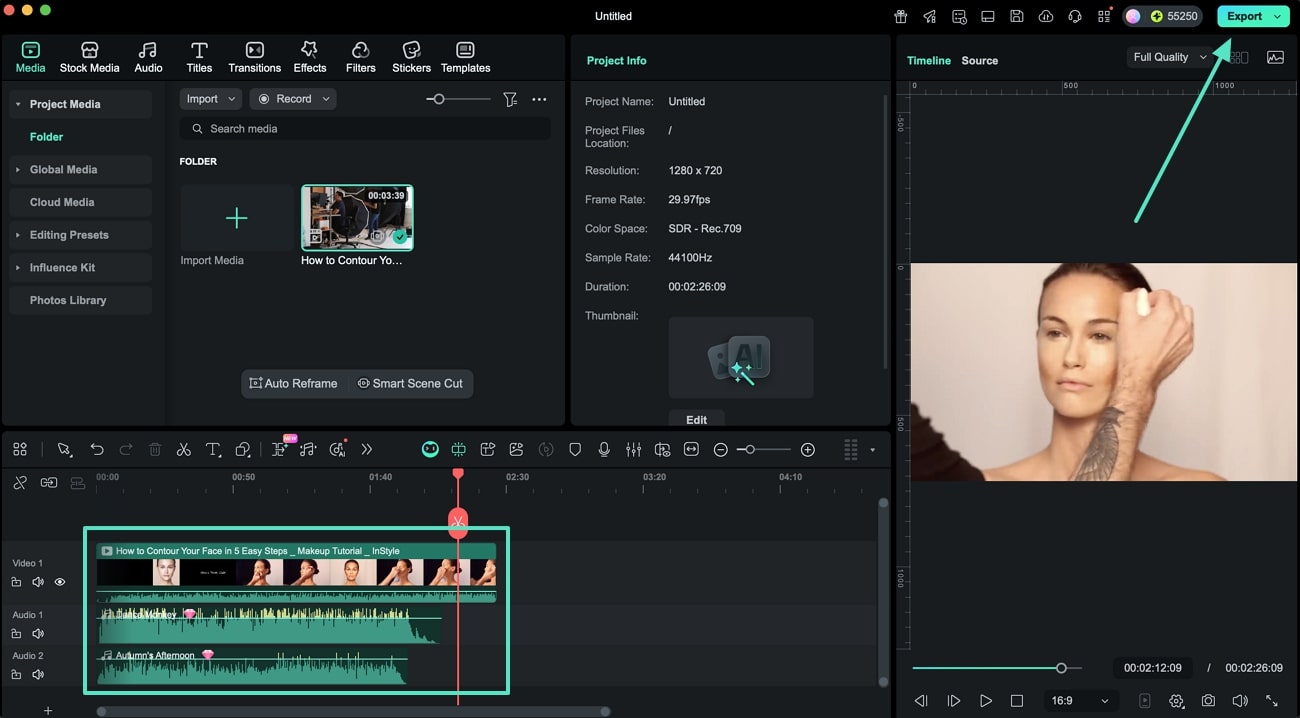
Step 1. Add Your Video and Audio Files
To begin the process, launch Filmora and create a new project from the homepage. Import the video and audio files to the tool’s interface and drag them to the editing timeline. Perform your desired edits on the audio and video files. Once done, press the Export button located at the top-right corner.
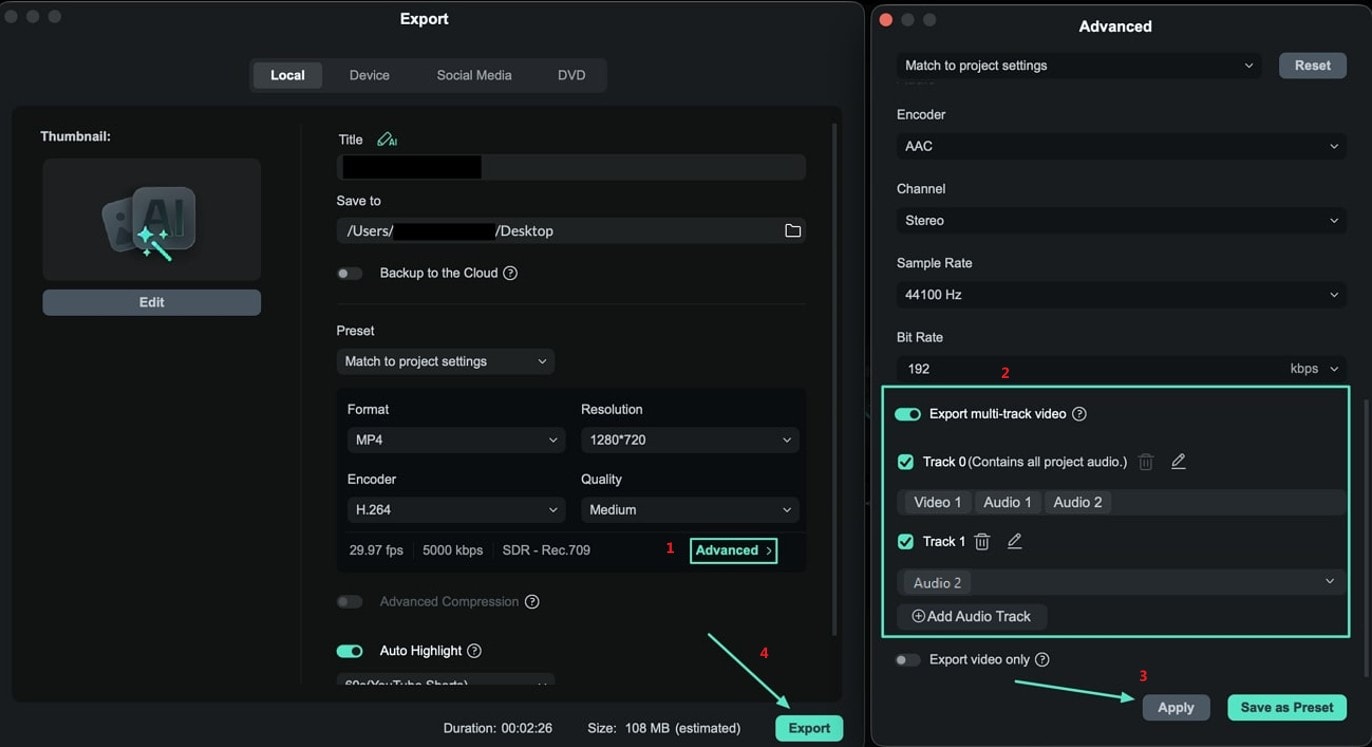
Step 2. Enable Multi-Track Function
After opening the Export window, select the Advanced button to launch a new pop-up. Scroll through the options to find the Export Multi-Track Video switch and activate it. Pick the audio tracks you want to include in the export, then press the Apply button. Once configured, press the Export button located at the bottom.
Related Posts
Featured Articles
Free Pie Chart Video Maker: How to Make an Animated Pie Chart in Videos?
Create animated pie charts for free in your videos. See why they work, what to avoid, and how a new video chart tool makes the process simple.
AI Polaroid Maker: Generate Polaroid Photos and Videos with AI
Transform your photos into vintage Polaroid-style images or short videos using AI. Learn how to use Filmora's intuitive AI Polaroid Maker with step-by-step guidance.
Elgato Green Screen Review: The Ultimate Background Solution for Streamers
Read our detailed review of Elgato green screens. Find out why they are a good choice for streamers seeking professional, portable, and high-quality backgrounds.
Recommended User Guide
Export on Mac
To export your video to your computer, click the export button and choose the Local tab. Then, select the format you want to export in. Currently, Filmora supports the following formats: WMV, MP4, AVI, MOV, F4V, MKV, TS, 3GP, MPEG-2, WEBM, GIF, and MP3.
AI Thumbnail Creator For Mac
Filmora has long supported generating thumbnails through the export window, the latest upgrade takes it to the next level with AI.
Video Compressor For Mac
Filmora's Video Compressor for Mac shrinks your videos by up to 90% at lightning speed, making it ideal for easy sharing on social media and via email.
