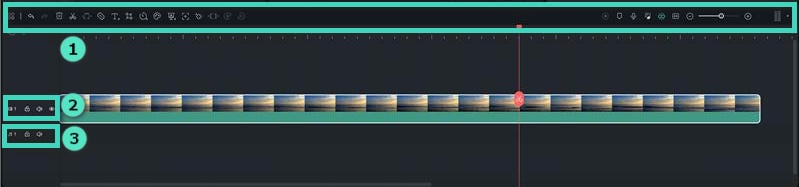
Filmora Mac Panel Layout
Wondershare Filmora is an all-in-one video editing software where you can create unique and polished videos in a few minutes. In this article, we'll show you how to know more about the different panel layouts of Filmora for Mac.
Index
1. What's New
Filmora for Mac is now equipped with a new addition to its layout called the Property Panel.
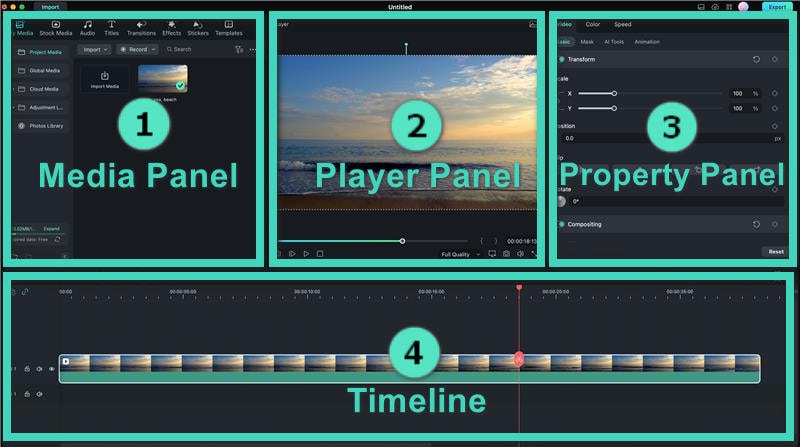
- Media Panel
Access your media files as well as other resources from audio, transitions, effects, stickers, templates, and more.
- Player Panel
Preview your videos and take still images using Snapshot.
- Timeline Panel
Arrange, split, and edit your clip sequence and other media files.
2. Property Panel
The new Property Panel for Mac makes all the info readily available so you can make adjustments when editing on the spot.
All the relevant information on your projects, such as the video, audio, color, and speed properties of your clip in the Timeline Panel or Preview Window, is placed on the new Property Panel so you can tweak your clips on the fly.
3. Player Panel/Preview Window
The Player Panel (Preview Window) allows you to preview your clips during the editing process. This is where you can (referring to the bottom-right area of the next image):
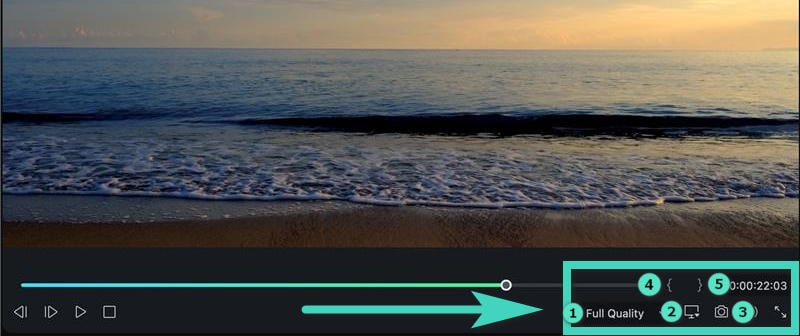
- Set playback quality
- Tweak display settings
- Capture a snapshot of the video
- Mark in
- Mark out
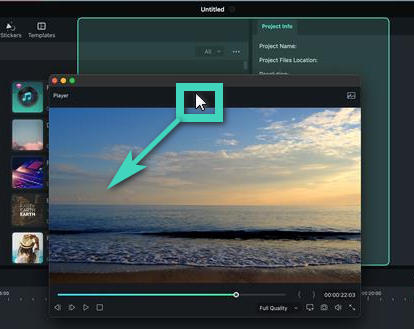
If you want to use the Player Panel as an independent panel or replace it with the default position, you can click the Cross Delete tab or simply drag the panel.
Note:
You can take a full-resolution image of the still frame in your player panel with the Snapshot button. Snapshot automatically saves the picture to your Media Library as an image for later viewing.
Note:
The position of the playhead is located in the lower-right corner and is fitted with a handy time code for tracking purposes. You can jump to a specific point on any part of the video if you want to enter a new time code.
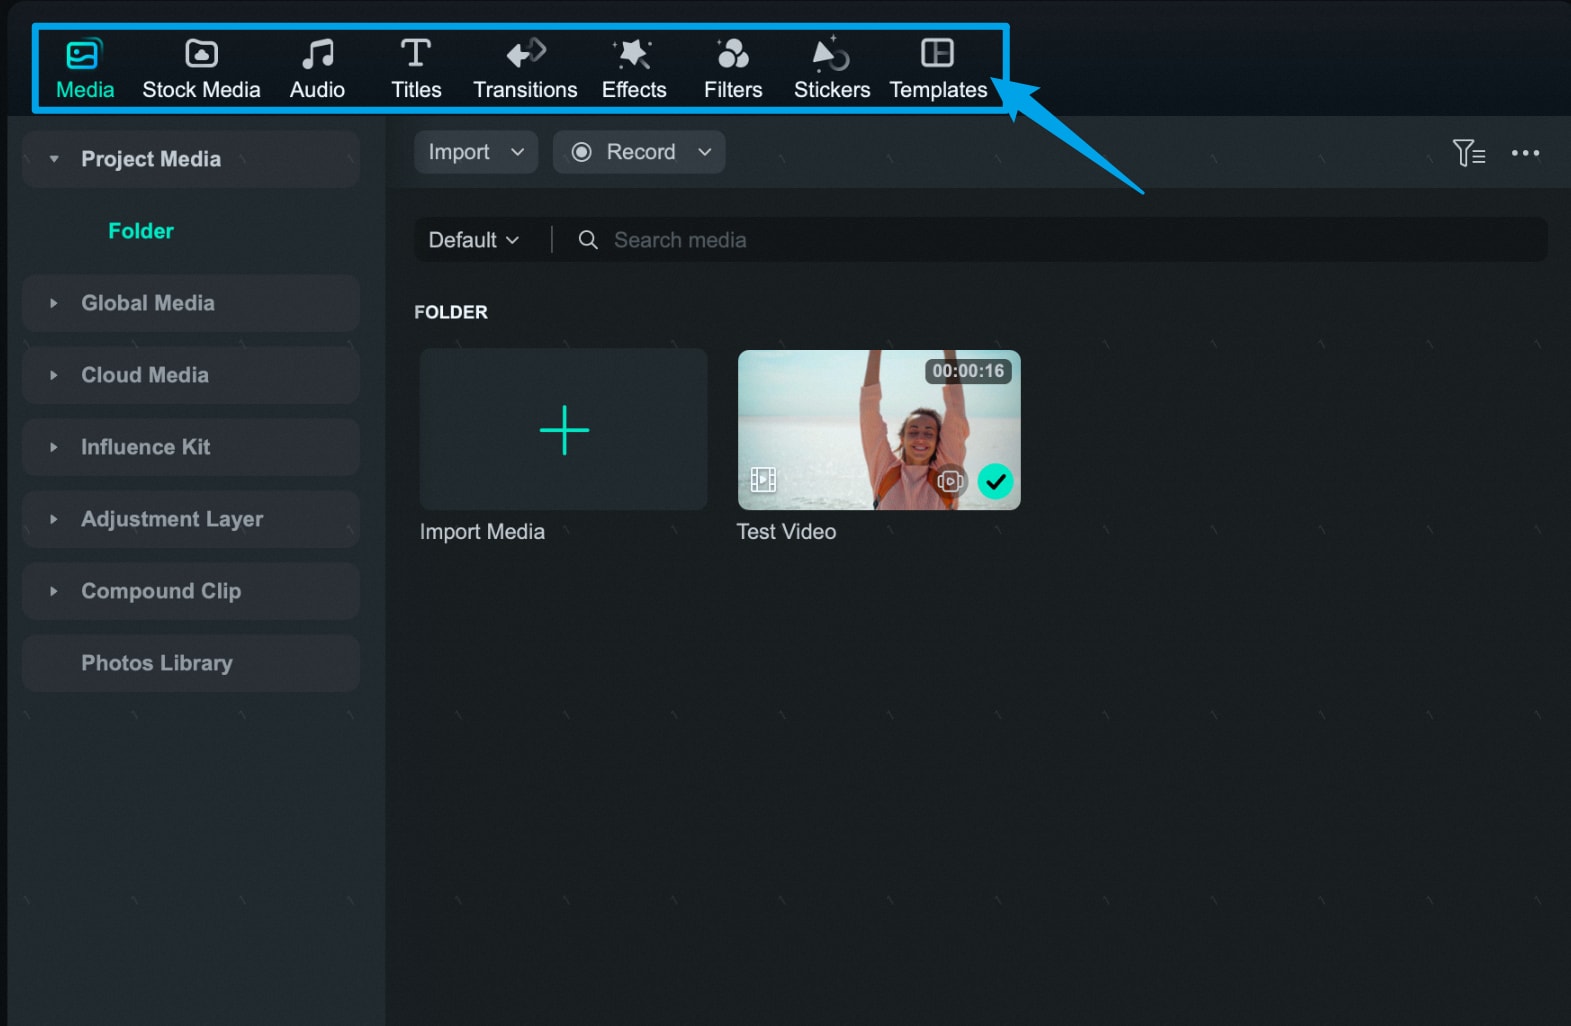
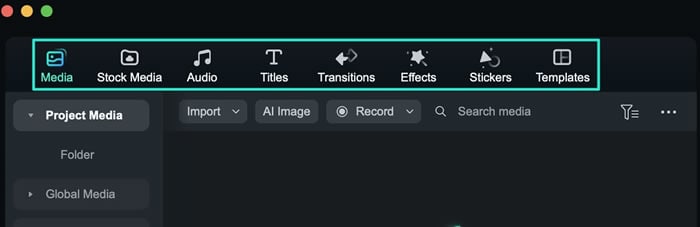
4. Media Panel
The Media Panel displays all your imported source files when creating a project. With the addition of Stickers and Templates, Filmora 12 is now equipped with more resources than ever before to create trendy videos on your Mac, such as:
- Media: To import your media files.
- Stock Media: Provide royalty-free stock media in GIPHY/Pixabay/Unsplash
- Audio: Search the audio files of Filmora.
- Titles: Select available preset titles and apply them to your video.
- Transitions: Give multiple transitions to make your video more eye-catching.
- Effects: Select eye-popping effects for your project.
- Filters: Select multiple filters to customize your video.
- Stickers: Add different stickers to your videos.
- Templates: To split screen videos with preset templates.
5. Timeline Panel
The Timeline Panel is where you assemble your clips and effects for your projects. This is where you can perform various actions to your media files, such as:
- Remove elements like video clips, audio, transitions, etc.
- Split your video clips or audio files into several parts.
- Adjust parameters in media files.
- Render your video for a preview.
- Add marker during the post-production phase.
- Record voiceover.
- Mix audios.
Notes:
Refer to the screenshot above for performing various functions such as:
- Basic & Advanced Editing
- Video Track
- Audio Track
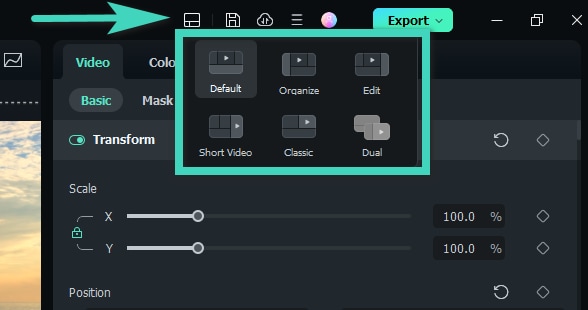
6. Layout Modes
With Filmora 12 for Mac, there are six layout models to choose from when editing your projects: Default, Organize, Edit, Short Video, Classic, and Dual.
If you're used to Filmora 11, you can choose the Classic mode to revert to the original layout. Meanwhile, the Dual layout works best for people with multiple monitors.
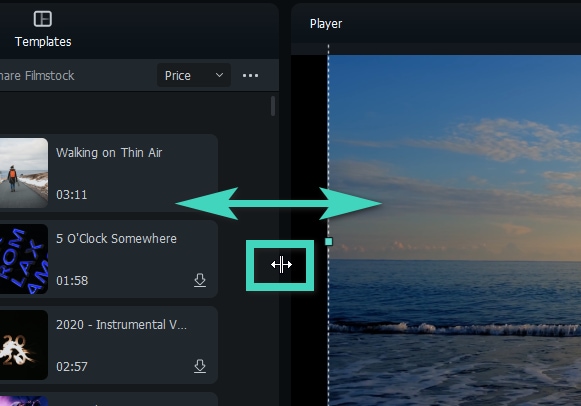
7. Resizing Panel Groups
If you want to resize any of the panels meanwhile, simply drag the resizing icon that appears at the borders between each panel to adjust to your preferred fit.
Method 1: Place the pointer to the sides, then the pointer becomes a left and right arrow. And you can resize panels horizontally,
Method 2: If you want to resize the panels vertically, put the pointer underneath the panels until the pointer becomes an up-and-down arrow.
8. Custom Toolbar for Mac
Unlike all professional-level video editing software, Filmora offers a user-friendly editing interface displaying its sophisticated and accessible custom toolbar. It provides quick access to features such as "Effects," "Stickers," "Transitions," "Titles," and more. In this guide, we will show you how to access Filmora's custom toolbar:
How to Access Filmora's Custom Toolbar?
While Filmora's editing interface is not complex, we've outlined a step-by-step procedure to help you explore it in an efficient way:
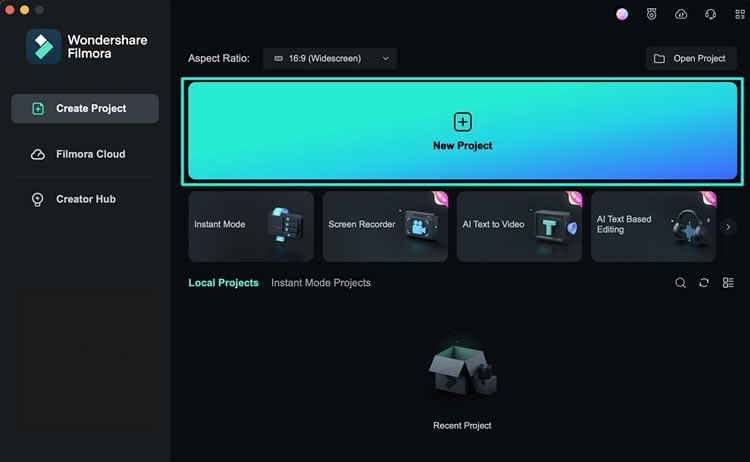
Step 1: Launch Wondershare Filmora and Start Editing
First, download the newest version of Filmora on your device, start it, and create a new project by clicking the "New Project" button. This action will take you to Filmora's main editing interface for editing.
Step 2: Access the Custom Toolbar
Once you're within Filmora's main editing window, move upwards and locate a bar that contains tabs such as "Media", "Stock Media", "Effects", and others. This bar is known as Filmora's custom toolbar, where you can access its "Effects", "Stickers", and "Transitions".
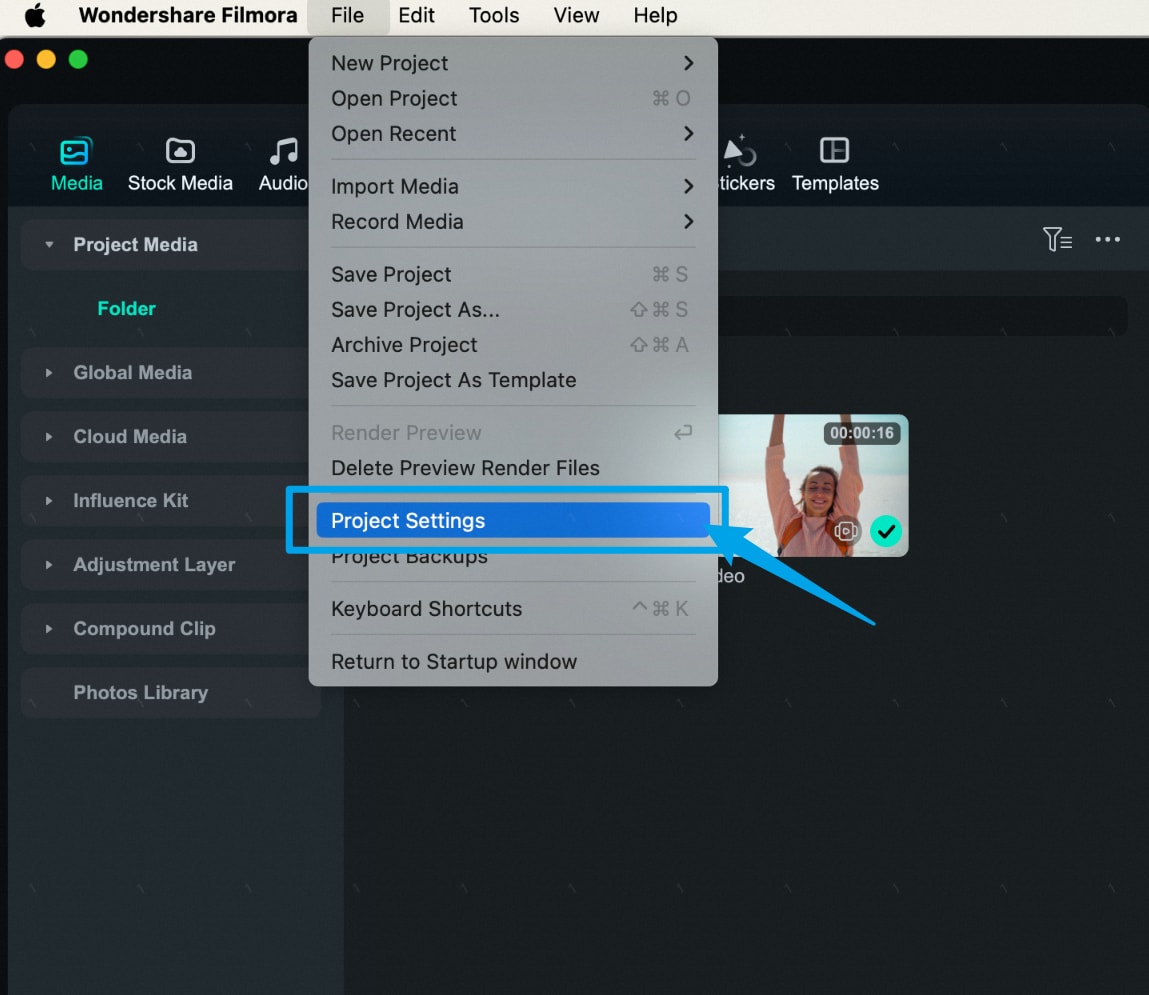
9. Project Settings
When you click the New Project button on the welcome screen, you will be taken to this screen, which is Filmora's default interface.
If you forgot to set the aspect ratio from the welcome screen, or if you wanted to use a different aspect than the defaults. You can do so by choosing "Project Settings" from the File menu.
Now, you can pick the correct aspect ratio, resolution, and frame rate from the Project Settings window. To use a custom aspect ratio, what you have to do is to change the resolution.
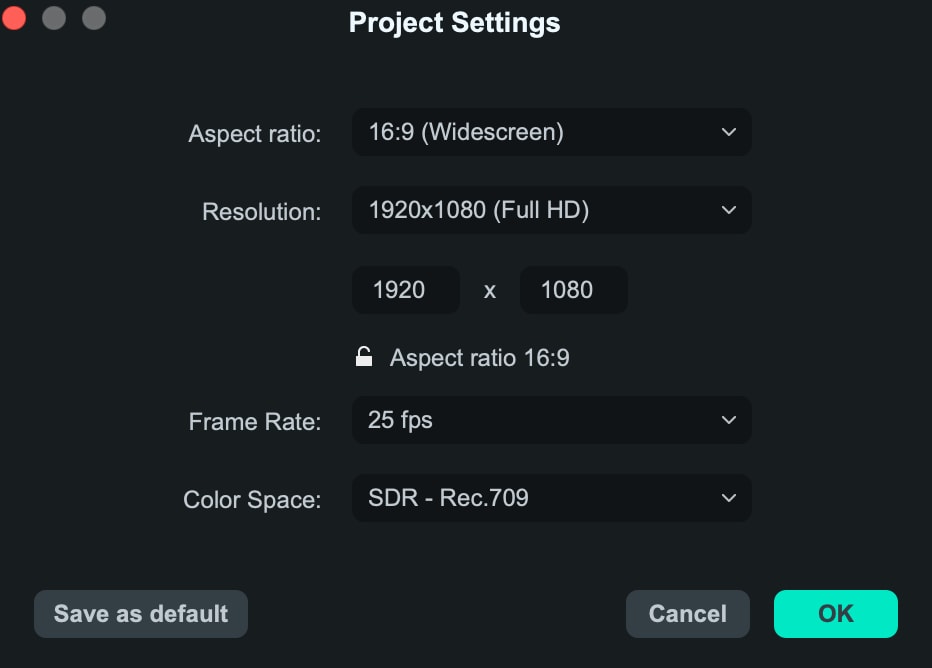
For example, if you are making an Instagram video, change the resolution to 1080 by 1350 and Filmora will automatically set the aspect ratio for you. You can lock the aspect ratio by clicking on this lock icon here.
The video aspect ratio is the video width in proportion to the height. This ratio describes how wide your video is.
For example, a video with a 16:9 aspect ratio would not be 16 px wide and 9 px tall. You wouldn't be able to see a video that small. One resolution that has an aspect ratio of 16:9 is 1920 px by 1080 px.
The resolution of our project is measured in how many pixels wide and how many pixels tall the video is. By default, Filmora projects will start with a resolution of 1920 pixels wide by 1080 pixels high. Since this is the standard scale of full HD video, we can freely change the resolution by modifying the number on each box.
The frame rate is the number of frames a video will show within a second. Many digital video cameras shoot at 23.976 and 29.97 frames per second. These are the standards in countries that use the NTSC system.
The 25 and 50 frames/second are used by the cameras in countries that use the PAL system. Most movies work in 24 frames/sec.
Some TV shows and home cameras work in 30 frames per second which reflects a realistic motion similar to what we are used to seeing in real life.
Anything higher than 30 frames per second is mainly used to create slow motion. However some people primarily gamers tend to work with higher frame rates like 60 frames per second.
If you are making videos to post on social media like YouTube, most frame rates should work fine. But it is ideal to match the settings of whatever footage your camera took. By default, Filmora will ask you if you want to match the settings of your footage when you drag the first clip into the editor from the media panel.
