
For the Best Results, Use the Latest Version.
Filmora User Guide for Mac
-
Preparations for Mac
-
Account (Mac)
-
Get Started & Basic Settings (Mac)
- Release Notes for Mac
- Latest Version and Features for Mac
- Get Started on Mac - Full Guide
- Download/register/uninstall on Mac
- Panel Layout on Mac
- Keyboard Shortcuts in Mac
- Touchbar on Mac
- Change playback quality on Mac
- Render preview files on Mac
- Manage Timeline in Mac
- Media for use on Mac
- Logo Reveal For Mac
- Marked Favorites for Mac
-
Compatibility & Tech Specs (Mac)
-
Performance Settings (Mac)
-
-
Creating Projects - Mac
-
Creating New Projects (Mac)
-
-
Importing & Recording - Mac
-
Importing (Mac)
-
Recording (Mac)
-
-
Video Editing for Mac
-
Basic Video Editing for Mac
- Edit Live Photos on Mac
- Enable/Disable Clip for Mac
- Magnetic Timeline For Mac
- Dual Monitor Setup for Video Editing on Mac
- Select All Clips on Timeline for Mac
- Auto Ripple for Mac
- Split & Cut Videos on Mac
- Compositing on Mac
- Crop and zoom on Mac
- Playback Zoom Level for Mac
- Change Speed on Mac
- Play Video in Reverse on Filmora for Mac
- Mark In and Mark Out for Mac
- Markers for Mac
- Group Clips in Filmora for Mac
- Customized Backgrounds for Videos and Images in Mac
- Video snapshot on Mac
- Freeze Frame on Mac
- Auto enhance on Mac
- Applying Drop Shadow for Mac
- Adjustment Layer for Mac
- Mark Clips in Filmora for Mac
- Video Editing Ruler – Mac
- Apply Transforming for Mac
-
Advanced Video Editing for Mac
- Keyframe Motion Blur for Mac
- Camera Tracking for Mac
- Keyframe Path Curve for Mac
- Text Animation Path for Mac
- Create Multi-Camera Clip for Mac
- Filmora Motion Blur | Mac
- Drawing Tools for Mac | Filmora Guide
- Track Matte for Mac
- Compound Clips for Mac
- 360° Video Reframing for Mac
- AI Video Enhancer for Mac
- Video Chapters in Filmora for Mac
- Filmora Flicker Removal Guide | Mac
- Multi-Clip Editing for Mac
- Keyframe Graph Editor for Mac
- Create Multi-Screen Videos in Filmora on Mac
- Animation Keyframing for Mac
- Masking in Filmora on Mac
- PIP (Picture in Picture) in Filmora on Mac
-
AI-Powered Video Editing for Mac
- Smart Scene Cut for Mac
- Smart Short Clips for Mac
- Filmora AI Eye Contact - Mac
- Filmora Image to Video for Mac
- AI Idea to Video for Mac
- AI Text-to-Video for Mac
- AI Media Analysis for Mac
- Instant Cutter Tool on Mac
- AI Face Mosaic for Mac
- Filmora Image to Prompt for Mac
- Filmora AI Image Enhancer Guide – macOS
- Planar Tracking for Mac
- Filmora AI Relight - Mac
- AI Extend For Mac
- AI Script-to-Video for Mac
- AI Text-Based Editing in Mac
- Create With Instant Mode on Mac
- ChatGPT Plugin - AI Copywriting on Mac
- AI Smart Cutout in Filmora for Mac
- Auto reframe on Mac
- Lens Correction in Filmora for Mac
- AI Portrait Cutout on Mac
- Scene detection on Mac
- AI Smart Masking for Mac
- AI Mate Editing for Mac
- Motion Tracking on Mac
- Video Stabilization for Mac
- AI Video/Photo Object Remover for Mac
- AI Smart Search for Mac
- AI Skin Tone Protection for Mac
- Green screen on Mac
- Super Slow Motion with Optical Flow for Mac
- AI Stylizer for Mac
- Video Denoise for Mac
-
-
Audio Editing for Mac
-
Basic Audio Editing for Mac
-
Advanced Audio Editing for Mac
-
AI-Powered Audio Editing for Mac
- Audio To Video for Mac
- AI Sound Effect for Mac
- Smart BGM Generation on Mac
- AI Voice Enhancer for Mac
- Audio Stretch for Mac
- AI Audio Denoise for Mac
- Auto Synchronization on Mac
- AI Vocal Remover for Mac
- AI Auto Beat Sync for Mac
- AI Music Generator for Mac
- AI Voice Cloning on Mac
- Silence Detection on Mac
-
-
Text Editing for Mac
-
Basic Text Editing for Mac
-
Advanced Text Editing for Mac
-
AI-Powered Text Editing for Mac
-
-
Video Customizations for Mac
-
Video Effects (Mac)
-
Audio Effects (Mac)
-
Transitions (Mac)
-
Stickers (Mac)
-
Filters (Mac)
-
Color Editing (Mac)
-
Animations (Mac)
-
Templates (Mac)
-
Asset Center (Mac)
-
-
Exporting & Share & Cloud Backup - Mac
Filmora Tutorial Videos
Filmora 15 User Guide in PDF
Filmora 13 & 14 User Guide in PDF
Filmora 12 User Guide in PDF
Filmora 11 User Guide in PDF
Filmora 9 & 10 User Guide
Export a Video in Filmora Mac
After completing your edits in Filmora for Mac, you can export the project directly to your device in several ways. Depending on your workflow, you can create an XML file for further editing, process several videos through Batch Export, or turn suitable clips into Live Photos. Each option serves a different purpose when taking your content outside the Filmora workspace.
Export a Video Locally
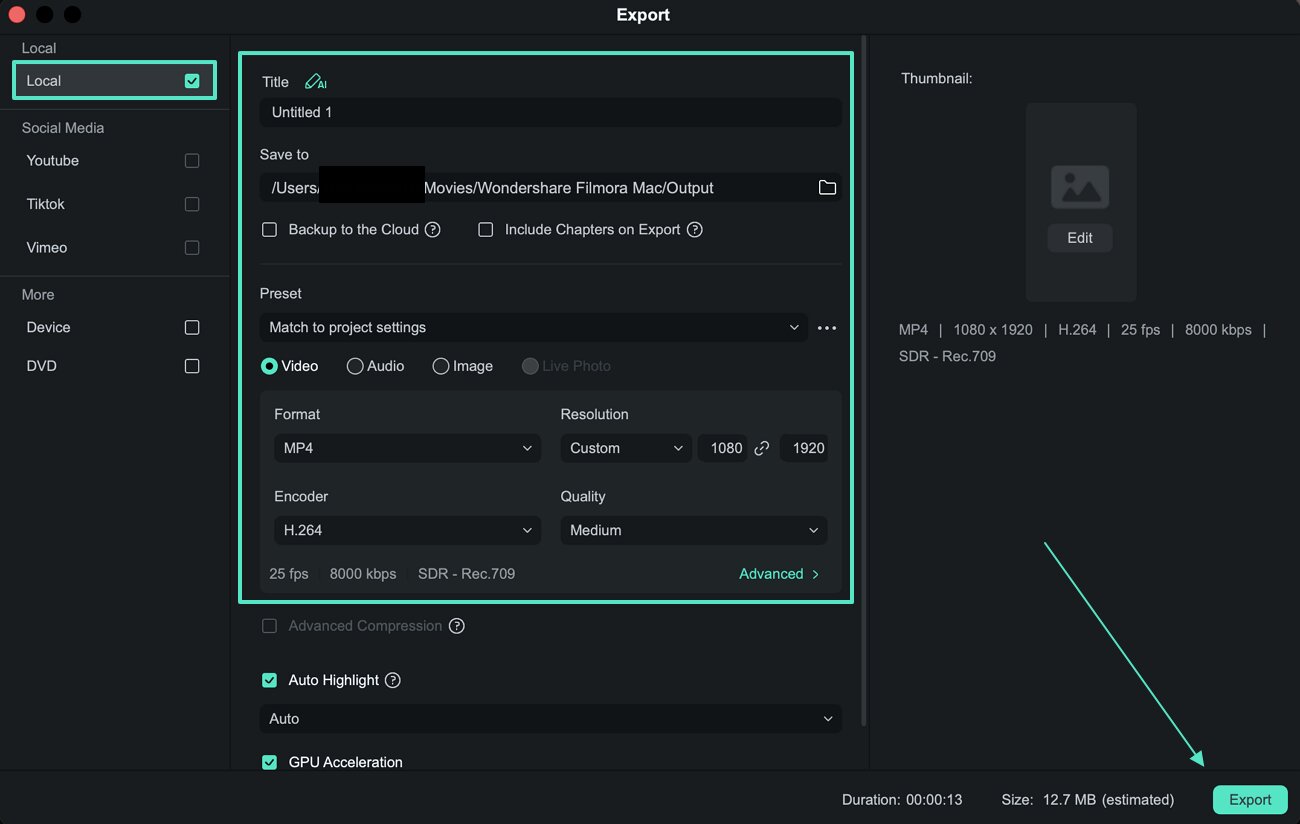
The following process shows how to save your completed video directly to your Mac:
Click Export and open the Local tab to view the available output formats. Select your preferred format, rename the video, and specify where the exported file should be stored. Review the resolution, frame rate, file size, and duration, then click Export to save the video.
Export Video to Device
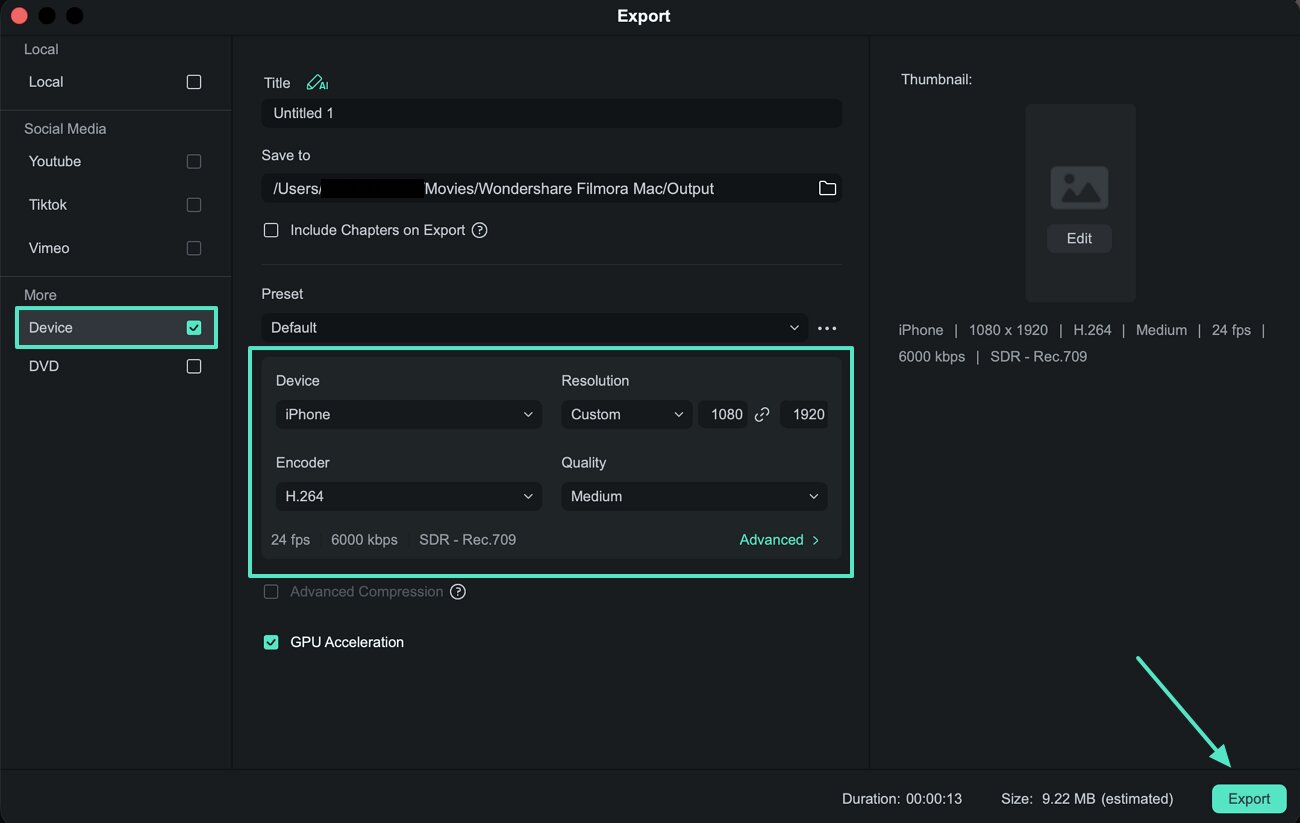
Filmora provides device-specific export options for platforms such as iPhone, iPad, Apple TV, Apple TV 4K, iPod, Samsung Galaxy, Smart Phone, Android Generic, Google Pixel, Xbox One, PlayStation 4, PSP, and Smart TV. Use the process below to prepare your video for a selected device:
Open the Device tab and select the device you want to optimize the video for. After choosing a device, configure the Resolution and Quality based on your requirements. Click Export when the settings are ready.
Export to YouTube
Filmora lets you prepare and publish your finished video directly to YouTube using its export window:
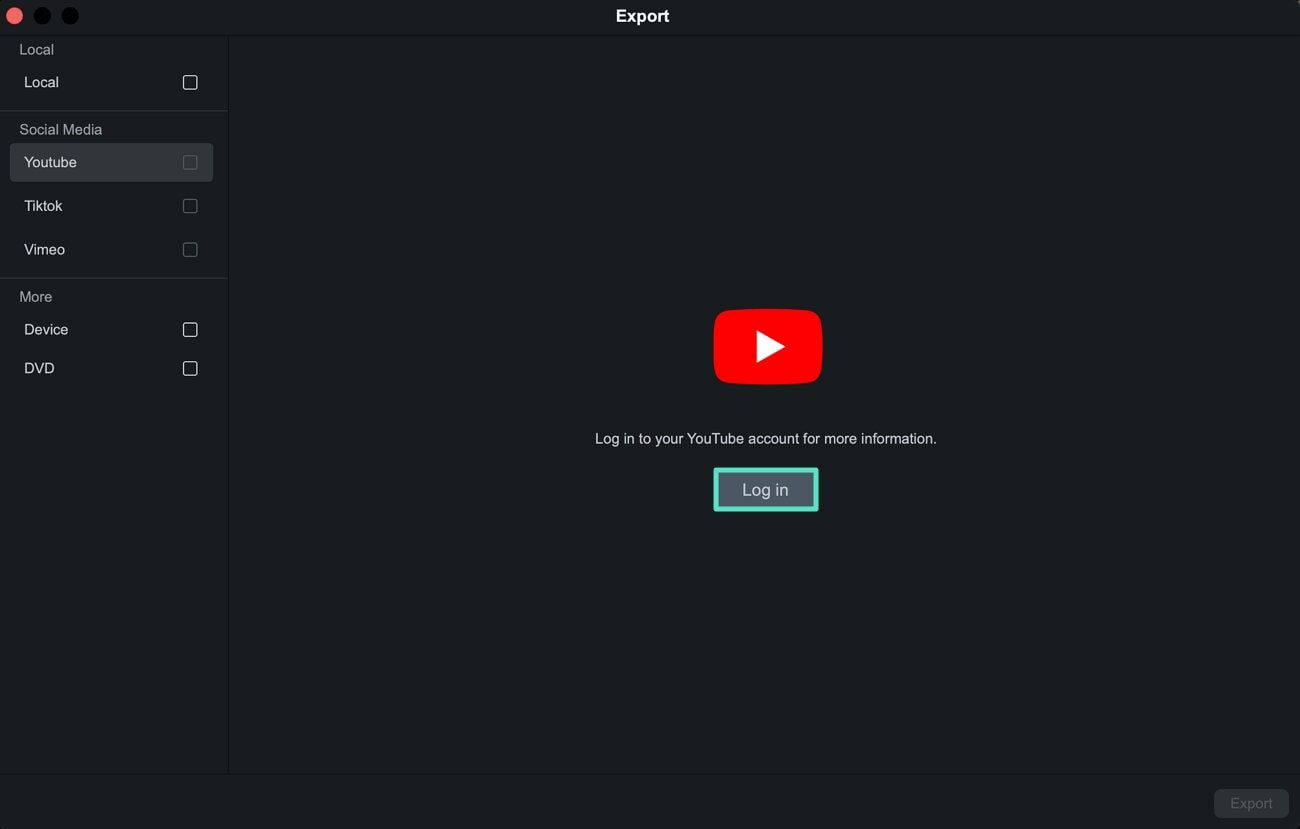
Step 1. Connect Your YouTube Account
Click Export and switch to the YouTube option. Sign in with your YouTube account through the available login process. When prompted, click Allow to grant Filmora the required account access.
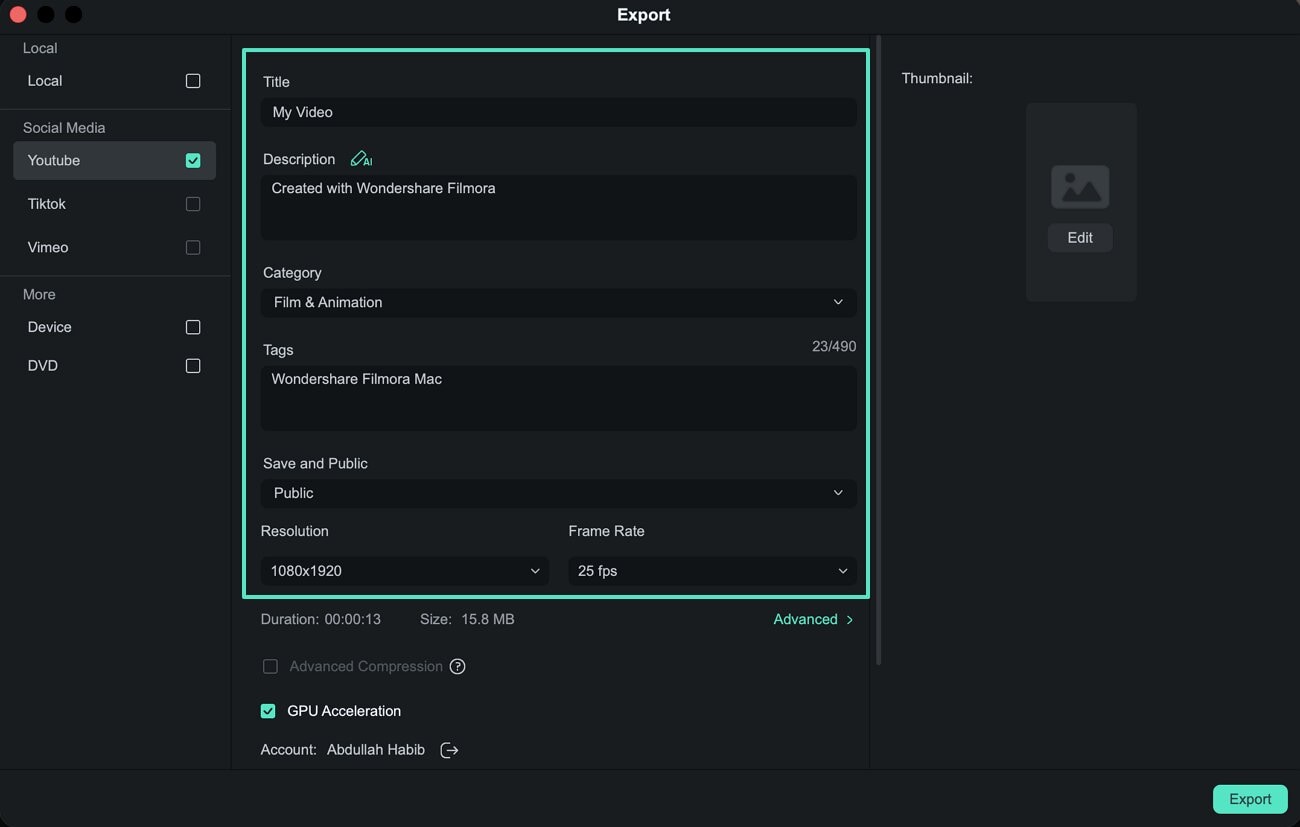
Step 2. Add Your Video Details
Enter the video title, description, and relevant tags before uploading. You can also choose whether the video should be public, unlisted, or private.
Step 3. Configure Advanced Settings
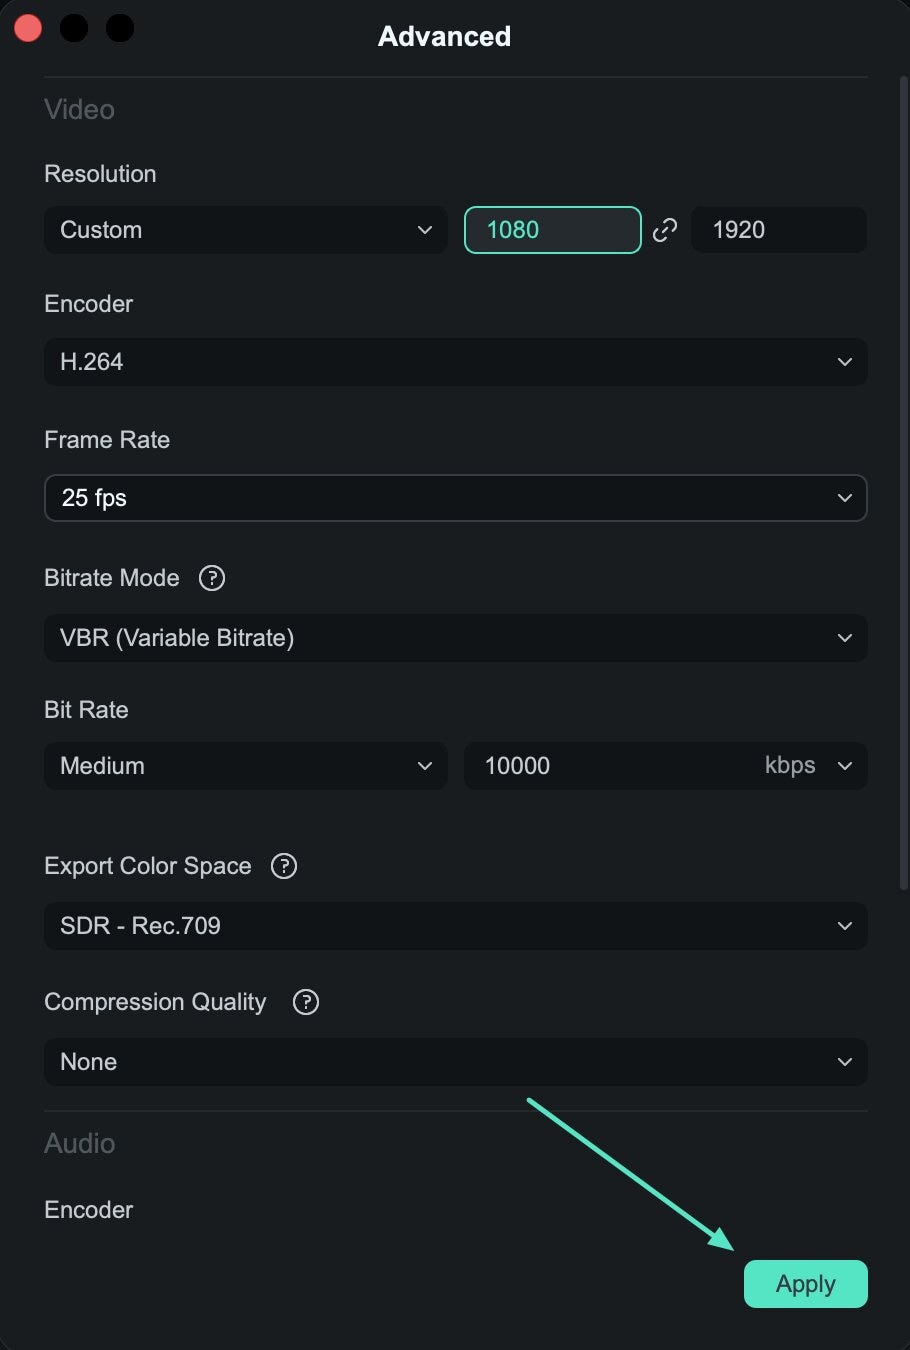
Open Advanced when you need to modify additional output options for the video. Confirm your selections by clicking Apply, then use the Export button to publish the video to your YouTube channel.
Export to TikTok
Completed videos can also be prepared for TikTok directly from Filmora. Use the following process to connect your account and export the video:
Step 1. Sign In to TikTok
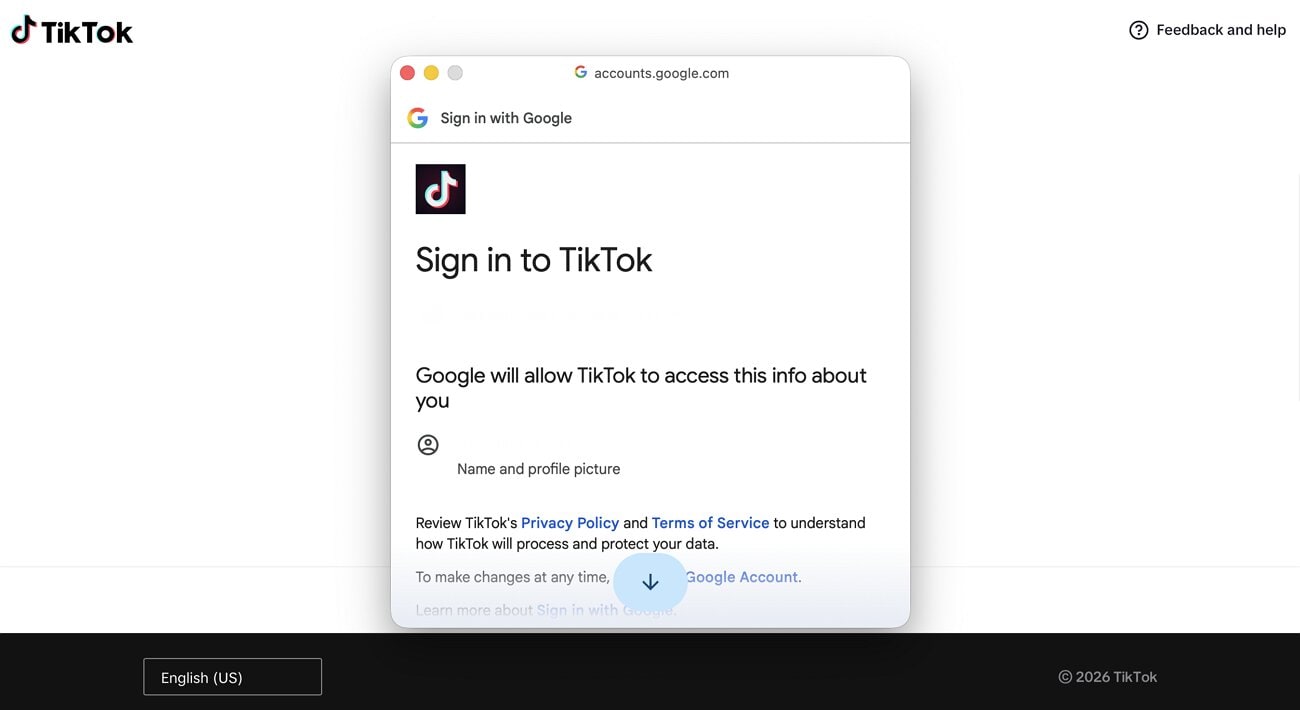
Open the TikTok tab from the export window and log in to your TikTok account. Review the available sign-in methods and select the option associated with your account.
Step 2. Prepare the Video for TikTok
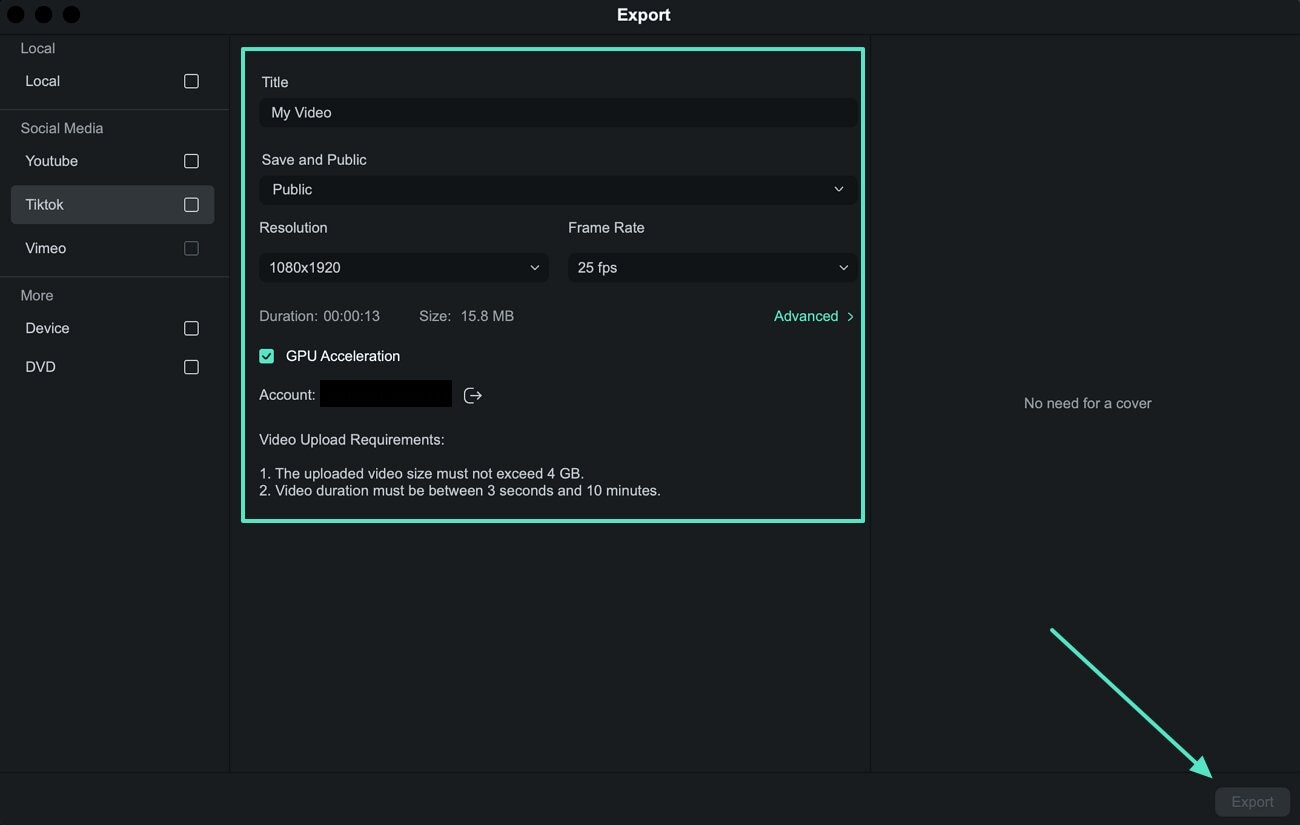
After signing in, adjust the required video and audio settings before publishing your content. Once everything is configured, click the Export button to continue.
Export to Vimeo
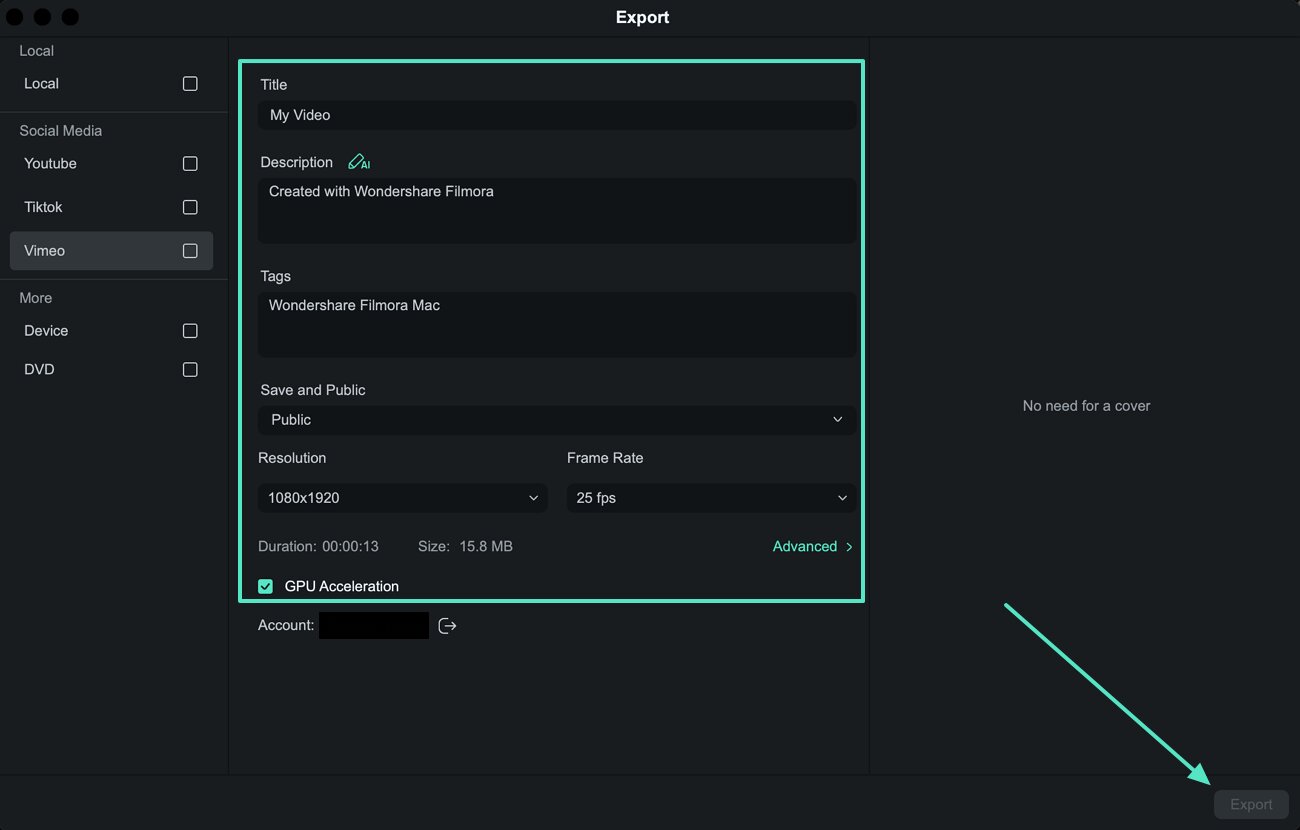
Filmora also provides an option for publishing completed videos directly to Vimeo. Connect your Vimeo account first, then configure the video information before exporting:
Step 1. Connect Your Vimeo Account
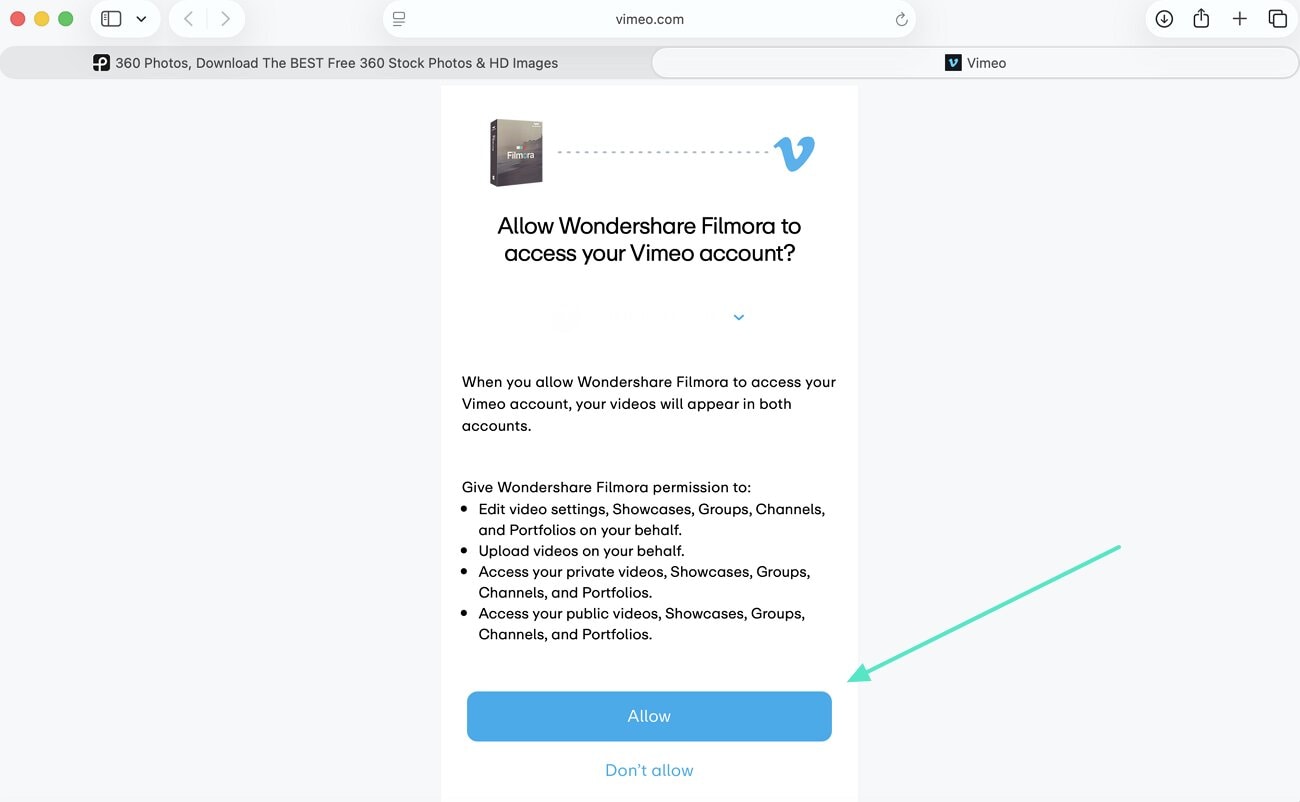
Select the Vimeo tab and continue with the account login through your browser. After signing in, click Allow when prompted to authorize Filmora to access your Vimeo account.
Step 2. Configure Vimeo Video Information
Add the video title, description, and tags, then select the preferred visibility setting. Once the required information is complete, click Export to upload the video.
Burn a DVD
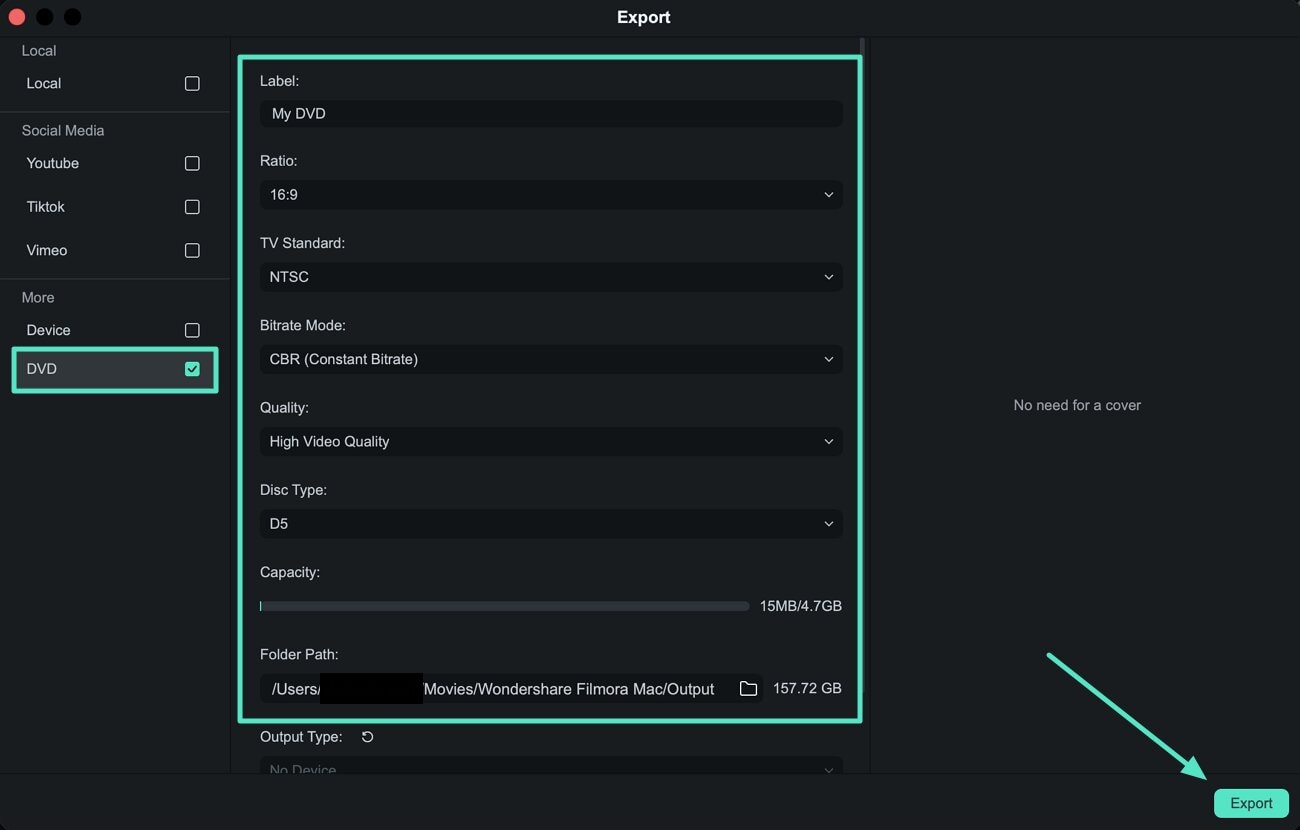
Filmora provides DVD export controls for creating a disc from your completed video. You can configure settings such as the disc type and aspect ratio before beginning the process:
Open the DVD tab and select the required disc settings, including the aspect ratio and disc type. Review the available options, then click Export to begin creating the DVD.
Batch Export
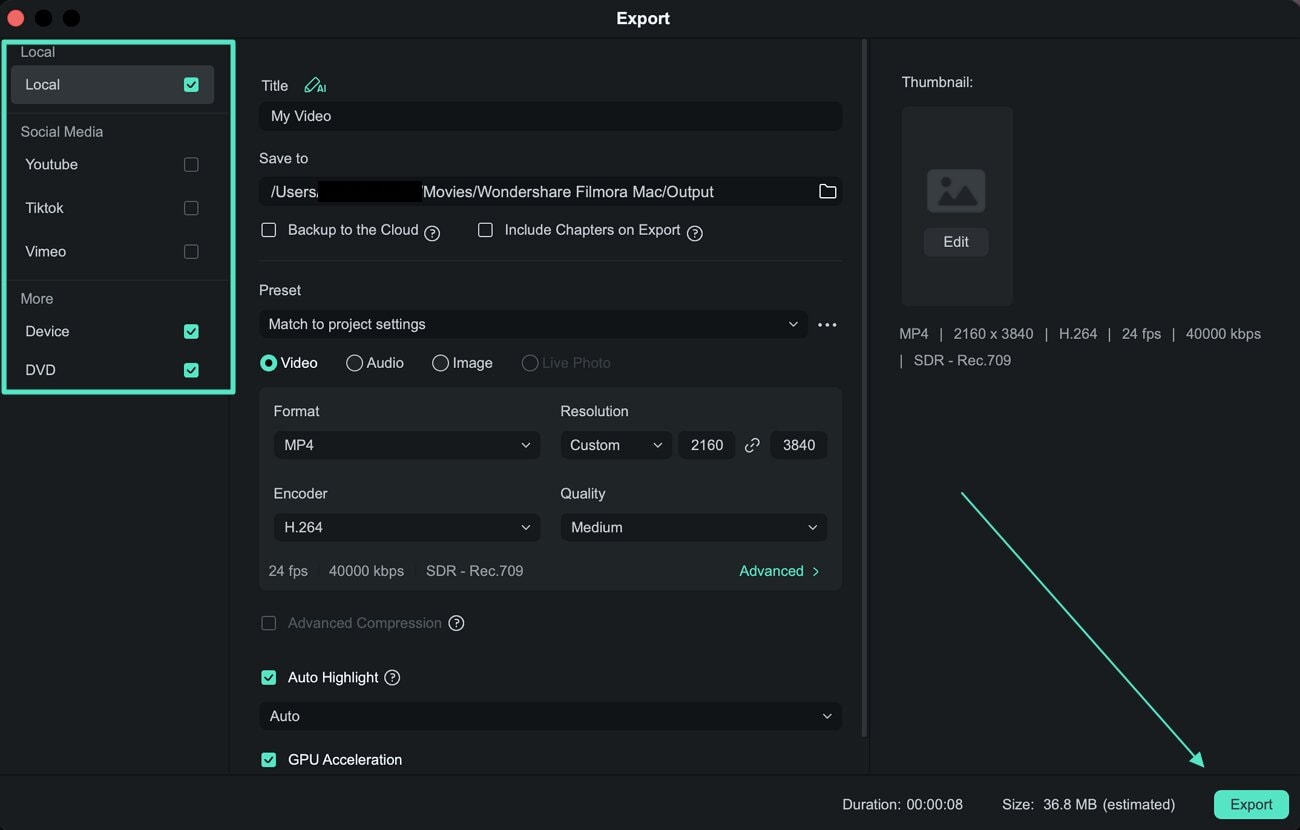
With Filmora's Batch Export feature, the functionality hits different. While you are allowed to export multiple media files at once, you are able to select different export presets within the platform. That means that Filmora allows you to simultaneously export a video across YouTube and TikTok within the same interface.
Step 1. Batch Export a Video in Filmora
After selecting the Export button, continue to choose different presets from the left column. After defining the exporting criteria successfully, tap the Export button and view individual progress for each export.
Step 2. Preview Export Progress of Individual Tasks
The progress window that follows up shows the status of all selected presets individually.
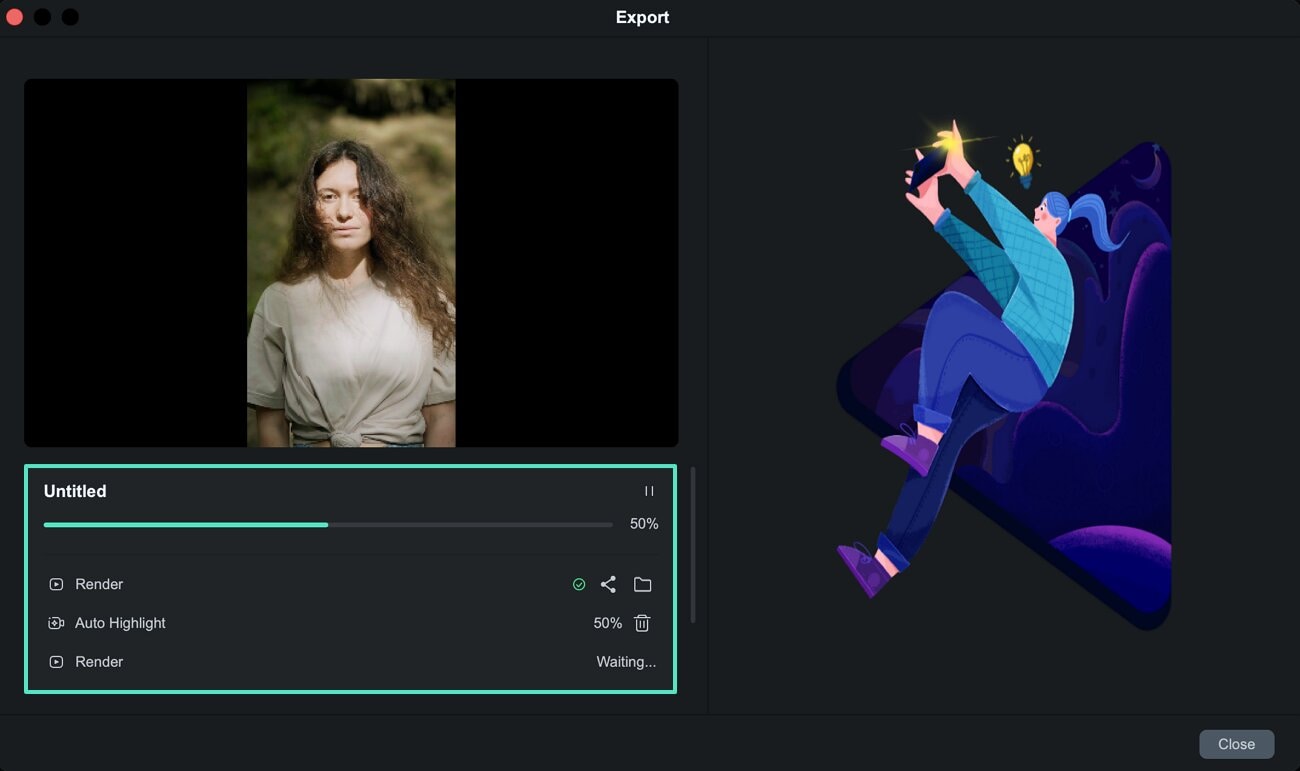
Note: This feature calls up for certain hardware requirements, which means that it will only operate for those where the particular feature entry is available.
Save Your Filmora Project in XML Format
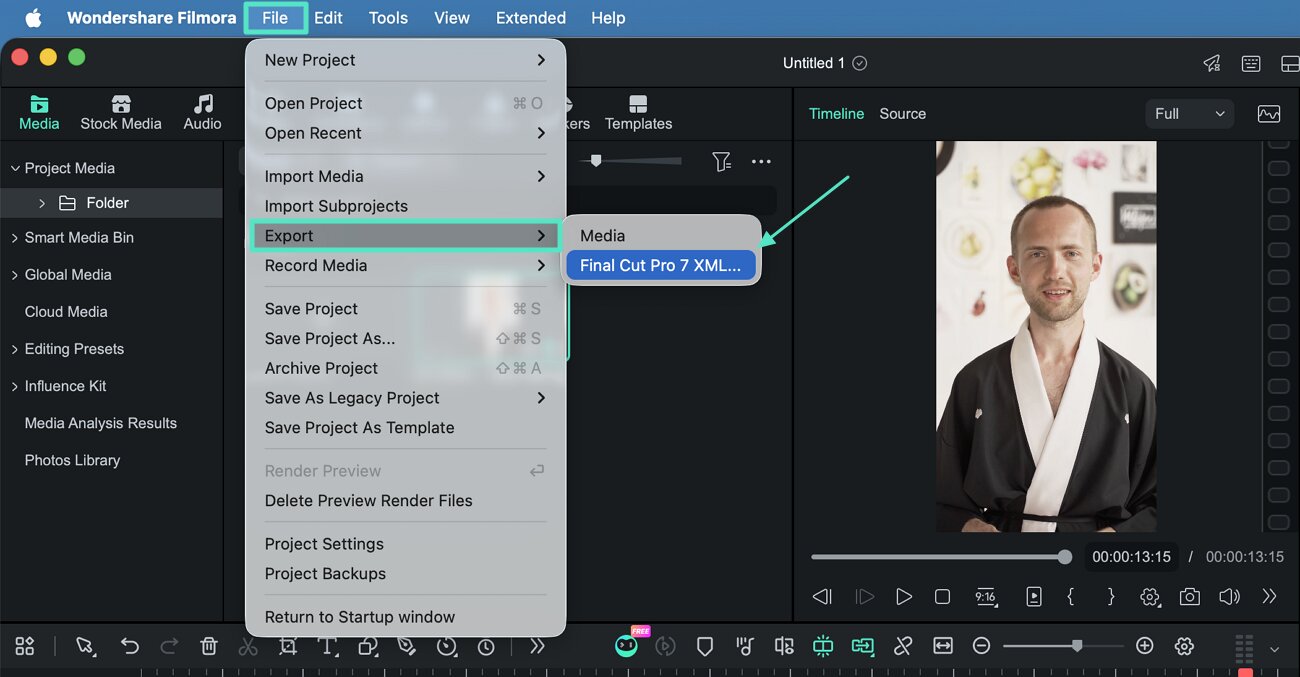
Use the process outlined below to create an XML export from Filmora on Mac:
With your Filmora project open, click the File option from the top menu and navigate to Export. From the available choices, select Final Cut Pro 7 XML, then choose where to save the exported file. You can later import the resulting XML file directly when needed.
Export Several Videos Using Batch Export
The following process shows how to export multiple videos together with Filmora's Batch Export feature:
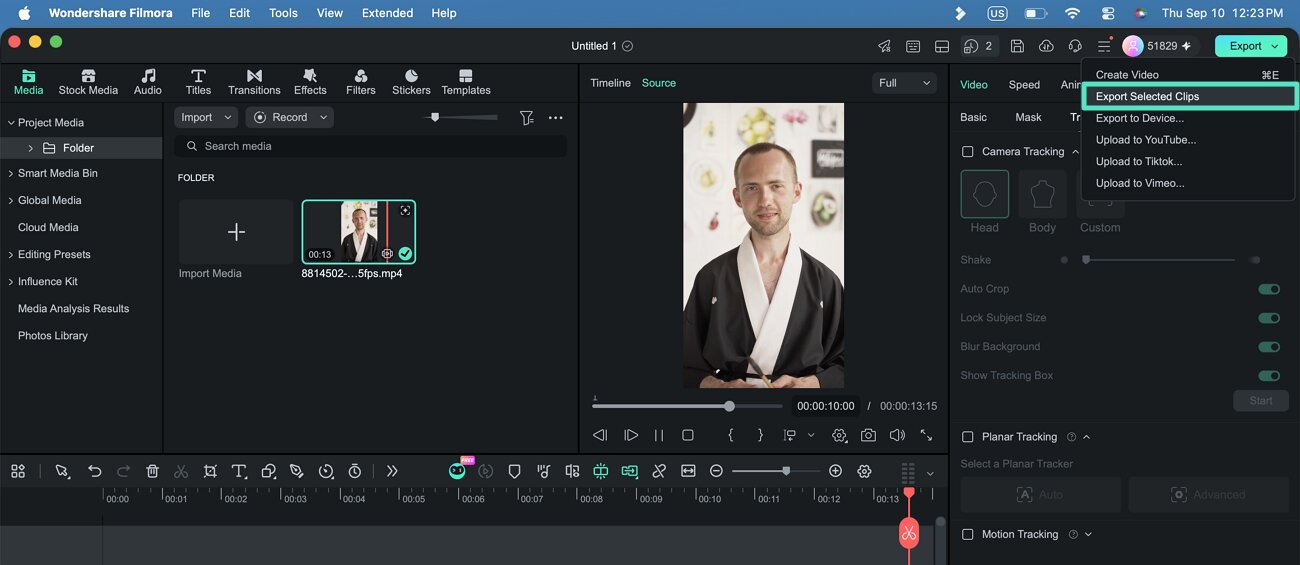
Step 1. Choose Multiple Video Clips
From the Filmora Timeline, hold the Command key and select the clips you want to export. Next, open the Export options and choose Export Selected Clips.
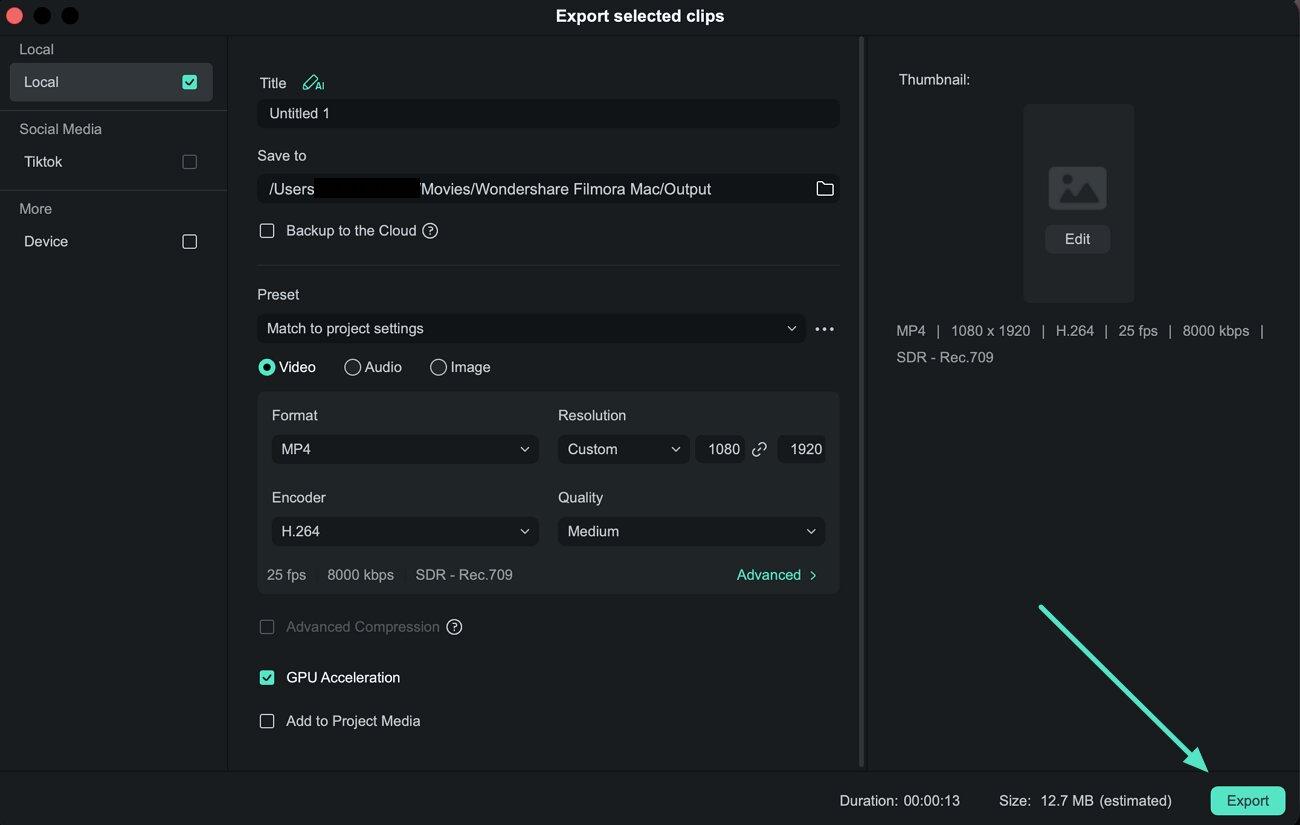
Step 2. Adjust the Export Settings
Enter a title for each selected clip and specify the Save to location. Then, select the required format, resolution, and quality before clicking the Export button to save the clips separately.
Save an Edited Video as a Live Photo
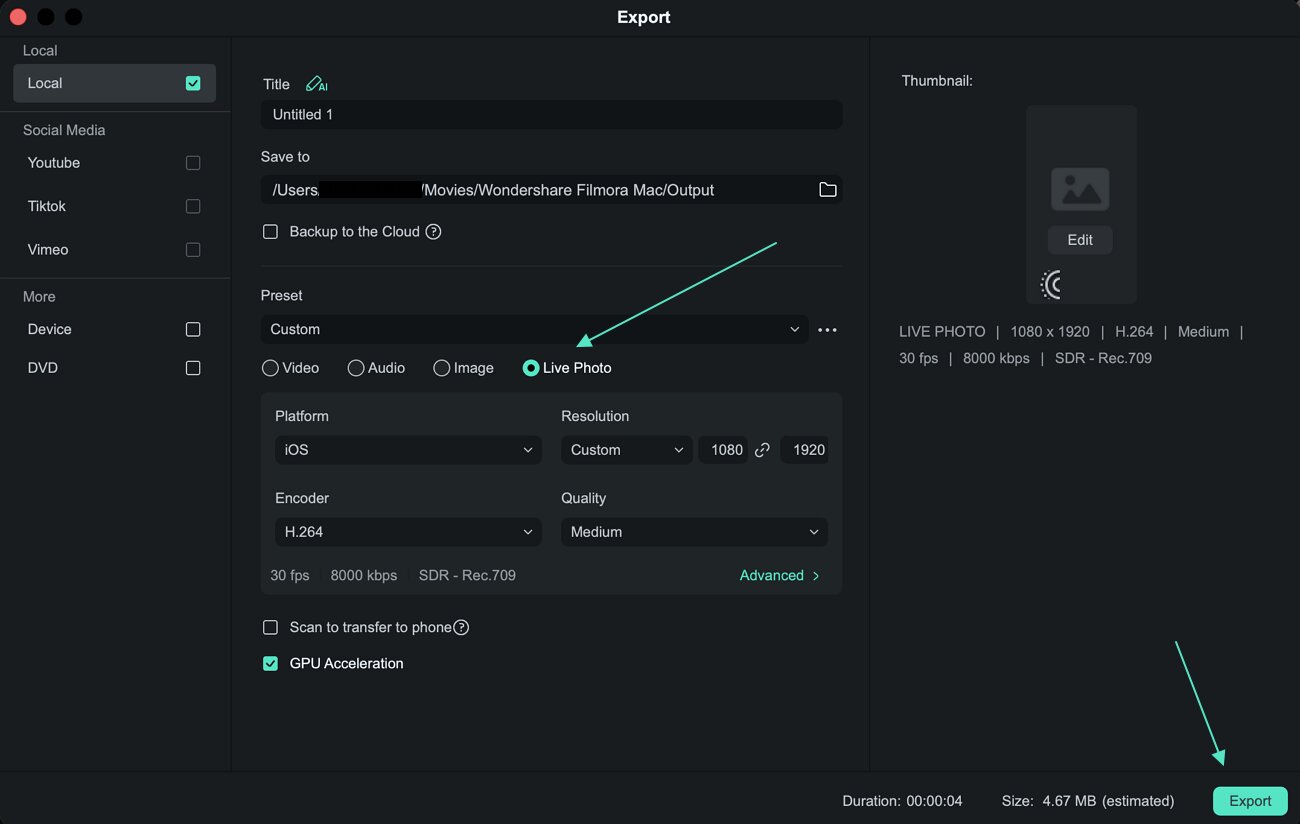
Use the steps outlined below to turn your edited video into a Live Photo in Filmora:
Keep your video clip within 5 seconds and click the Export button in the top-right corner. Next, select Live Photo and set the desired platform, resolution, and quality. Once the settings are ready, click Export to store the Live Photo in your chosen location.
Related Posts
Featured Articles
Learn more popular articles from Wondershare.
Essential Graphics Premiere Pro: 2026 Guide to the New Workflow
Discover the 2026 updates to Essential Graphics in Premiere Pro. Learn how the new Properties and Graphics Templates panels replace the old workspace for better motion graphics editing.
How To Make a Video on YouTube on Your Phone [iPhone&Android]
Is it hard for you to create videos for your YouTube channel? Read this article and learn how to make a video on YouTube on your phone for maximum engagement.
How to Fade In/Out Text in After Effects
Learn how to use the opacity keyframe feature in After Effects to fade in texts and create smooth transitions that gradually reveal or conceal text elements.
Recommended User Guide
Learn how to use more features.
The Workflow of Exporting on Mac
You will export the video when you finish editing. Here is the workflow of exporting.
Video Compressor For Mac
Filmora's Video Compressor for Mac shrinks your videos by up to 90% at lightning speed, making it ideal for easy sharing on social media and via email.
Auto Highlight for Mac
You will learn how to use auto highlight feature in Filmora for mac to generate the highlight moment in 1 click.
