For the Best Results, Use the Latest Version.
-
Preparations
-
Account
-
Get Started & Basic Settings
-
Compatibility & Tech Specs
-
Performance Settings
-
-
Creating Projects
-
Creating New Projects
-
-
Importing & Recording
-
Video Editing for Windows
-
Basic Video Editing
- Enable/Disable Clip in Windows
- Magnetic Timeline for Windows
- Dual Monitor Setup for Video Editing on Windows
- Select All Clips on Timeline for Windows
- Manage Timeline and Tracks on Windows
- Auto Ripple for Windows
- Split & trim video
- Crop & Pan & Zoom Video
- Compositing
- Change Video Speed on Windows
- Playing videos in reverse
- Mark In and Mark Out for Windows
- Markers for Windows
- Group editing
- Customizable Backgrounds for Videos and Images in Windows
- Video snapshot
- Using freeze frame
- Logo Reveal For Windows
- Apply auto enhance
- Applying drop shadow
- Adjustment layer for Windows
- Transforming
- Video Editing Ruler – Windows
-
Advanced Video Editing
- Drawing Tools for Windows | Filmora Guide
- Create Multi-Camera Clip
- Compound Clip for Windows
- Multi-Clip Editing for Windows
- Filmora Motion Blur | Windows
- Filmora Flicker Removal Guide | Windows
- Apply mask to video
- Creating a PIP effect
- Keyframe Graph Editor for Windows
- Add animation keyframing for Windows
- Keyframe Path Curve for Windows
-
AI-Powered Video Editing
- Smart Scene Cut for Windows
- Smart Short Clips for Windows
- AI Face Mosaic for Windows
- Filmora AI Eye Contact- Windows
- AI Video Enhancer for Windows
- AI Text-to-Video for Windows
- Planar Tracking for Windows
- AI Idea to Video for Windows
- Filmora Image to Video for Windows
- Filmora Image to Prompt for Windows
- Instant Cutter Tool for Windows
- AI Extend
- Filmora AI Relight - Windows
- Filmora AI Image Enhancer Guide - Windows
- AI Script to Video Guide for Windows
- AI Text-Based Editing for Windows
- AI Mate Editing for Windows
- Create with instant mode
- ChatGPT Plugin - AI Copywriting
- AI Smart Cutout
- Lens correction on Windows
- Auto reframe video
- AI Portrait Cutout
- Scene detection feature
- AI Smart Masking for Windows
- Make motion tracking
- Video Stabilization for Windows
- AI Video/Photo Object Remover for Windows
- AI Smart Search for Windows
- AI Skin Tone Protection for Windows
- AI Image for Windows
- Chroma key (green screen)
- Super Slow Motion with Optical Flow for Windows
- Video Denoise for Windows
-
-
Audio Editing for Windows
-
Basic Audio Editing
-
Advanced Audio Editing
-
AI-Powered Audio Editing
-
-
Text Editing for Windows
-
Basic Text Editing
-
Advanced Text Editing
-
AI-Powered Text Editing
-
-
Video Customizations
-
Video Effects
-
Audio Effects
-
Transitions
-
Stickers
-
Filters
-
Color Editing
-
Animations
-
Templates
-
Asset Center
-
-
Exporting & Share & Cloud Backup
Add Animation Keyframing in Filmora for Windows
Keyframing in Filmora for Windows gives editors precise control over how elements move and change throughout a video. Instead of applying static effects, users can animate properties like movement, zoom, rotation, and transparency by setting adjustment points at different moments on the timeline. Filmora automatically connects these changes to produce smooth visual transitions without requiring advanced animation skills.
Steps to Use Animation Keyframing
Filmora offers a simple method to create, adjust, and remove keyframes directly from the timeline and property panel. Follow the instructions below to use animation keyframing in Filmora for Windows:
Index
Add Keyframes in Filmora for Windows
Step 1. Open a New Project and Import Video
Launch Filmora on your Windows PC and click New Project from the startup screen. Import your media file into the library and drag it onto the timeline to begin editing.

Step 2. Access Transform or Animation Controls
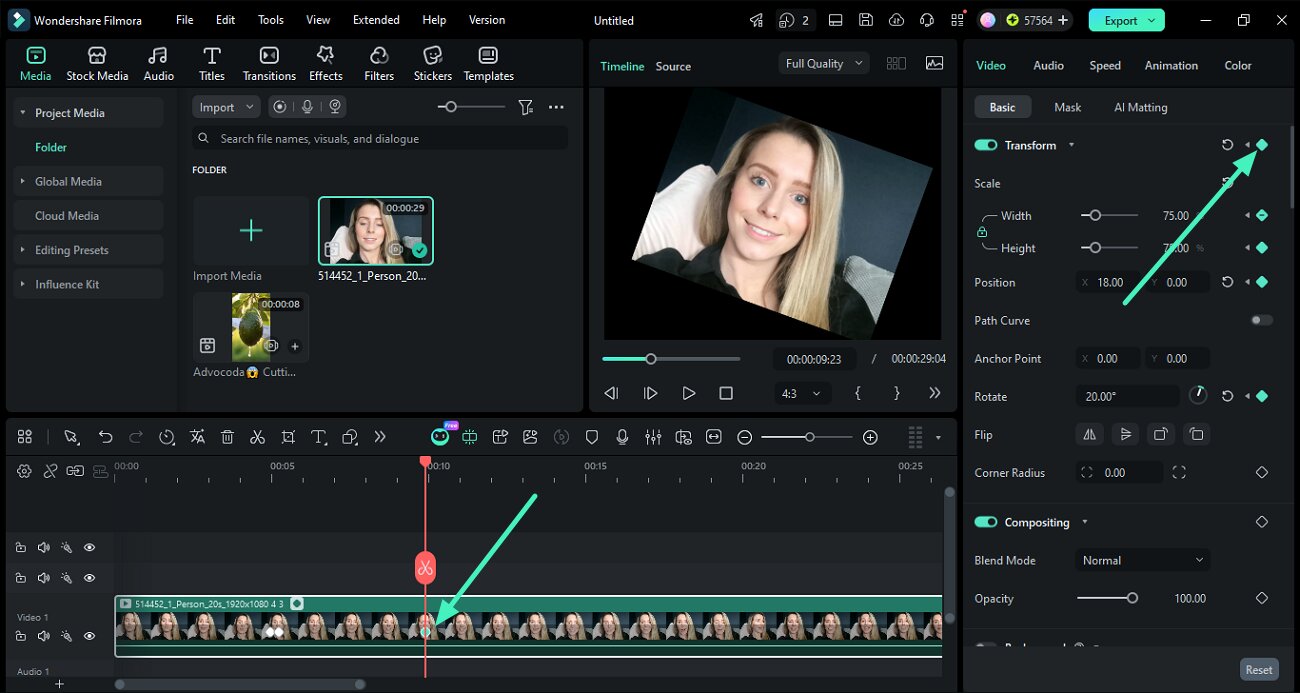
Click the clip in the timeline to open the editing panel on the right side. Enable Transform or choose another adjustable setting, such as position, scale, rotation, or opacity, for animation.

Step 3. Insert Keyframes on the Timeline
Move the playhead to the point where you want the animation to start. Click the Keyframe icon in the property panel to place a keyframe on the selected parameter.
Edit Keyframes in Filmora for Windows
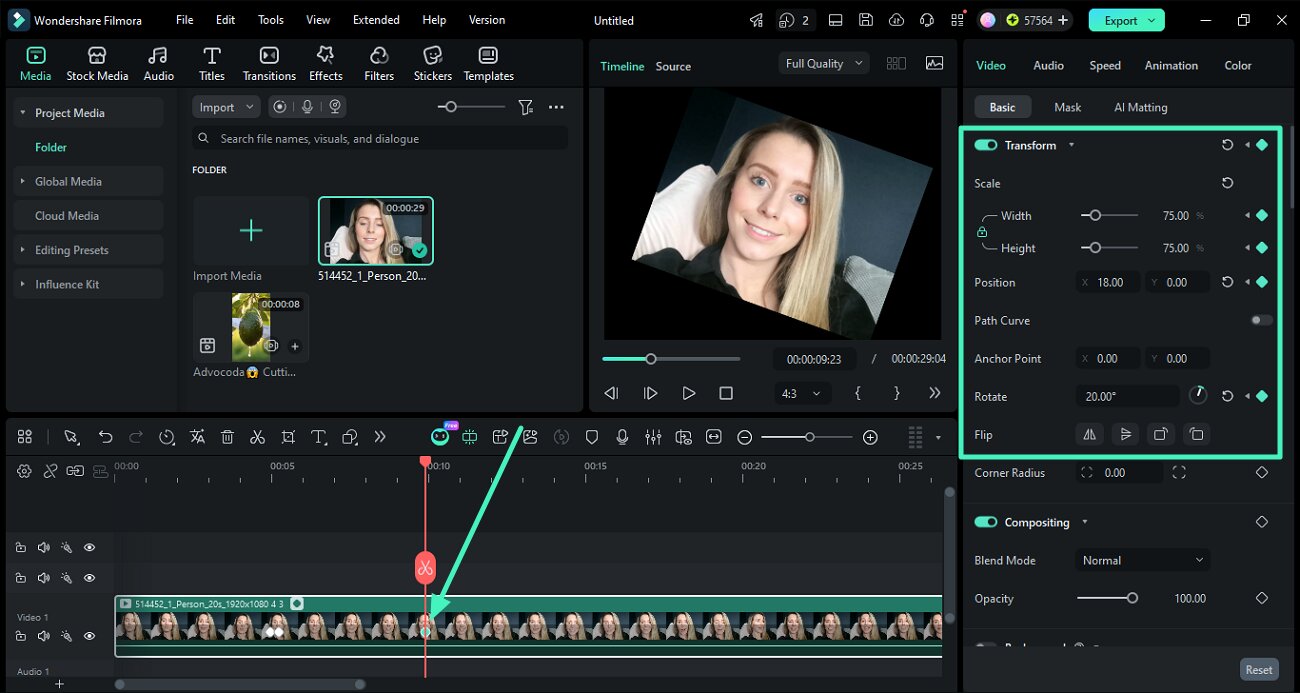
Step 4. Modify Keyframe Values
After inserting a keyframe, adjust settings like scale, position, rotation, flip, or opacity according to your editing needs. Move the playhead to another location and add an additional keyframe to create motion between the two points.
Delete Keyframes in Filmora for Windows
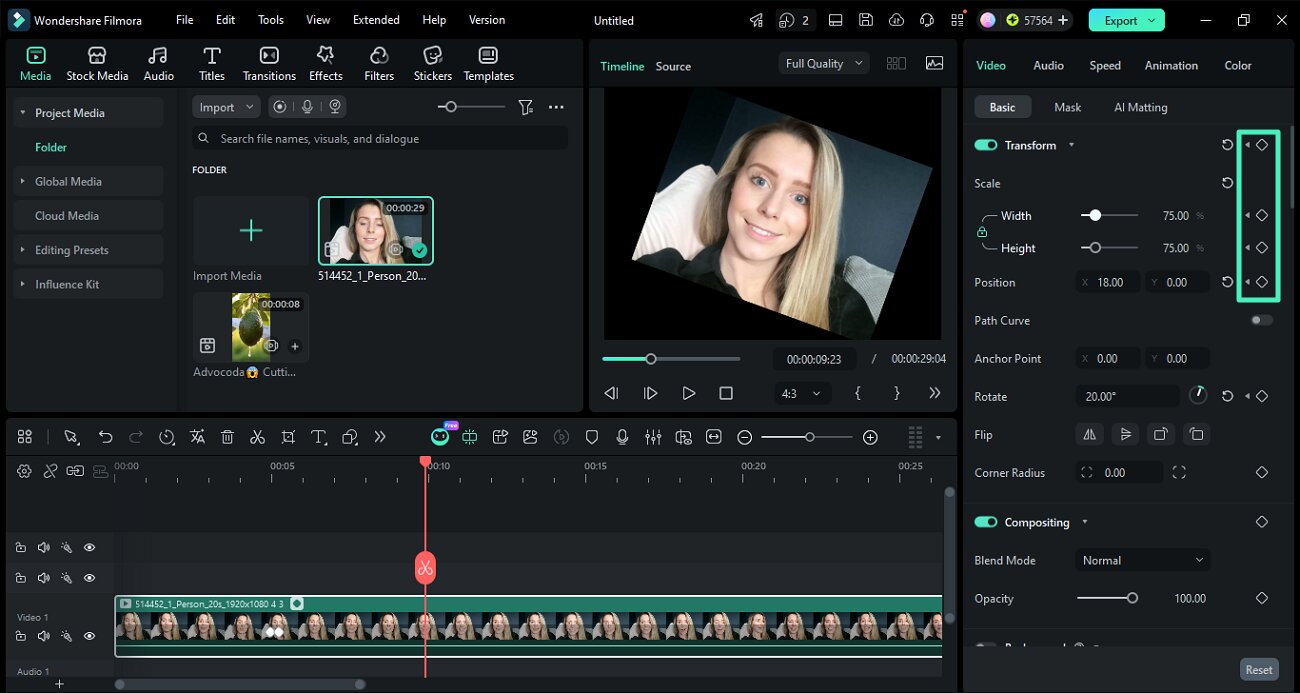
Step 5. Remove Keyframes from Property Panel
Select the keyframe parameter and disable the Keyframe icon beside it to delete a single keyframe. You may also use the reset option to clear all adjustments from the selected property.
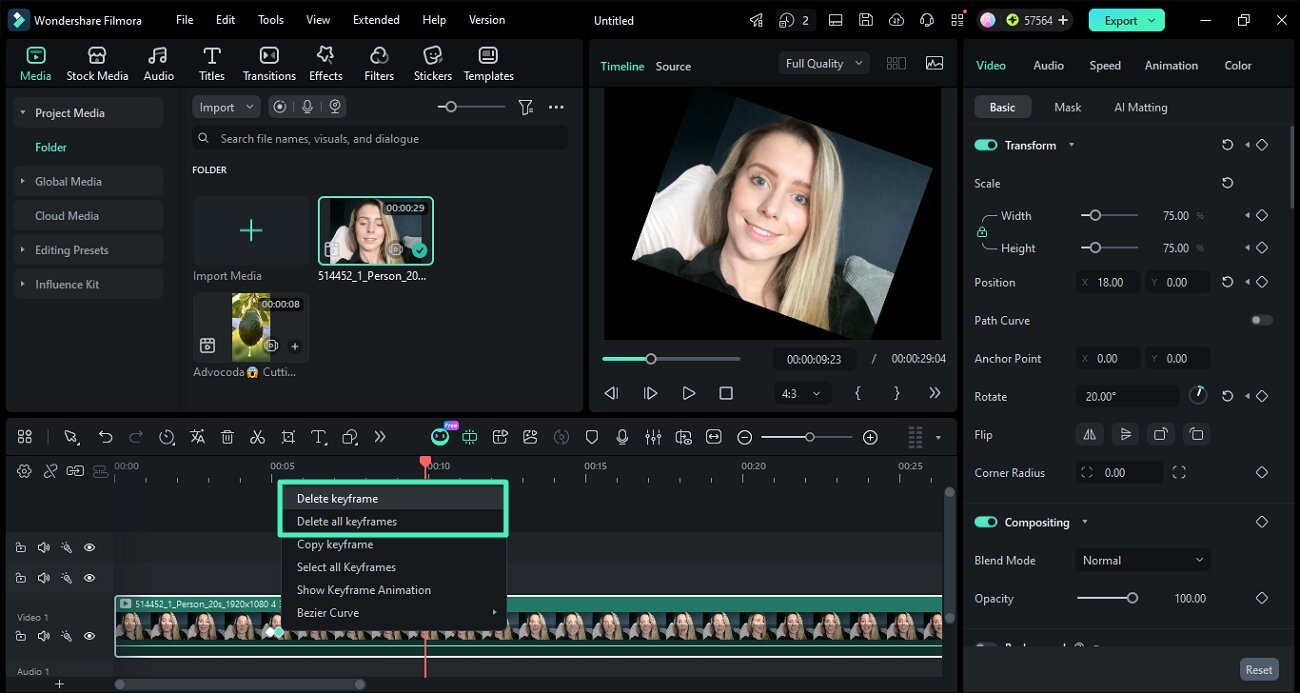
Step 6. Delete Keyframes from Timeline
Right-click the keyframe marker directly on the timeline and choose Delete Keyframe or Delete All Keyframes to remove animation points as required.
Related Posts
Featured Articles
Best Free and Paid Text-to-Speech APIs
Looking for the best paid and free text-to-speech APIs? Check out the top eight tools and watch your experience transform.
13 Funny Happy New Year Videos for a Joyful Start to 2026
Check out these 13 funny New Year videos to welcome 2026! From silly skits to dance moves, these clips will make you want to have fun and create your own hilarious videos!
8 Best Video Editors for Mac (Free, Open-Source, & Paid)
Are you searching for a way to maximize efficiency and edit your videos professionally on your Mac? Check out these video editing programs for your Mac and watch your experience transform.
Recommended User Guide
Apply mask to video
Learn how to use Masks in Filmora.
Keyframe Path Curve for Windows
Filmora has recently introduced the keyframe path curve feature. When you adjust the transition effects between keyframes, you can change keyframe type to control the speed and pacing of the animation, making it look smoother and more natural, and helping you create high-quality video clips. Now Let us know how to use it.
Filmora Motion Blur | Windows
Here is the guide on how to use the Motion Blur feature in Filmora.
