Change Video Playback Speed
You can change the playback speed of videos in several ways with Filmora. Speed up the video and play it at lightning speed to add comedy to the video, or slow down the video to emphasize details. Changing the speed at various instances in a clip makes the video more engaging.
Index
Change Video Speed with Uniform Speed
Using the Uniform Speed feature, you can adjust the speed of the selected clip to the same rate.
Step 1 - Get to the Uniform Speed Panel
Here you have three ways to go to the Uniform Speed tab:
1 Double click on the video or audio clip that you want to change the speed. In the pop-up editing window, select Speed>Uniform Speed.
2 Right-click on the video or audio clip, go to Uniform Speed
3 Kindly tab on the Speed icon on the toolbar, then choose Uniform Speed.
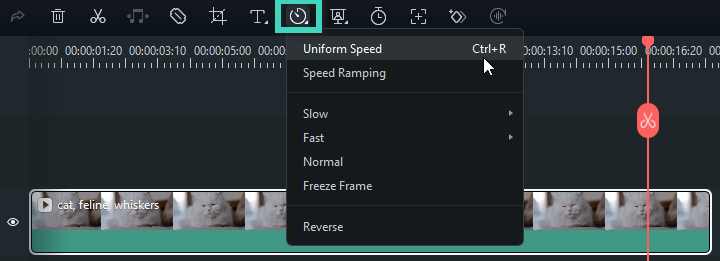
Step 2 - Change Video Speed to Constant Speed
Drag the Speed slider to the right or left to speed up or slow down the playback speed. Optionally, you can enter your preferred value in the Duration field to get a more precise output.
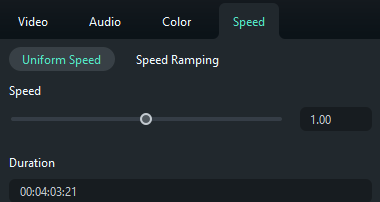
Speed: You can speed up or slow down the videos or audio by dragging the slider to the right or the left. The default speed is x1.
Duration: It will show the exact duration of the video. You can increase or decrease the duration by changing the values. Increasing the duration will make the video speed slow down certainly.
Reverse: You can reverse the video or audio clip to make a funny effect.
Ripple: The Ripple Edit is a trim tool used to trim a clip and “ripple” the rest of the clips in the timeline.
Maintain pitch:It means keeping the original pitch of a sound the same, even if you change its speed or other aspects.
If you feel satisfied after the adjustments, you can click OK to save the settings. Otherwise, you can click on the Reset button to restore the previous settings.
Step 3 - Preview the Video and Save
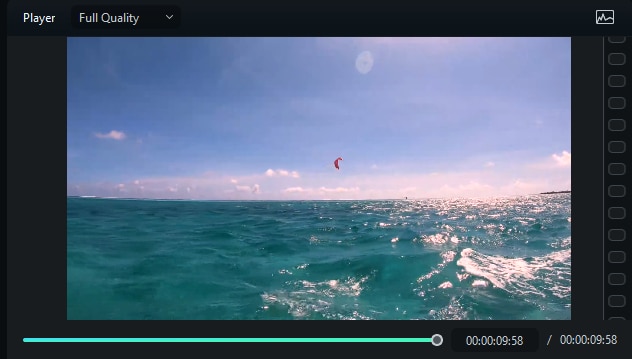
Click the Play button in the Preview window or press the Spacebar to preview the modifications.
Note:
It is recommended to enable Maintain Audio Pitch option to keep the video audio sound natural.Modify Video Playback Speed with Speed Ramping
In addition to constant speed changes in Uniform Speed, you can create variable speed effects with Speed Ramping, where a clip's playback speed changes dynamically. You can set up different playback speeds for each portion of the video.
❶ Step 1 - Go to the Speed Ramping Panel
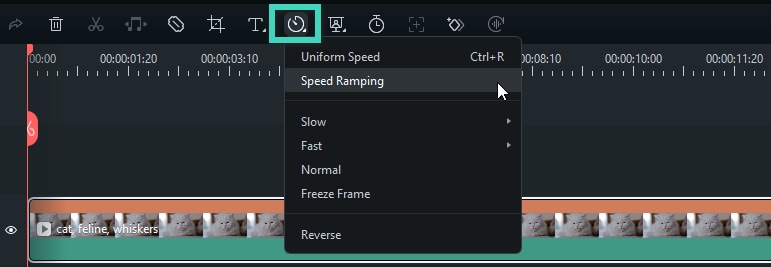
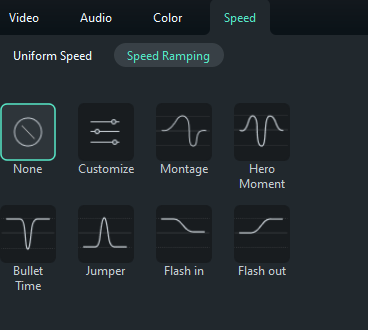
Click the video in the timeline and click the Speed icon, select the Speed Ramping option, and then you will see a couple of options on the property panel:
None: Apply no speed ramping.
Customize: By default, five-speed points allow you to customize the speed exactly the way you want.
Montage:Six speed points in the playback speed of the selected video: 0.9x, 0.9x, 6.9x, 0.3x, 1.0x, and 1.0x, which present a slow, slow, fast, slow, and normal rhythm.
Hero Moment: Eight-speed points in the playback speed of the selected video: 1.0x, 1.0x, 5.4x, 0.5x, 0.5x, 5.4x, 1.0x, and 1.0x, which present a normal, fast, slow, slow, fast, and normal rhythm.
Bullet Time: Six-speed points in the playback speed of the selected video: 5.2x, 5.2x, 0.5x, 0.5x, 5.2x, and 5.2x, which present a fast, fast, slow, slow, fast, fast rhythm.
Jumper: Five-speed points in the playback speed of the selected video: 0.6x, 0.6x, 6.0x, 0.6x, and 0.6x, which present a slow, slow, fast, slow, slow rhythm.
Flash in: Four-speed points in the playback speed of the selected video: 5.2x, 5.2x, 1x, and 1x, which present a fast, fast, normal, normal rhythm.
Flash out: Four-speed points in the playback speed of the selected video: 1x, 1x, 5.2x, and 5.2x, which present a normal, normal, fast, fast rhythm.
❷ Step 2 - Select and Customize Speed Ramping Preset
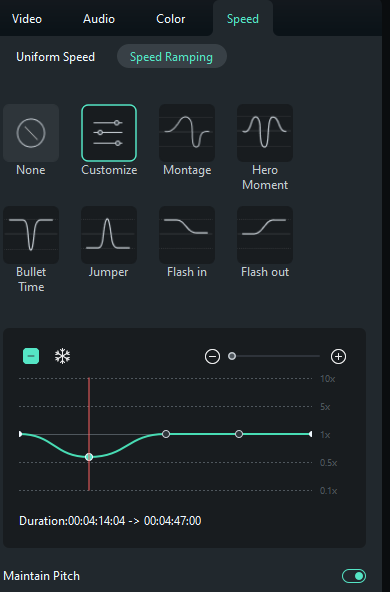
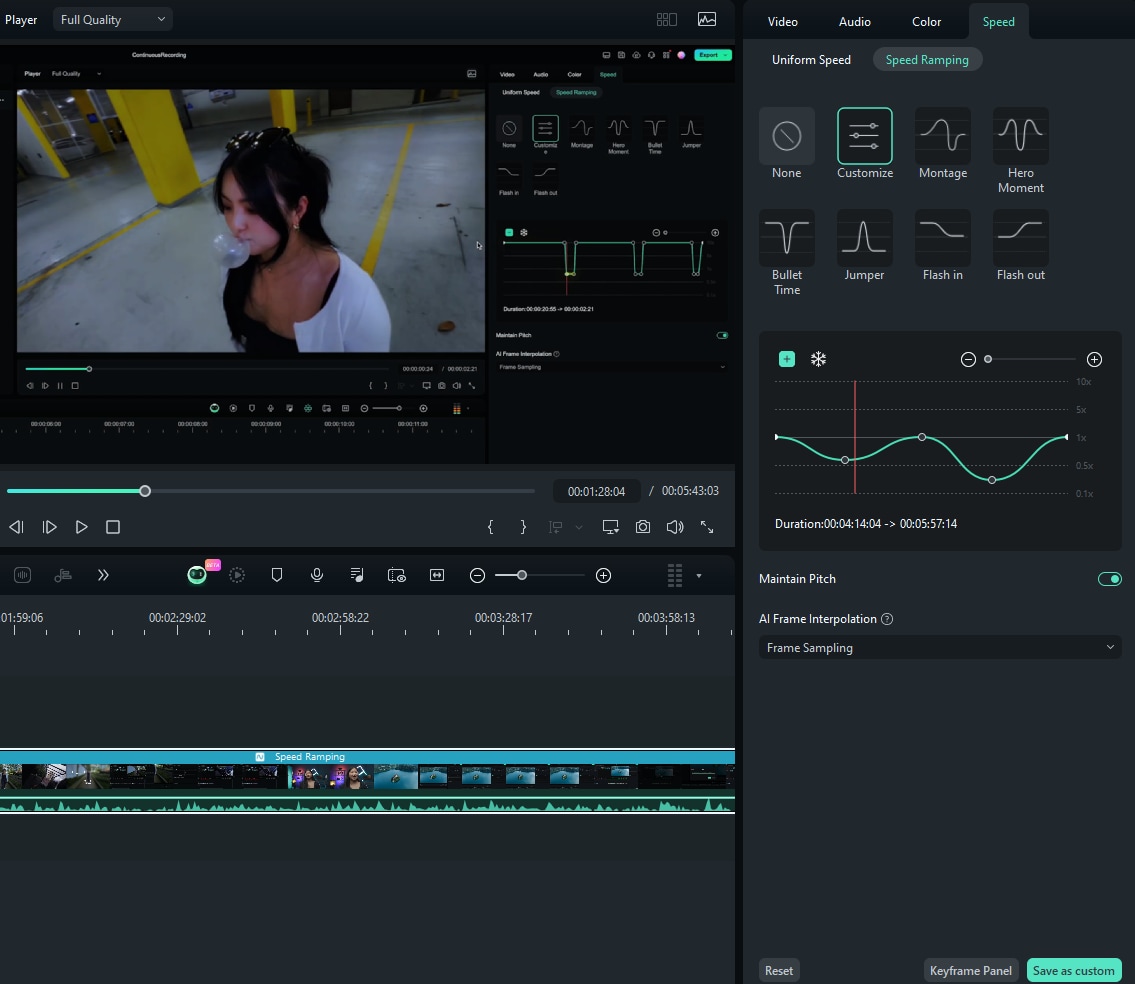
Please select one of the presets to apply variable video speed and customize it based on your needs. Variation in the speed will remain effective until the Play head reaches the next speed point. The speed of the video will gradually change as the Play head moves between the speed points.
Adjust the speed of the section: Drag the speed point up or down to increase or decrease the speed of the section.
Adjust the range of the section: Drag the speed point left or right to change the portion applying the speed.
Add speed point: Place the play head to the point you want to change the speed, and then click the Plus + icon on the left to add a speed point.
Delete speed point: Select the speed point and click the Plus – icon to remove it.
Add a freeze frame: Place the play head to the point you want to freeze, and then click the snow icon to add a freeze frame. Set up the freeze time and click Apply to save.
Note:
You can also click the Customize option to set up the speed ramping from scratch.❸ Step 3 - Preview the Video and Save
Press the Spacebar on your keyboard or click the Play button in the Preview window to preview the modifications in the video. You can click Reset to remove the settings. Also, you can save the speed ramping setting by clicking the Save as a custom button.
Note:
If the Uniform Speed and Speed Ramping options are not visible, try upgrading Filmora to the latest version.Change Speed in Timeline
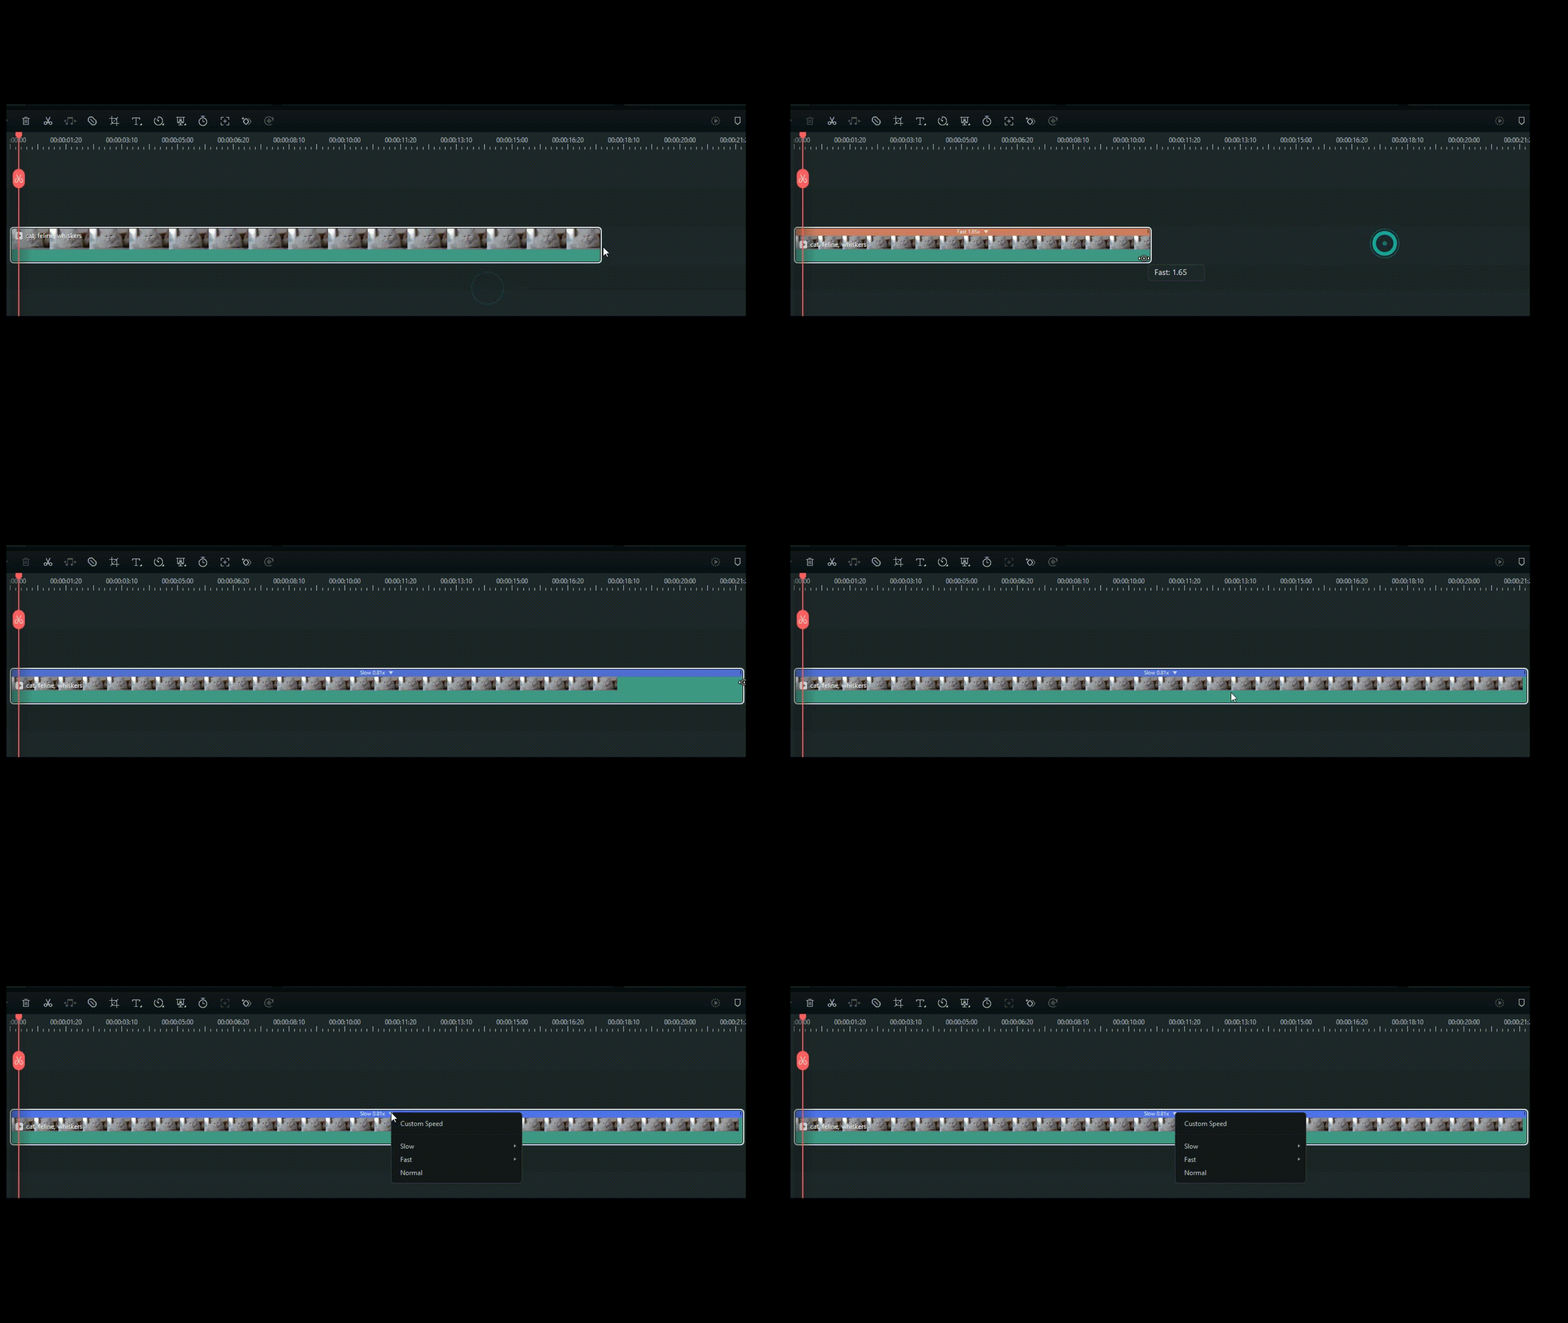
You can drag the video edge in the timeline to speed up or slow down the video.
- Press the Ctrl button on your keyboard, then hover the mouse over the end of the video in the timeline. You will see the around speed change icon.
- While holding down the 'Ctrl' button, drag the edge of the clip backward to slow down the clip or forward to speed it up.
- After you slow down the clip, you will see a purple strip showing the speed change. After you speed up the clip, you will see a red strip showing the speed change.
Playback Speed Shortcuts for Windows
Changing the speed of your video is just a click away. Here is a step-by-step guide to changing the playback speed of video:
Step 1: Download Filmora and Initiate a New Project
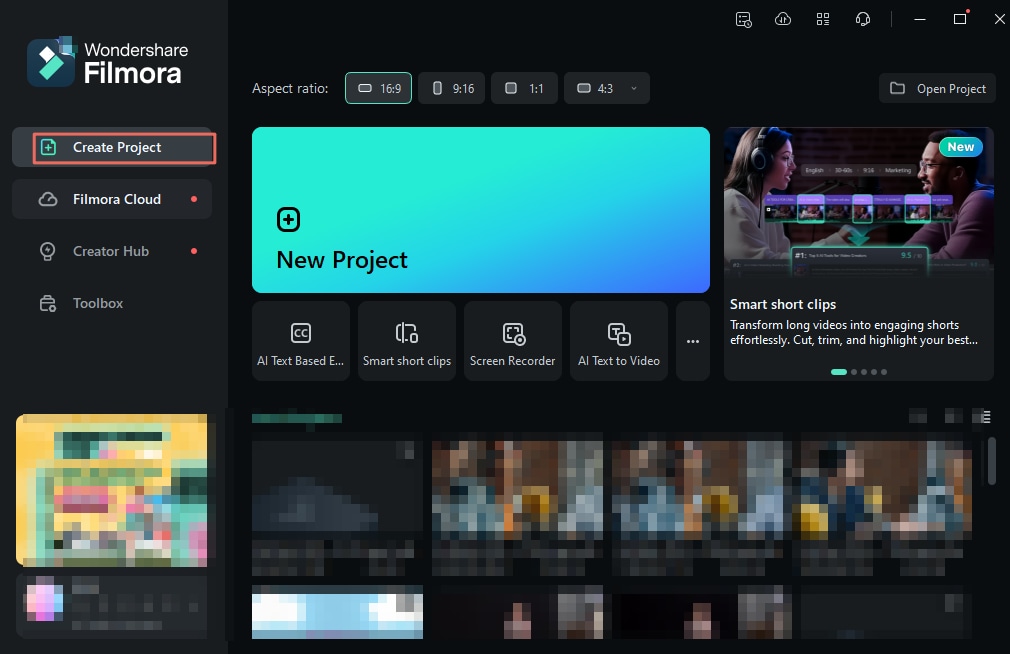
To utilize this functionality, download Filmora on your PC and initiate it. After logging into it, go to the left panel and select "Create Project" from the given option. Go to the "New Project" tab to start creating or editing.
Step 2: Import the Video and Drop it on the Timeline
Once in the editing window of Filmora, navigate towards the top toolbar, click "Files", select "Import" from the options menu, and import your media clip. After that, place your cursor on the video in the timeline, bring it on the timeline, and release it on a track.
Step 3: Reverse a Video
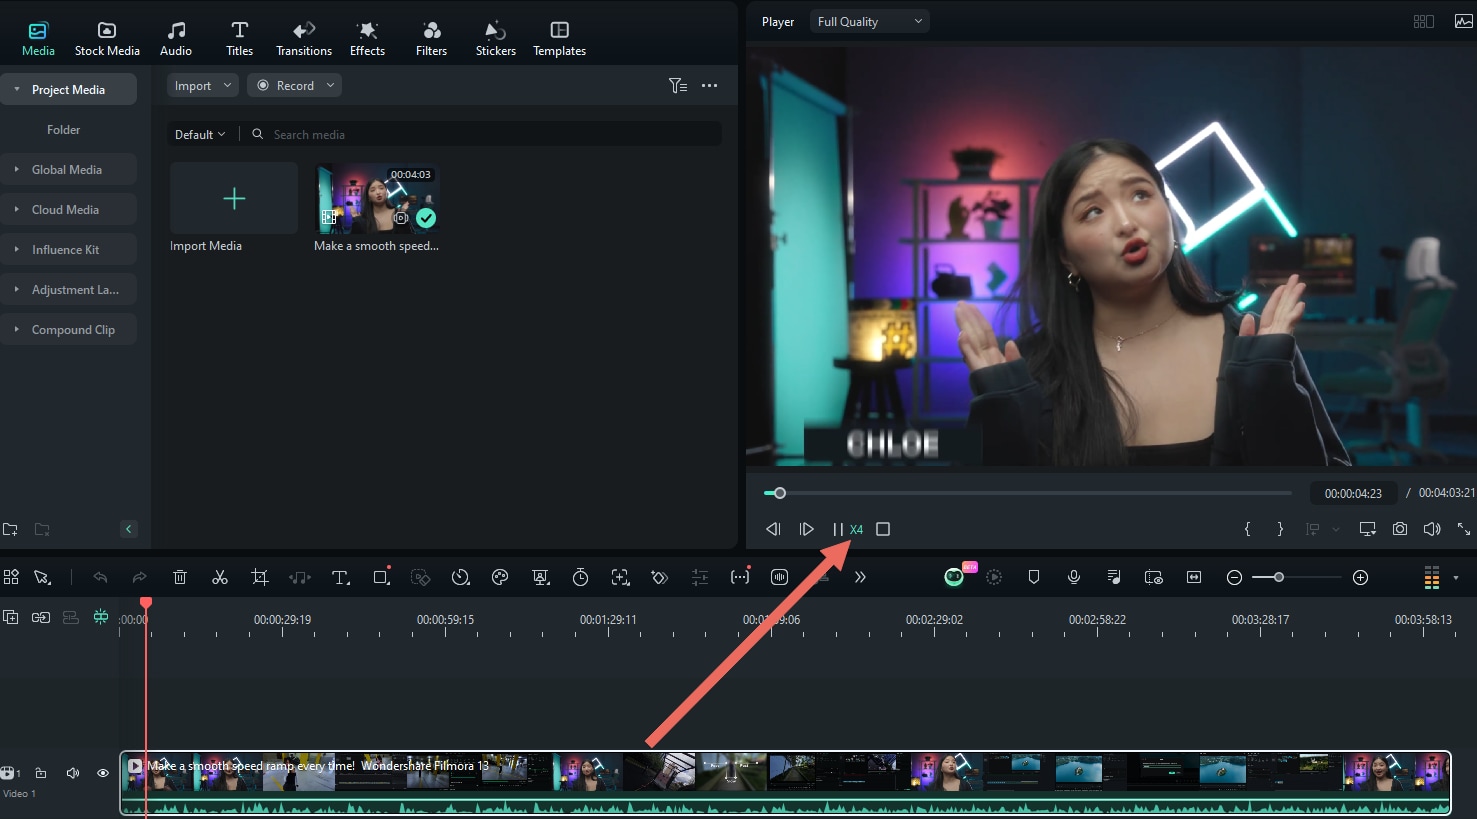
To reverse a video in the timeline, the user must press the "J" key on the keyboard. The playback speed range for reversing a video is from -x1 to -x32.
Step 4: Pause a Video
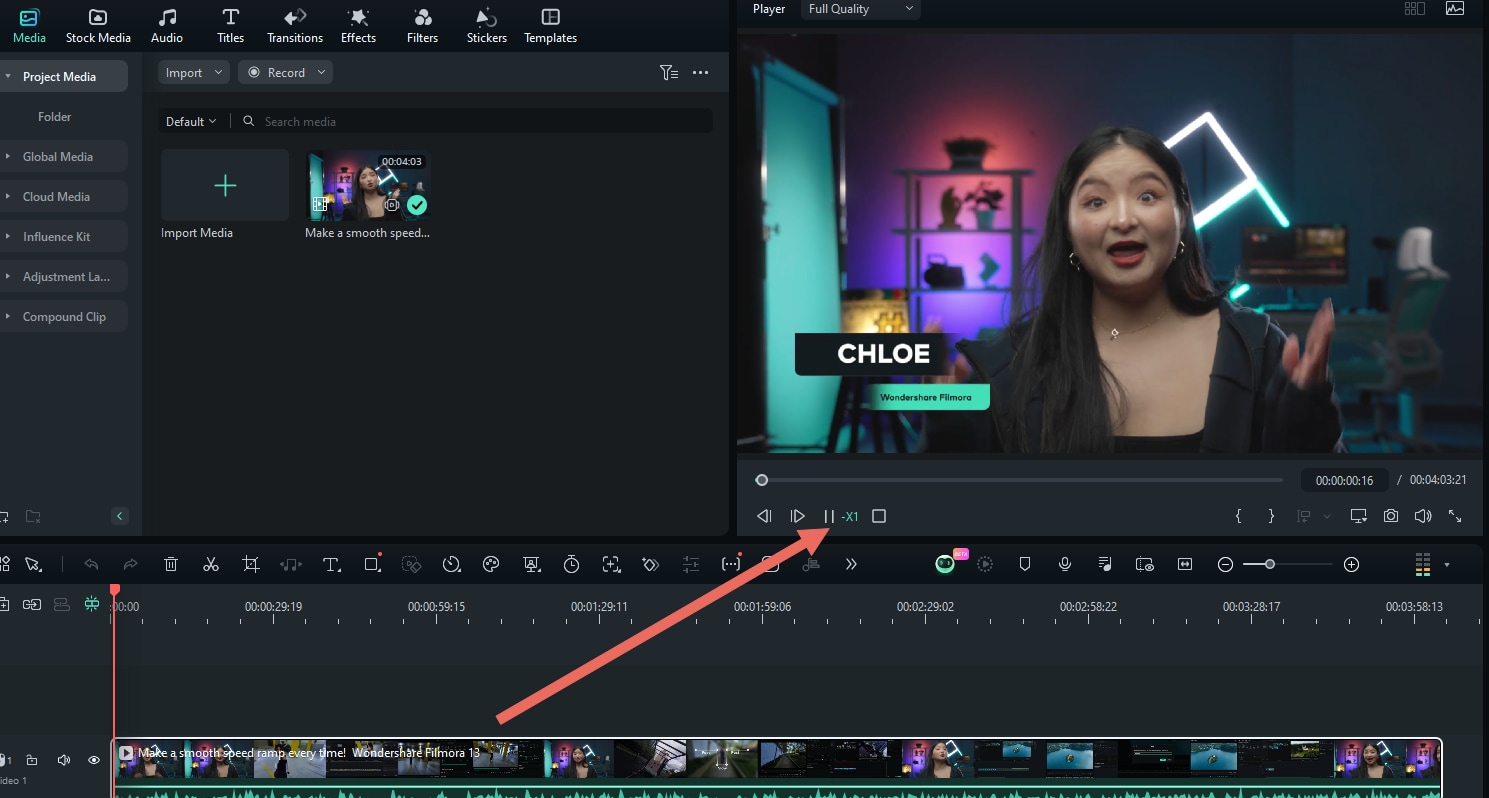
You need to pause a video several times while editing it in the timeline, and sometimes, reaching the pause option may take time. To speed this up, tap the "K" key on your keyboard, and your video will be paused.
Step 5: Forward a Video
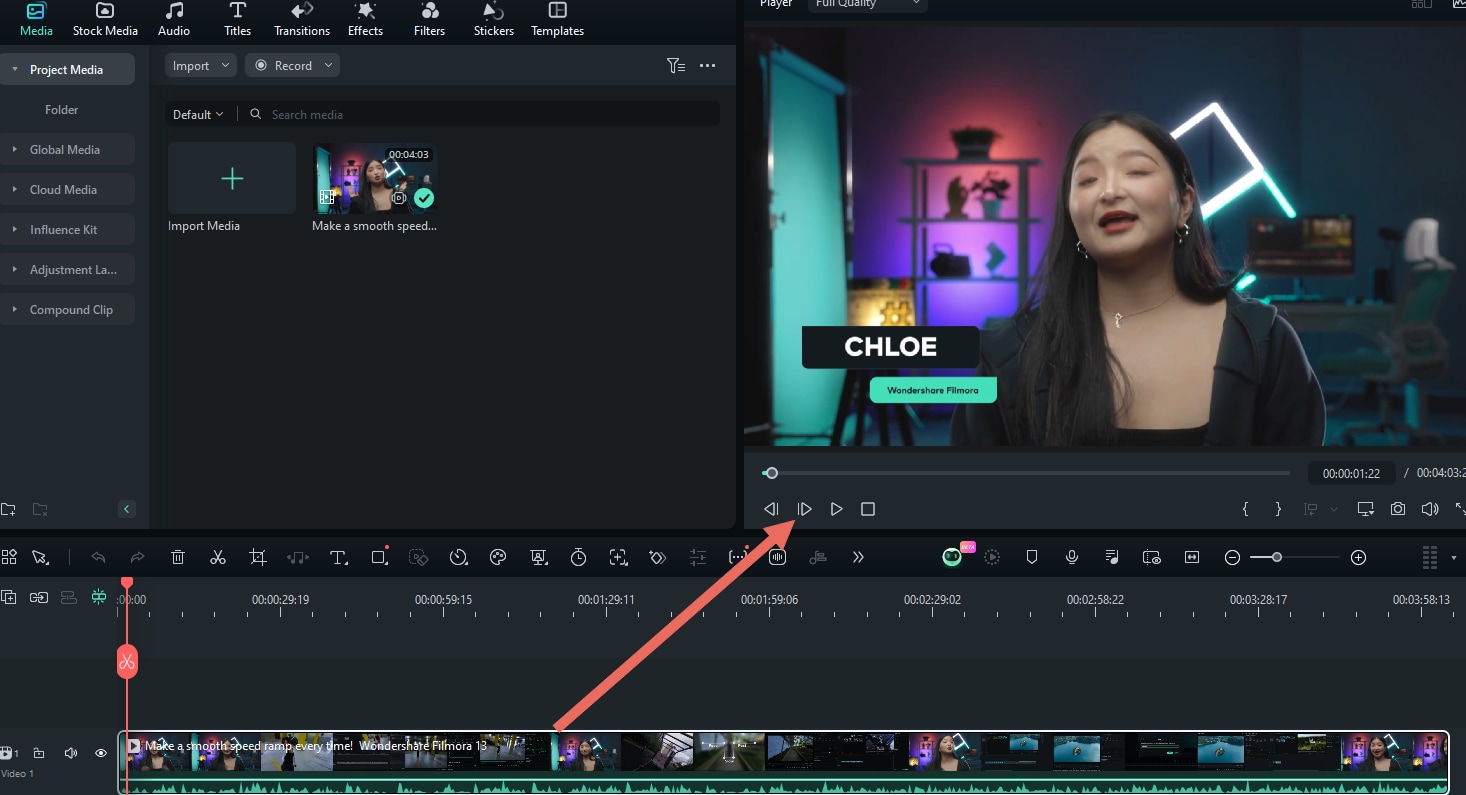
To move forward with a video in the timeline, place your finger on your keyboard's "L" key and tap it repeatedly until you reach the desired speed. The playback speed range for forwarding a video in Filmora is from 2x to 32x.

