For the Best Results, Use the Latest Version.
-
Preparations
-
Account
-
Get Started & Basic Settings
-
Compatibility & Tech Specs
-
Performance Settings
-
-
Creating Projects
-
Creating New Projects
-
-
Importing & Recording
-
Video Editing for Windows
-
Basic Video Editing
- Enable/Disable Clip in Windows
- Magnetic Timeline for Windows
- Drawing Tools fo Windows
- Dual Monitor Setup for Video Editing on Windows
- Select All Clips on Timeline for Windows
- Dual Monitor Setup for Video Editing on Mac
- Manage Timeline and Tracks
- Auto Ripple for Windows
- Split & trim video
- Crop & Pan & Zoom Video
- Compositing
- Change video playback speed
- Playing videos in reverse
- Mark In and Mark Out for Windows
- Markers for Windows
- Group editing
- Customizable Backgrounds for Videos and Images in Windows
- Video snapshot
- Using freeze frame
- Logo Reveal For Windows
- Apply auto enhance
- Applying drop shadow
- Adjustment layer for Windows
- Transforming
- Video Editing Ruler – Windows
-
Advanced Video Editing
-
AI-Powered Video Editing
- Smart Scene Cut for Windows
- Smart Short Clips for Windows
- AI Face Mosaic for Windows
- AI Video Enhancer
- AI Text-to-Video for Windows
- Planar Tracking
- AI Idea to Video for Windows
- Image to Video for Windows
- Instant Cutter Tool for Windows
- AI Extend
- AI Script to Video Guide for Windows
- AI Text-Based Editing for Windows
- AI Mate Editing for Windows
- Create with instant mode
- ChatGPT Plugin - AI Copywriting
- AI Smart Cutout
- Lens correction
- Auto reframe video
- AI Portrait Cutout
- Scene detection feature
- AI Smart Masking for Windows
- Make motion tracking
- Stabilization
- AI Video/Photo Object Remover for Windows
- AI Smart Search for Windows
- AI Skin Tone Protection for Windows
- AI Image for Windows
- Chroma key (green screen)
- Super Slow Motion with Optical Flow for Windows
- Video Denoise for Windows
-
-
Audio Editing for Windows
-
Basic Audio Editing
-
Advanced Audio Editing
-
AI-Powered Audio Editing
-
-
Text Editing for Windows
-
Basic Text Editing
-
Advanced Text Editing
-
AI-Powered Text Editing
-
-
Video Customizations
-
Video Effects
-
Audio Effects
-
Transitions
-
Stickers
-
Filters
-
Color Editing
-
Animations
-
Templates
-
Asset Center
-
-
Exporting & Share & Cloud Backup
Add, Edit, and Customize Texts
Learn how to add, edit, and customize texts, making it easy to create the text & titles that match your style.
1. Types of Titles
Filmora makes it easy to create text & titles that match your style.
You will learn how to find titles and the types of titles.
How to Find Titles in Filmora?
- Open Filmora at first, and once the welcome window pops up on the screen. Click on the New Project option.
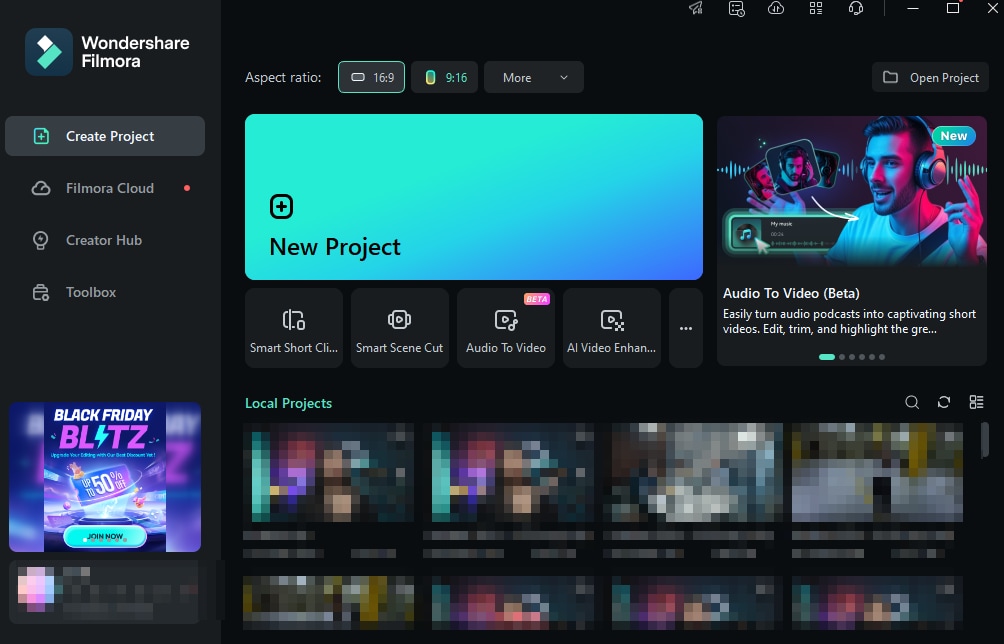 Open Filmora
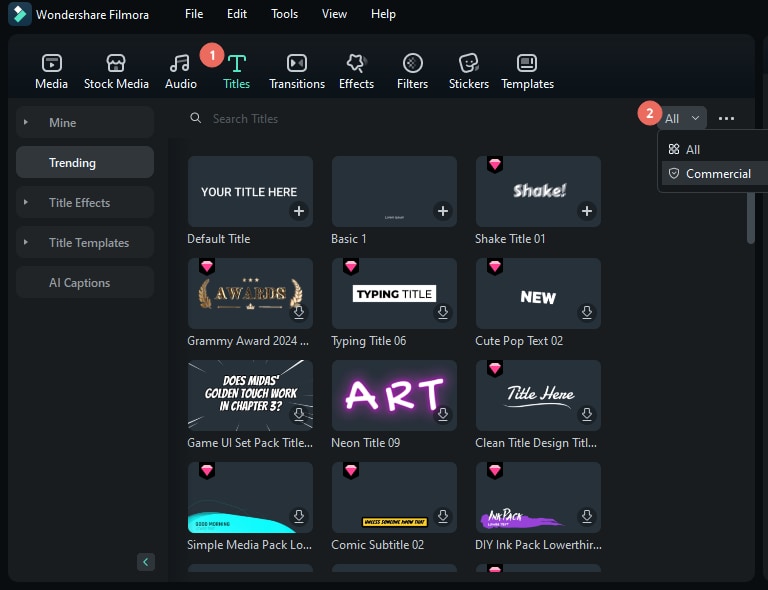
 - In the upper corner of the editor's main window, you'll be able to see several tabs, like Audio, Titles, or Effects. Click on the Titles tab.
 Click Title's Tab
 - Now, you can try to use the titles.
 Filmora Titles
Types of Filmora Titles
Filmora has more than 1000 types of titles. You can see them on the left, choosing and downloading your desired titles.
- Filmora has especially provided a new type of title – 3D title. With stunning 3D text animations, you can bring your video to the next level. From metallic, nature, to festival, you can get inspired and create with more than 40 3D text effects. Moreover, 3D text effects can be edited in batch to increase your editing efficiency.

- 3D Titles
- Vertical
- Plain Text
- Word Art
- Openers
- Lower Thirds
Note:Click the inverted triangle to filter Titles to check if they are available for commercial use.
2. Edit Texts
Change the Duration
The default duration of a text effect is 5 seconds. There are two ways to change the duration of a text effect.
- Drag the text on the timeline directly.
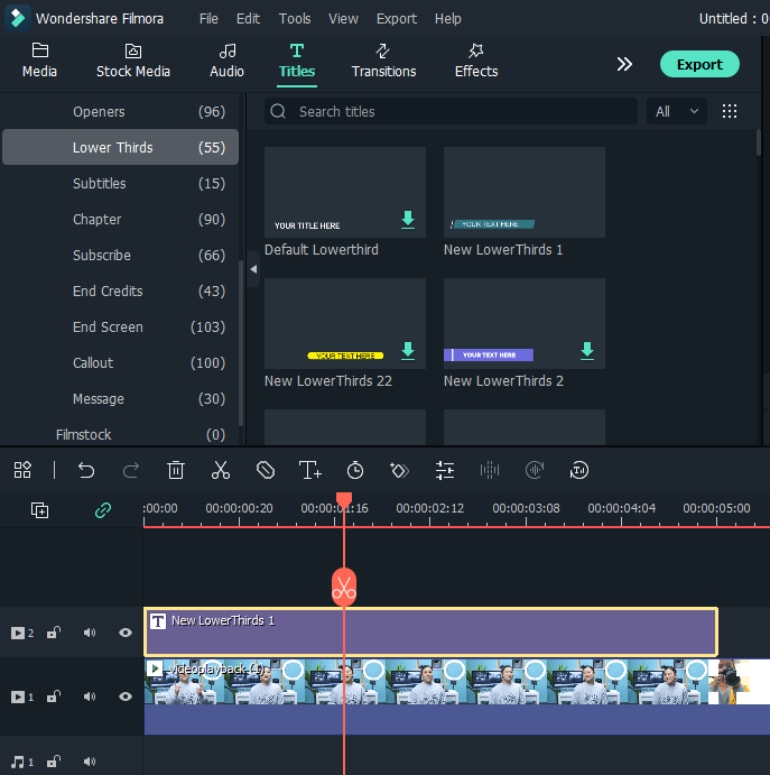
- Select the text in the timeline and click the "Duration" icon to set a new duration.
Drag the Title to the Timeline
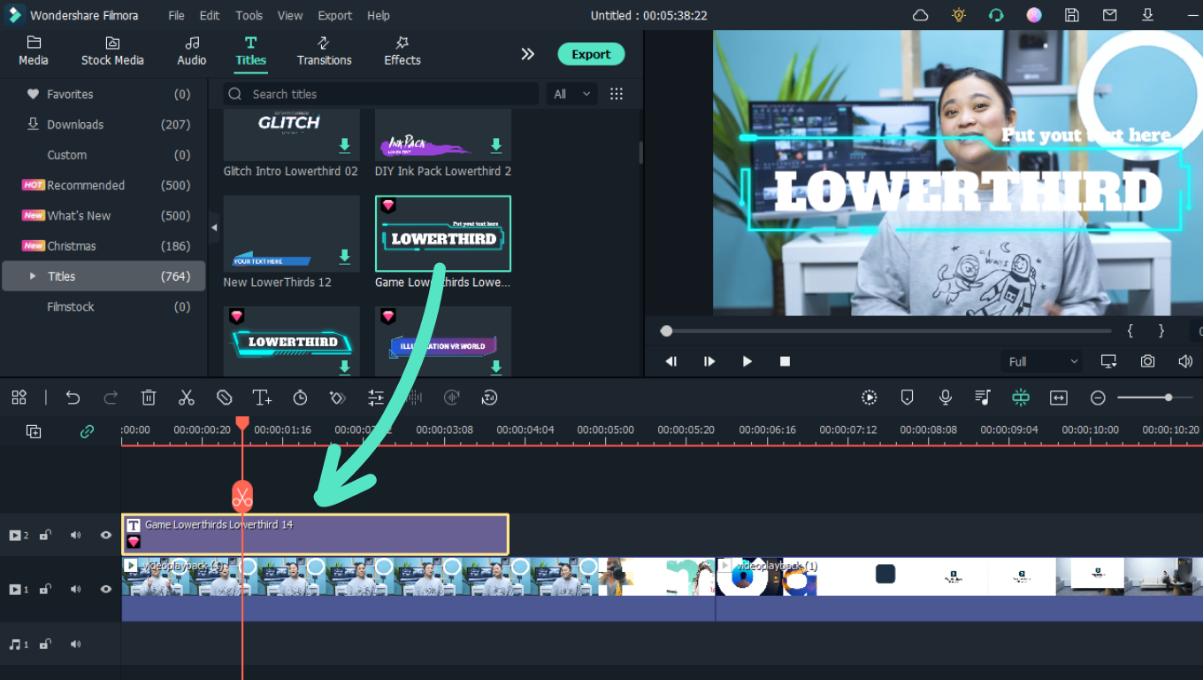
You can drag it from the Titles library and drop it into the timeline. You can also right-click on the title effect you want and select "Apply" to add it to the timeline.
Edit Text Effects
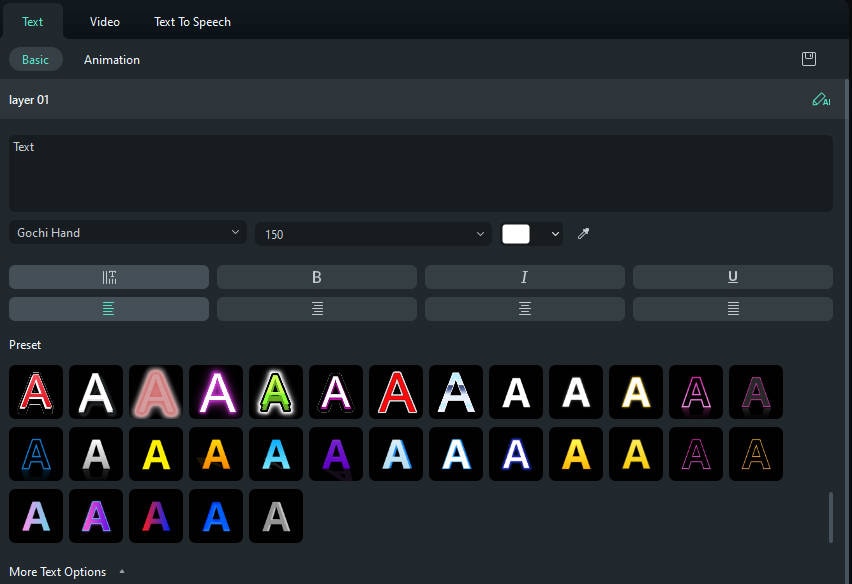
Right-click the font on the timeline, and the font editing panel will appear on the right. You can perform basic and dynamic editing on the font.
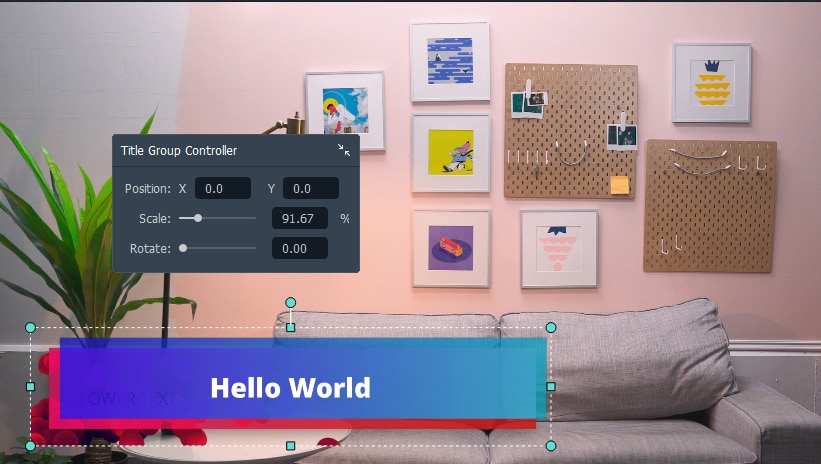
Edit a Title with the Title Group Controller.
- Double click the title in the track and the Title Group Controller will appear.
- Enter values into the X and Y boxes to adjust the position.
- Drag the scale slider to adjust the size of the title template.
- Drag the rotate slider to change the orientation of the template.
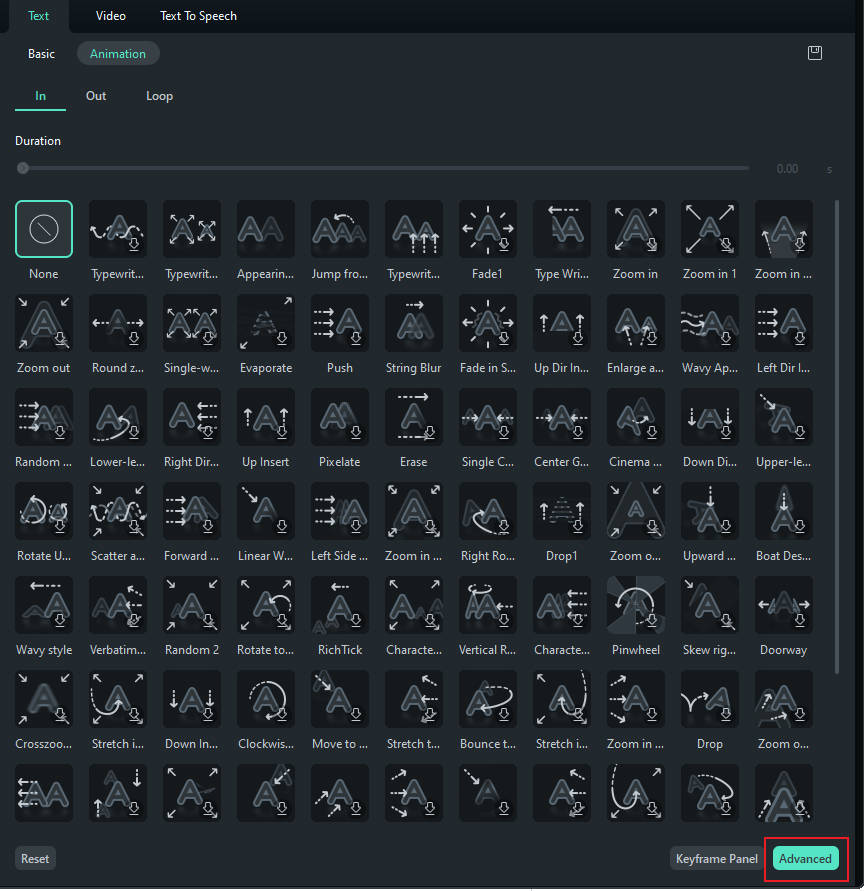
Advanced Text Editing
To edit your text in even more ways, click the Advanced button to enter the Advanced Text Edit panel.
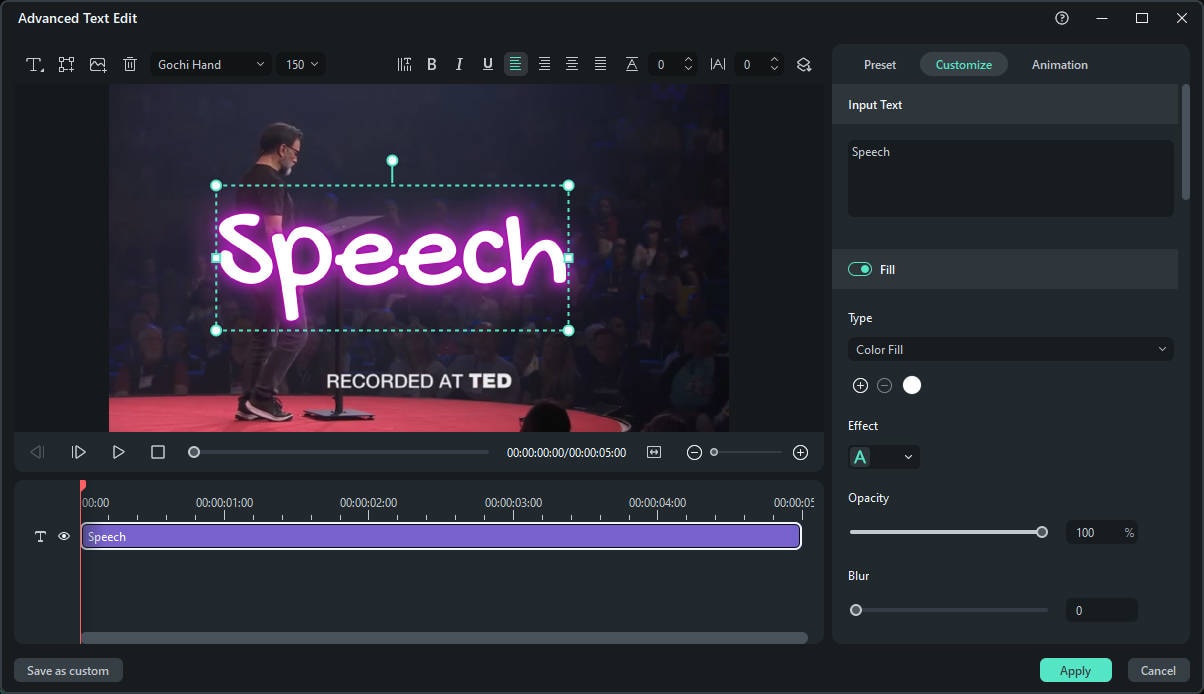
In the Advanced Text Edit panel, you can add more elements to a premade title effect such as new text boxes, shapes, or images.
You can customize your text effects in the Advanced Text Edit panel in the following ways: font, color, animation, opacity, fill, border (color and size), and shadow (style, color, and size).
Curved Text
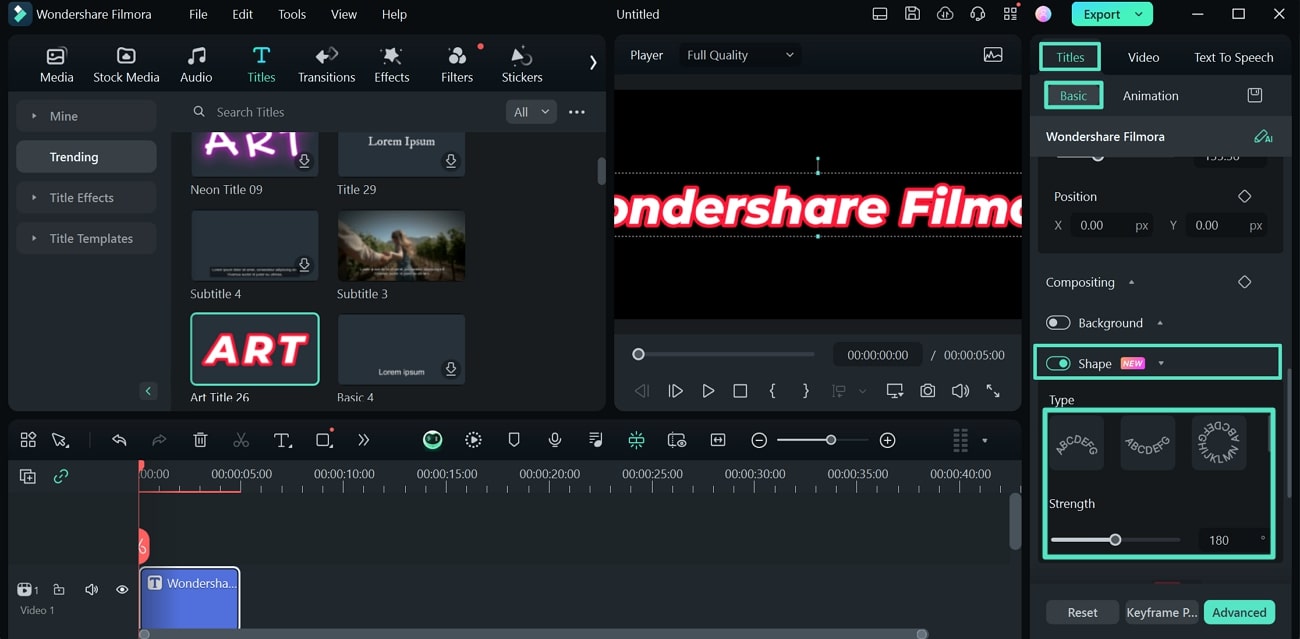
While you perform the basic edits across the added text, look for the "Shape" toggle in the "Basic" section after expanding the settings using "More Text Options." On turning on the toggle, you will be able to see different curved text options that you can select according to your video aesthetics.
On enabling the option, select any curved option available and set its "Strength" to control the curvature of the text. If you want to change the curvature, manually switch between the presets and override the previous edits. On disabling the "Shape" toggle, the curve effect will be reverted, and the text will return to its original state.
Add a Glow Effect
To make your titles stand out and grab the viewer's attention, you can add a vibrant glow effect. This feature is perfect for creating cinematic titles, highlighting key information, or simply adding a stylish flair to your text.
Here’s how to apply and customize the Glow effect:
- Double-click your text clip in the timeline to open the Text editing panel on the right.
- Under the Basic tab, find the Glow option and enable the toggle switch next to it.
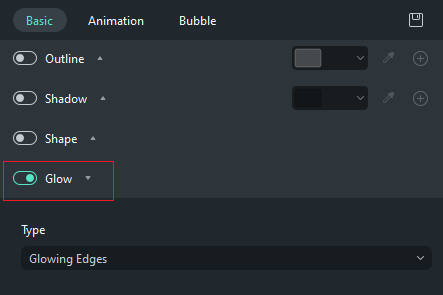 Enable the Glow Effect
 - Once enabled, you can customize the following parameters to achieve the perfect look:
- Type: Choose the style of your glow. Filmora offers two types:
- Glowing Edges: Applies a glow just to the outline of your text for a crisp, defined look.
- Glowing Ray: Creates a softer, more diffused glow that radiates from the text, giving it a luminous feel.
- Color: Click the color box to select a pre-made color, or use the eyedropper tool to pick a color directly from your video preview.
- Intensity: This slider controls how bright and strong the glow effect is. A higher value creates a more prominent glow.
- Range: Adjusts how far the glow spreads from the text. Increase the range for a wider, softer effect.
- Horizontal Angle: This slider adjusts the horizontal direction of the glow, creating an offset effect. Drag it to the left or right to change the angle from which the light appears to shine.
- Vertical Angle: This slider adjusts the vertical direction of the glow. Use it to move the glow effect up or down, giving you precise control over the light's position.
You can fine-tune these settings until your text has the exact visual impact you desire.
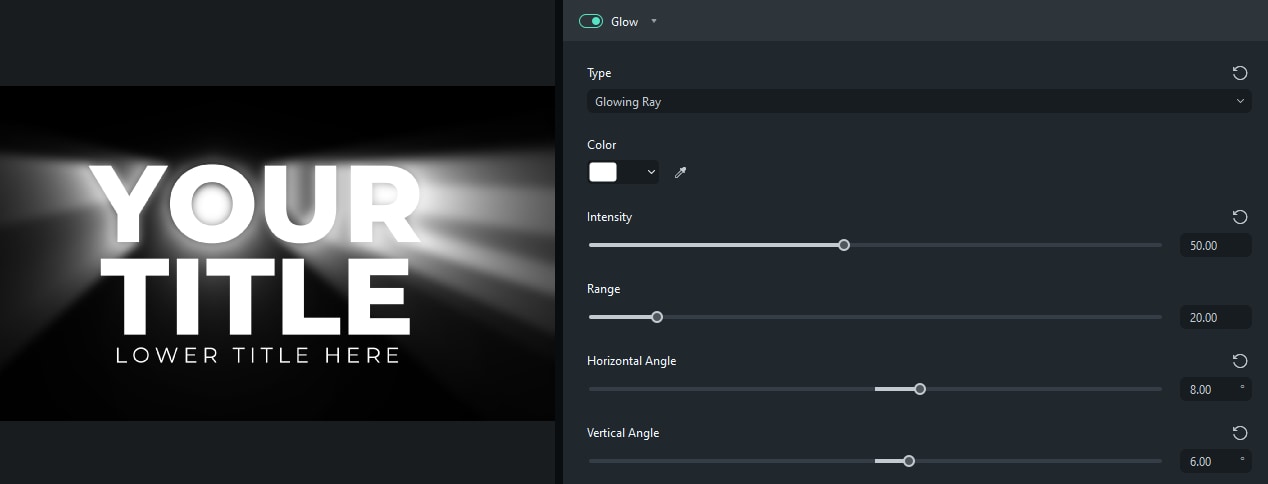 Glow Effect Parameters
 - Type: Choose the style of your glow. Filmora offers two types:
3. Text Presets
Filmora allows you to save customized text effects as presets for quick use in the future from both the Text Edit panel and the Advanced Text Edit panel.
- In the Text Edit panel, after customizing your text (changing the font, size, color, position, or animation), click Save as Preset.
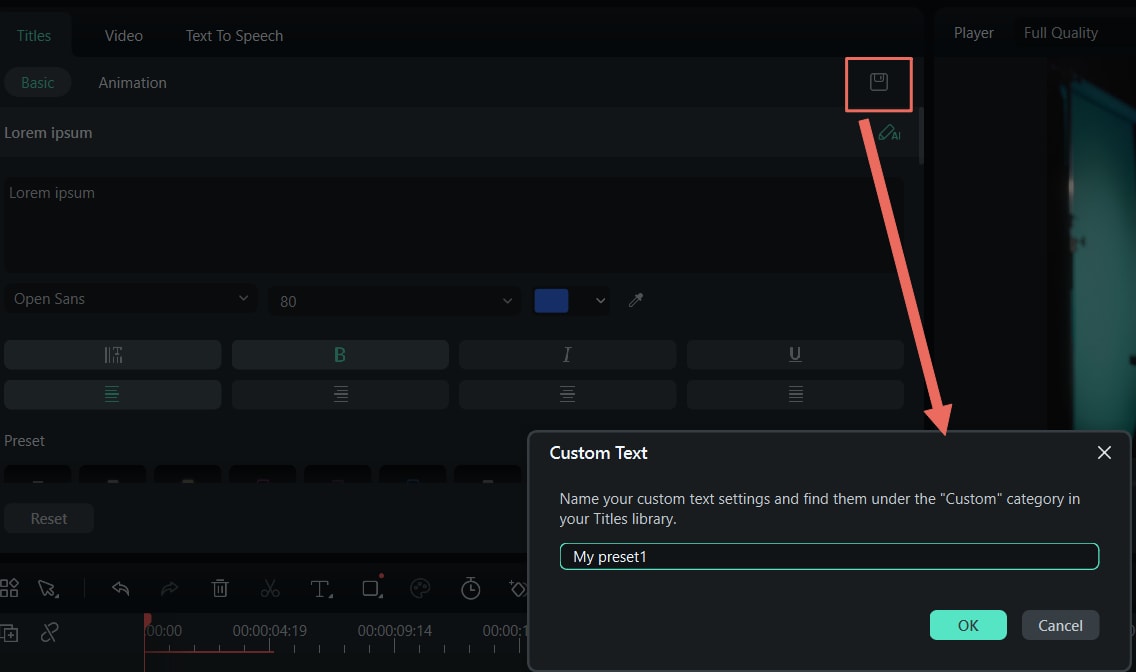
- In the pop-up Preset Dialog window, enter a name for your new preset and click OK to save it.
- The preset will be saved in the Custom folder under Titles.
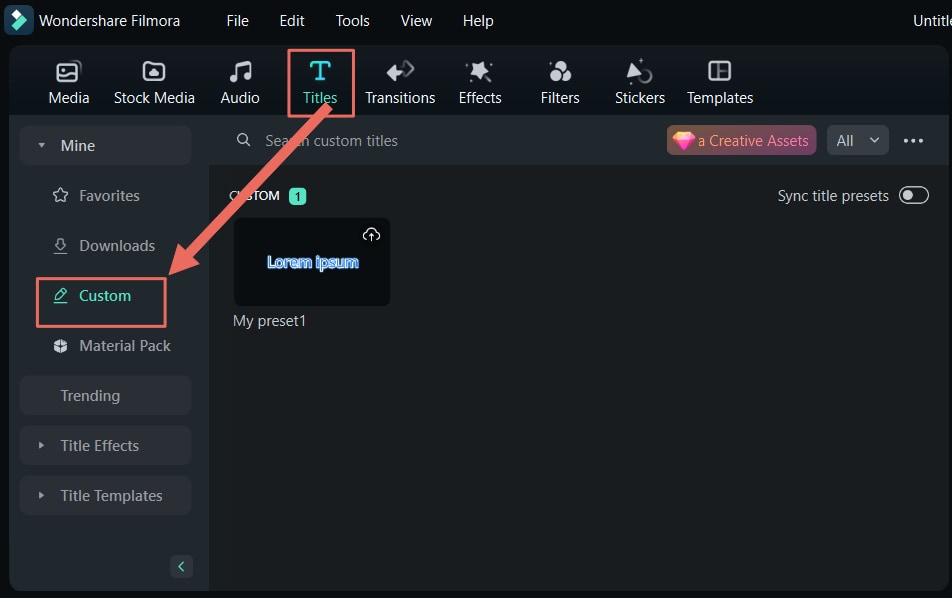
- While in the Advanced Text Edit panel, you can save presets the same way: by clicking the Save as Preset button.
4. Remove Texts
There are two ways to remove tests from your video:
- Select the text that you want to remove and hit "Delete" on your keyboard.
- Right click on the text in the timeline and select "DELETE" from the menu.
5. Favorite Texts
- Right click on the text in the Titles menu, and choose the text you like to add to favorites.
- Or choose the text you like, you will see a "star"shape on the top right, click the "star" into green.
- You can check your favorite texts on the left Mine- Favorites.
Related Posts
Featured Articles
Cognitive Guide: How to Create a Lyrics Video on YouTube in 2025
Looking for ways to craft music videos that make the audience sing along? Read this article to learn how to create a lyric video on YouTube with no editing.
How to Translate RedNote Contents | TikTok Refugees' Full Guide
If you are curious about how to use RedNote in English and want to translate the comments on Xiaohongshu to English, we've got you covered. You will also learn how to translate videos and add bilingual captions (both Chinese and English subtitles)
Reviewing Single Camera vs Multi-Camera Production
What’s the differences between single-camera and multi-camera production? Explore some examples and get guidance to choose the best setup for your project, along with software recommendation for your video production.
Recommended User Guide
Text animation
There are 80+ animation presets available in Filmora. Try to create your video!
