For the Best Results, Use the Latest Version.
-
Preparations
-
Account
-
Get Started & Basic Settings
-
Compatibility & Tech Specs
-
Performance Settings
-
-
Creating Projects
-
Creating New Projects
-
-
Importing & Recording
-
Video Editing for Windows
-
Basic Video Editing
- Enable/Disable Clip in Windows
- Magnetic Timeline for Windows
- Dual Monitor Setup for Video Editing on Windows
- Select All Clips on Timeline for Windows
- Manage Timeline and Tracks on Windows
- Auto Ripple for Windows
- Split & trim video
- Crop & Pan & Zoom Video
- Compositing
- Change video playback speed
- Playing videos in reverse
- Mark In and Mark Out for Windows
- Markers for Windows
- Group editing
- Customizable Backgrounds for Videos and Images in Windows
- Video snapshot
- Using freeze frame
- Logo Reveal For Windows
- Apply auto enhance
- Applying drop shadow
- Adjustment layer for Windows
- Transforming
- Video Editing Ruler – Windows
-
Advanced Video Editing
- Drawing Tools for Windows | Filmora Guide
- Create Multi-Camera Clip
- Compound Clip for Windows
- Multi-Clip Editing for Windows
- Filmora Motion Blur | Windows
- Filmora Flicker Removal Guide | Windows
- Apply mask to video
- Creating a PIP effect
- Keyframe Graph Editor for Windows
- Add animation keyframing for Windows
- Keyframe Path Curve for Windows
-
AI-Powered Video Editing
- Smart Scene Cut for Windows
- Smart Short Clips for Windows
- AI Face Mosaic for Windows
- Filmora AI Eye Contact- Windows
- AI Video Enhancer for Windows
- AI Text-to-Video for Windows
- Planar Tracking for Windows
- AI Idea to Video for Windows
- Filmora Image to Video for Windows
- Filmora Image to Prompt for Windows
- Instant Cutter Tool for Windows
- AI Extend
- Filmora AI Relight - Windows
- Filmora AI Image Enhancer Guide - Windows
- AI Script to Video Guide for Windows
- AI Text-Based Editing for Windows
- AI Mate Editing for Windows
- Create with instant mode
- ChatGPT Plugin - AI Copywriting
- AI Smart Cutout
- Lens correction on Windows
- Auto reframe video
- AI Portrait Cutout
- Scene detection feature
- AI Smart Masking for Windows
- Make motion tracking
- Video Stabilization for Windows
- AI Video/Photo Object Remover for Windows
- AI Smart Search for Windows
- AI Skin Tone Protection for Windows
- AI Image for Windows
- Chroma key (green screen)
- Super Slow Motion with Optical Flow for Windows
- Video Denoise for Windows
-
-
Audio Editing for Windows
-
Basic Audio Editing
-
Advanced Audio Editing
-
AI-Powered Audio Editing
-
-
Text Editing for Windows
-
Basic Text Editing
-
Advanced Text Editing
-
AI-Powered Text Editing
-
-
Video Customizations
-
Video Effects
-
Audio Effects
-
Transitions
-
Stickers
-
Filters
-
Color Editing
-
Animations
-
Templates
-
Asset Center
-
-
Exporting & Share & Cloud Backup
Preset Color Adjustment
When using Filmora, you can harness the power of many options to enhance its color tones. Applying the tone adjustments can set the video to meet your ideal color, be brighter, lighter, darker, or gray. This function grants users easy access to tweak color tones by adjusting sliders or modifying the color element values. In this guide, you'll discover the built-in presets and other color tone adjustment features:
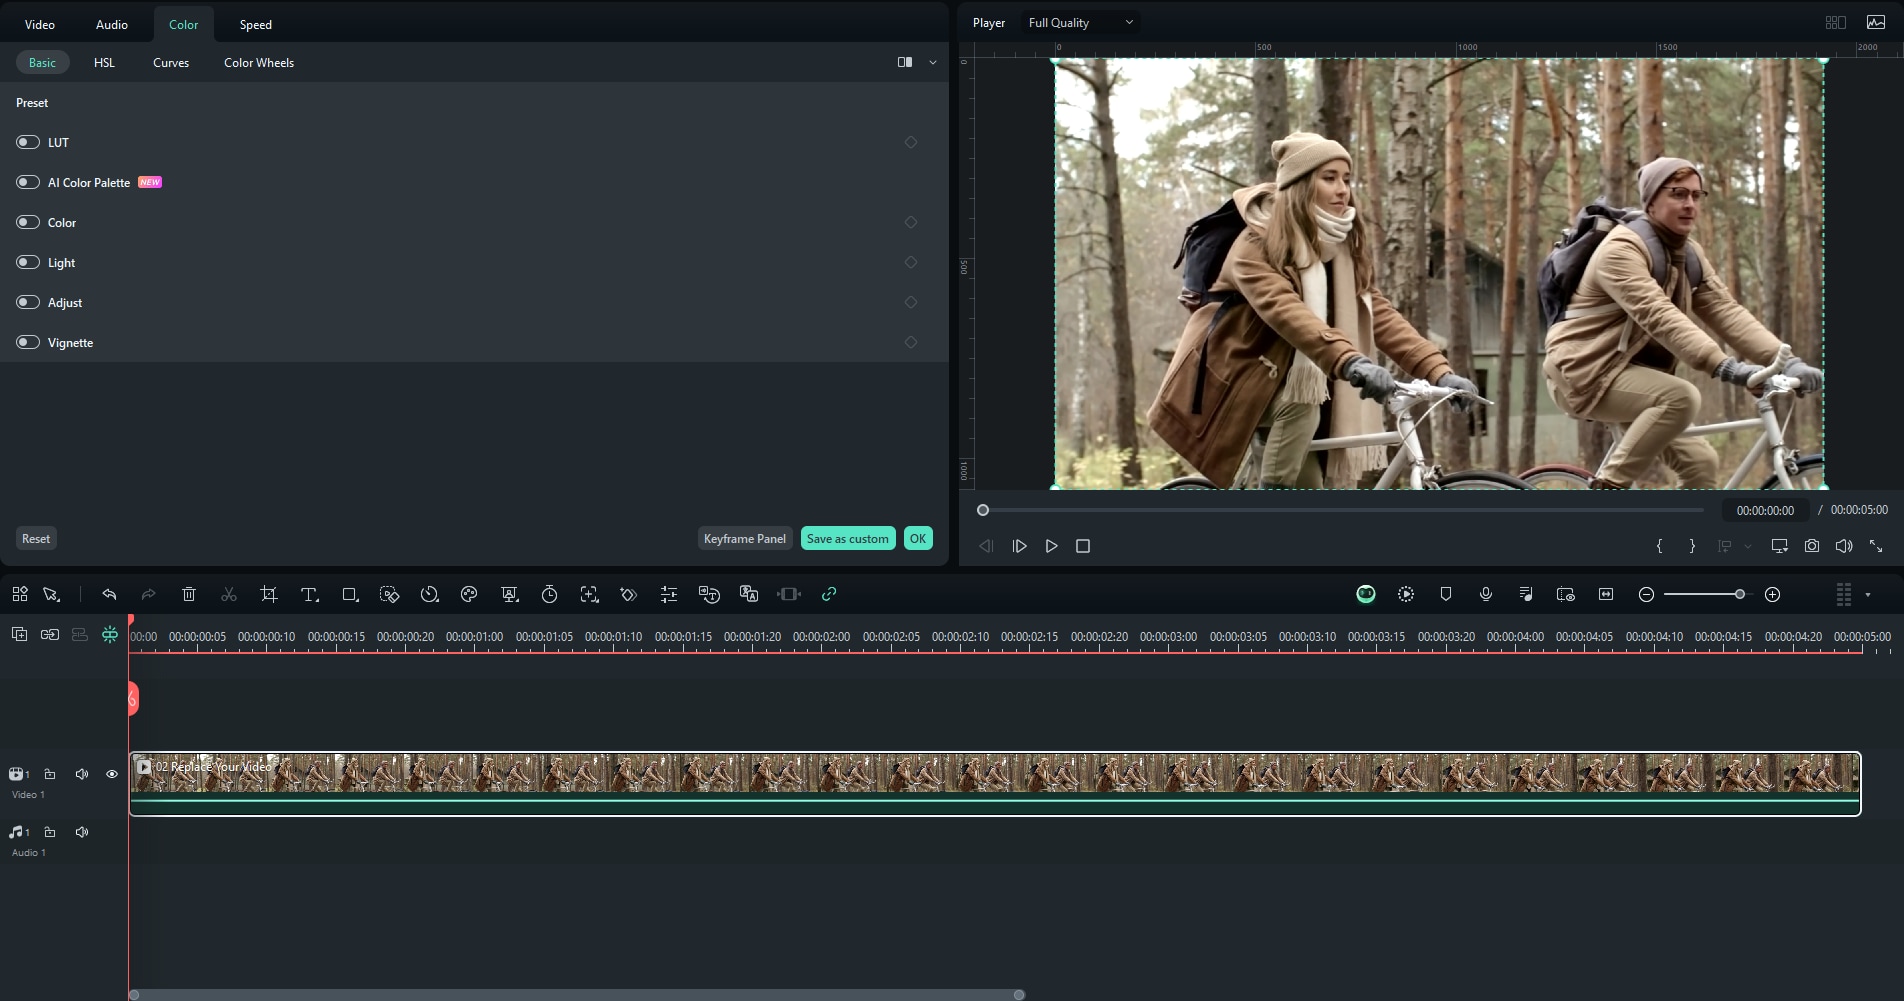
Following the previous step, proceed to the left-side panel and access the "Color > Basic" tab. Here, you'll find a variety of color tone adjustment elements, including "Presets", "LUT", "Color", "Light", and more.
LUT
Step 1: Open Color Settings
After adding the video to the timeline, double-click on it to open the color settings.
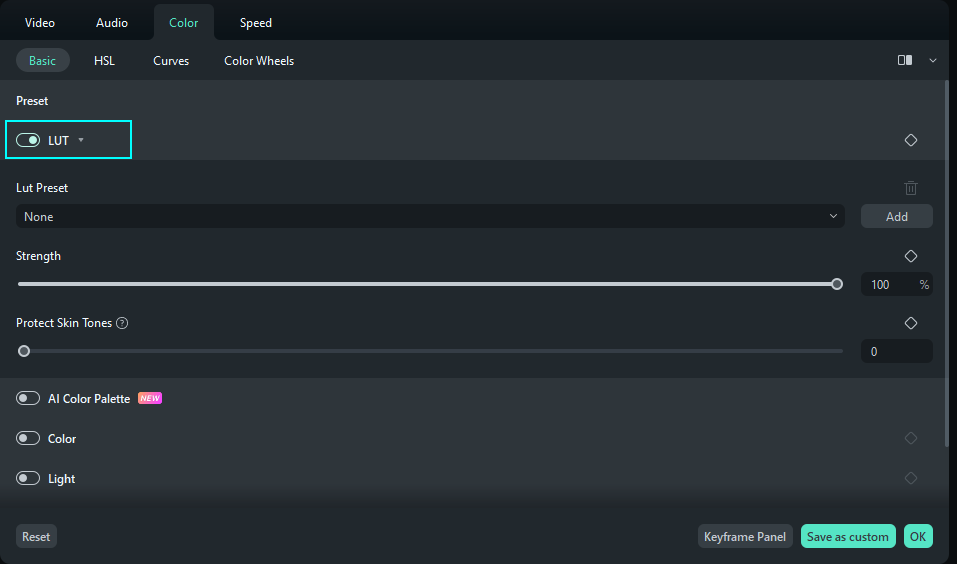
Step 2: Access LUT Settings
Navigate through the "Color" tab and select the "Basic" sub-tab from the available options. Continue to scroll down and turn on the "LUT" section if needed.
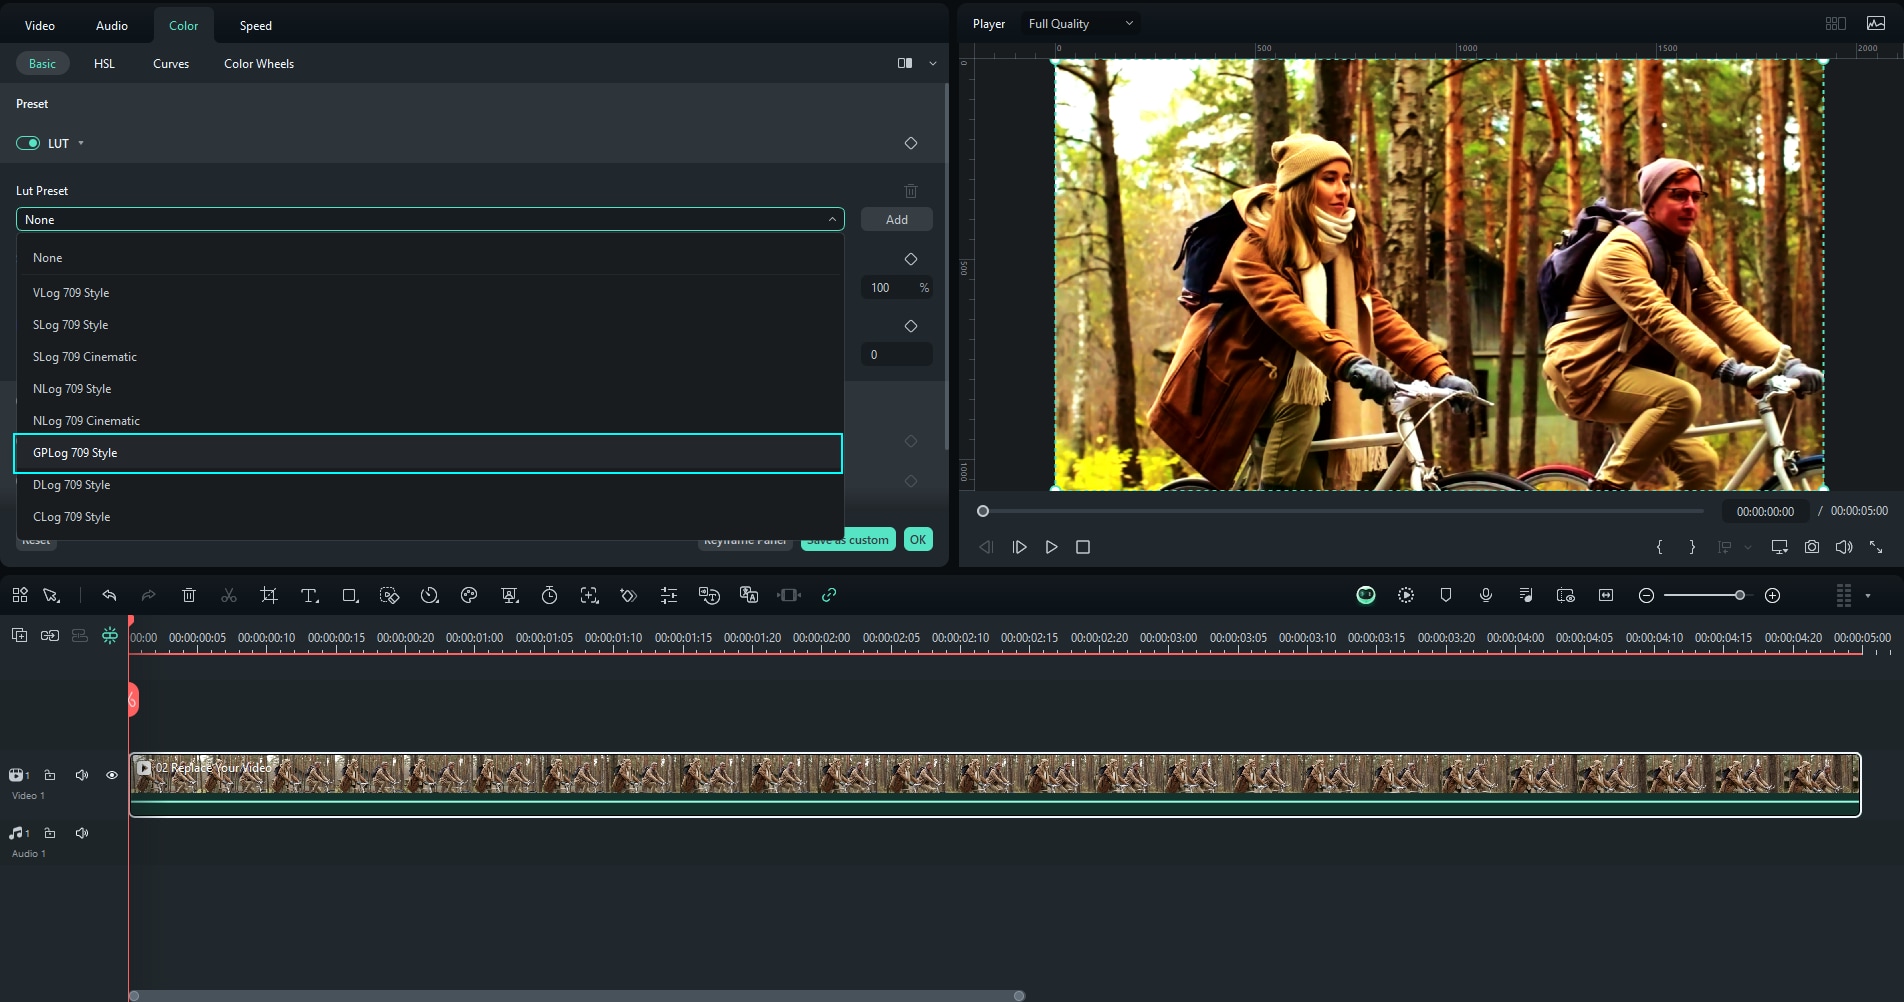
Step 3: Add LUT and Set Its Parameters
Once done, select the respective LUT from the available list that you want to add. You can also browse the LUT using the "Load new LUT…" option available in the drop-down menu.
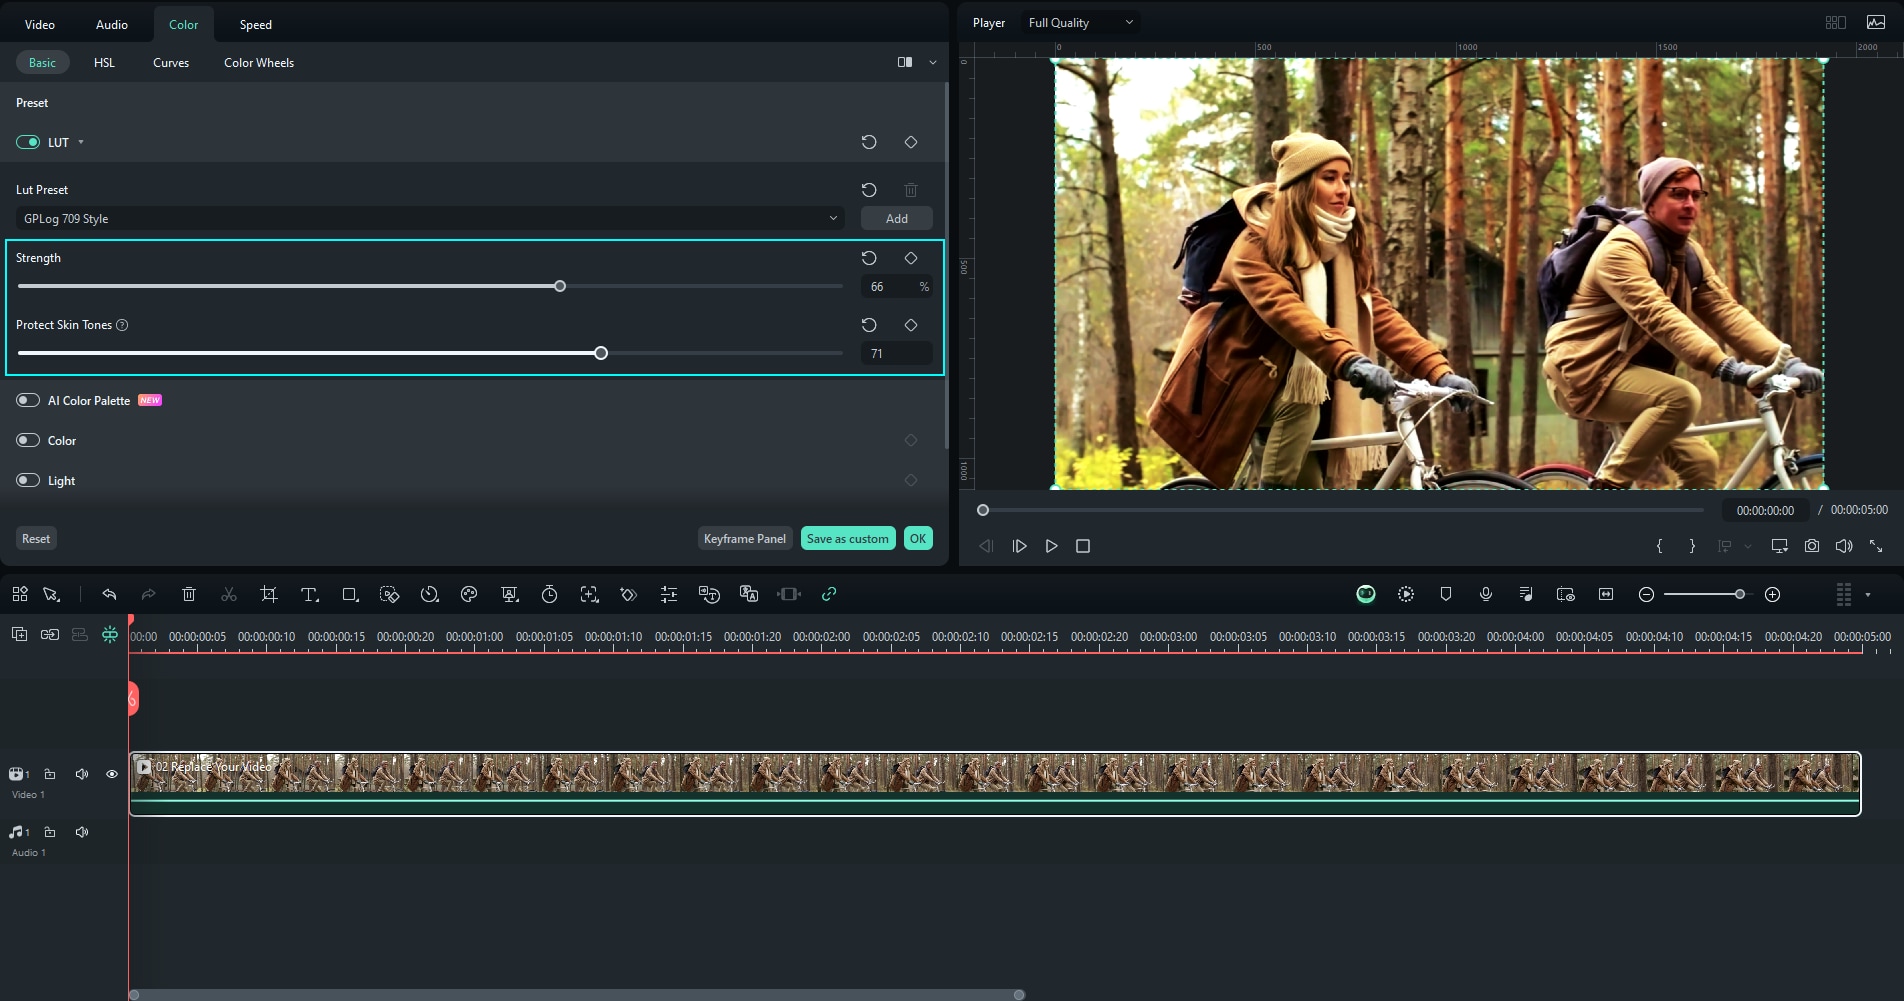
Set the "Strength" of the added LUT with the available slider and click "OK" to conclude the process. Click "Protect Skin Tones" if there are any human in your video.
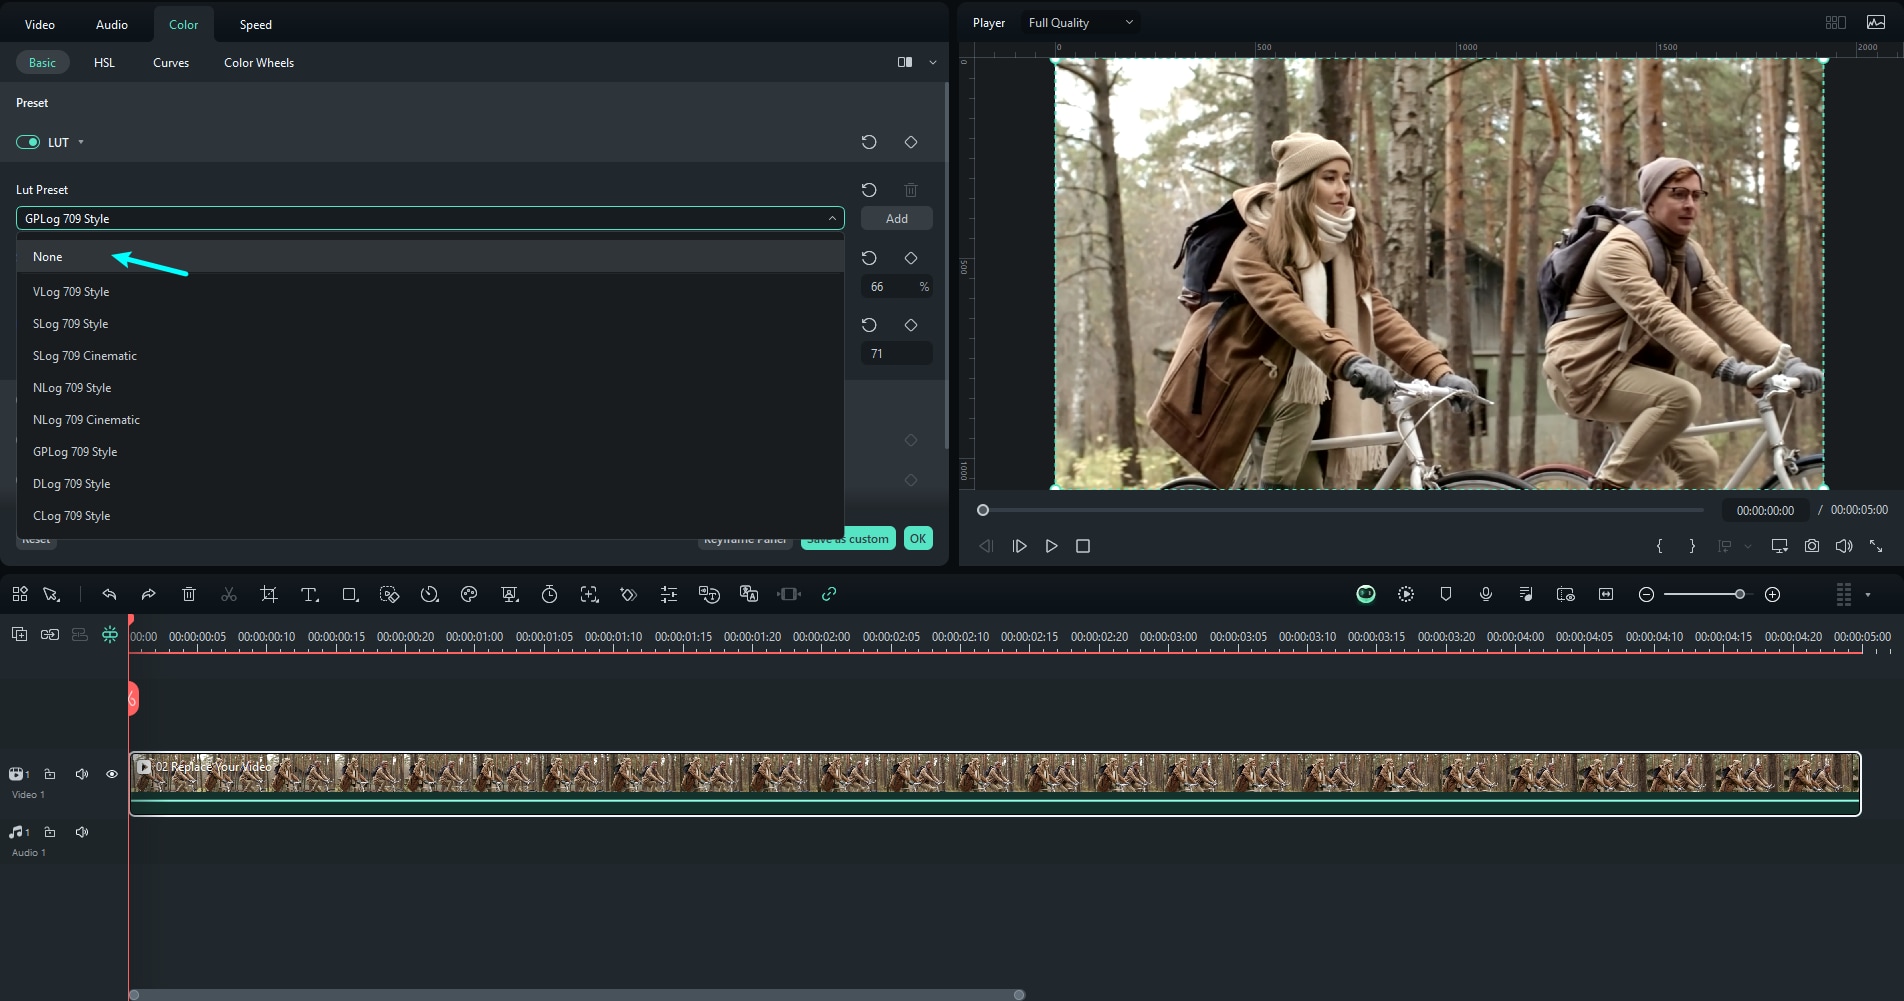
Step 4: Remove LUTs from the Video
For those who have added the LUTs from the "Video" settings in the "Color" tab, proceed to the drop-down menu against the "LUT" section. Select "None" from the menu and remove the LUT successfully.
Adjust Color
Color eliminates color casts to restore the natural color temperature of a video. It is widely used to make the white objects in a video look white. Also, with the settings of color, you can create an atmosphere of your preference, ranging from cold to warm.
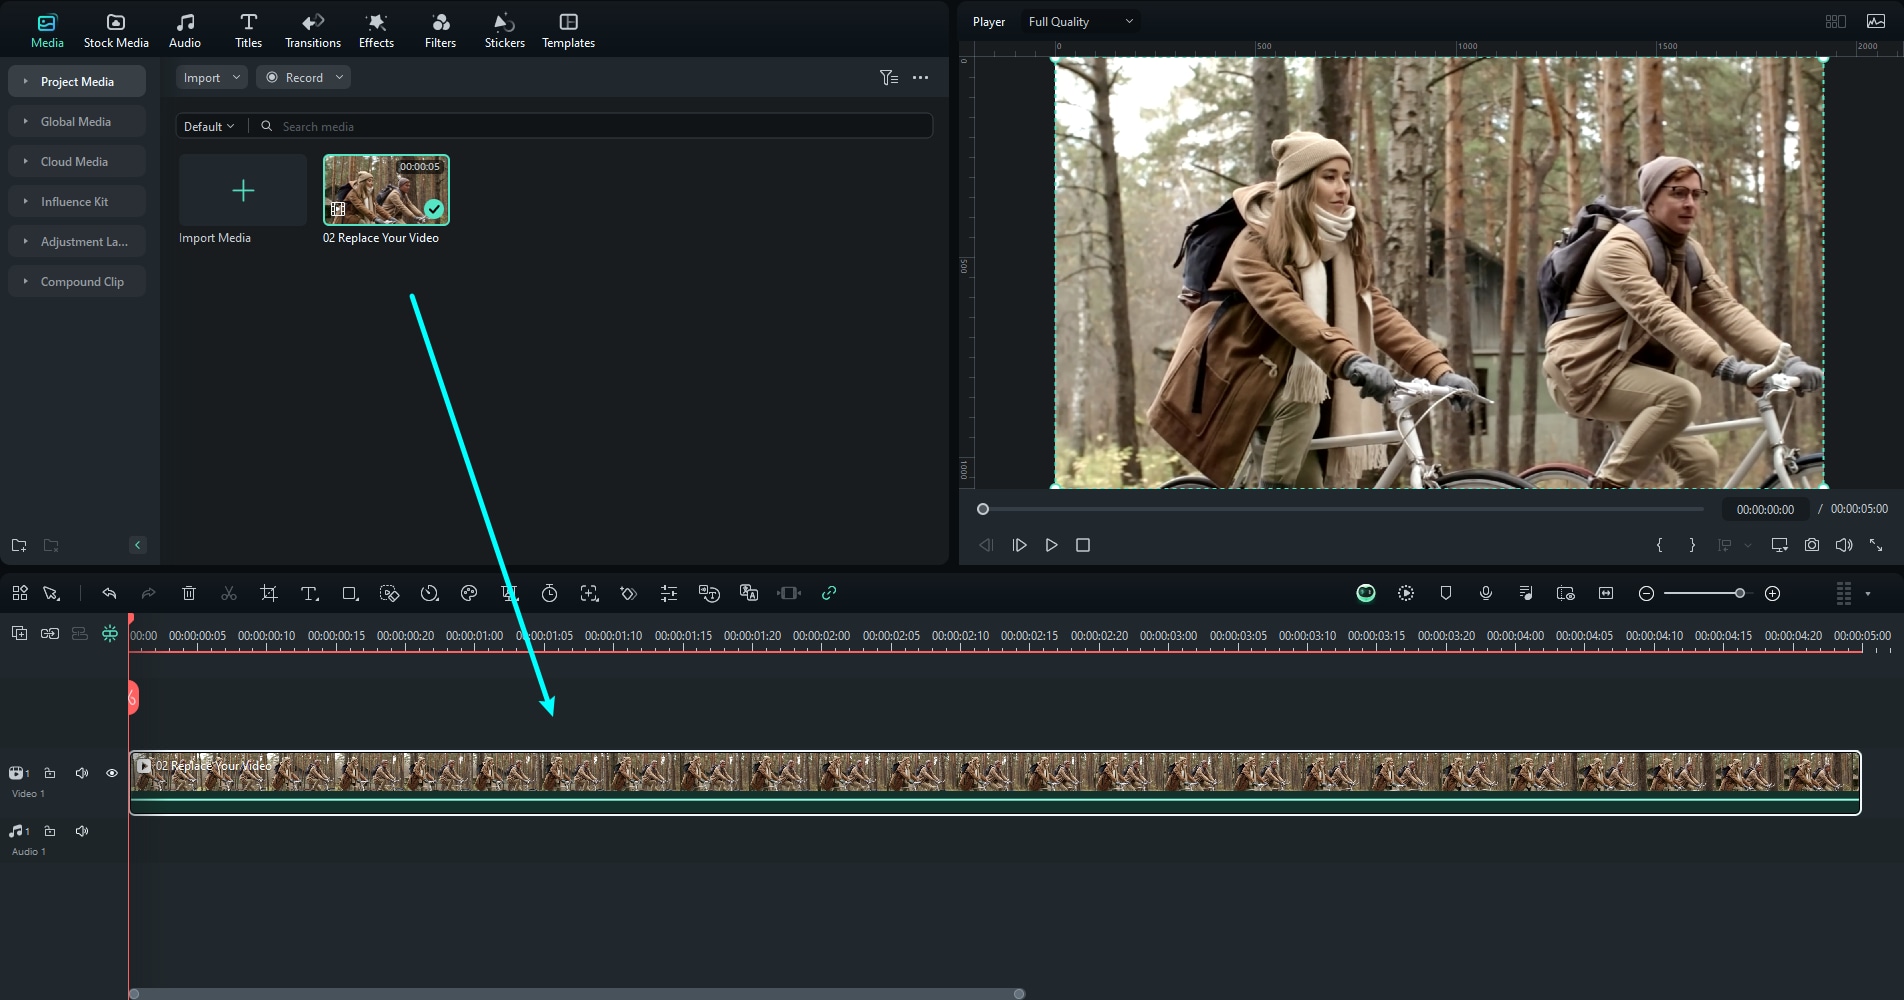
Step 1: Add your required video
Launch the application on your computer. Import media or select your needed one from the stock, then drag it to the bottom processing interface.
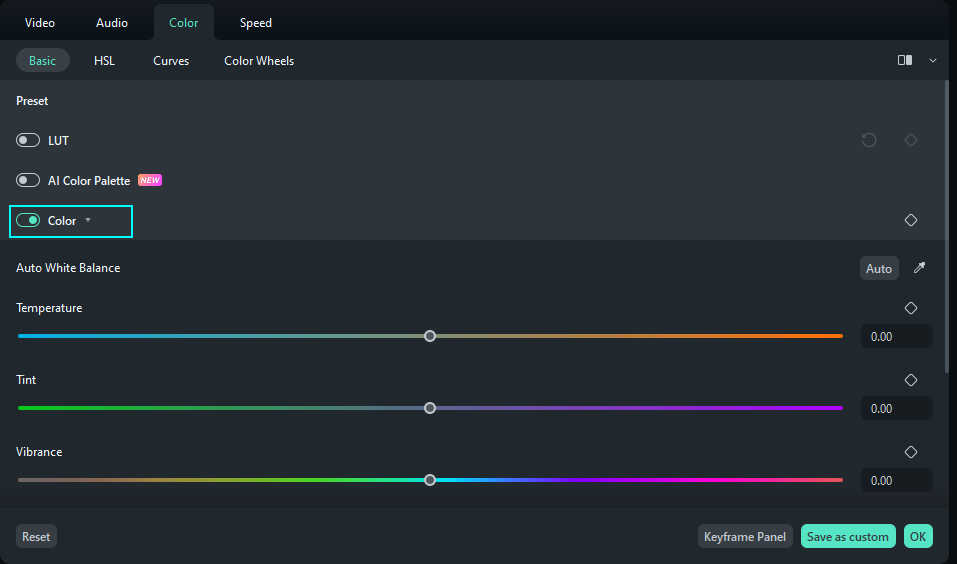
Step 2: Open the Color Feature
Click the video in the timeline and then switch to the Color tab. Turn on the Color feature by clicking the button beside it.
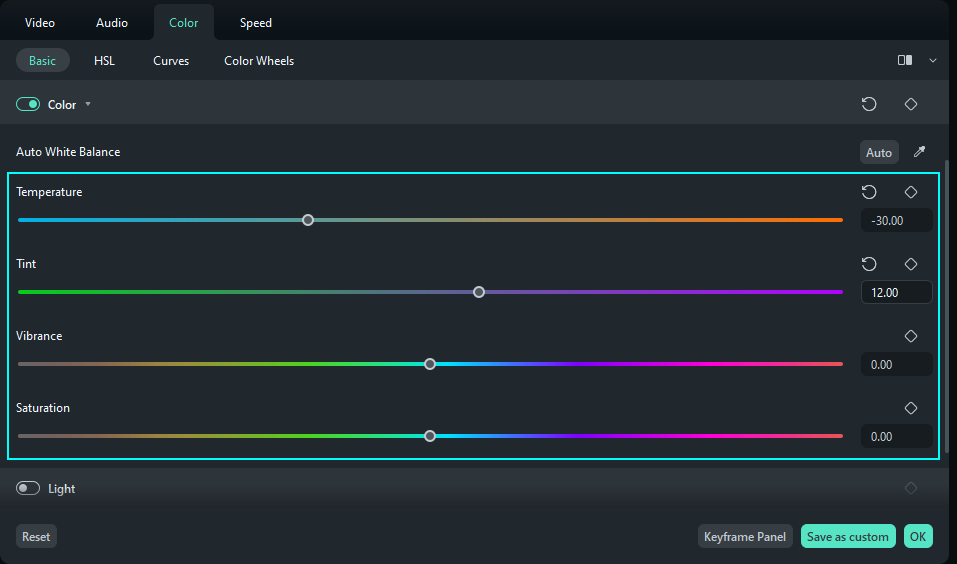
Step 3: Adjust the settings
Navigating to the editing panel, if you want to apply the function automatically, you can click Auto or the eyedropper tool to set the color instantly.
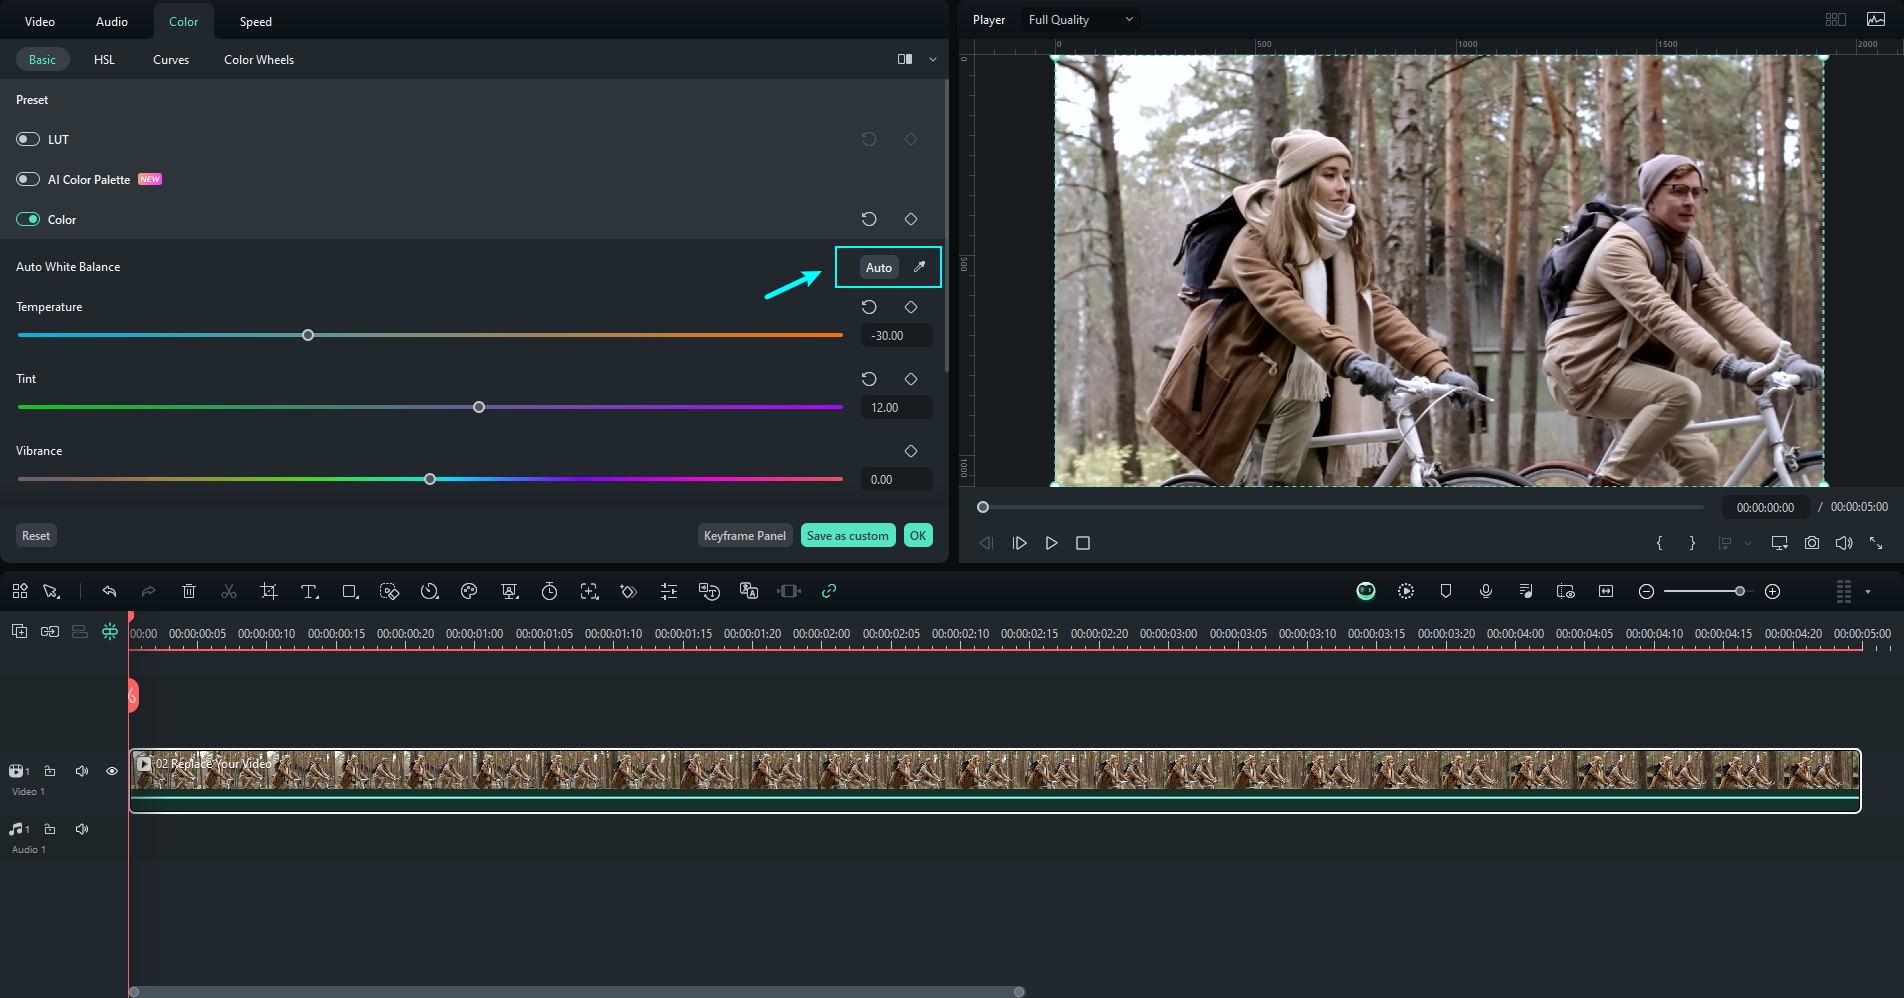
For more precise adjustments, Temperature and Tint settings are available:
- Drag the Temperature slider to modify the color of the video. A lower value means a colder color temperature, and a higher value will be a warmer color temperature.
- Then, drag the Tint slider to change the color level of the video.
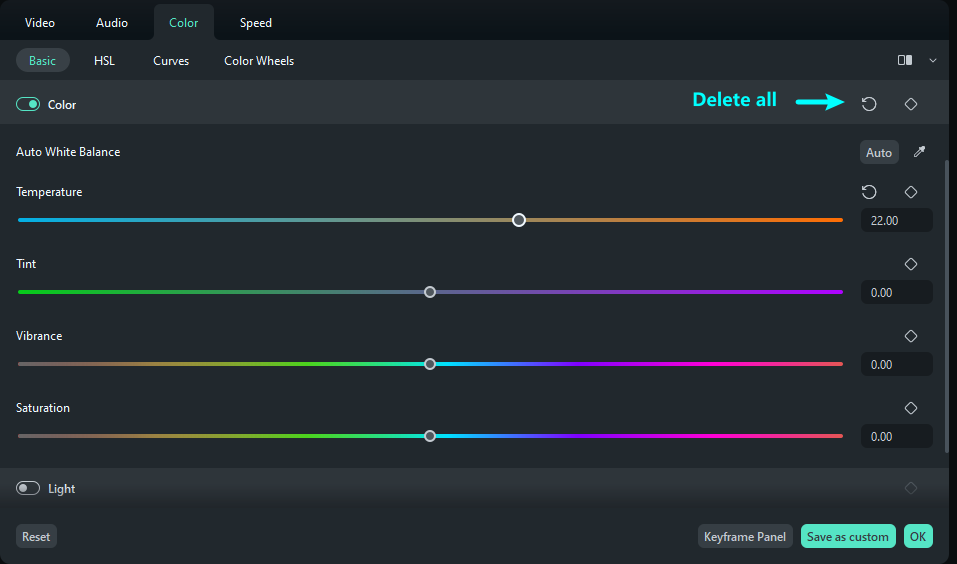
Step 4: Remove Color
To remove the set feature, you can click the reset icon on the right side of the Color section title. Then, the values will revert to the default 0.
Step 5: Keyframes on Color
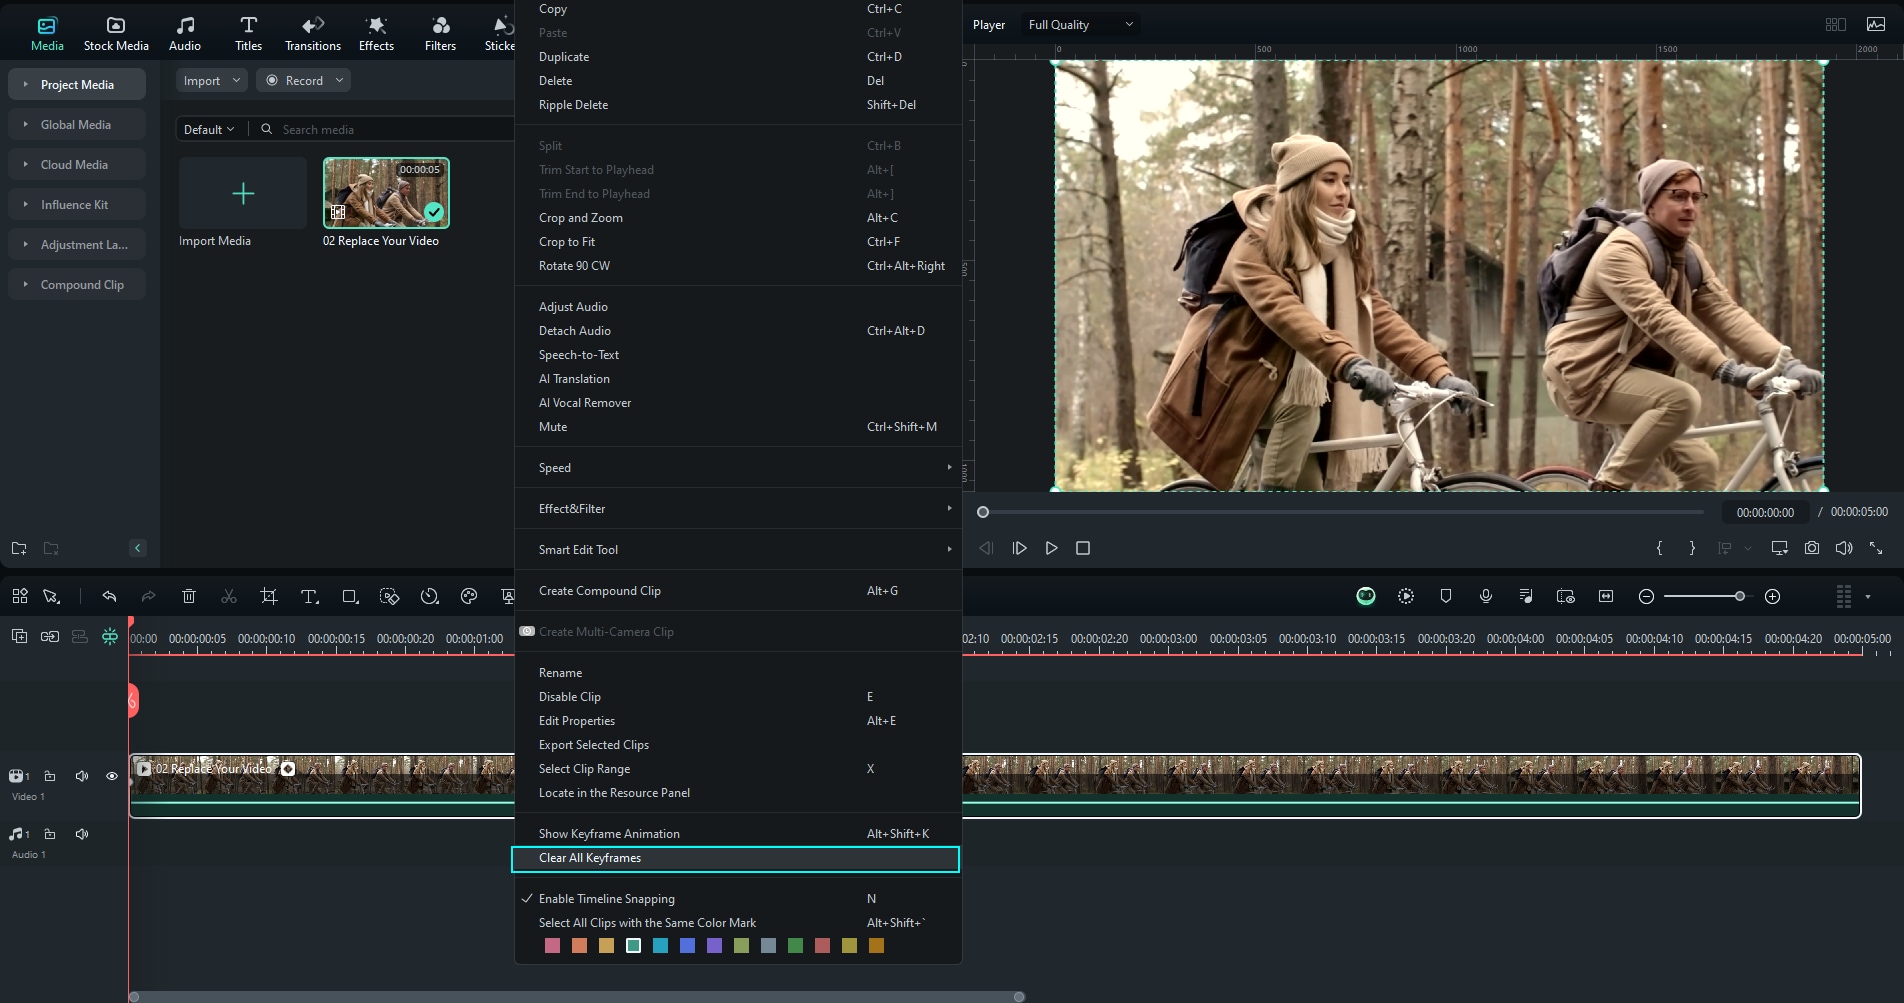
When you only want to apply white balance for a short period of the video or set different color effects at several points, you need to set keyframes in the timeline. Drag the playhead to where you need it, set the color adjustments, and click the keyframe icon.

You can add as many keyframes as you need. The system can analyze the differences between two close keyframes, and export natural changes from one point to another. To delete the keyframe features, you can right-click the specific keyframe in the timeline, and select Clear All Keyframes.
Adjust Light
Step 1: Add the needed clip
After launching the application, you can import the media from your computer. Or you can drag the clip directly to the bottom processing interface.
Step 2: Activate the color feature
Click the video in the timeline. In the property panel on the right side of the interface, select Color > Basic > Light. Click the button beside Light to change the settings.
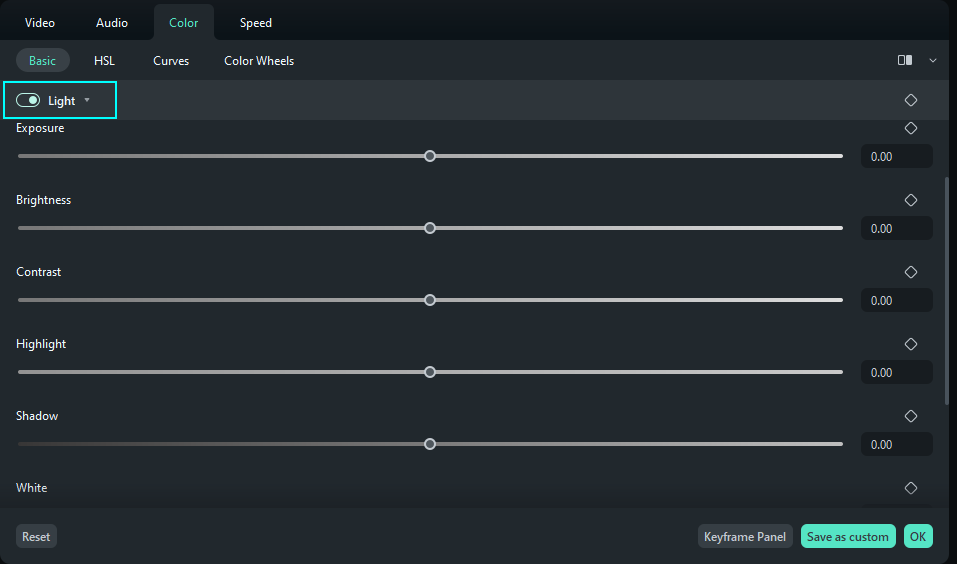
Step 3: Change precise settings
Adjust the effects of the video based on your needs from five aspects: Exposure, Brightness, Contrast, Highlight, and Shadow. Click OK when you have set the values.
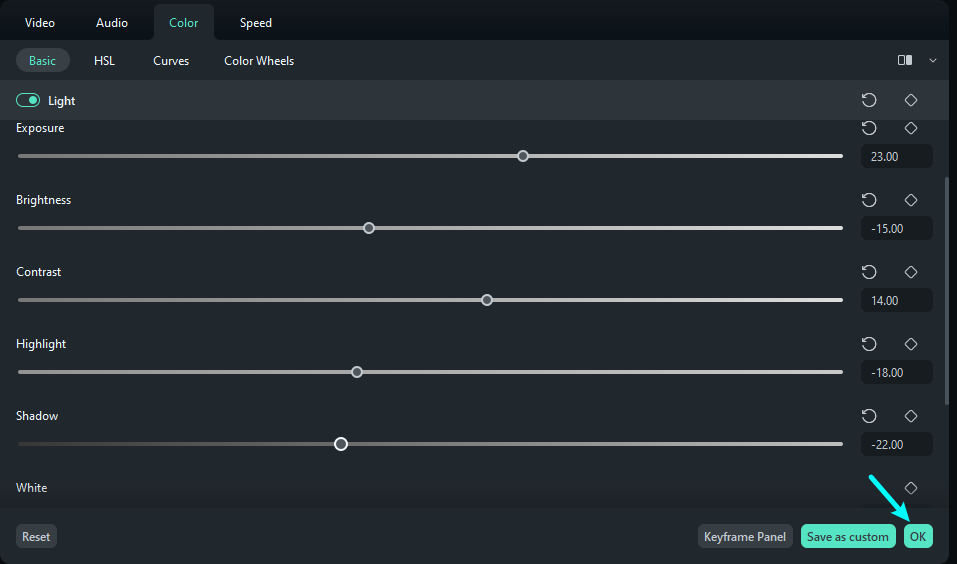
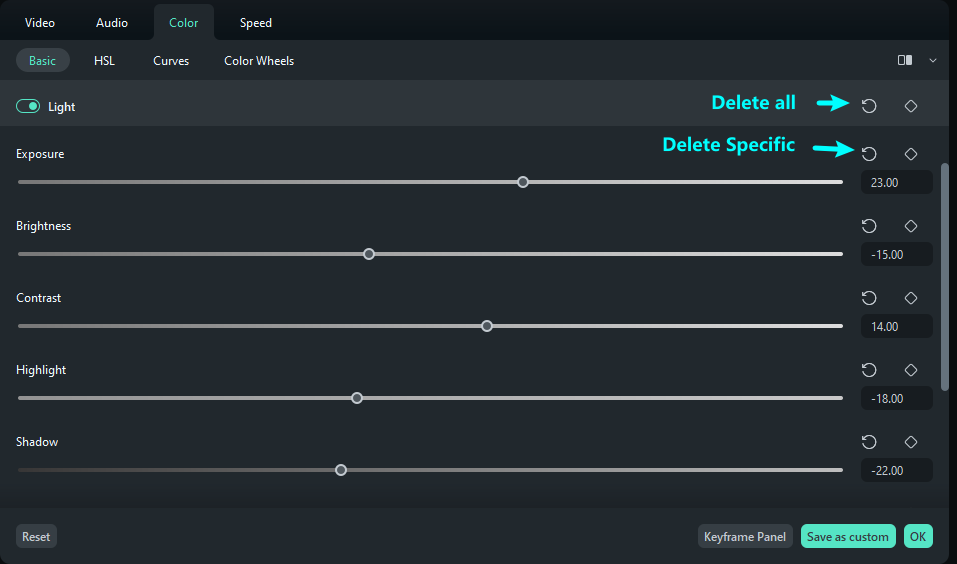
Step 4: Remove Light Settings
You can click the Return icon beside the corresponding feature to remove the specific adjustment. If you want to delete all Light settings, you can click the return icon beside the Light tab.
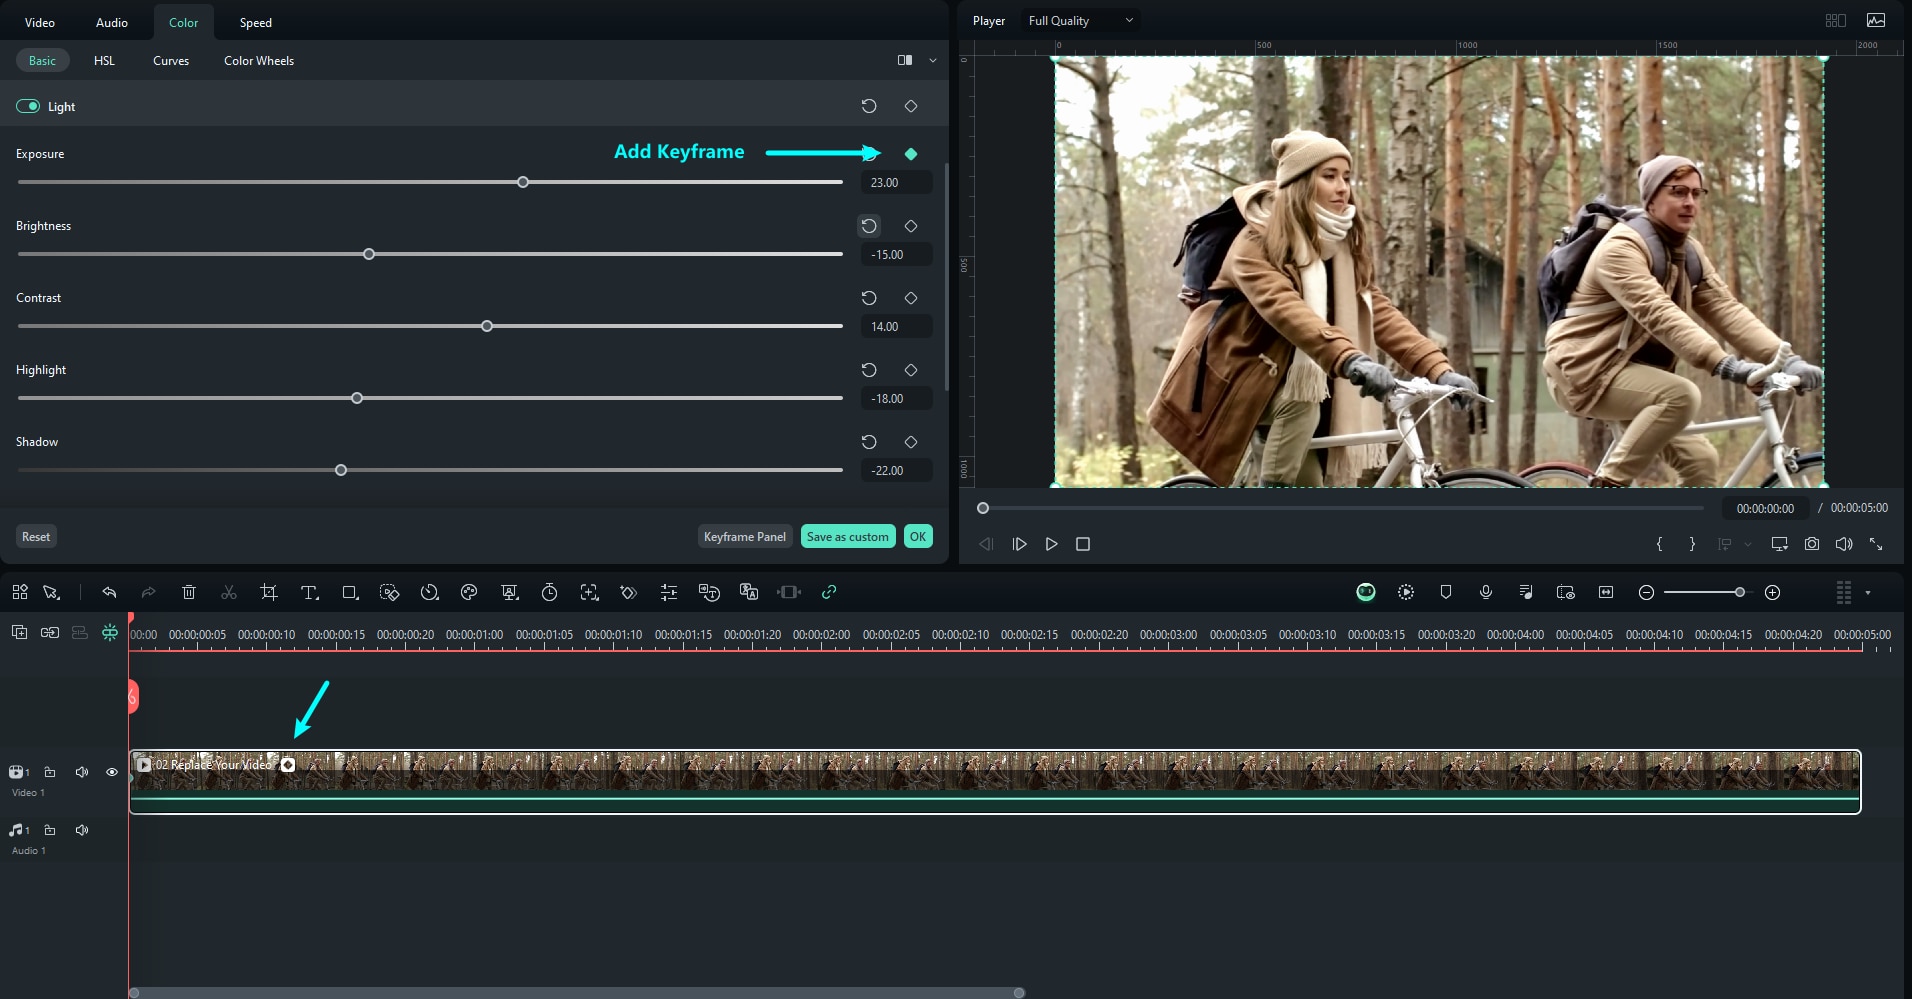
Step 5: Keyframes on Tone
Filmora enables you to create color changes with keyframes.
If you want to change the color at one or several points during a single video, you need to click the keyframe icon beside the return icon and change the color settings in the property panel. Once added several keyframes, the system will export the outcome with natural changes of light.
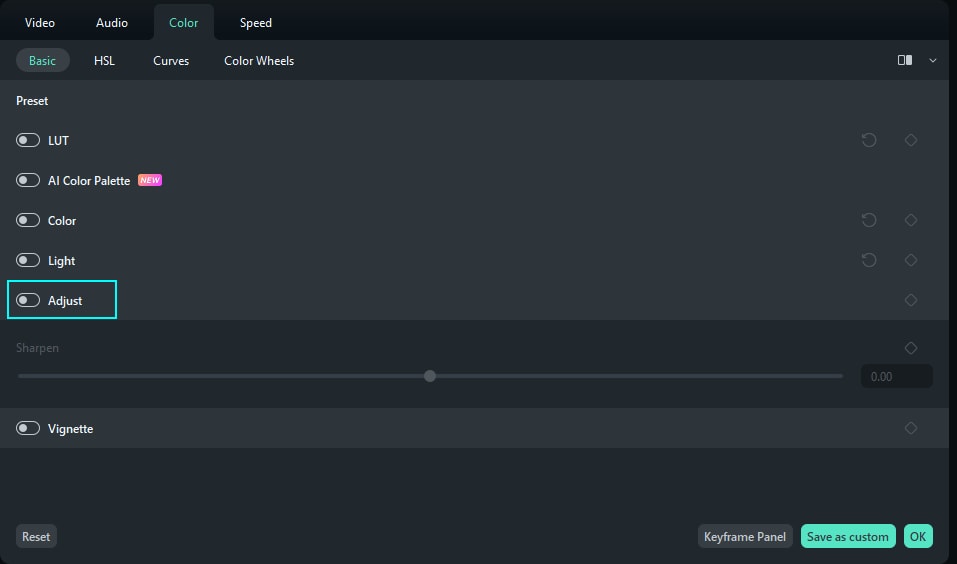
Adjust
Filmora's sharpness feature empowers users to bring clarity to their content and enhance the definition of objects. While it's not an independent function, accessing it is straightforward.
Step 1: Locating and Enabling the Sharpen Option
Select the timeline clip and access the "Color" settings in the editing panel. Here, scroll until you find the "Adjust" slider, and enable it. Then, expand it to reveal the "Sharpen" slider. By adjusting the slider forwards and backward, you can control the intensity of this effect.
Step 2: Saving or Re-Adjusting Settings
To preserve these settings for future use, click the "Save as custom" button or press the "Reset" button to return to the editing process from the start.

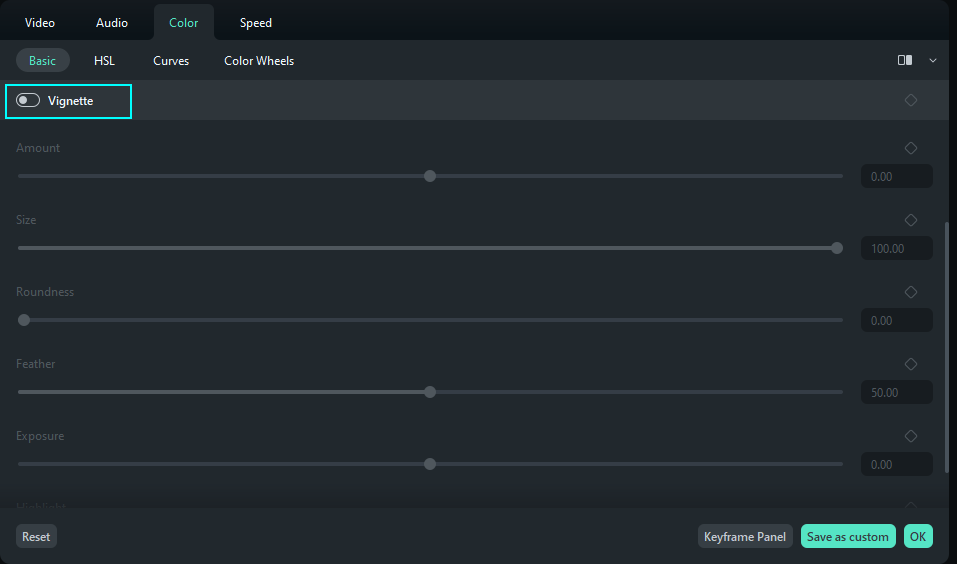
Vignette Effect
Vignette Effect is a widely-used effect, mainly known for adding a touch of nostalgia or past to your images and videos, and you can achieve this effortlessly with Wondershare Filmora. This effect allows users to edit their media and capture viewers' attention with its outlook.
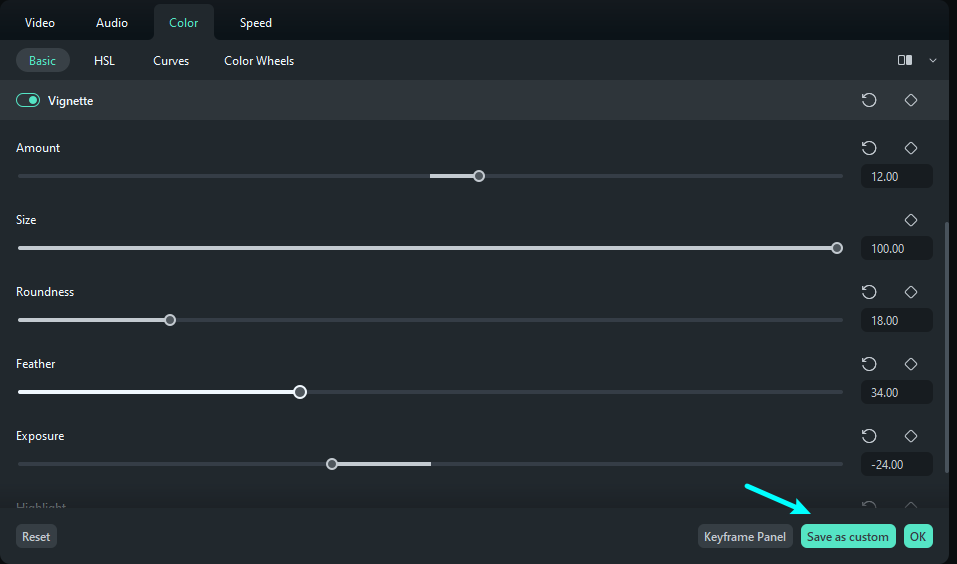
Step 1: Enable the Vignette Effect
Import your media on the timeline and select it, a customization panel will appear. Using your cursor, navigate towards this panel, and under the "Color > Basic" tab, scroll down to locate the "Vignette" effect. Once found, enable it and adjust the settings below as per your video requirements. Users also have the flexibility to customize the parameters under the vignette.
Step 2: Save the Vignette Settings
To re-adjust the vignette parameters, click the "Reset" button to revert the changes. After completing your editing, save your customized settings by clicking the "Save as custom" button at the bottom of the customization panel.
Related Posts
Featured Articles
Rev Voice Recorder Review: Key Features, How to Use, Pros and Cons, Price, and More
If you want to know if the Rev online voice recorder is a good audio recorder or how to use the Rev voice recorder, check this article to figure it out.
How To Create an Eye-Catching Gaming Banner for YouTube
It’s time to enhance your channel with professional designs! Learn how to create a stunning gaming banner for YouTube with free templates and easy steps.
Efficiently Remove Video Captions: Your Guide to Clean Content
Transform your videos! Learn proven techniques to effortlessly remove unwanted captions, ensuring a clean aesthetic and expanded content repurposing opportunities. Get started today.
Recommended User Guide
Pro Video Scopes
Video Scopes is like a track of color elements during color correction and enhancement, and Filmora's new upgrades include pro video scopes for a professional editing experience.
Color Comparison View
While maintaining your content's integrity, Filmora offers dedicated color comparison functionality for clip editing.
Advanced Color Adjustment | Windows
Amongst Filmora's many features for color correcting and adjustment.
