For the Best Results, Use the Latest Version.
-
Preparations
-
Account
-
Get Started & Basic Settings
-
Compatibility & Tech Specs
-
Performance Settings
-
-
Creating Projects
-
Creating New Projects
-
-
Importing & Recording
-
Video Editing for Windows
-
Basic Video Editing
- Enable/Disable Clip in Windows
- Magnetic Timeline for Windows
- Dual Monitor Setup for Video Editing on Windows
- Select All Clips on Timeline for Windows
- Manage Timeline and Tracks on Windows
- Auto Ripple for Windows
- Split & trim video
- Crop & Pan & Zoom Video in Filmora for Windows
- Compositing
- Change Video Speed on Windows
- Playing videos in reverse
- Mark In and Mark Out for Windows
- Markers for Windows
- Group editing
- Customizable Backgrounds for Videos and Images in Windows
- Video snapshot
- Using Freeze Frame in Filmora for Windows
- Logo Reveal For Windows
- Auto Enhance in Filmora for Windows
- Applying drop shadow
- Adjustment layer for Windows
- Apply Transforming for Windows
- Video Editing Ruler – Windows
-
Advanced Video Editing
- Drawing Tools for Windows | Filmora Guide
- Create Multi-Camera Clip in Filmora for Windows
- Compound Clip for Windows
- Multi-Clip Editing for Windows
- Filmora Motion Blur | Windows
- Filmora Flicker Removal Guide | Windows
- Apply mask to video
- Creating a PIP Effect for Windows
- Keyframe Graph Editor for Windows
- Add animation keyframing for Windows
- Keyframe Path Curve for Windows
-
AI-Powered Video Editing
- Smart Scene Cut for Windows
- Smart Short Clips for Windows
- AI Face Mosaic for Windows
- Filmora AI Eye Contact- Windows
- AI Video Enhancer for Windows
- AI Text-to-Video for Windows
- Planar Tracking for Windows
- AI Idea to Video for Windows
- Filmora Image to Video for Windows
- Filmora Image to Prompt for Windows
- Instant Cutter Tool for Windows
- AI Extend
- Filmora AI Relight - Windows
- Filmora AI Image Enhancer Guide - Windows
- AI Script to Video Guide for Windows
- AI Text-Based Editing for Windows
- AI Mate Editing for Windows
- Instant Mode in Filmora
- ChatGPT Plugin - AI Copywriting
- AI Smart Cutout for Windows
- Lens correction on Windows
- Auto Reframe Video for Windows
- AI Portrait Cutout
- Scene detection feature
- AI Smart Masking for Windows
- Motion Tracking on Windows
- Video Stabilization for Windows
- AI Video/Photo Object Remover for Windows
- AI Smart Search for Windows
- AI Skin Tone Protection for Windows
- AI Image for Windows
- Chroma key (green screen)
- Super Slow Motion with Optical Flow for Windows
- Video Denoise for Windows
-
-
Audio Editing for Windows
-
Basic Audio Editing
-
Advanced Audio Editing
-
AI-Powered Audio Editing
- Auto synchronization
- AI Sound Effects in Filmora for Windows
- Smart BGM Generation on Windows
- AI Voice Enhancer in Filmora
- AI Voice Cloning in Wondershare Filmora
- AI Music Generator for Windows
- Audio To Video
- AI Vocal Remover for Windows
- AI Auto Beat Sync for Windows
- AI Audio Stretch for Windows
- AI Audio Denoise for Windows
- Silence Detection on Windows
-
-
Text Editing for Windows
-
Basic Text Editing
-
Advanced Text Editing
-
AI-Powered Text Editing
-
-
Video Customizations
-
Video Effects
-
Audio Effects
-
Transitions
-
Stickers
-
Filters
-
Color Editing
-
Animations
-
Templates
-
Asset Center
-
-
Exporting & Share & Cloud Backup
Transitions for Windows
This creative asset of Filmora helps connect clips and images smoothly, making videos look more professional and visually connected. Filmora for Windows offers a large collection of built-in transitions that can improve scene changes and storytelling. From simple fades to creative motion effects, users can quickly apply, customize, and manage transitions while editing videos.
Steps to Use Transitions in Filmora for Windows
You get the ability to apply multiple transitions in a single video to give the cut between scenes a smoother effect. Follow the steps mentioned below to learn how to apply them:
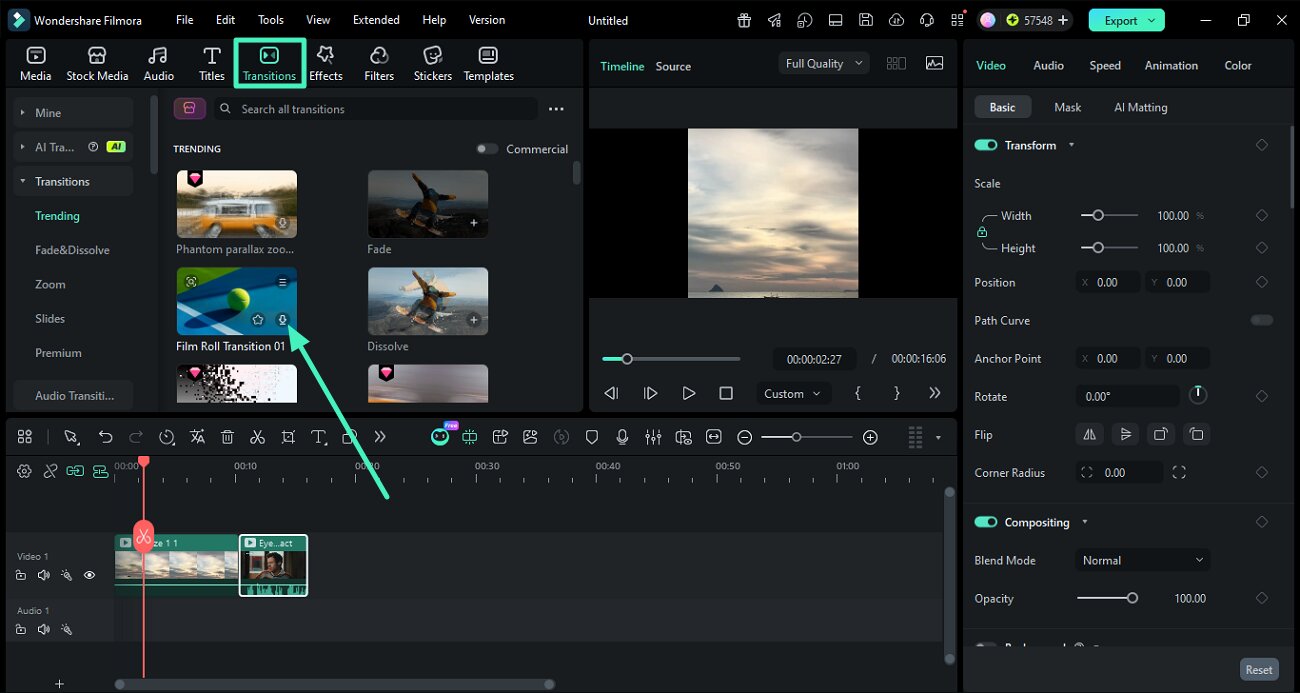
Step 1. Create a New Project
Launch Wondershare Filmora on your Windows computer and click the New Project option from the welcome screen. Now import the video clips and drag them to the editing timeline.
Step 2. Download and Add Transitions
Navigate to the top menu bar and select the Transitions tab to access the transition library. Browse the available transition collection and click the download icon on any transition to save it to your library. After downloading, drag the selected transition to the timeline. You can place it at the beginning or end of a clip or position it between two clips.
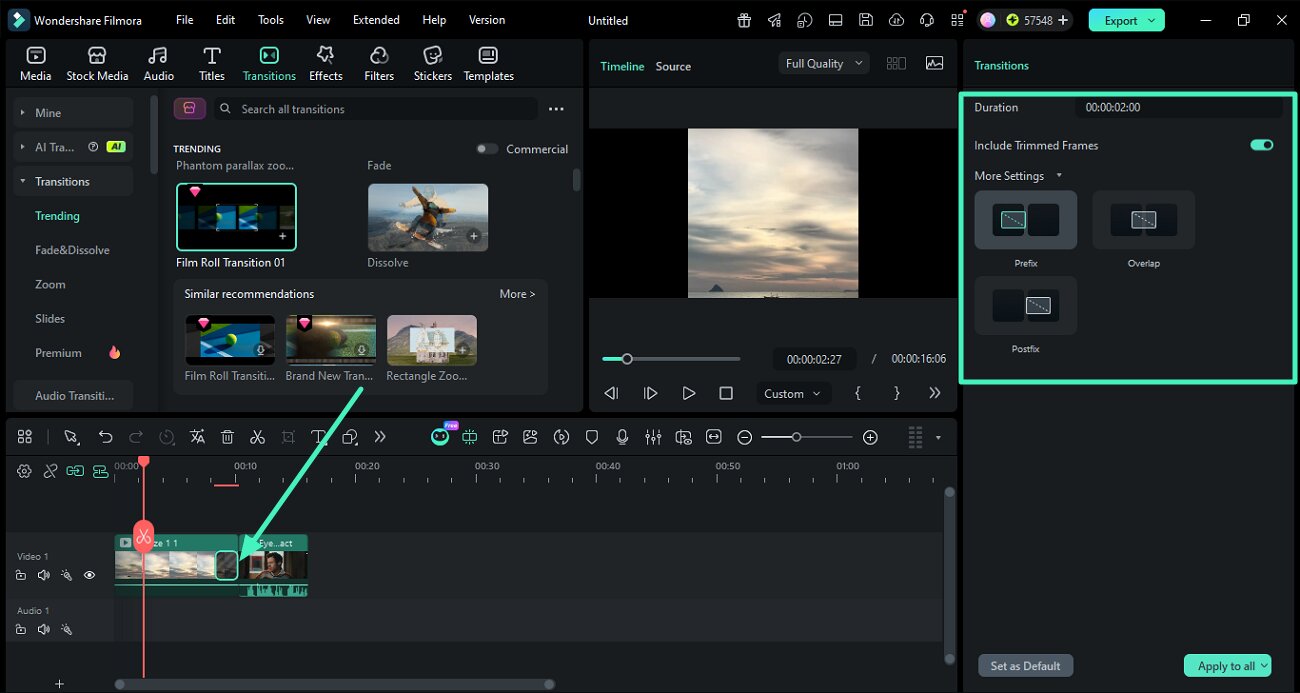
Step 3. Adjust Transition Settings
Once the transition is added to the timeline, double-click it to open the properties panel. From here, you can change the duration and adjust the transition position. Another way to adjust duration is by dragging the starting or ending edge of the transition directly inside the timeline.
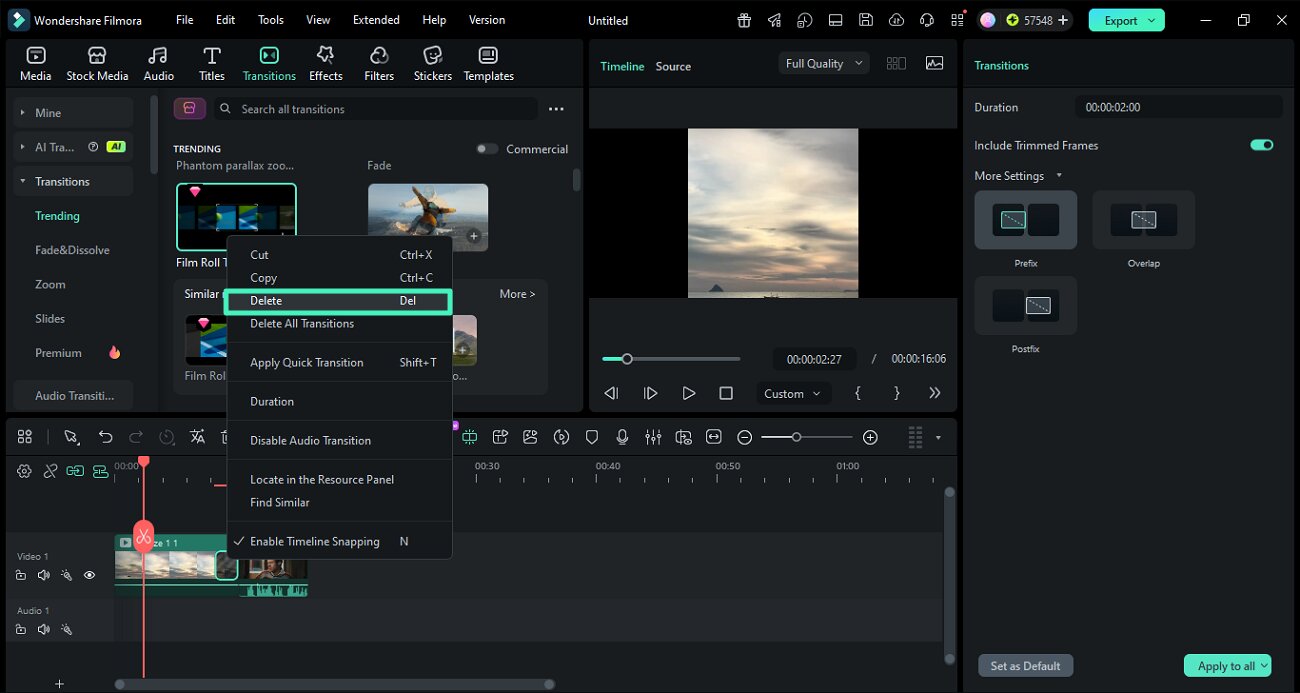
Step 4. Remove Transitions From Clips
To delete a transition, select it from the timeline and press the Delete key on your keyboard. You can also right-click the transition and choose the Delete option from the menu.
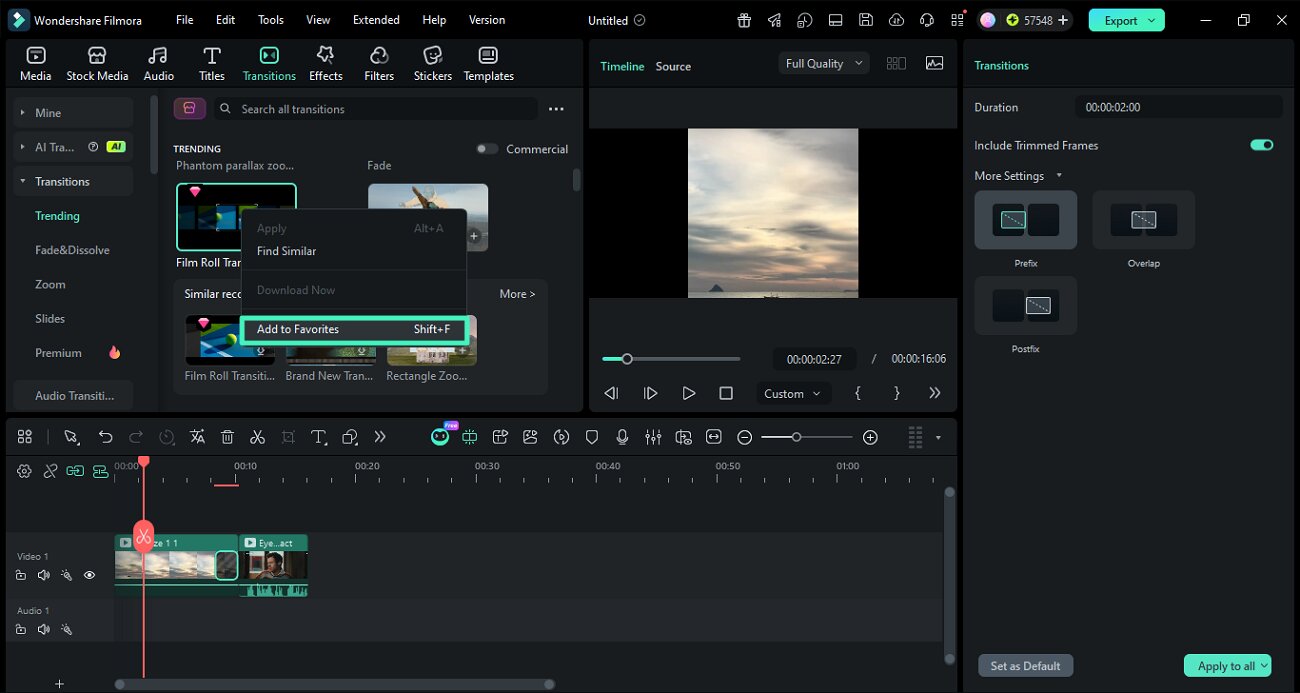
Step 5. Add Transitions to Favorites
To save preferred transitions for future use, right-click a transition in the library and choose Add to Favorites. Once you are satisfied with the applied transitions, save the video to your device using the Export button.
Related Posts
Featured Articles
🌍Earth Day Video For Kids: Easy, Fun Ideas for Classrooms & Homes
As Earth Day is around the corner, it is important to raise awareness to protect the globe among the youth. Read and learn how to make a perfect Earth Day video.🌳
Easy Steps to Convert Twitch Clips to TikTok Videos
Do you want to attract a large Twitch audience using your TikTok account? If the answer is yes, check out this guide to maximize your efficiency and easily create TikTok shorts.
Best 4K Screen Recorders for Any Platforms
Do you want to create high-quality recordings of your screen or camera? Try these seven 4K screen recorders and enjoy superior screen capture on any device.
