For the Best Results, Use the Latest Version.
-
Preparations
-
Account
-
Get Started & Basic Settings
-
Compatibility & Tech Specs
-
Performance Settings
-
-
Creating Projects
-
Creating New Projects
-
-
Importing & Recording
-
Video Editing for Windows
-
Basic Video Editing
- Enable/Disable Clip in Windows
- Magnetic Timeline for Windows
- Drawing Tools fo Windows
- Dual Monitor Setup for Video Editing on Windows
- Select All Clips on Timeline for Windows
- Dual Monitor Setup for Video Editing on Mac
- Manage Timeline and Tracks
- Auto Ripple for Windows
- Split & trim video
- Crop & Pan & Zoom Video
- Compositing
- Change video playback speed
- Playing videos in reverse
- Mark In and Mark Out for Windows
- Markers for Windows
- Group editing
- Customizable Backgrounds for Videos and Images in Windows
- Video snapshot
- Using freeze frame
- Logo Reveal For Windows
- Apply auto enhance
- Applying drop shadow
- Adjustment layer for Windows
- Transforming
- Video Editing Ruler – Windows
-
Advanced Video Editing
-
AI-Powered Video Editing
- Smart Scene Cut for Windows
- Smart Short Clips for Windows
- AI Face Mosaic for Windows
- AI Video Enhancer
- AI Text-to-Video for Windows
- Planar Tracking
- AI Idea to Video for Windows
- Image to Video for Windows
- Instant Cutter Tool for Windows
- AI Extend
- AI Script to Video Guide for Windows
- AI Text-Based Editing for Windows
- AI Mate Editing for Windows
- Create with instant mode
- ChatGPT Plugin - AI Copywriting
- AI Smart Cutout
- Lens correction
- Auto reframe video
- AI Portrait Cutout
- Scene detection feature
- AI Smart Masking for Windows
- Make motion tracking
- Stabilization
- AI Video/Photo Object Remover for Windows
- AI Smart Search for Windows
- AI Skin Tone Protection for Windows
- AI Image for Windows
- Chroma key (green screen)
- Super Slow Motion with Optical Flow for Windows
- Video Denoise for Windows
-
-
Audio Editing for Windows
-
Basic Audio Editing
-
Advanced Audio Editing
-
AI-Powered Audio Editing
-
-
Text Editing for Windows
-
Basic Text Editing
-
Advanced Text Editing
-
AI-Powered Text Editing
-
-
Video Customizations
-
Video Effects
-
Audio Effects
-
Transitions
-
Stickers
-
Filters
-
Color Editing
-
Animations
-
Templates
-
Asset Center
-
-
Exporting & Share & Cloud Backup
AI Smart Cutout
Filmora’s AI Smart Cutout is an advanced feature that uses AI to automatically detect and isolate subjects from video backgrounds, enabling seamless background removal or replacement. It supports precise, dynamic tracking with edge stabilization to prevent drifting when subjects or cameras move.
Users can enhance cutouts by adding customizable borders with various stroke styles, such as glowing or rough edges, to emphasize the subject and add depth. The tool also allows fine-tuning frame-by-frame for flawless results. AI Smart Cutout is ideal for creators seeking professional-quality, creative effects with minimal manual effort and high accuracy.
Apply AI Smart Cutout to Images on Windows
Here are the steps for processing images with smart cutout on Windows.
Step 1: Add the image to the processing interface
Launch Filmora on your computer. Then, drag your required image to the bottom of the interface or select it from the files.
Step 2: Launch the Smart Cutout event
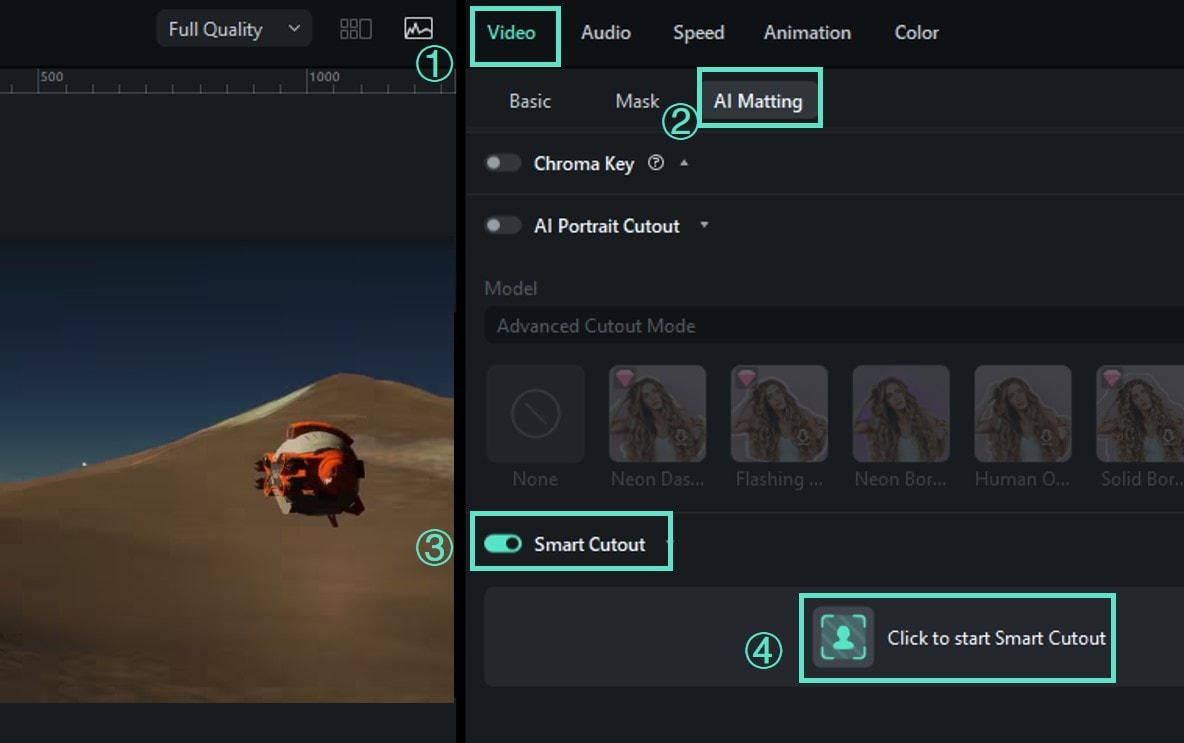
1Click the image on the timeline to launch the settings window.
2Click Image > AI Matting to start a new task.
3Then, click the button beside Smart Cutout to start the function.
4After it, you need to click the Click to start to analyze to process cutout.
Step 3: Draw the section you need
- Use the Brush to draw the area to cut out. A simple line around the edge of the subject is enough for the tool to recognize where you need it.
- If some unwanted areas are selected, you can click the icon, which is an Eraser with a minus to erase them.
- If you have amplified the image and want to move the image for more detailed adjustments, use the Palm.

Step 4: Change the settings
- Simple Mode Setting
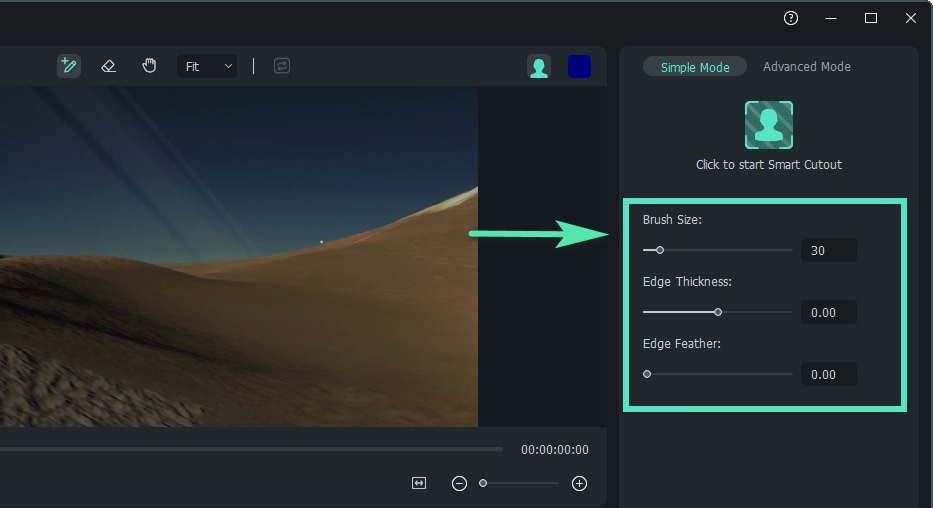
On the right side of the interface, there are settings of Brush Size, Edge Thickness, and Edge Feather.
The Brush Size is used to draw more precisely, with the size ranging from 1 to 300; Edge Thickness is to modify the margin encircling the subject, ranging from -100 to 100; If you want to adjust harsh edges to blend images, you can change the figure of Edge Feather.
- Invert Mask
If you want to retain the background not chosen, you can click the Invert Foreground/Backg icon, as marked in the image below.
- Preview Mode - Background
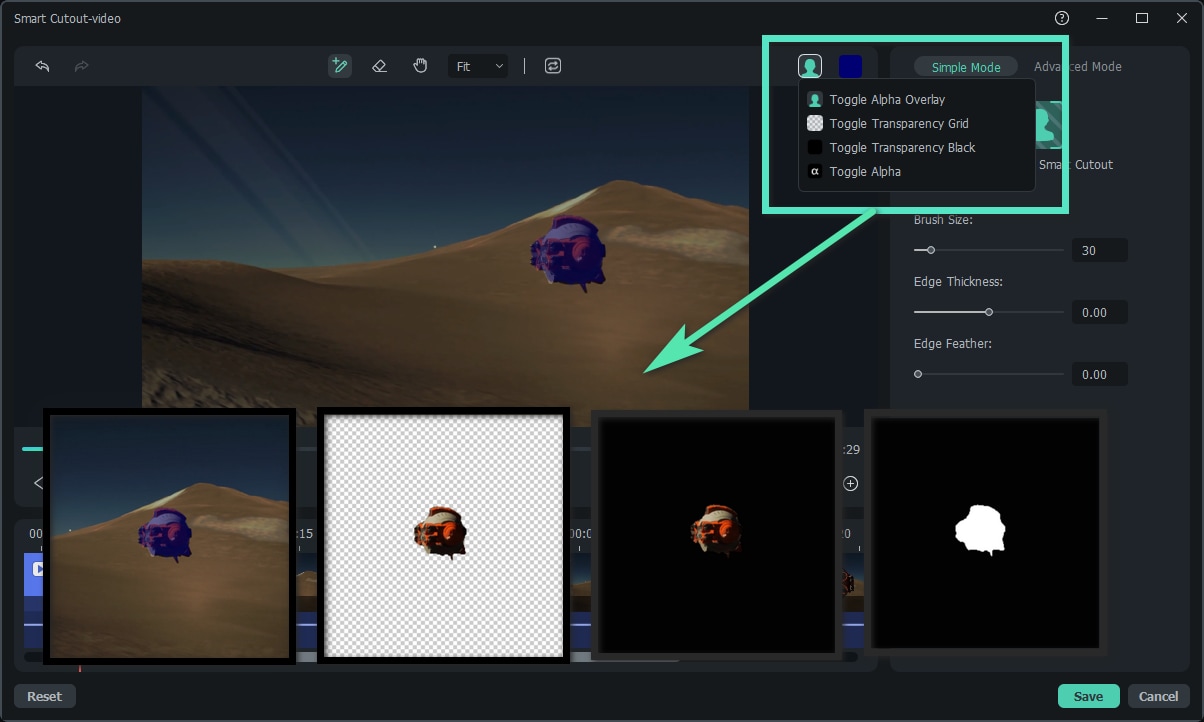
After confirming the selected area, you can set the background of the image. Click the bust icon in the upper right corner of the window and choose from Toggle Alpha Overby, Toggle Transparency Grid, Toggle Transparency Black, or Toggle Alpha. Then, change the edge thickness or the edge feather on the left side of the window if you need.

Step 5: Save the changes
When you are done with the settings, click Save. Then, the effect will be applied to your image automatically.
Apply AI Smart Cutout to Videos on Windows
You can follow the procedures below to remove the background in a video on Windows.
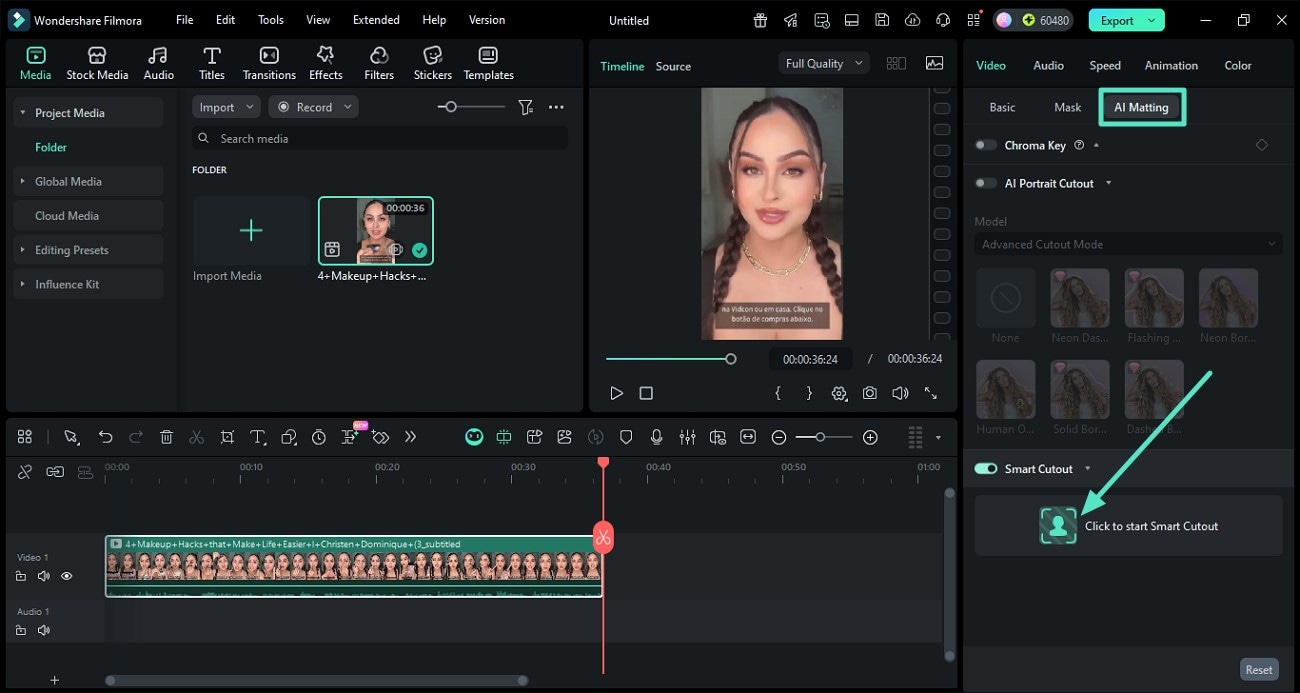
Step 1. Start By Importing a Video and Choosing Smart Cutout
Import the video to the tool’s interface and head to the panel on the right. Next, enable the AI Matting section and locate the Smart Cutout option. Now, turn its toggle on and press the Click to Smart Cutout option.
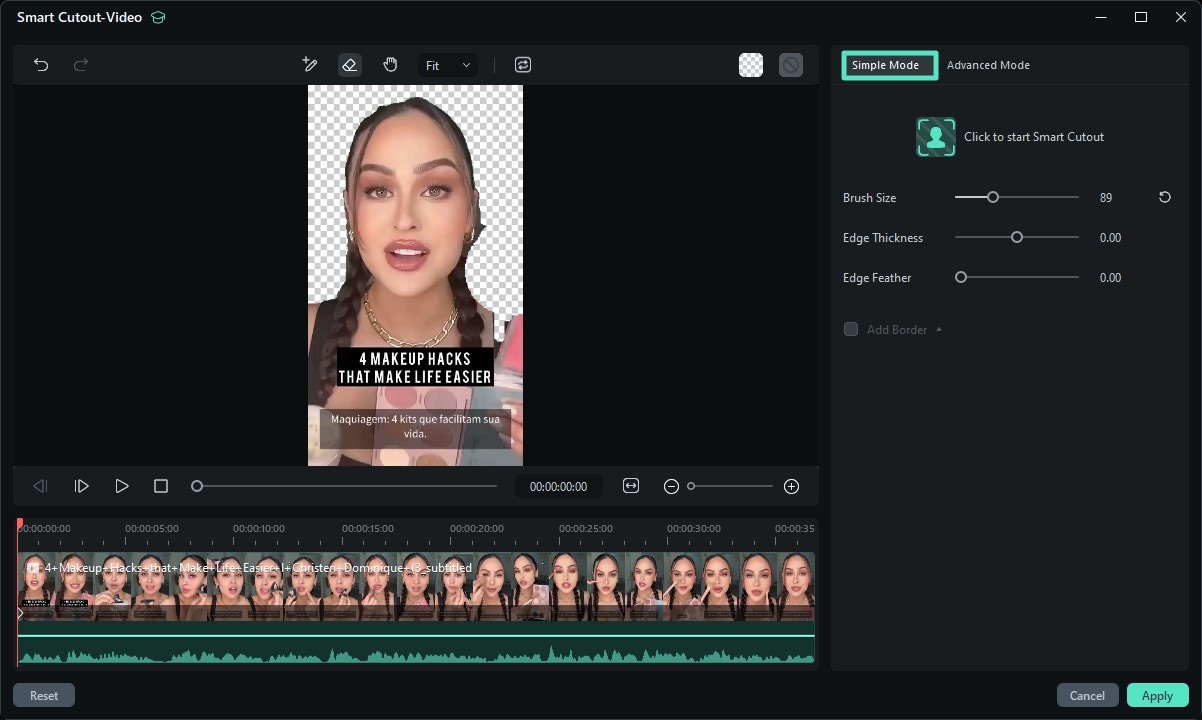
Step 2. Enable Simple Mode
In the following window, enable the Simple Mode on the right and make the selection by dragging the brush over the area. You can adjust the size of the brush according to your preferences.
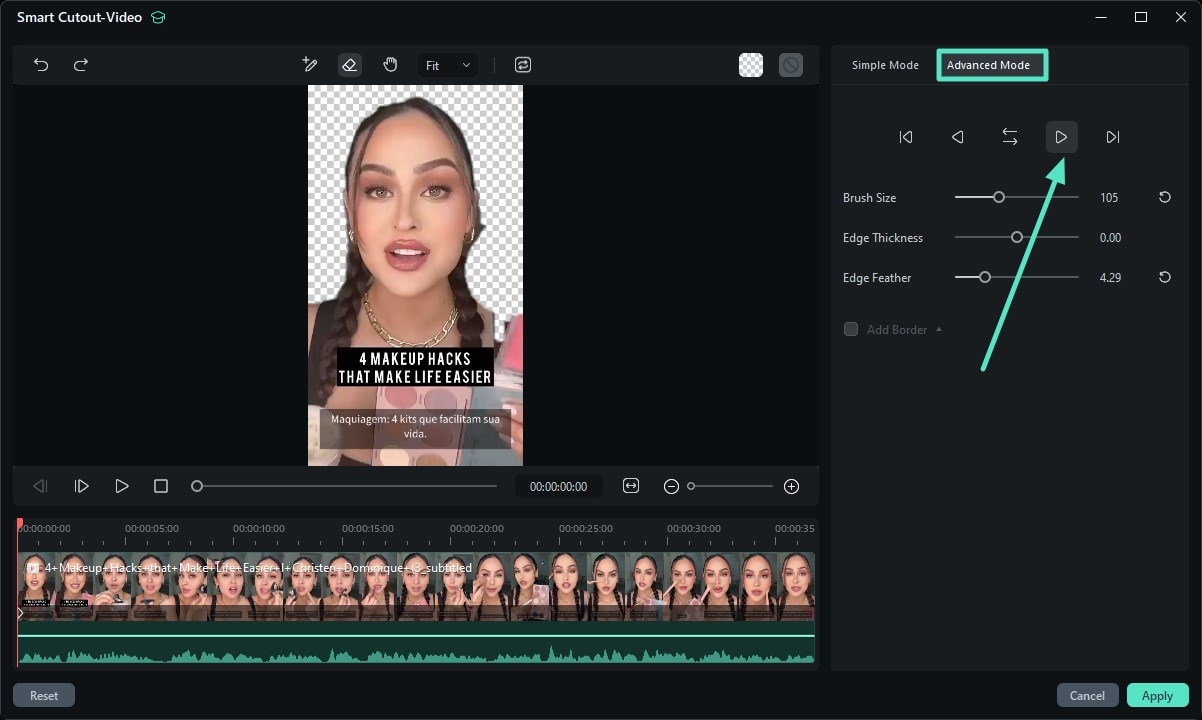
Step 3. Choose Advanced Mode
In the advanced mode, enable the Forward Tracking option for the tool to automatically track the subject in the entire video for isolation.
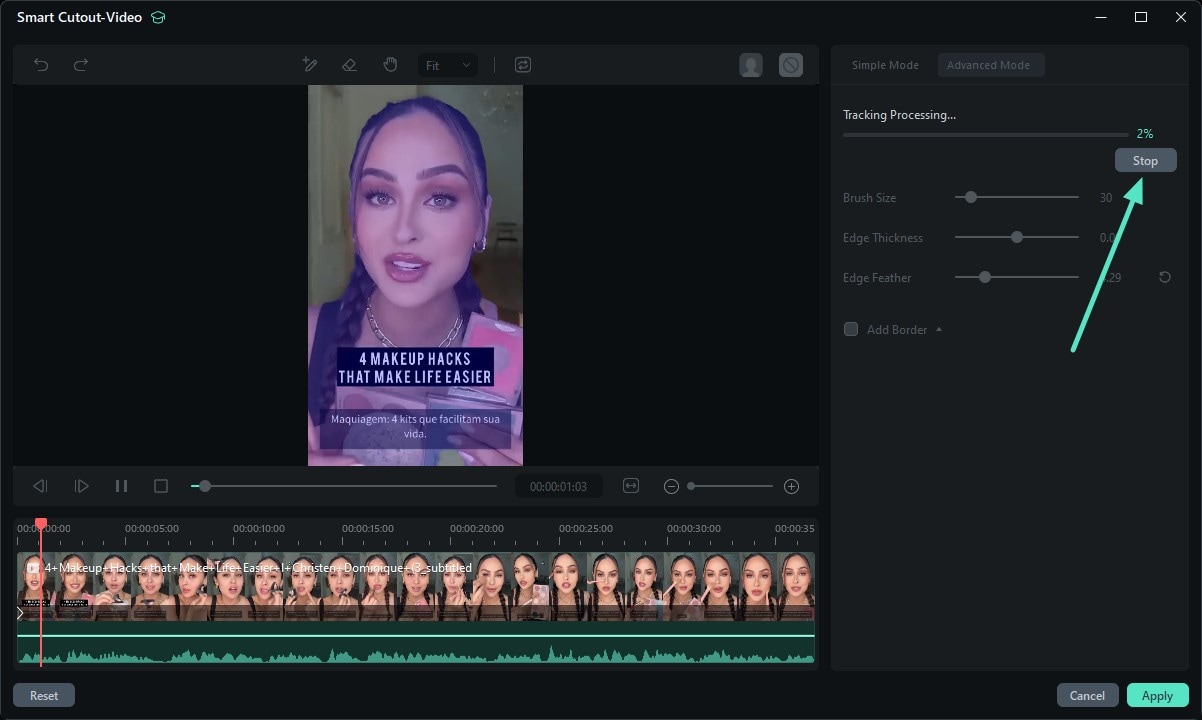
Step 4. Stop Tracking If Required
Preview the tracking progress and press the Stop button if needed.
Step 5. Add Border to the Subject
Once the tracking is completed, enable the Add Border option and choose the order of your choice to apply. Now adjust the Size, Blur, Opacity and other attributes by dragging the slider. Finally, hit the Apply button located at the bottom to save the changes made successfully.
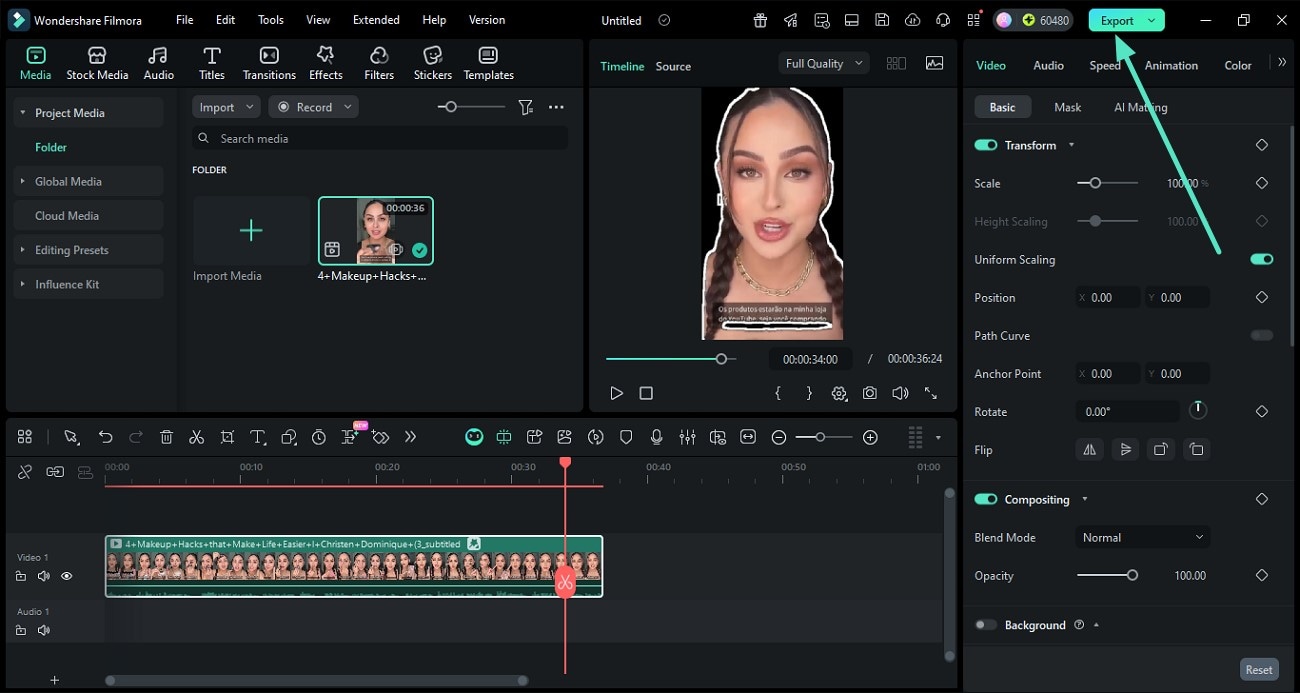
Step 6. Hit Export to Save Results
When the subject is successfully isolated, preview the video and hit the Export button to save the results to your device.
Related Posts
Featured Articles
[2025 Guide] How To Create an Effective Meme Marketing Strategy
In search of ways to make your brand recognizable through light humor on social platforms? Read this article to learn how to create meme marketing videos.
Streamlabs VS OBS: Which One to Choose?
Are you exploring whether to go for Streamlabs or OBS? Well, this article dives into a streamlabs vs OBS comparison to help you make an informed choice.
[Full Guide] Keying in Green Screen in After Effects
Learn how you can use Adobe After Effects to effectively remove green screen from your video and replace it with a different background image. Make your videos versatile and background-ready with this step-by-step guide.
Recommended User Guide
Create with instant mode
No editing skill is needed for using an Instant Mode to create a video. Just add the media you want to show, and Filmora will make a video for you at once. (This feature is only for Windows)
AI Image for Windows
To meet more creative needs of creators, Filmora has added ai content generator technology to the product. You can directly experience the function of generating images from text through AIGC.
AI Text-to-Video for Windows
Wondershare Filmora is an AI-supported desktop tool designed to assist in video editing to its core. Its new V13 upgrade includes many video editing features, and one of them is AI Text-to-Video.
