
For the Best Results, Use the Latest Version.
-
Preparations
-
Account
-
Get Started & Basic Settings
-
Compatibility & Tech Specs
-
Performance Settings
-
-
Creating Projects
-
Creating New Projects
-
-
Importing & Recording
-
Video Editing for Windows
-
Basic Video Editing
- Enable/Disable Clip in Windows
- Magnetic Timeline for Windows
- Dual Monitor Setup for Video Editing on Windows
- Select All Clips on Timeline for Windows
- Timeline and Track Management
- Auto Ripple for Windows
- Split & Trim Video
- Crop & Pan & Zoom Video in Filmora for Windows
- Compositing
- Change Video Speed on Windows
- Reverse Video for Windows
- Mark In and Mark Out for Windows
- Markers for Windows
- Group editing
- Customizable Backgrounds for Videos and Images in Windows
- Video Snapshot
- Using Freeze Frame in Filmora for Windows
- Logo Reveal For Windows
- Auto Enhance in Filmora for Windows
- Applying drop shadow
- Adjustment layer for Windows
- Apply Transforming for Windows
- Video Editing Ruler – Windows
-
Advanced Video Editing
- Keyframe Motion Blur for Windows
- Drawing Tools for Windows | Filmora Guide
- Camera Tracking for Windows
- Create Multi-Camera Clip in Filmora for Windows
- Compound Clip for Windows
- Multi-Clip Editing for Windows
- Filmora Motion Blur | Windows
- 360° Video Reframing for Windows
- Track Matte for Windows
- Video Chapters in Filmora on Windows
- Filmora Flicker Removal Guide | Windows
- Create Multi-Screen Videos in Filmora on Windows
- Masking in Filmora on Windows
- Creating a PIP Effect for Windows
- Keyframe Graph Editor for Windows
- Animation Keyframing for Windows
- Keyframe Path Curve
-
AI-Powered Video Editing
- Smart Scene Cut for Windows
- Smart Short Clips for Windows
- AI Face Mosaic for Windows
- Filmora AI Eye Contact- Windows
- AI Video Enhancer for Windows
- AI Text-to-Video for Windows
- Planar Tracking for Windows
- AI Idea to Video for Windows
- AI Media Analysis for Windows
- Filmora Image to Video for Windows
- Filmora Image to Prompt for Windows
- Instant Cutter Tool for Windows
- AI Extend
- Filmora AI Relight - Windows
- Filmora AI Image Enhancer Guide - Windows
- AI Script to Video Guide for Windows
- AI Text-Based Editing for Windows
- AI Mate Editing for Windows
- Instant Mode for Windows
- ChatGPT Plugin - AI Copywriting
- AI Smart Cutout for Windows
- Lens correction on Windows
- Auto Reframe Video for Windows
- AI Portrait Cutout
- Scene Detection for Windows
- AI Smart Masking for Windows
- Motion Tracking on Windows
- Video Stabilization for Windows
- AI Video/Photo Object Remover for Windows
- AI Smart Search for Windows
- AI Skin Tone Protection for Windows
- AI Image for Windows
- Chroma Key (Green Screen) for Windows
- Super Slow Motion with Optical Flow for Windows
- Video Denoise for Windows
-
-
Audio Editing for Windows
-
Basic Audio Editing
-
Advanced Audio Editing
-
AI-Powered Audio Editing
- Auto synchronization
- AI Sound Effects in Filmora for Windows
- Smart BGM Generation on Windows
- AI Voice Enhancer in Filmora
- AI Voice Cloning in Wondershare Filmora
- AI Music Generator for Windows
- Audio To Video
- AI Vocal Remover for Windows
- AI Auto Beat Sync for Windows
- AI Audio Stretch for Windows
- AI Audio Denoise for Windows
- Silence Detection on Windows
-
-
Text Editing for Windows
-
Basic Text Editing
-
Advanced Text Editing
-
AI-Powered Text Editing
-
-
Video Customizations
-
Video Effects
- Filmora VST3 Plugins for Windows
- Filmora OpenFX Plugins for Windows
- Retouch Guide for Windows
- Filmora Pen Tool Tutorial: Motion Paths & Animation Guide
- Animated Charts
- Mocha Filmora - For Windows
- Different Types of Video Effects
- NewBlue FX effects
- Boris FX effects | Filmora Windows Guide
- Body Effects for Windows
- Filmora -Filmstock Asset
-
Audio Effects
-
Transitions
-
Stickers
-
Filters
-
Color Editing
-
Animations
-
Templates
-
Asset Center
-
-
Exporting & Share & Cloud Backup
AI Thumbnail Creator
Filmora's AI Thumbnail Creator can generate attractive thumbnails for your videos with AI assistance. It analyzes your video frames and takes out some of the best ones as thumbnails. If you want to grab your audience's attention with eye-catching thumbnails, here is your guide:
Index
How to Access AI Thumbnail Creator?
This is your ultimate step-by-step guide to extracting thumbnails from your videos or generating new ones along with AI’s help:
Method 1: Using the Export Window
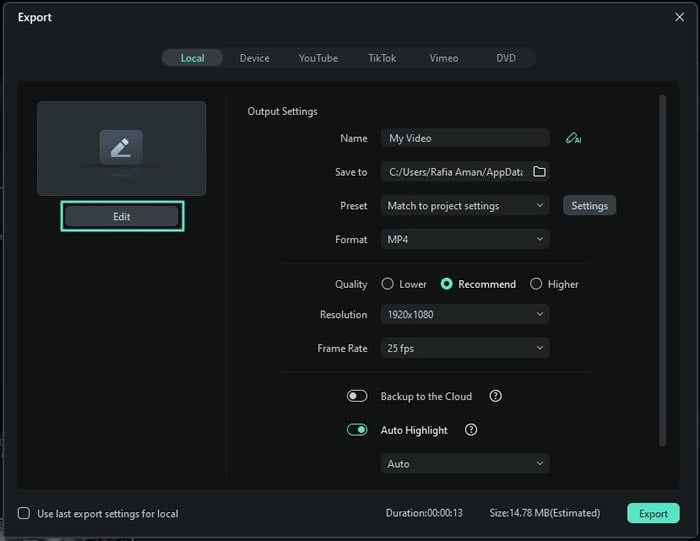
After editing your video completely with Wondershare Filmora, click the "Export" button. The export window will appear; click the "Edit" button at the left top corner of this window. This will take you to the thumbnail generator window.
Method 2: From the Project Info Panel
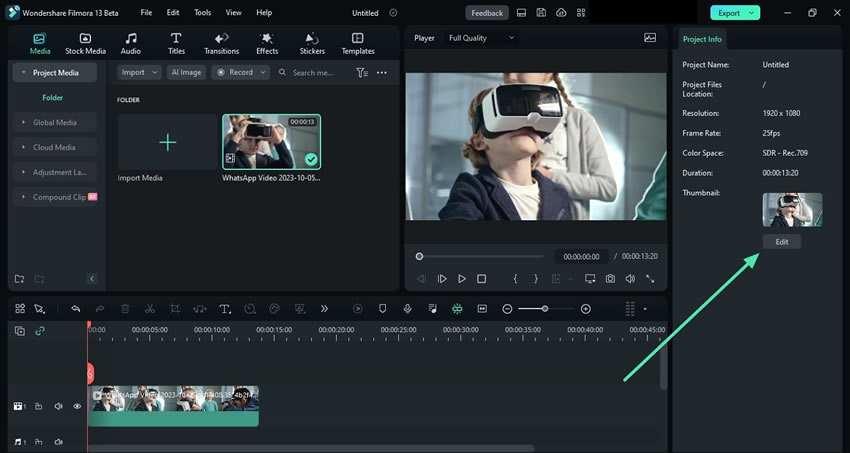
After editing your content, click anywhere in the timeline other than the media clip, and a panel named "Project Info" will appear at the right. From this panel, click the "Edit" button. This will take you to the "Set Thumbnail" window, from where you can generate thumbnails from your video in the "Video" tab and export it in the same manner above.
How to Generate a Video Thumbnail With Filmora?
Step 1: Choose a Frame as a Thumbnail
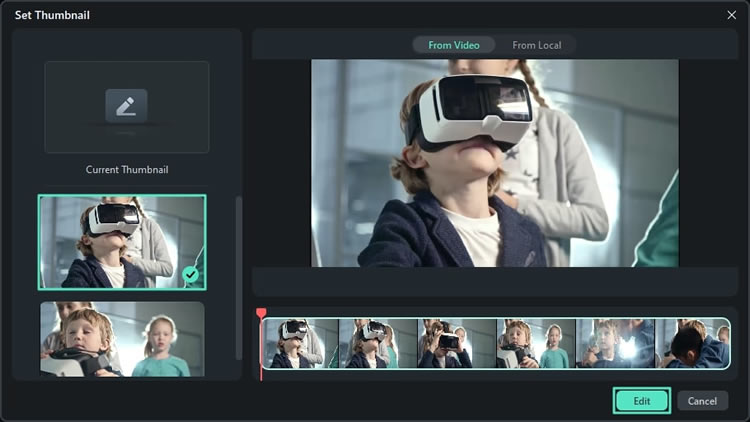
After accessing the thumbnail generator, navigate towards the left. There, AI is showing the best-fitted frames from video as thumbnails. Select the frame you like and click "Edit".
Step 2: Choose a Template
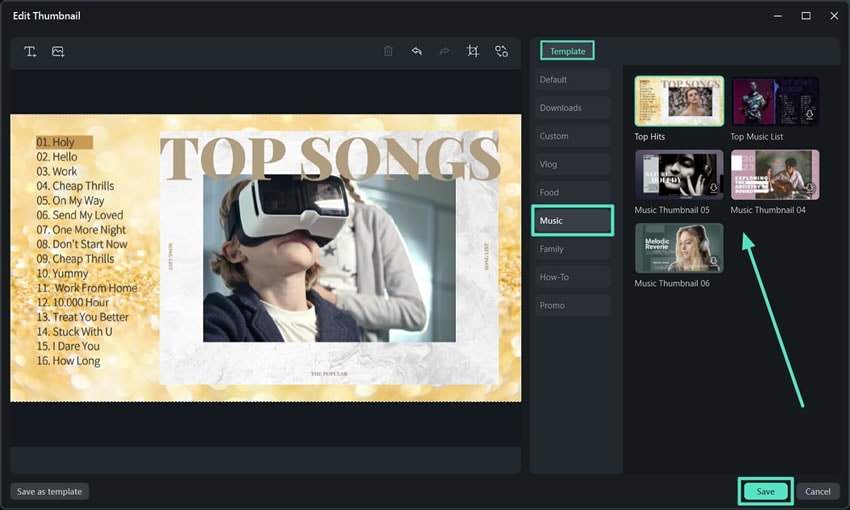
Another editing window will appear where you can enhance your thumbnail. It has built-in AI templates for different categories to fit yours perfectly. Select a category, choose a template from the given options, and click "Save".
Step 3: Export the Thumbnail
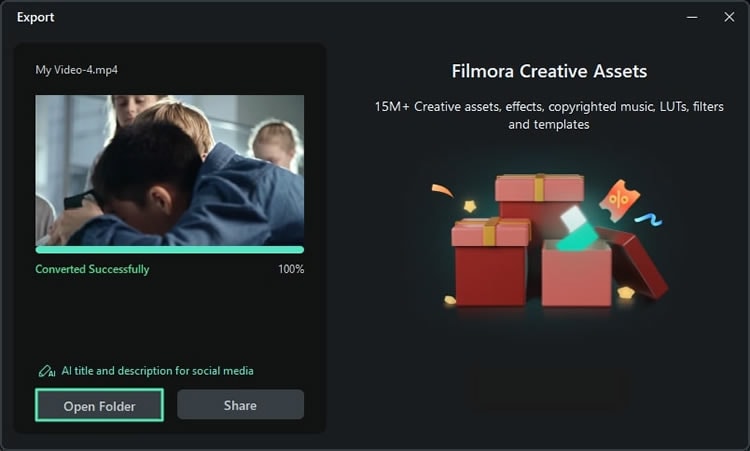
Following that, the export window will appear again. Click the "Export" button, and the AI will convert this selected video frame into a thumbnail image so the conversion will start. After its completion, click on the "Open Folder" option to see the AI thumbnail.
How to Generate a Local Thumbnail with Filmora?
Sometimes, you want a different and creative outlook for your thumbnail. That is when you generate it from a local source; read below to learn how to do that step-by-step:
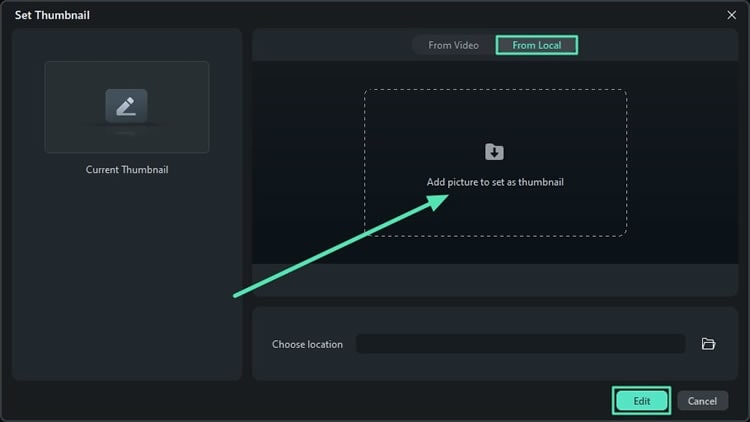
Step 1: Select the Local Option
Once you have edited your video, click "Export "and select the "From Local" tab from the top of the respective window. Click on the "Add picture to set as thumbnail"and import a picture from your device. Once the picture is added, click "Edit" to proceed further.
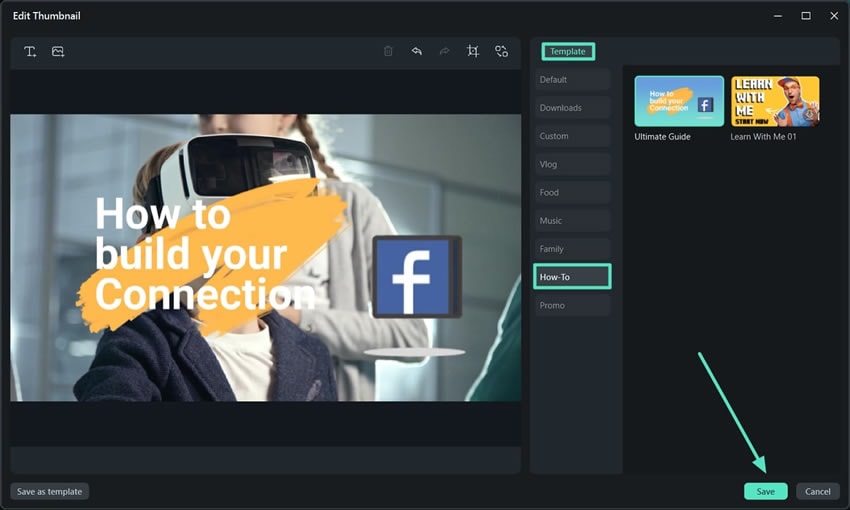
Step 2: Set a Suitable Template
A new window will appear where you can select the template for your video. Furthermore, you can also make several adjustments to your image, like cropping or replacing it with another picture. Then click the "Save" button for further processing.
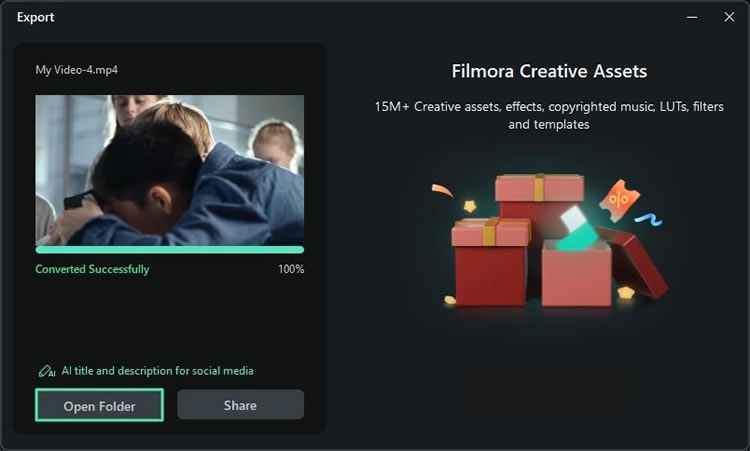
Step 3: Export the Thumbnail
By doing this, you'll be directed towards the export window again; click "Export" to finalize. The conversion will start, and you can see the progress on screen. When the conversion process completes, click the "Open Folder" button to view the final results.
Related Posts
Featured Articles
How to Turn Text Into Speech Using Your Own Voice
Looking to level up your content? Transform text into speech with your own voice. This option is perfect for creators who want to sound unique, real, and unforgettable.
LinkedIn Video Ads: Specs, Examples, and a Step-by-Step Creation Guide
Boost your business with LinkedIn video ads. Learn the specs, see examples, and follow this step-by-step guide. Create campaigns that elevate brand awareness and drive results.
How To Make Glowing Text Effect In Premiere Pro [2026]
Discover how to create glow text Premiere Pro effects with our easy guide. Transform your videos and learn the techniques now!
Recommended User Guide
Exporting for Windows
Learn how to export videos in Filmora for Windows locally or to YouTube, TikTok, and Vimeo, and save projects as XML or export multiple clips.
Auto Highlight
This is a guide about the auto highlight feature in Filmora.
