For the Best Results, Use the Latest Version.
-
Preparations
-
Account
-
Get Started & Basic Settings
-
Compatibility & Tech Specs
-
Performance Settings
-
-
Creating Projects
-
Creating New Projects
-
-
Importing & Recording
-
Video Editing for Windows
-
Basic Video Editing
- Enable/Disable Clip in Windows
- Magnetic Timeline for Windows
- Dual Monitor Setup for Video Editing on Windows
- Select All Clips on Timeline for Windows
- Manage Timeline and Tracks on Windows
- Auto Ripple for Windows
- Split & trim video
- Crop & Pan & Zoom Video
- Compositing
- Change video playback speed
- Playing videos in reverse
- Mark In and Mark Out for Windows
- Markers for Windows
- Group editing
- Customizable Backgrounds for Videos and Images in Windows
- Video snapshot
- Using freeze frame
- Logo Reveal For Windows
- Apply auto enhance
- Applying drop shadow
- Adjustment layer for Windows
- Transforming
- Video Editing Ruler – Windows
-
Advanced Video Editing
- Drawing Tools for Windows | Filmora Guide
- Create Multi-Camera Clip
- Compound Clip for Windows
- Multi-Clip Editing for Windows
- Filmora Flicker Removal Guide | Windows
- Apply mask to video
- Creating a PIP effect
- Keyframe Graph Editor for Windows
- Add animation keyframing for Windows
- Keyframe Path Curve for Windows
-
AI-Powered Video Editing
- Smart Scene Cut for Windows
- Smart Short Clips for Windows
- AI Face Mosaic for Windows
- Filmora AI Eye Contact- Windows
- AI Video Enhancer for Windows
- AI Text-to-Video for Windows
- Planar Tracking for Windows
- AI Idea to Video for Windows
- Filmora Image to Video for Windows
- Filmora Image to Prompt for Windows
- Instant Cutter Tool for Windows
- AI Extend
- Filmora AI Relight - Windows
- Filmora AI Image Enhancer Guide - Windows
- AI Script to Video Guide for Windows
- AI Text-Based Editing for Windows
- AI Mate Editing for Windows
- Create with instant mode
- ChatGPT Plugin - AI Copywriting
- AI Smart Cutout
- Lens correction on Windows
- Auto reframe video
- AI Portrait Cutout
- Scene detection feature
- AI Smart Masking for Windows
- Make motion tracking
- Video Stabilization for Windows
- AI Video/Photo Object Remover for Windows
- AI Smart Search for Windows
- AI Skin Tone Protection for Windows
- AI Image for Windows
- Chroma key (green screen)
- Super Slow Motion with Optical Flow for Windows
- Video Denoise for Windows
-
-
Audio Editing for Windows
-
Basic Audio Editing
-
Advanced Audio Editing
-
AI-Powered Audio Editing
-
-
Text Editing for Windows
-
Basic Text Editing
-
Advanced Text Editing
-
AI-Powered Text Editing
-
-
Video Customizations
-
Video Effects
-
Audio Effects
-
Transitions
-
Stickers
-
Filters
-
Color Editing
-
Animations
-
Templates
-
Asset Center
-
-
Exporting & Share & Cloud Backup
AI Motion Blur for Windows
Filmora’s AI Motion Blur feature helps add smooth and natural-looking motion effects to fast-moving footage with just a single click. Designed to make movement appear more cinematic and realistic, the tool automatically creates soft motion trails that reduce rigid or choppy visuals in action scenes, gameplay clips, sports videos, and dynamic camera movements.
Whether you are working with panning shots, zoom effects, rotations, or tracking scenes, AI Motion Blur improves viewing comfort while enhancing the overall visual quality.
Steps to Use AI Motion Blur in Filmora
This feature also provides flexible controls for adjusting Blur Intensity, Blur Range, and Motion Direction to match different creative styles and editing needs. To learn how to use this feature read the steps mentioned below:
Index
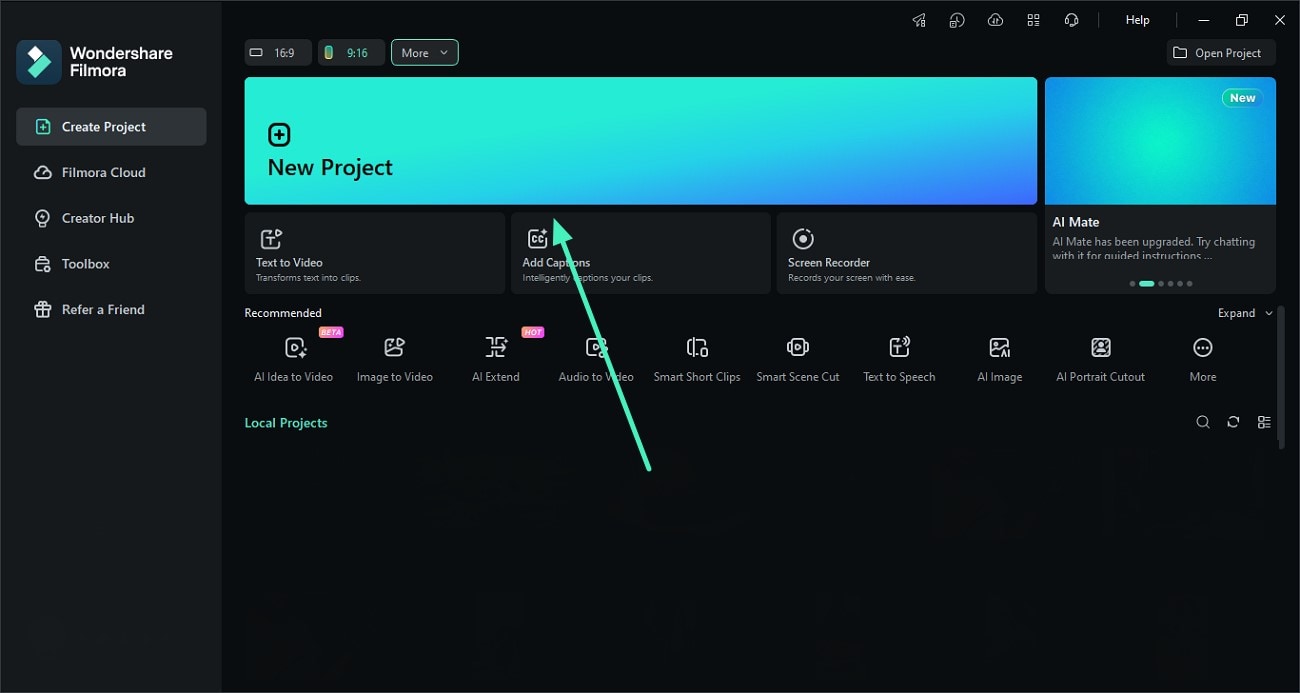
Step 1. Open New Project Import Video
Launch Filmora on your device and create a New Project. Import the video into the media library and drag it onto the editing timeline.
Step 2. Enable the AI Motion Blur Feature
Turn on the AI Motion Blur toggle to let Filmora automatically apply motion blur effects to fast-moving elements in the footage.
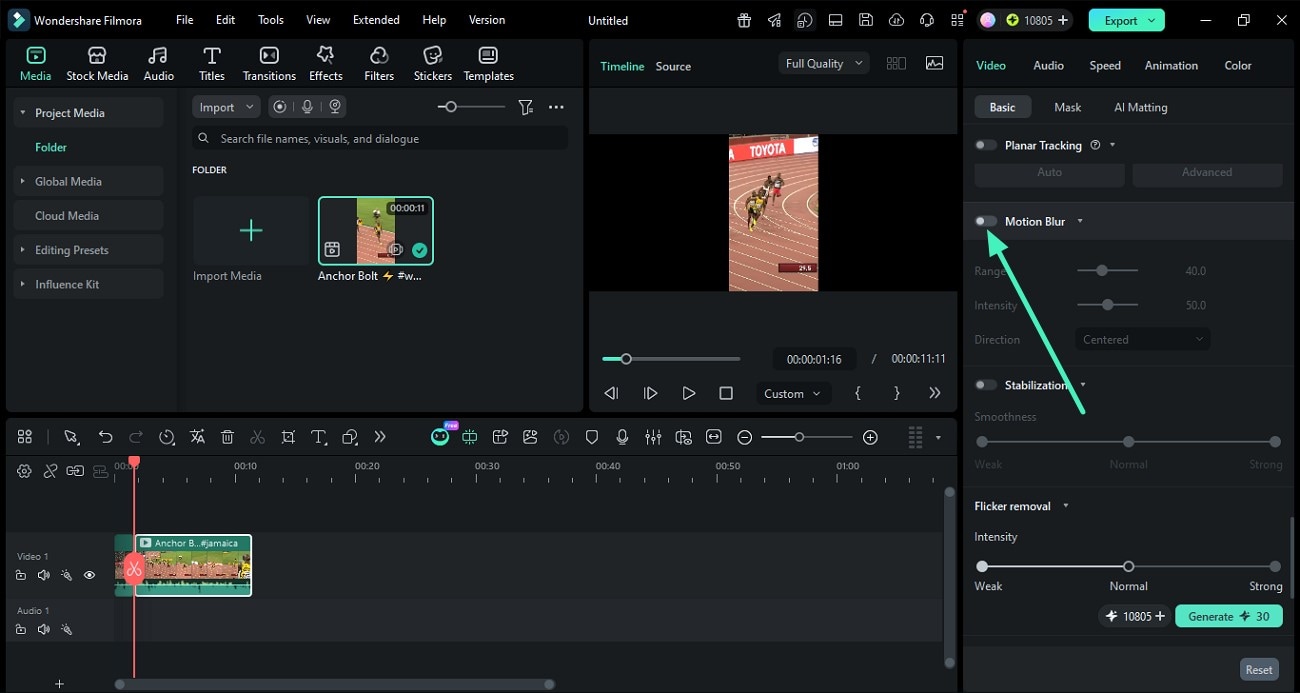
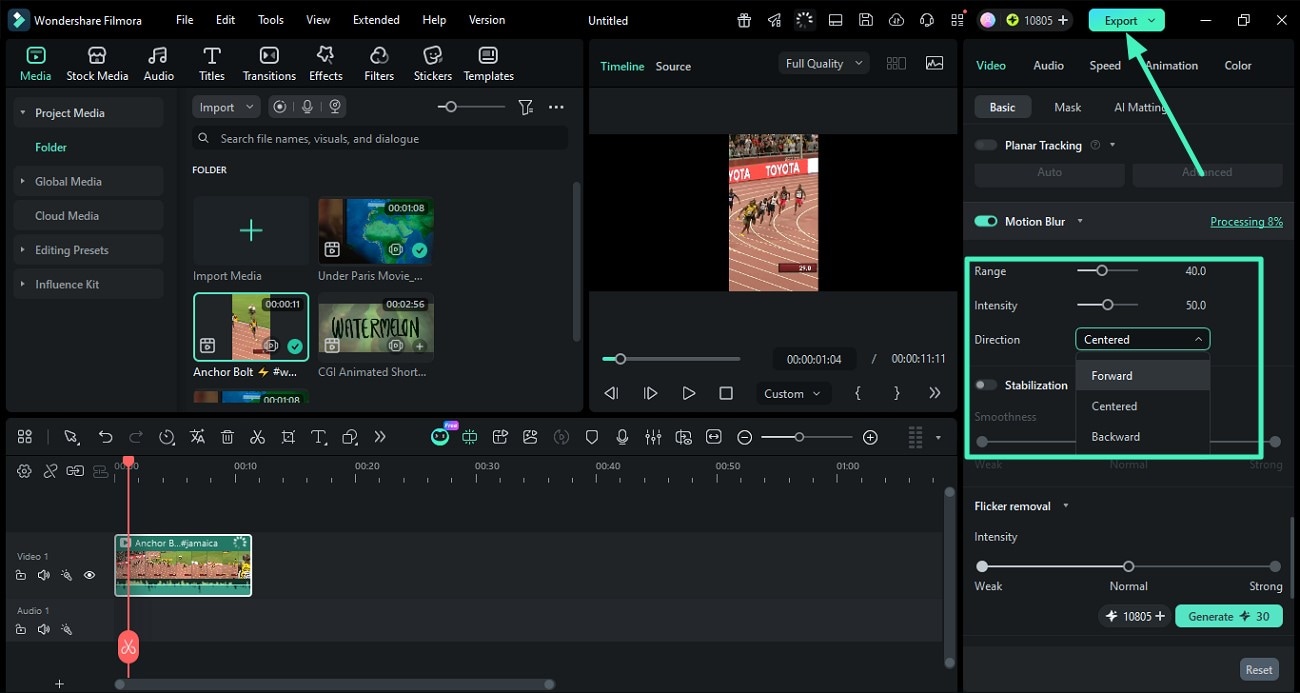
Step 3. Adjust Blur Range and Intensity
Use the Range slider to control the spread of the blur effect and adjust the Intensity slider to define how strong the motion blur appears in the video. Expand the Direction drop-down menu and select the preferred motion style. Once the adjustments are complete, preview the enhanced motion effect within the player window. If satisfied with the results, click the Export button to save the final video.
Related Posts
Featured Articles
How To Add Objects to Videos With AI
Learn how to add objects to videos with AI using a new feature, similar to Kling, that lets you insert, swap, or delete elements effortlessly.
Repurpose Video with AI for Social Media | 4 Ways
Repurposing video content for different platforms doesn’t need to be complex if you are using AI tools like Filmora Smart Short Clips. Learn how to maximize your content’s reach with minimal effort here.
The 10 Best Video Editing Software to Edit Videos Like a Pro
This guide will help you learn more about the 10 best editing software tools for top-grade videography. Find out more about their features, compatibility, user ratings, strengths, weaknesses, and pricing plans.
Recommended User Guide
Create with instant mode
No editing skill is needed for using an Instant Mode to create a video. Just add the media you want to show, and Filmora will make a video for you at once. (This feature is only for Windows)
ChatGPT Plugin - AI Copywriting
Auto-generate your video scripts, captions, descriptions, and more with ChatGPT in Filmora
AI Skin Tone Protection for Windows
Flawless skin has become the ultimate symbol of perfection, and hence, keeping that in mind, Wondershare Filmora has come up with the perfect feature.
