For the Best Results, Use the Latest Version.
-
Preparations
-
Account
-
Get Started & Basic Settings
-
Compatibility & Tech Specs
-
Performance Settings
-
-
Creating Projects
-
Creating New Projects
-
-
Importing & Recording
-
Video Editing for Windows
-
Basic Video Editing
- Enable/Disable Clip in Windows
- Magnetic Timeline for Windows
- Dual Monitor Setup for Video Editing on Windows
- Select All Clips on Timeline for Windows
- Manage Timeline and Tracks on Windows
- Auto Ripple for Windows
- Split & trim video
- Crop & Pan & Zoom Video
- Compositing
- Change video playback speed
- Playing videos in reverse
- Mark In and Mark Out for Windows
- Markers for Windows
- Group editing
- Customizable Backgrounds for Videos and Images in Windows
- Video snapshot
- Using freeze frame
- Logo Reveal For Windows
- Apply auto enhance
- Applying drop shadow
- Adjustment layer for Windows
- Transforming
- Video Editing Ruler – Windows
-
Advanced Video Editing
- Drawing Tools for Windows | Filmora Guide
- Create Multi-Camera Clip
- Compound Clip for Windows
- Multi-Clip Editing for Windows
- Filmora Motion Blur | Windows
- Filmora Flicker Removal Guide | Windows
- Apply mask to video
- Creating a PIP effect
- Keyframe Graph Editor for Windows
- Add animation keyframing for Windows
- Keyframe Path Curve for Windows
-
AI-Powered Video Editing
- Smart Scene Cut for Windows
- Smart Short Clips for Windows
- AI Face Mosaic for Windows
- Filmora AI Eye Contact- Windows
- AI Video Enhancer for Windows
- AI Text-to-Video for Windows
- Planar Tracking for Windows
- AI Idea to Video for Windows
- Filmora Image to Video for Windows
- Filmora Image to Prompt for Windows
- Instant Cutter Tool for Windows
- AI Extend
- Filmora AI Relight - Windows
- Filmora AI Image Enhancer Guide - Windows
- AI Script to Video Guide for Windows
- AI Text-Based Editing for Windows
- AI Mate Editing for Windows
- Create with instant mode
- ChatGPT Plugin - AI Copywriting
- AI Smart Cutout
- Lens correction on Windows
- Auto reframe video
- AI Portrait Cutout
- Scene detection feature
- AI Smart Masking for Windows
- Make motion tracking
- Video Stabilization for Windows
- AI Video/Photo Object Remover for Windows
- AI Smart Search for Windows
- AI Skin Tone Protection for Windows
- AI Image for Windows
- Chroma key (green screen)
- Super Slow Motion with Optical Flow for Windows
- Video Denoise for Windows
-
-
Audio Editing for Windows
-
Basic Audio Editing
-
Advanced Audio Editing
-
AI-Powered Audio Editing
-
-
Text Editing for Windows
-
Basic Text Editing
-
Advanced Text Editing
-
AI-Powered Text Editing
-
-
Video Customizations
-
Video Effects
-
Audio Effects
-
Transitions
-
Stickers
-
Filters
-
Color Editing
-
Animations
-
Templates
-
Asset Center
-
-
Exporting & Share & Cloud Backup
Windows Panel Layout
Wondershare Filmora is now equipped with four types of panel layouts and even more layout models to unleash your creativity. Read more to learn what's new and changed with Filmora's latest version on Windows.
Index
1. What's New
Filmora 12/13/14 is now equipped with a new addition to its layout called the Property Panel.
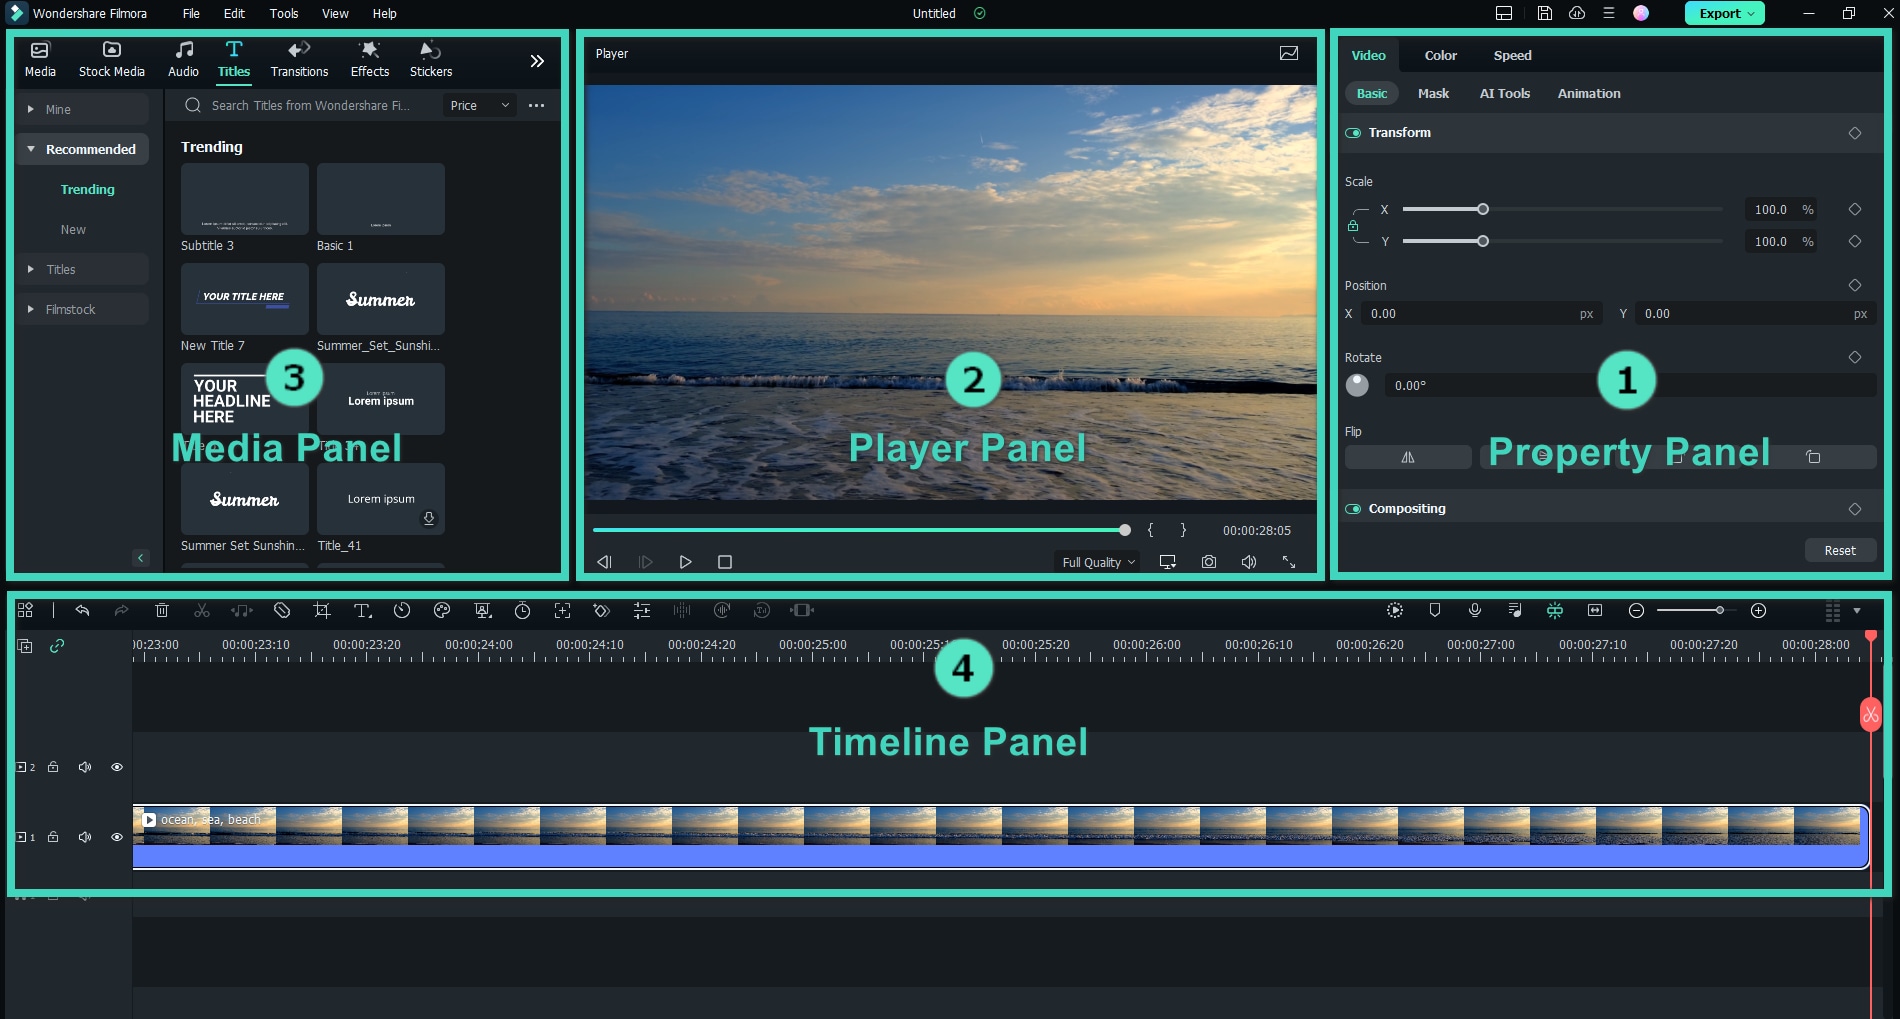
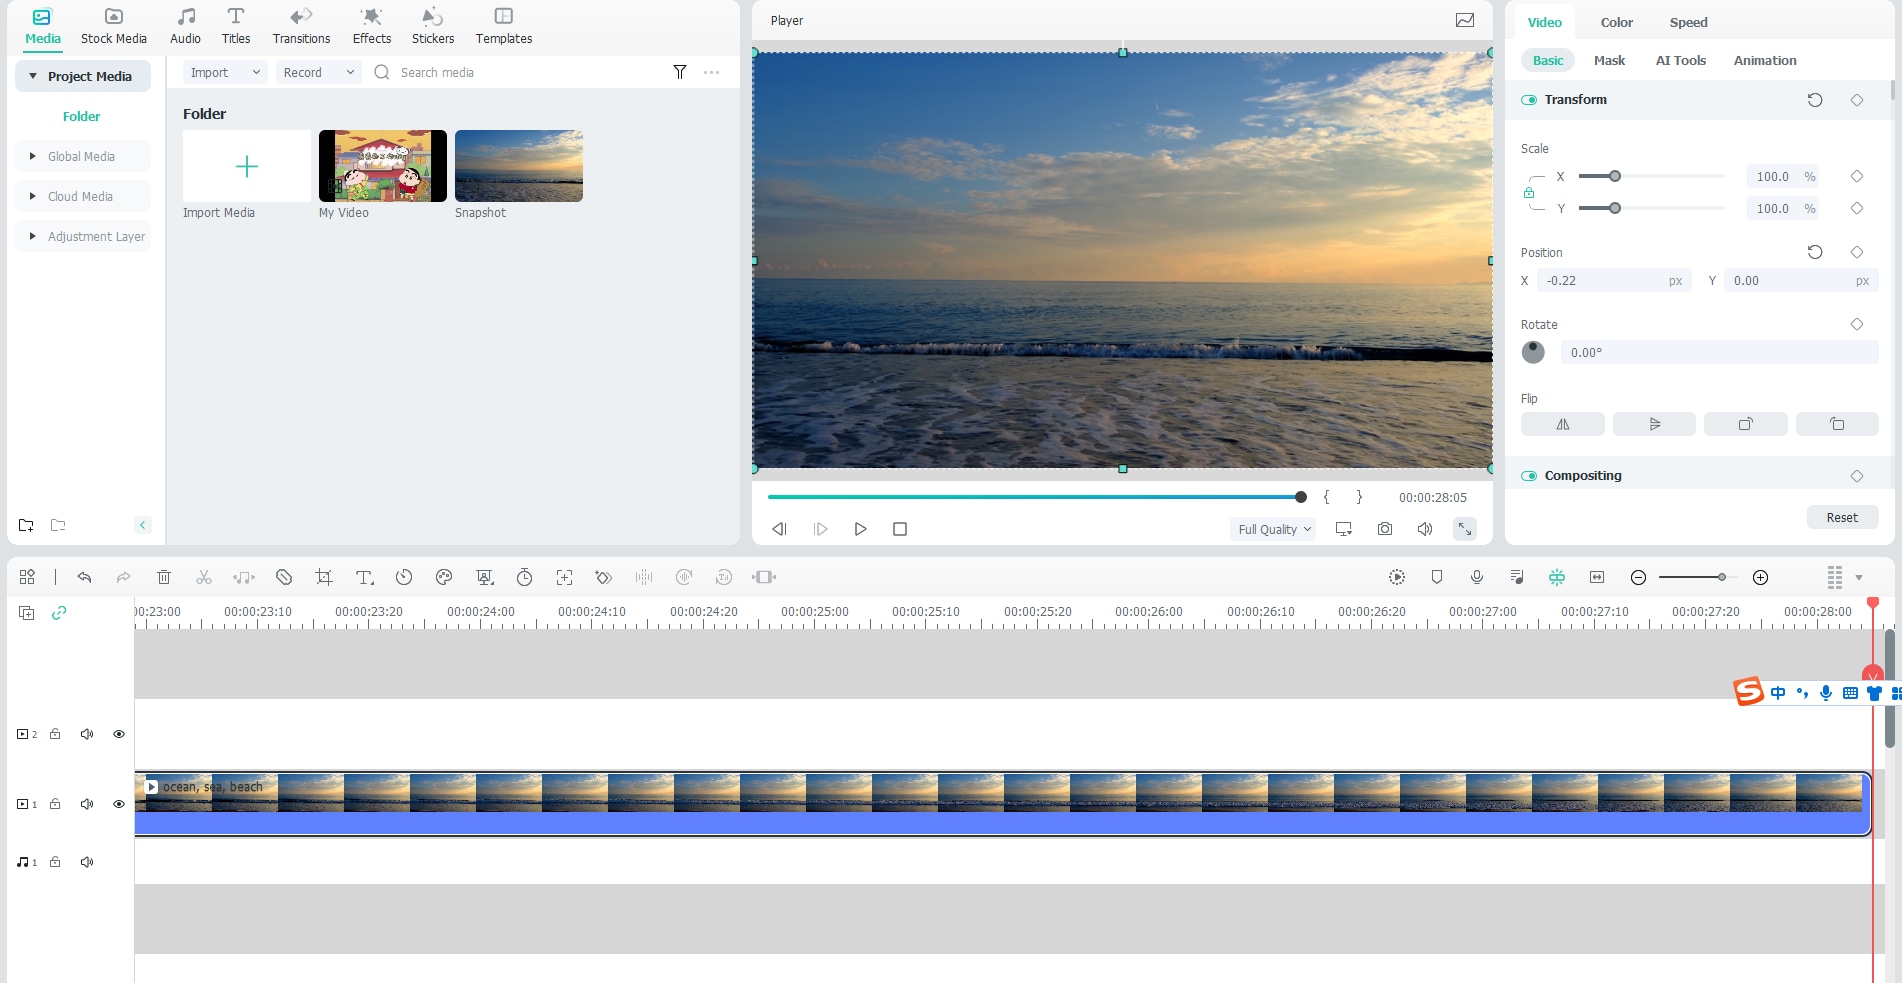
2. Property Panel
The Property Panel shows you all relevant information on your project to display your clip's video, audio, color, and speed properties in the Timeline Panel or Preview Window. This makes all the info readily available so you can make adjustments when editing on the spot.
3. Player Panel/Preview Window
The Player Panel (Preview Window) shows you how the video plays in the Timeline. This is where you can adjust different settings, such as:
• Playback quality and display settings
• Capture a snapshot of the video
• Mark in and Mark out
The Player Panel can also be used as an independent panel or replaced with the default position by simply dragging the panel.
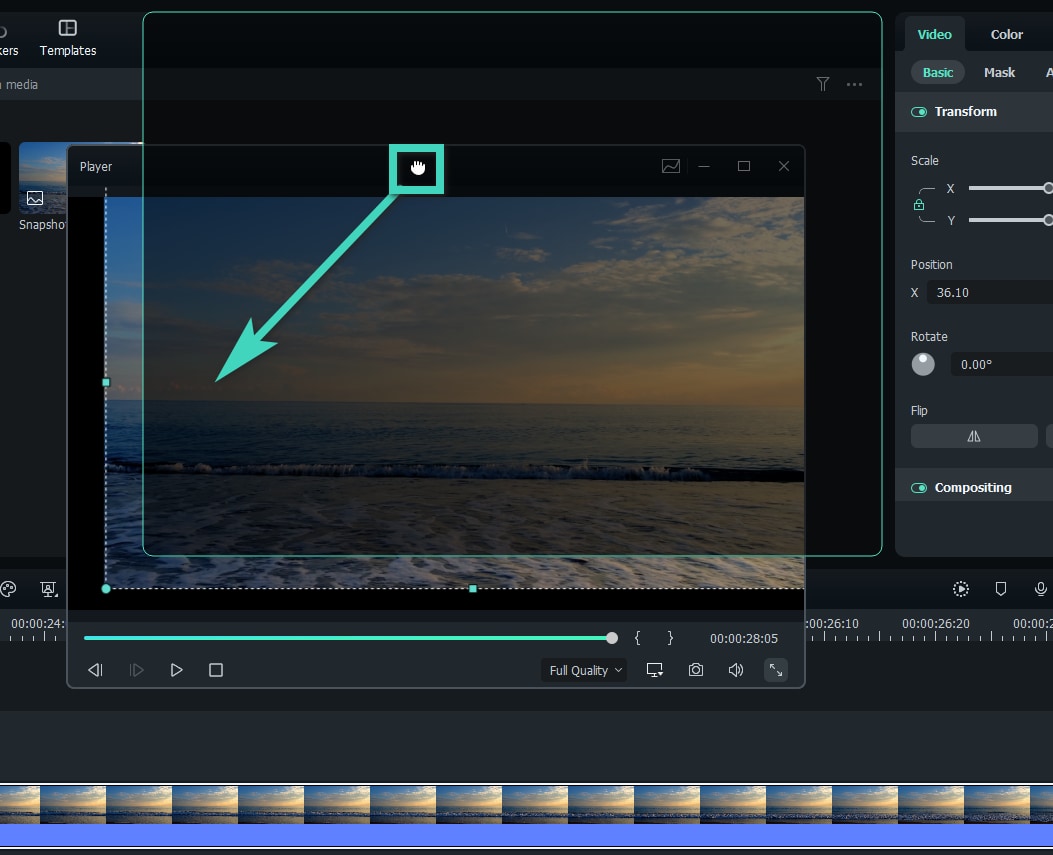
Note:
Underneath the time code is the Snapshot button. Snapshot lets you take a full-resolution still frame and automatically saves the picture to your Media Library as an image.
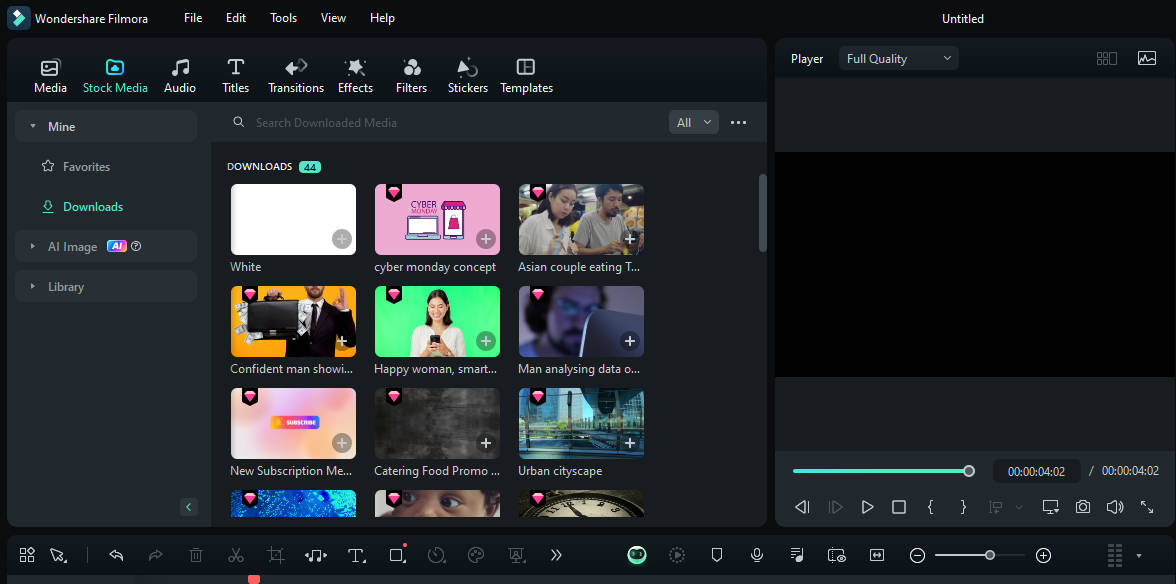
4. Media Panel
Also called your "Media Library," the Media Panel will display all your imported source files when creating a project.
Here is a brief introduction to the functions:
• Media: Where your media files are imported.
• Stock Media: Choose royalty-free stock media from GIPHY/Pixabay/Unsplash.
• Audio: Explore Filmora's audio files.
• Titles: Choose between available preset titles to use on your video.
• Transitions: Make your project eye-catching by using different Transitions.
• Effects: Choose eye-popping effects for your video.
• Stickers: Add elements to your projects like Stickers.
• Templates: Allows you to split screen videos with preset Templates.
5. Timeline Panel
The Timeline Panel is where you unleash your creativity by assembling your media files and adding effects to your video project. This is where you can perform various actions such as:
• Delete video clips, audio, transitions, elements, etc.
• Split your video clips or audio files.
• Edit your media file's parameters.
• Render your video for a preview.
• Add marker.
• Record voiceover.
• Mix audio and more.
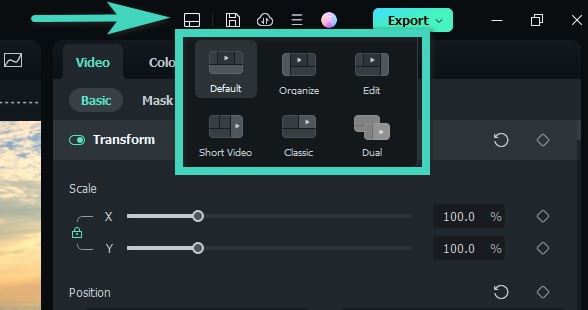
6. Layout Modes
There are six layout models to choose from when editing your projects. You can choose between:
• Default: This will help you back to the original layout panel.
• Organize: The media panel will be extended to the bottom line in this mode.
• Edit: The property panel will be extended to the bottom line in this mode.
• Short Video: Best suit creators who intend to upload a short-form vertical video.
• Classic: for people who like the way it looked with the original version of Filmora.
• Dual: This mode works best for people who are accustomed to multiple monitors.
7. Resizing Panel Groups
If you want to resize any of the panels, drag the resizing icon at the borders between each panel to adjust to your preferred fit.
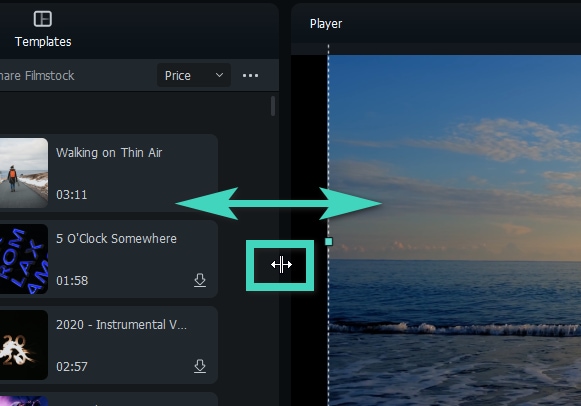
Method 1: To resize panels horizontally, position the pointer on the sides until the pointer becomes a left and right arrow.
Method 2: To resize the panels vertically, position the pointer underneath the panels, and then the pointer becomes an up-and-down arrow.
8. Action Cam Editing
Filmora also has a number of features tailored to GoPro and action cam footage and an Instant Cutter to trim the clip without losing any quality. Please visit the Lens Correction guide to learn more.
9. Dark & Light Mode
To toggle between Light and Dark modes, go to File > Preferences > General and choose Light Mode or Dark Mode under Appearance. Click Ok to save the change.
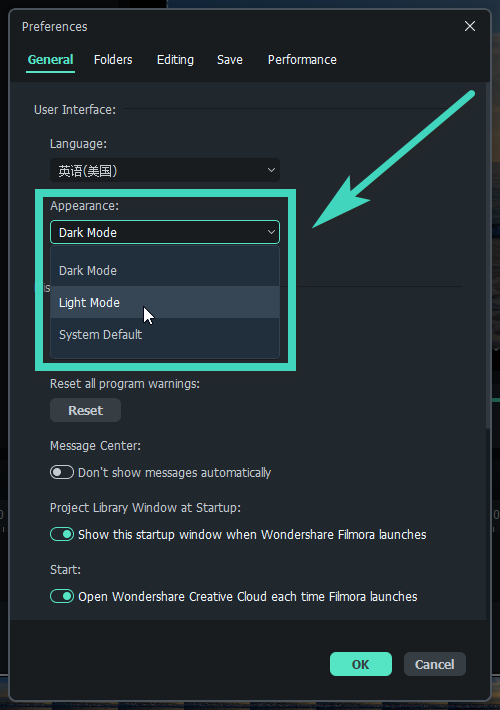
This is what the light mode looks like:
Note:
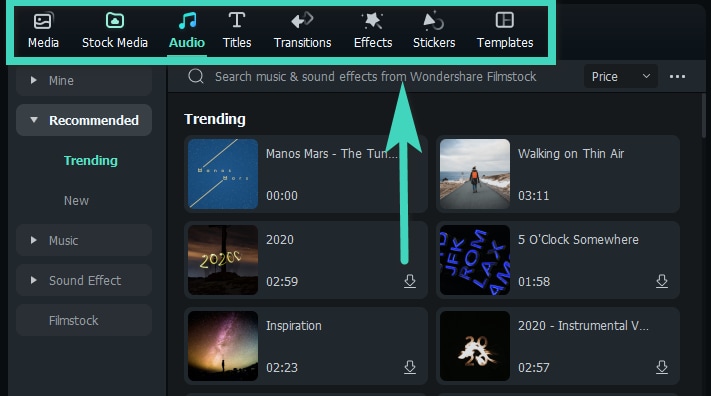
10. Custom Toolbar
Filmora's editing interface is accessible, and with its custom toolbar located upfront, users can find all the major features like "Effects," "Stickers," "Transitions," "Titles," and more in the primary window. In this guide, users will learn how they can access Filmora's custom toolbar:
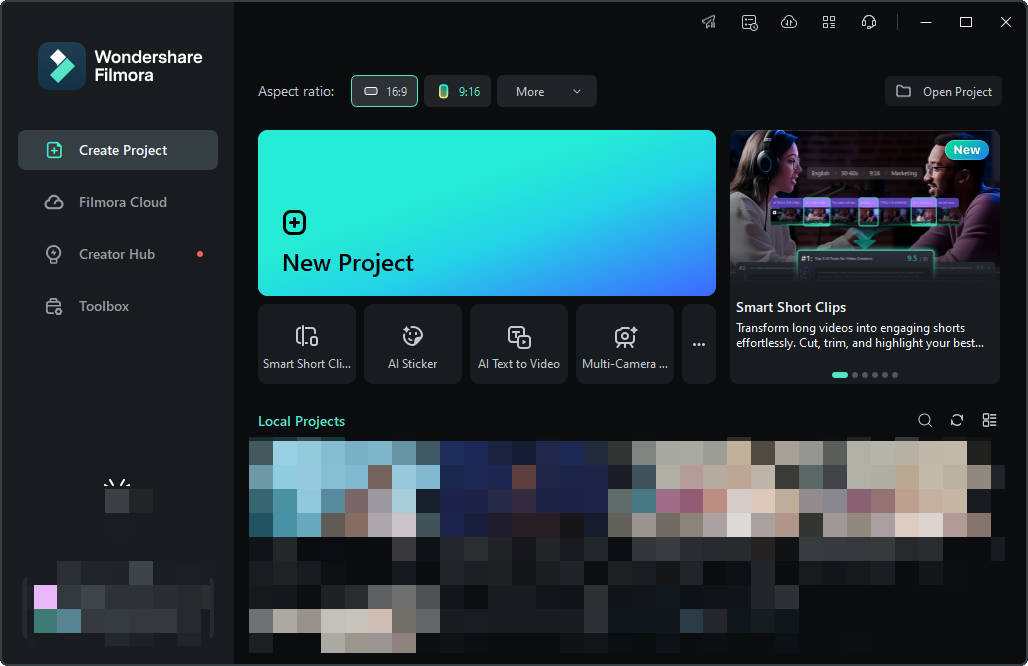
Step 1: Create a New Project
First, download Wondershare Filmora and launch it on your device. Once you reach its main display after the launch, click the "New Project" tab in its main display window.
Step 2: Access Custom Toolbar
Once you are in Filmora's main editing window, navigate upwards and locate a bar where you can find "Media", "Stock Media", "Effects", and other tabs. This is named Filmora's custom toolbar, and each tab has unique features.
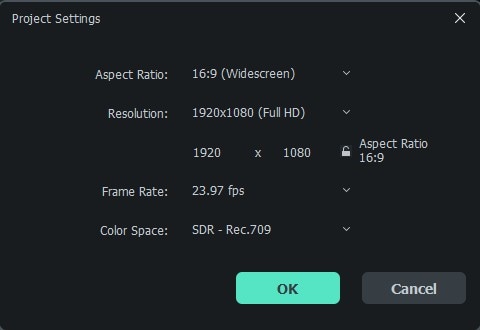
11. Project Settings
If you want to adjust the basic parameters before editing videos. You can view the top and find File-Project Settings.
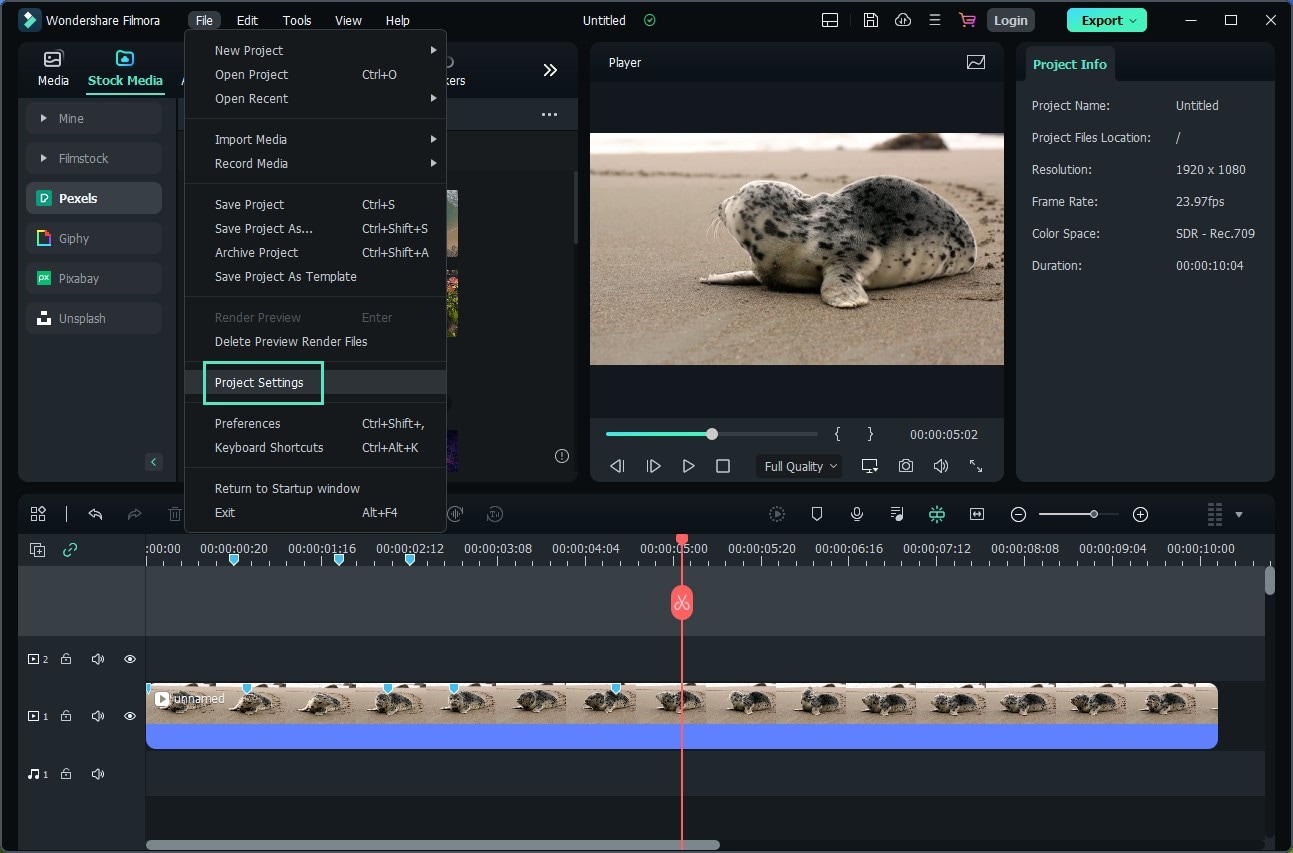
Project settings include aspect ratio, resolution, and frame rate. You can adjust the parameters you want.
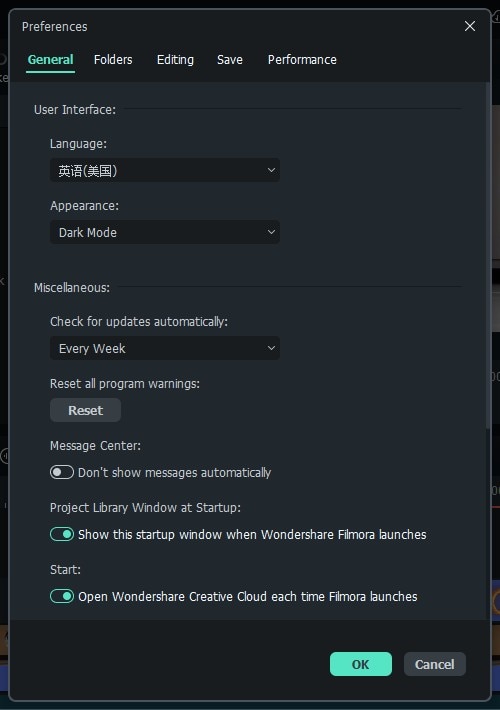
12. Set Preference
Learn how to get the most out of Filmora by configuring preference settings for several things from appearance to folders, editing, and more.
- You can customize the look and behavior of Filmora, from determining the default length of transitions to setting the brightness of the user interface.
- Most of these preferences remain in effect until you change them. The preferences you set for scratch disks, however, are saved with your projects.
- Whenever you open a project, it automatically defaults to the scratch disks you selected for it when you set up that project.

- You can set up General, Folders, Editing, Save, and Performance as you want. When you finish setting, click ok to apply.
Related Posts
Featured Articles
How to Mirror Video in Filmora and Make It Look Super Cool
Turn simple clips into mesmerizing visuals with the mirrored effect. This guide shows you how to mirror video in Filmora and add creative flair with ease.
How to Make a Twitch Trailer and Show Off Your Channel
Create a custom Twitch trailer that runs when you're offline. We break down how to make a Twitch channel trailer step-by-step, from planning to uploading it without problems.
How to Create Reels Ads for Facebook and Instagram: Create Short Video Ad
Learn how to create Facebook and Instagram Reels ads with the right specs and setup. Run Reels as ads to boost engagement and reach more viewers with short video ads.
Recommended User Guide
Keyboard shortcuts list
Use this handy list to reference keyboard shortcuts for Filmora and even print a PDF of the keyboard shortcuts. You can also use the visual keyboard layout to customize the shortcuts and assign multiple shortcuts to a command.
Register / update / uninstall
The latest and greatest version of Filmora Video Editor for Windows and Mac can be downloaded from the official website top navigation bar.
