For the Best Results, Use the Latest Version.
-
Preparations
-
Account
-
Get Started & Basic Settings
-
Compatibility & Tech Specs
-
Performance Settings
-
-
Creating Projects
-
Creating New Projects
-
-
Importing & Recording
-
Video Editing for Windows
-
Basic Video Editing
- Enable/Disable Clip in Windows
- Magnetic Timeline for Windows
- Dual Monitor Setup for Video Editing on Windows
- Select All Clips on Timeline for Windows
- Manage Timeline and Tracks on Windows
- Auto Ripple for Windows
- Split & trim video
- Crop & Pan & Zoom Video
- Compositing
- Change video playback speed
- Playing videos in reverse
- Mark In and Mark Out for Windows
- Markers for Windows
- Group editing
- Customizable Backgrounds for Videos and Images in Windows
- Video snapshot
- Using freeze frame
- Logo Reveal For Windows
- Apply auto enhance
- Applying drop shadow
- Adjustment layer for Windows
- Transforming
- Video Editing Ruler – Windows
-
Advanced Video Editing
- Drawing Tools for Windows | Filmora Guide
- Create Multi-Camera Clip
- Compound Clip for Windows
- Multi-Clip Editing for Windows
- Filmora Motion Blur | Windows
- Filmora Flicker Removal Guide | Windows
- Apply mask to video
- Creating a PIP effect
- Keyframe Graph Editor for Windows
- Add animation keyframing for Windows
- Keyframe Path Curve for Windows
-
AI-Powered Video Editing
- Smart Scene Cut for Windows
- Smart Short Clips for Windows
- AI Face Mosaic for Windows
- Filmora AI Eye Contact- Windows
- AI Video Enhancer for Windows
- AI Text-to-Video for Windows
- Planar Tracking for Windows
- AI Idea to Video for Windows
- Filmora Image to Video for Windows
- Filmora Image to Prompt for Windows
- Instant Cutter Tool for Windows
- AI Extend
- Filmora AI Relight - Windows
- Filmora AI Image Enhancer Guide - Windows
- AI Script to Video Guide for Windows
- AI Text-Based Editing for Windows
- AI Mate Editing for Windows
- Create with instant mode
- ChatGPT Plugin - AI Copywriting
- AI Smart Cutout
- Lens correction on Windows
- Auto reframe video
- AI Portrait Cutout
- Scene detection feature
- AI Smart Masking for Windows
- Make motion tracking
- Video Stabilization for Windows
- AI Video/Photo Object Remover for Windows
- AI Smart Search for Windows
- AI Skin Tone Protection for Windows
- AI Image for Windows
- Chroma key (green screen)
- Super Slow Motion with Optical Flow for Windows
- Video Denoise for Windows
-
-
Audio Editing for Windows
-
Basic Audio Editing
-
Advanced Audio Editing
-
AI-Powered Audio Editing
-
-
Text Editing for Windows
-
Basic Text Editing
-
Advanced Text Editing
-
AI-Powered Text Editing
-
-
Video Customizations
-
Video Effects
-
Audio Effects
-
Transitions
-
Stickers
-
Filters
-
Color Editing
-
Animations
-
Templates
-
Asset Center
-
-
Exporting & Share & Cloud Backup
AI Color Palette (Color Match)
The Color Match feature has been upgraded to AI Color Palette. This new tool utilizes advanced AI algorithms to more accurately extract and apply color palettes from videos or images. AI Color Palette is widely used to match the color between different shots to create a consistent look across your videos. It is designed for users who need color correction but may not have expertise in detailed color adjustments. It can improve the efficiency of color-correcting clips as a batch.
This guide will show you how to apply AI Color Palette to your videos or images on Windows:
Index
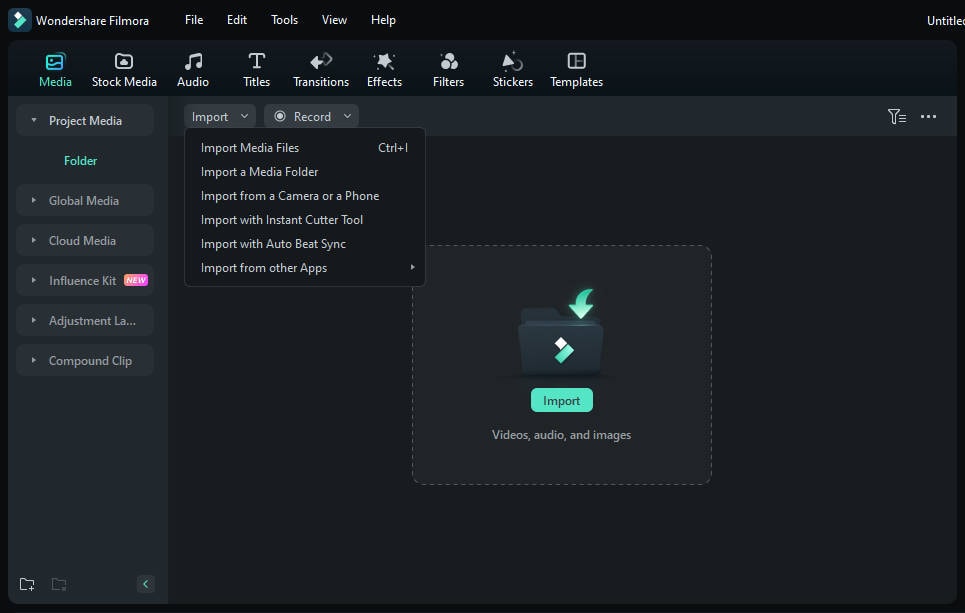
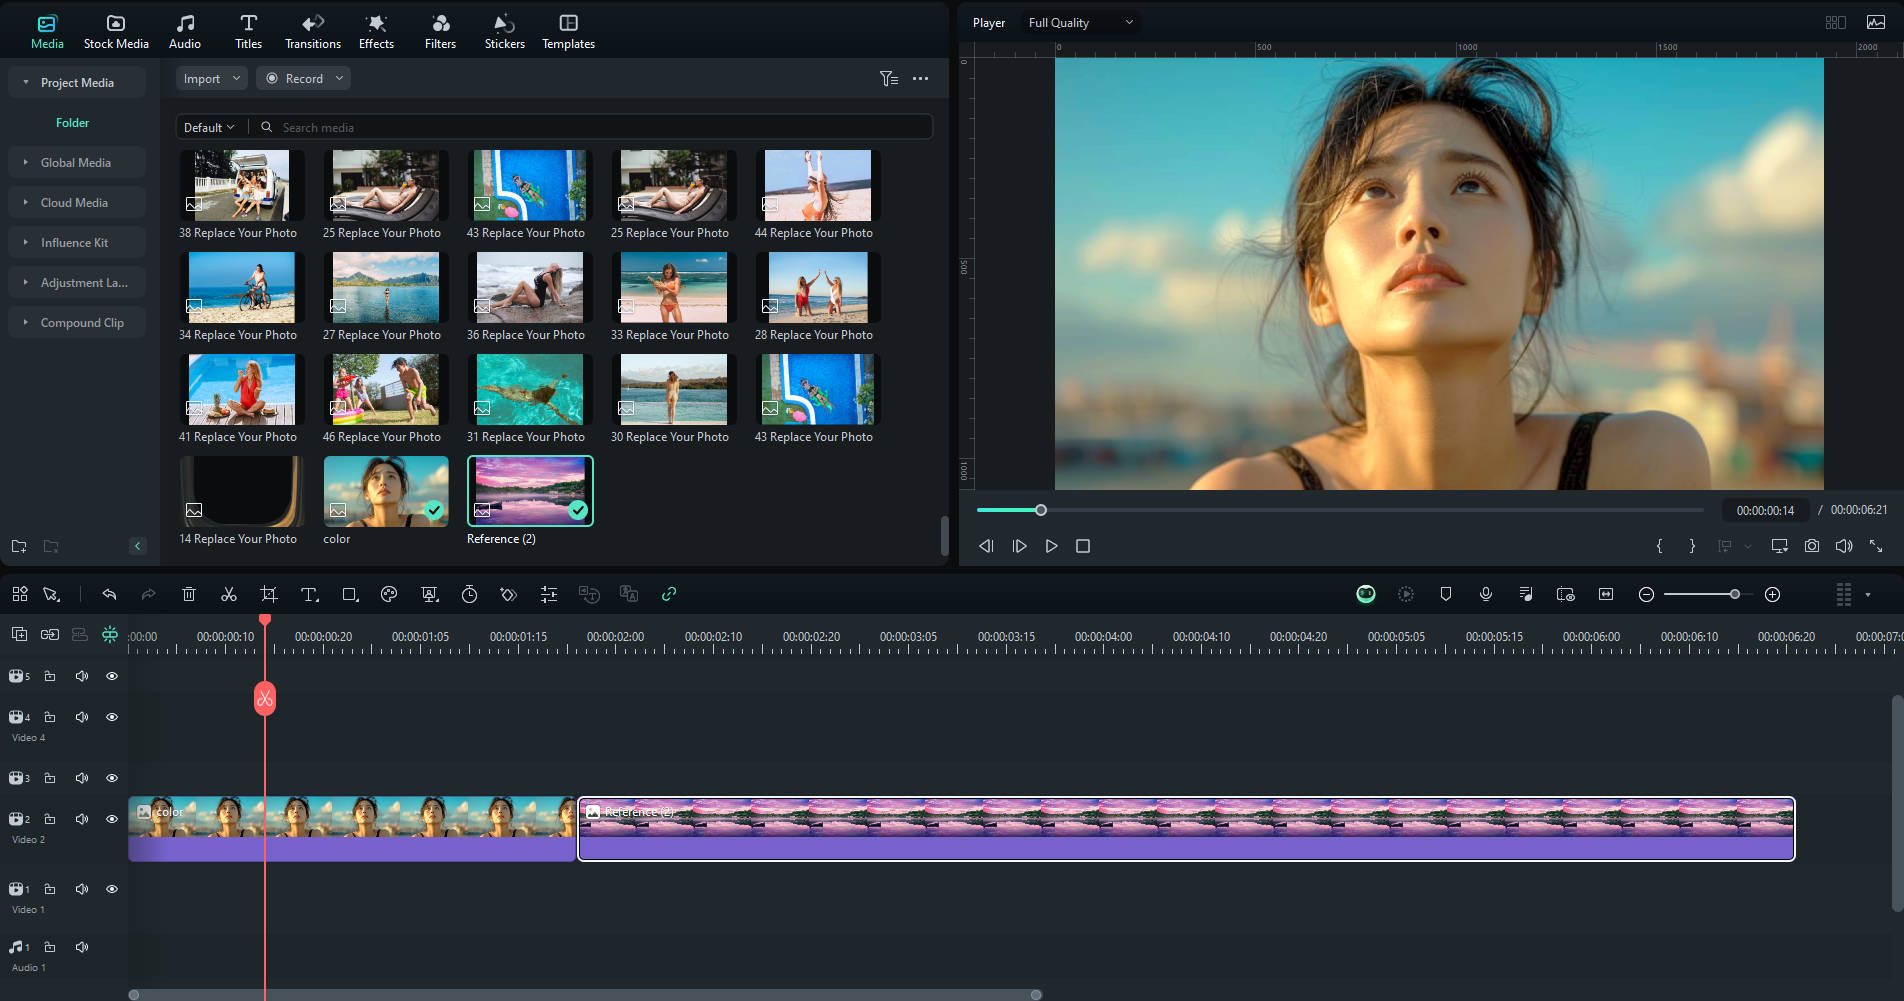
Step 1: Import and Add Media Files to the Timeline
If you have Filmora installed, open the program and create a new project. Import the color reference video or image and the footage you want to adjust from your computer, then add them to the timeline.
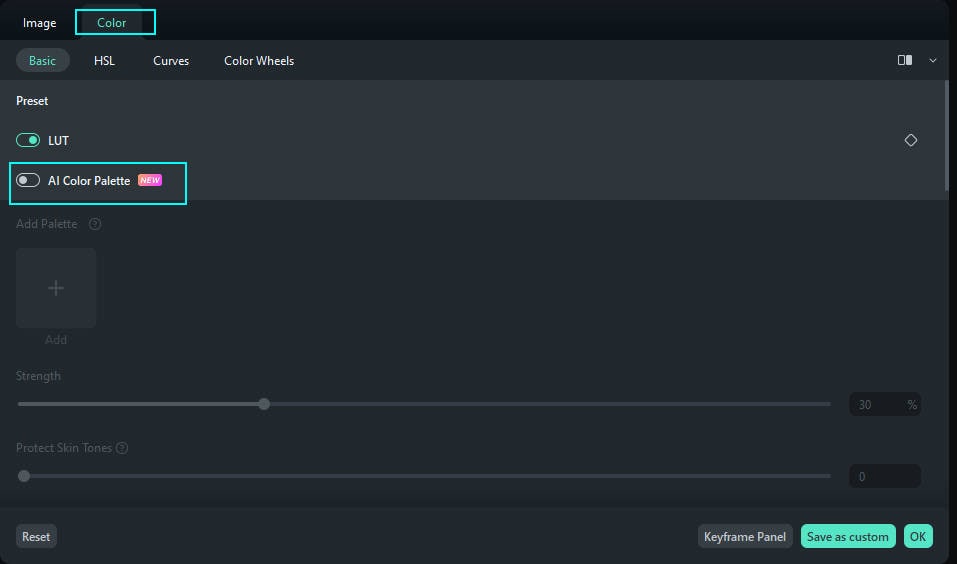
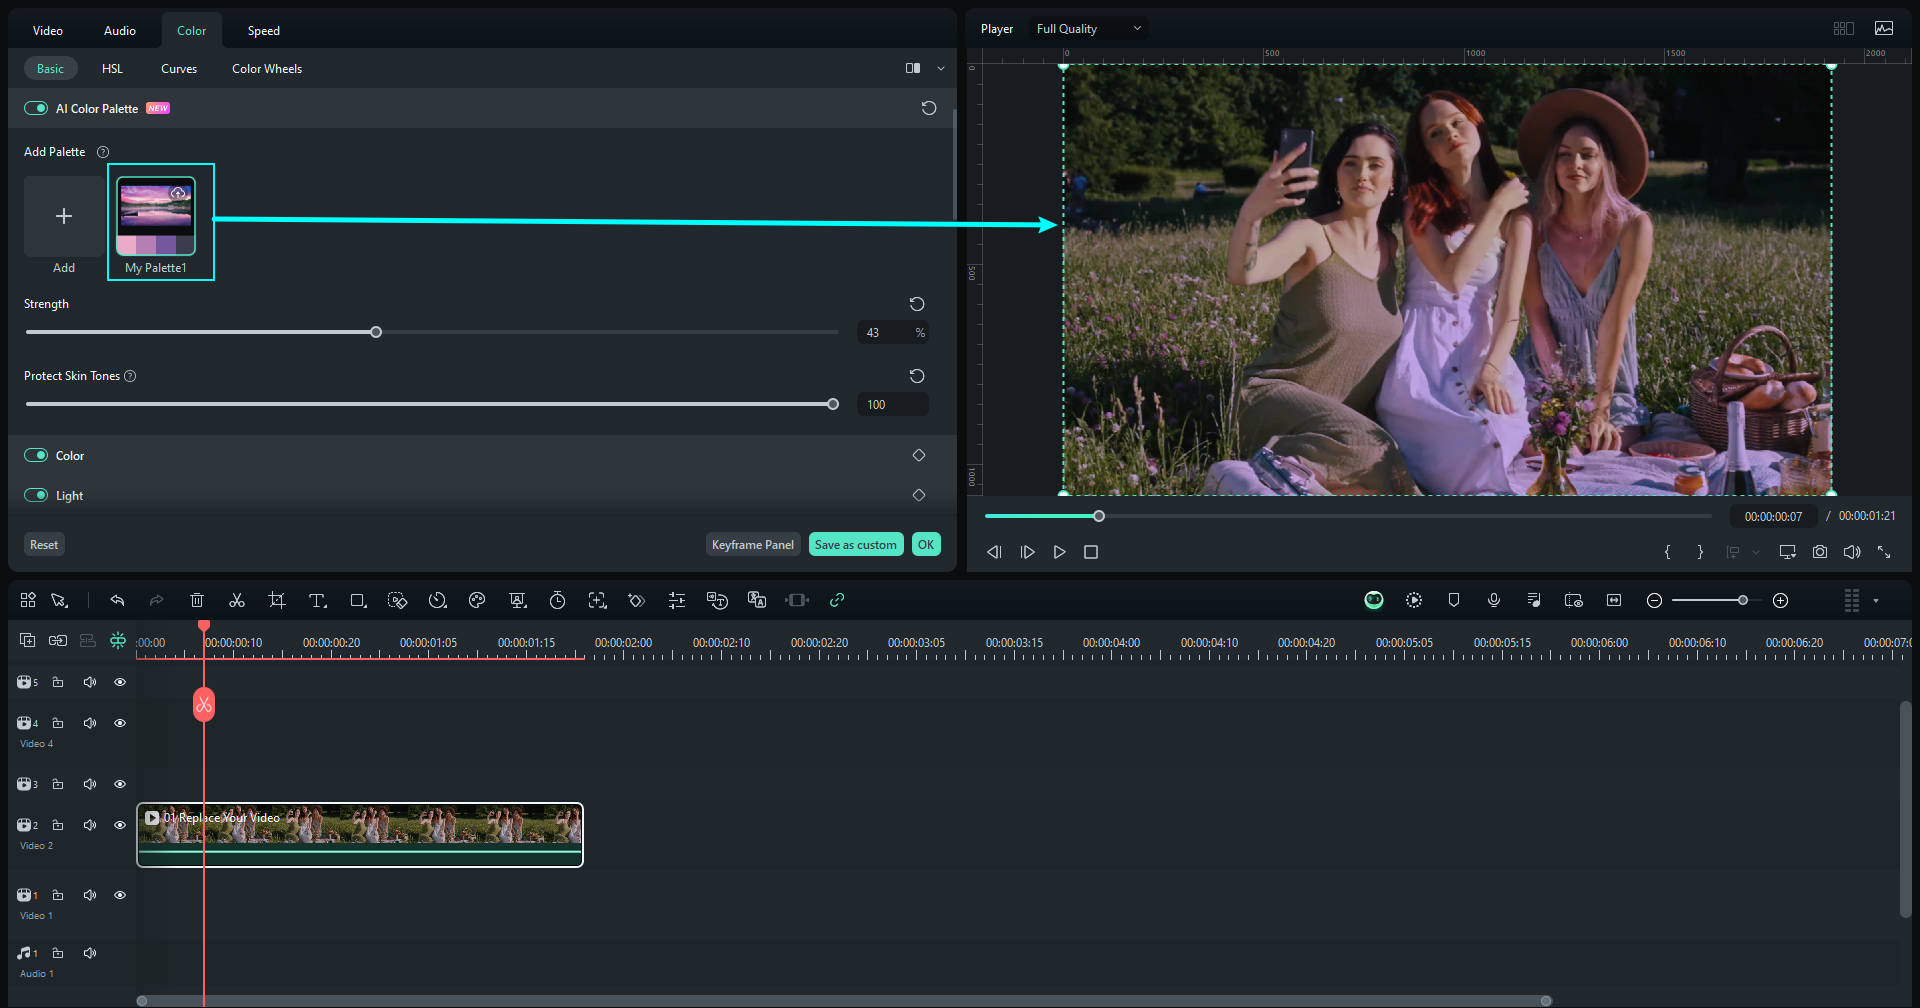
Step 2: Enable AI Color Palette
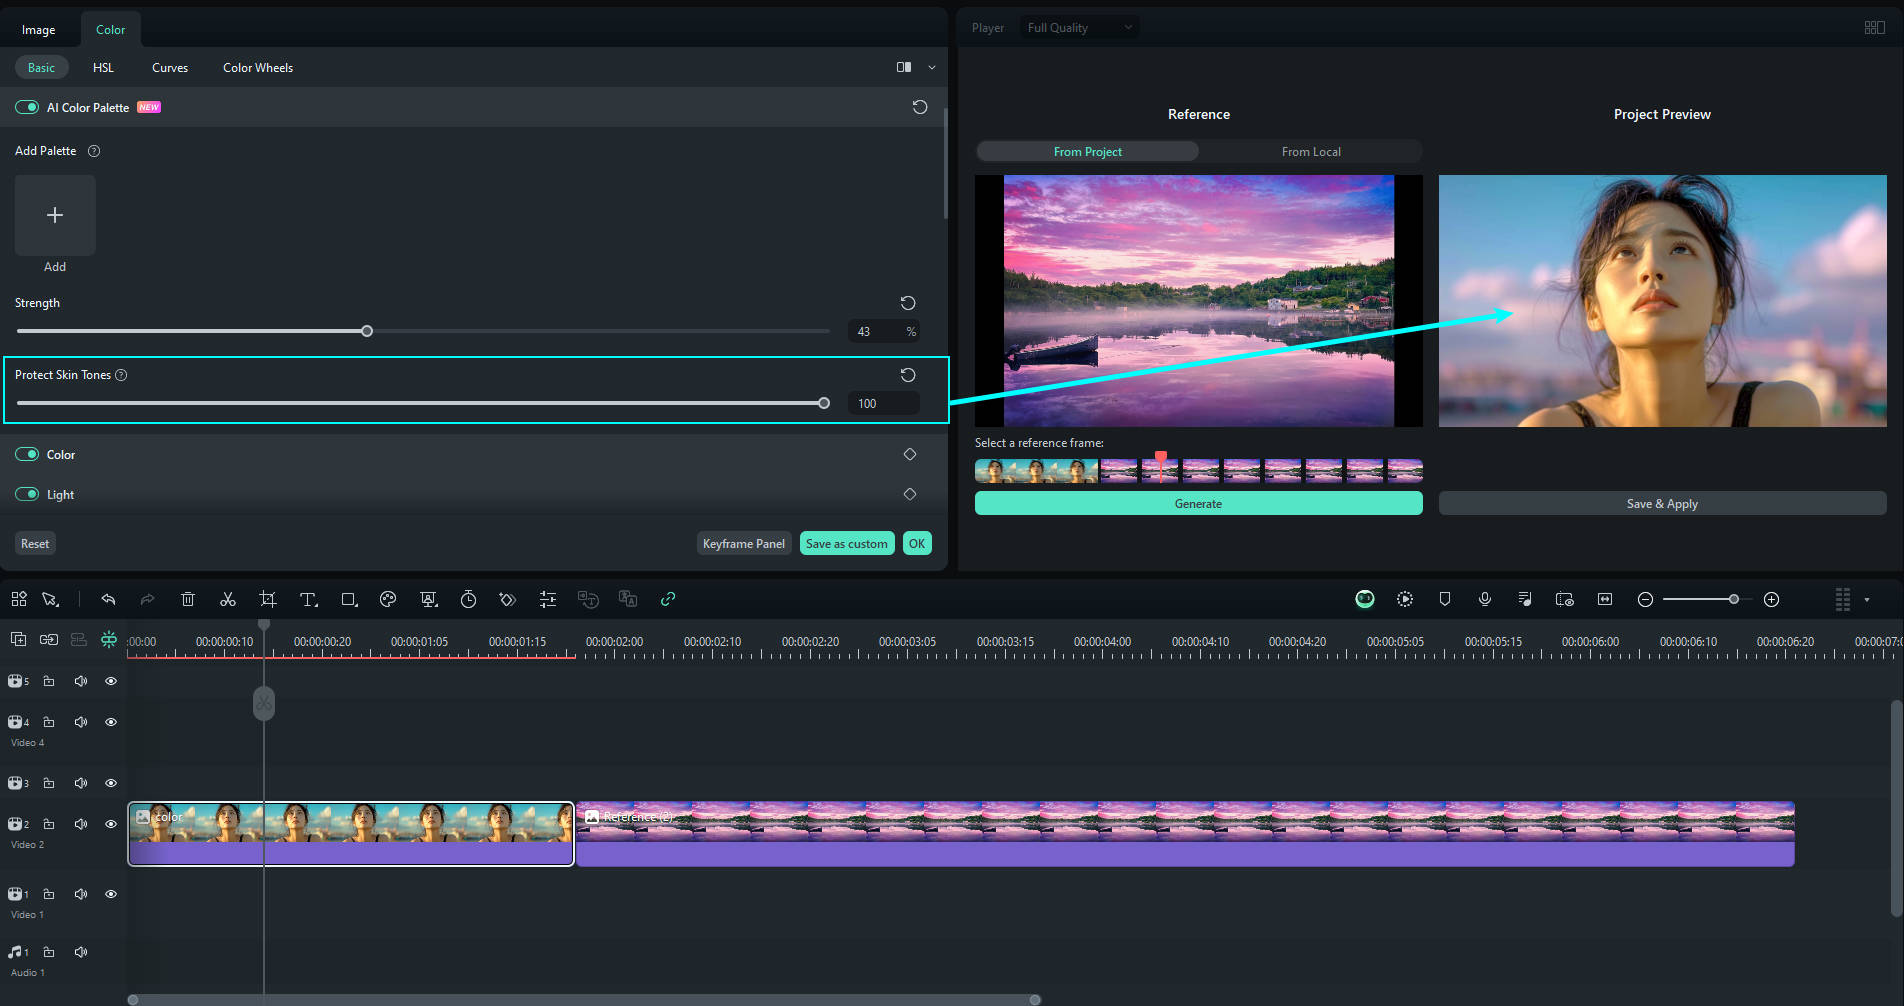
Double-click the clip on the timeline that you want to adjust the color for, opening the editing panel. Then, navigate to Color > Basic and click the button next to AI Color Palette to activate the feature.
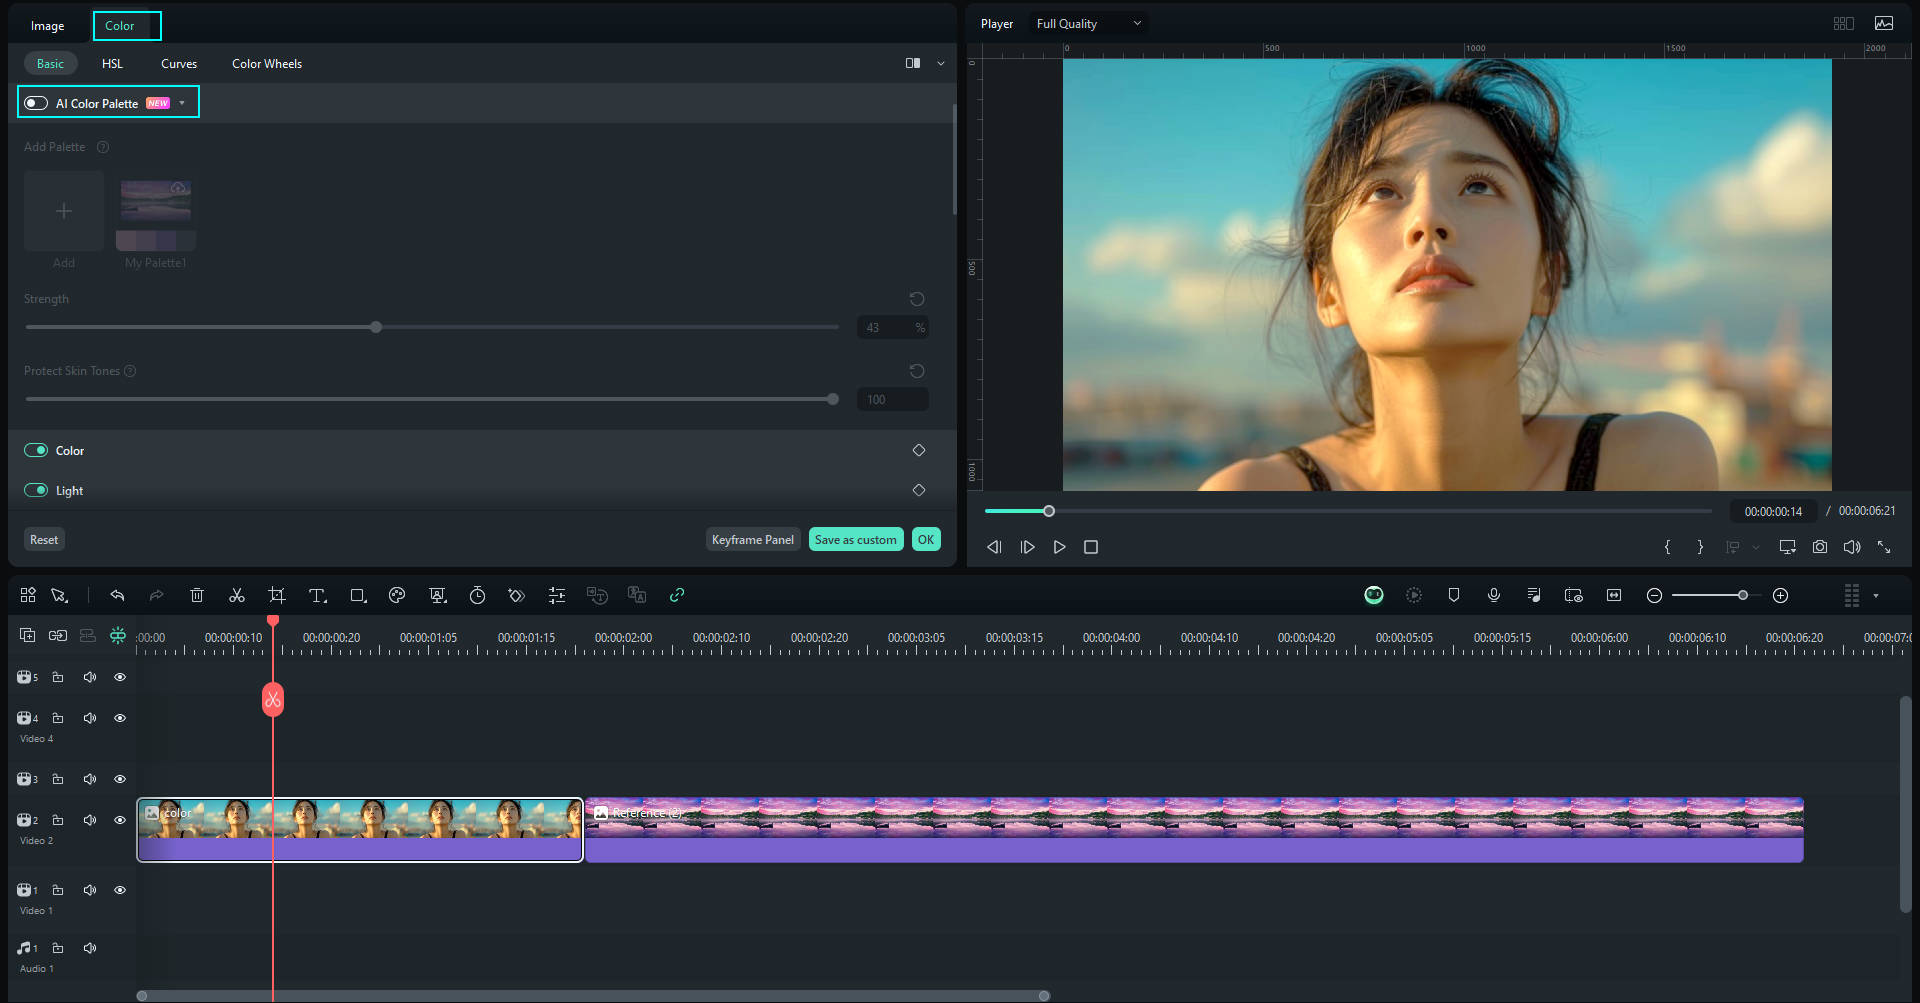
Step 3: Choose the Reference Frame
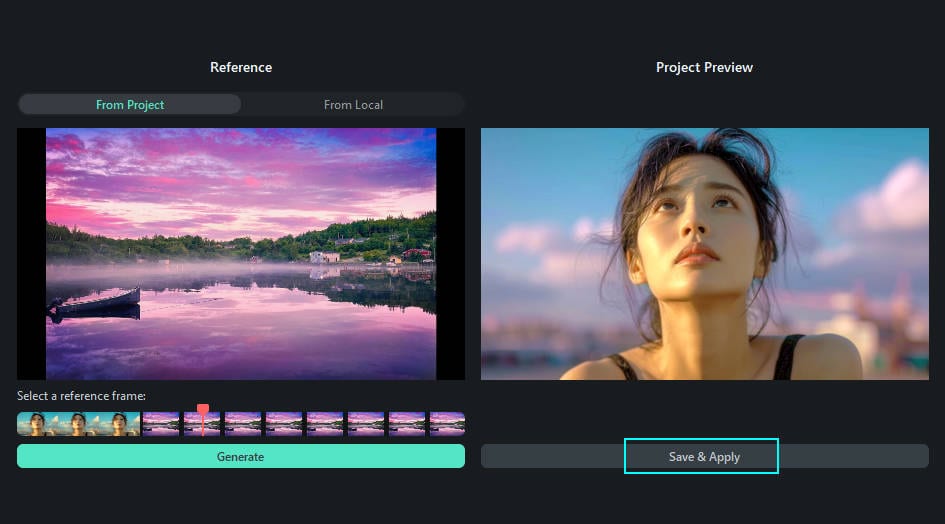
Method 1: From Project
Click the "Timeline" button, select an imported media file, move the cursor to choose the reference frame, and click "Generate".
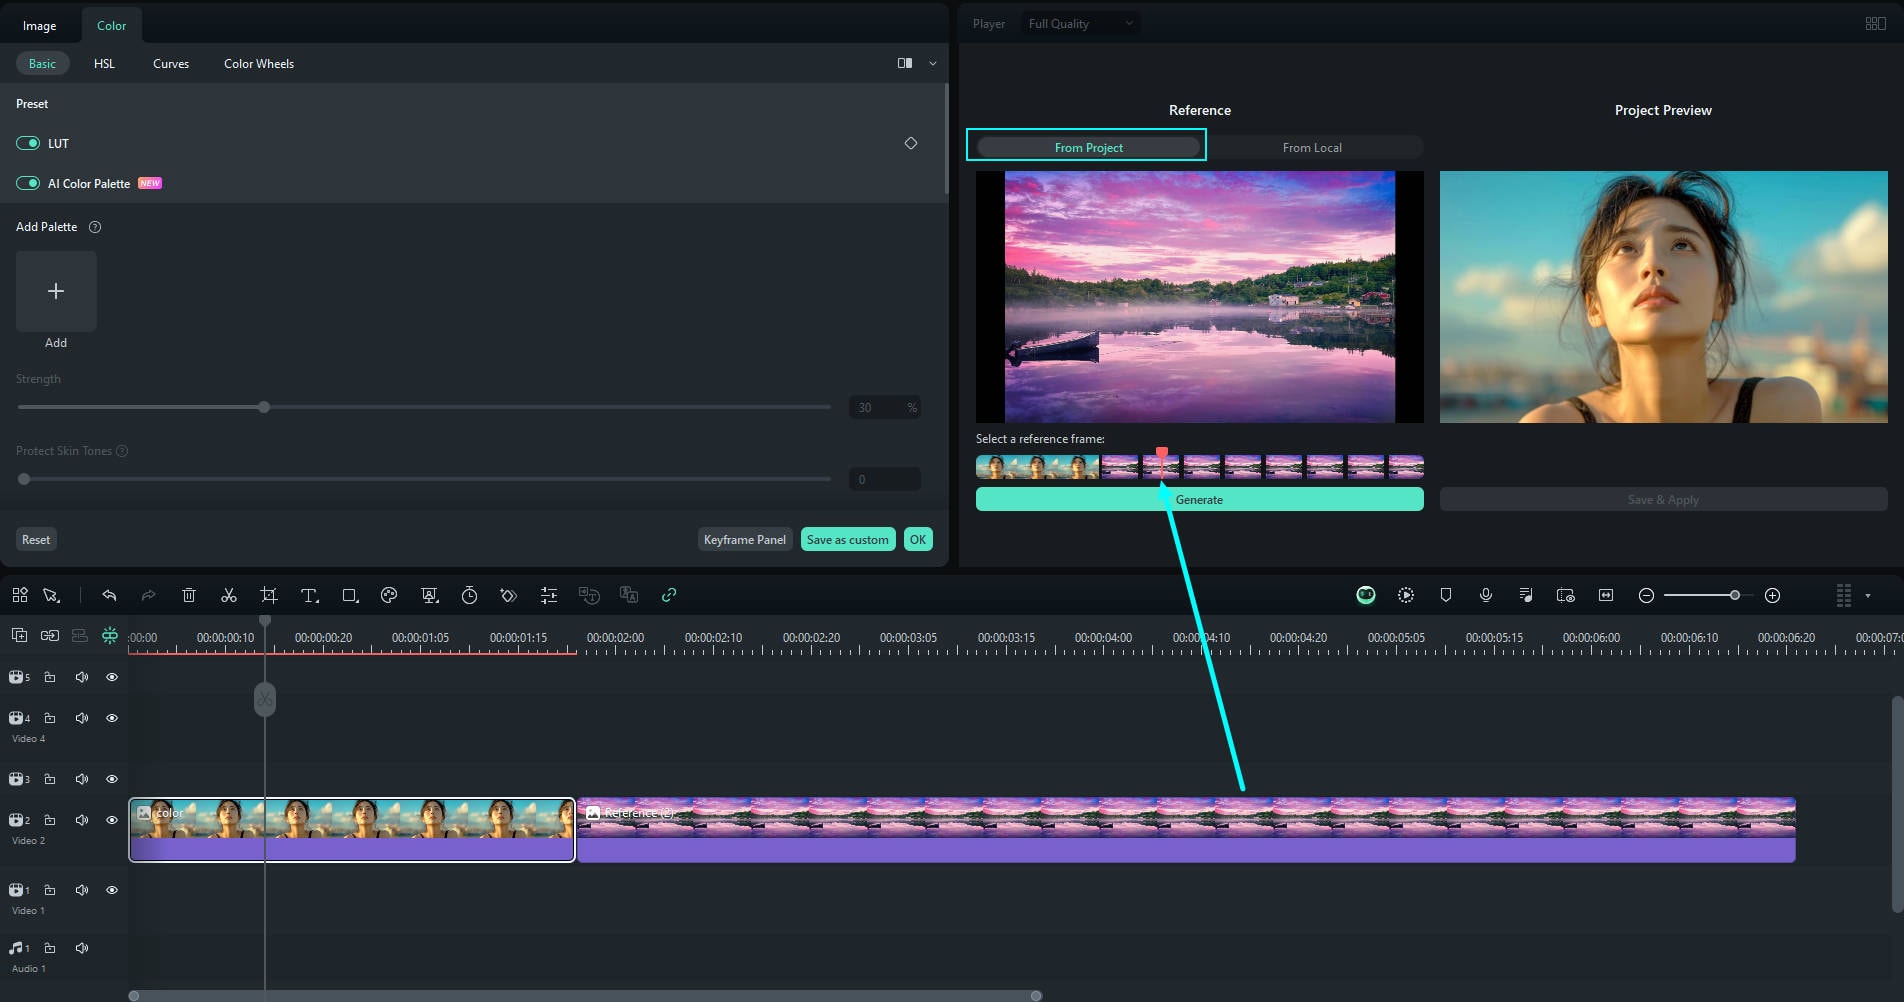
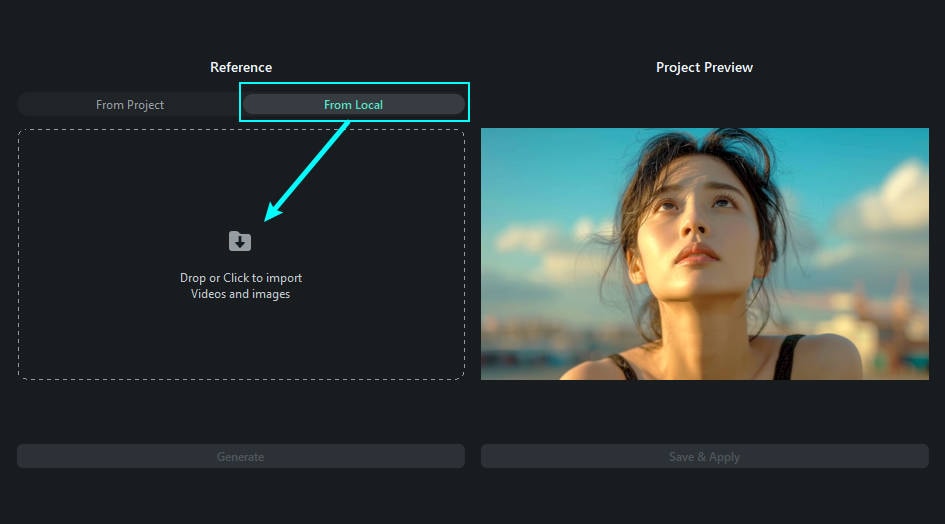
Method 2: From Local
Click the "Local Files" button to import a local file. If you want to select a different file, click the "Replace" button above. Move the cursor to choose the reference frame and click "Generate".
Step 4: Preview and Adjust the Setting
View the video on the right side of the preview panel. Adjust the strength in the property panel, drag the slider in the property panel to change the strength of matching colors. The range of settings is from 0 to 100. When you finish adjusting the strength, click OK.

Enable Protect skin tones and adjust the settings in the property panel if there are people in the video.
Step 5: Save and Apply the Color Palette
After completing the color adjustments, click Save and Apply to exit the color palette mode.
Customized color palette templates will be generated automatically in the properties panel. You can also click the cloud button above to store it in the cloud.
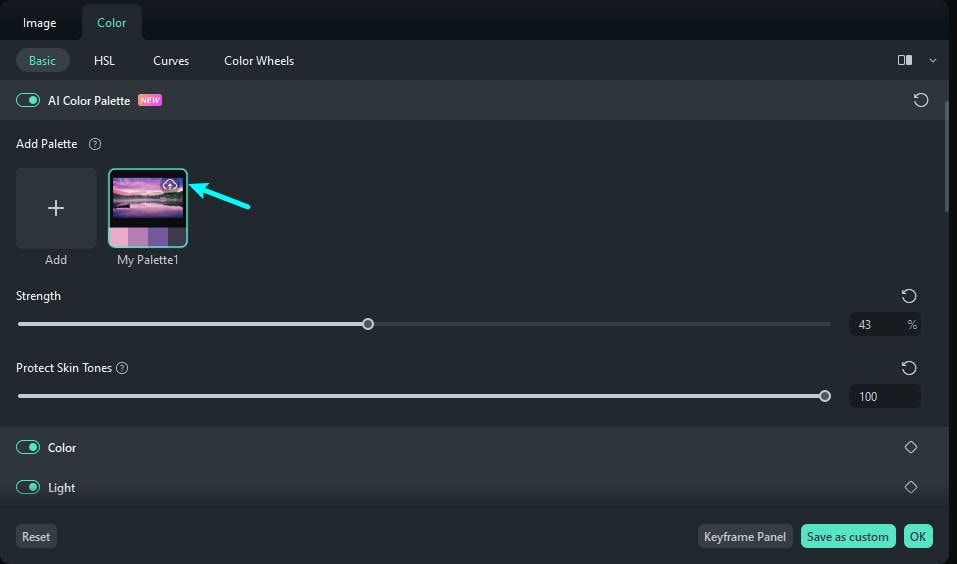
When importing new media files, click on the saved palette template in the AI Color Palette section to apply it with a single click.
Step 6: Remove Color Palette Adjustment
If you want to remove the adjustments, navigate to Color > Basic and click the button next to AI Color Palette to deactivate the feature. Then, the changes would be removed.
Step 7: Export and Share
Click Export when you finish editing and choose the format you want to save. Using Filmora 9 or 10? Click here to learn how to do color match.
Related Posts
Featured Articles
Audacity for Podcasts: How to Perfect Your Podcast Creation?
Need to generate high-fidelity audio for your podcast, but do not know how to? Read this article to learn how to use Audacity for podcasting effortlessly.
How Do You Merge Two Pictures into One?
Meta Description: If you want to learn how to use the best photo blender tool to merge pictures together, this article is perfect for you, offering multiple methods.
Japanese House Minecraft: 6 Stunning Oriental Builds
In this article, we will list down the best 6 Japanese house Minecraft ideas that you can use to build marvelous houses.
Recommended User Guide
Preset Color Adjustment
Learn how to adjust color, light, LUT in Filmora
Color Comparison View
While maintaining your content's integrity, Filmora offers dedicated color comparison functionality for clip editing.
Custom Color Layer for Windows
This guide shows how to use Filmora's Custom Color Layer to enhance mood, style, and consistency across your videos.
