
For the Best Results, Use the Latest Version.
-
Preparations
-
Account
-
Get Started & Basic Settings
-
Compatibility & Tech Specs
-
Performance Settings
-
-
Creating Projects
-
Creating New Projects
-
-
Importing & Recording
-
Video Editing for Windows
-
Basic Video Editing
- Enable/Disable Clip in Windows
- Magnetic Timeline for Windows
- Dual Monitor Setup for Video Editing on Windows
- Select All Clips on Timeline for Windows
- Timeline and Track Management
- Auto Ripple for Windows
- Split & Trim Video
- Crop & Pan & Zoom Video in Filmora for Windows
- Compositing
- Change Video Speed on Windows
- Reverse Video for Windows
- Mark In and Mark Out for Windows
- Markers for Windows
- Group editing
- Customizable Backgrounds for Videos and Images in Windows
- Video Snapshot
- Using Freeze Frame in Filmora for Windows
- Logo Reveal For Windows
- Auto Enhance in Filmora for Windows
- Applying drop shadow
- Adjustment layer for Windows
- Apply Transforming for Windows
- Video Editing Ruler – Windows
-
Advanced Video Editing
- Keyframe Motion Blur for Windows
- Drawing Tools for Windows | Filmora Guide
- Camera Tracking for Windows
- Create Multi-Camera Clip in Filmora for Windows
- Compound Clip for Windows
- Multi-Clip Editing for Windows
- Filmora Motion Blur | Windows
- 360° Video Reframing for Windows
- Track Matte for Windows
- Video Chapters in Filmora on Windows
- Filmora Flicker Removal Guide | Windows
- Create Multi-Screen Videos in Filmora on Windows
- Masking in Filmora on Windows
- Creating a PIP Effect for Windows
- Keyframe Graph Editor for Windows
- Animation Keyframing for Windows
- Keyframe Path Curve
-
AI-Powered Video Editing
- Smart Scene Cut for Windows
- Smart Short Clips for Windows
- AI Face Mosaic for Windows
- Filmora AI Eye Contact- Windows
- AI Video Enhancer for Windows
- AI Text-to-Video for Windows
- Planar Tracking for Windows
- AI Idea to Video for Windows
- AI Media Analysis for Windows
- Filmora Image to Video for Windows
- Filmora Image to Prompt for Windows
- Instant Cutter Tool for Windows
- AI Extend
- Filmora AI Relight - Windows
- Filmora AI Image Enhancer Guide - Windows
- AI Script to Video Guide for Windows
- AI Text-Based Editing for Windows
- AI Mate Editing for Windows
- Instant Mode for Windows
- ChatGPT Plugin - AI Copywriting
- AI Smart Cutout for Windows
- Lens correction on Windows
- Auto Reframe Video for Windows
- AI Portrait Cutout
- Scene Detection for Windows
- AI Smart Masking for Windows
- Motion Tracking on Windows
- Video Stabilization for Windows
- AI Video/Photo Object Remover for Windows
- AI Smart Search for Windows
- AI Skin Tone Protection for Windows
- AI Image for Windows
- Chroma Key (Green Screen) for Windows
- Super Slow Motion with Optical Flow for Windows
- Video Denoise for Windows
-
-
Audio Editing for Windows
-
Basic Audio Editing
-
Advanced Audio Editing
-
AI-Powered Audio Editing
- Auto synchronization
- AI Sound Effects in Filmora for Windows
- Smart BGM Generation on Windows
- AI Voice Enhancer in Filmora
- AI Voice Cloning in Wondershare Filmora
- AI Music Generator for Windows
- Audio To Video
- AI Vocal Remover for Windows
- AI Auto Beat Sync for Windows
- AI Audio Stretch for Windows
- AI Audio Denoise for Windows
- Silence Detection on Windows
-
-
Text Editing for Windows
-
Basic Text Editing
-
Advanced Text Editing
-
AI-Powered Text Editing
-
-
Video Customizations
-
Video Effects
- Filmora VST3 Plugins for Windows
- Filmora OpenFX Plugins for Windows
- Retouch Guide for Windows
- Filmora Pen Tool Tutorial: Motion Paths & Animation Guide
- Animated Charts
- Mocha Filmora - For Windows
- Different Types of Video Effects
- NewBlue FX effects
- Boris FX effects | Filmora Windows Guide
- Body Effects for Windows
- Filmora -Filmstock Asset
-
Audio Effects
-
Transitions
-
Stickers
-
Filters
-
Color Editing
-
Animations
-
Templates
-
Asset Center
-
-
Exporting & Share & Cloud Backup
Different Types of Video Effects
Filmora is a powerful video editing software with thousands of video effects, which can help to make your videos or audios more creative and brilliant.
Upon reading this guide, users will learn about how to commence the step-by-step action of adding different effects:
Mosaic Blur Effects
The mosaic effect allows you to blur a specific area in the video or the whole video.
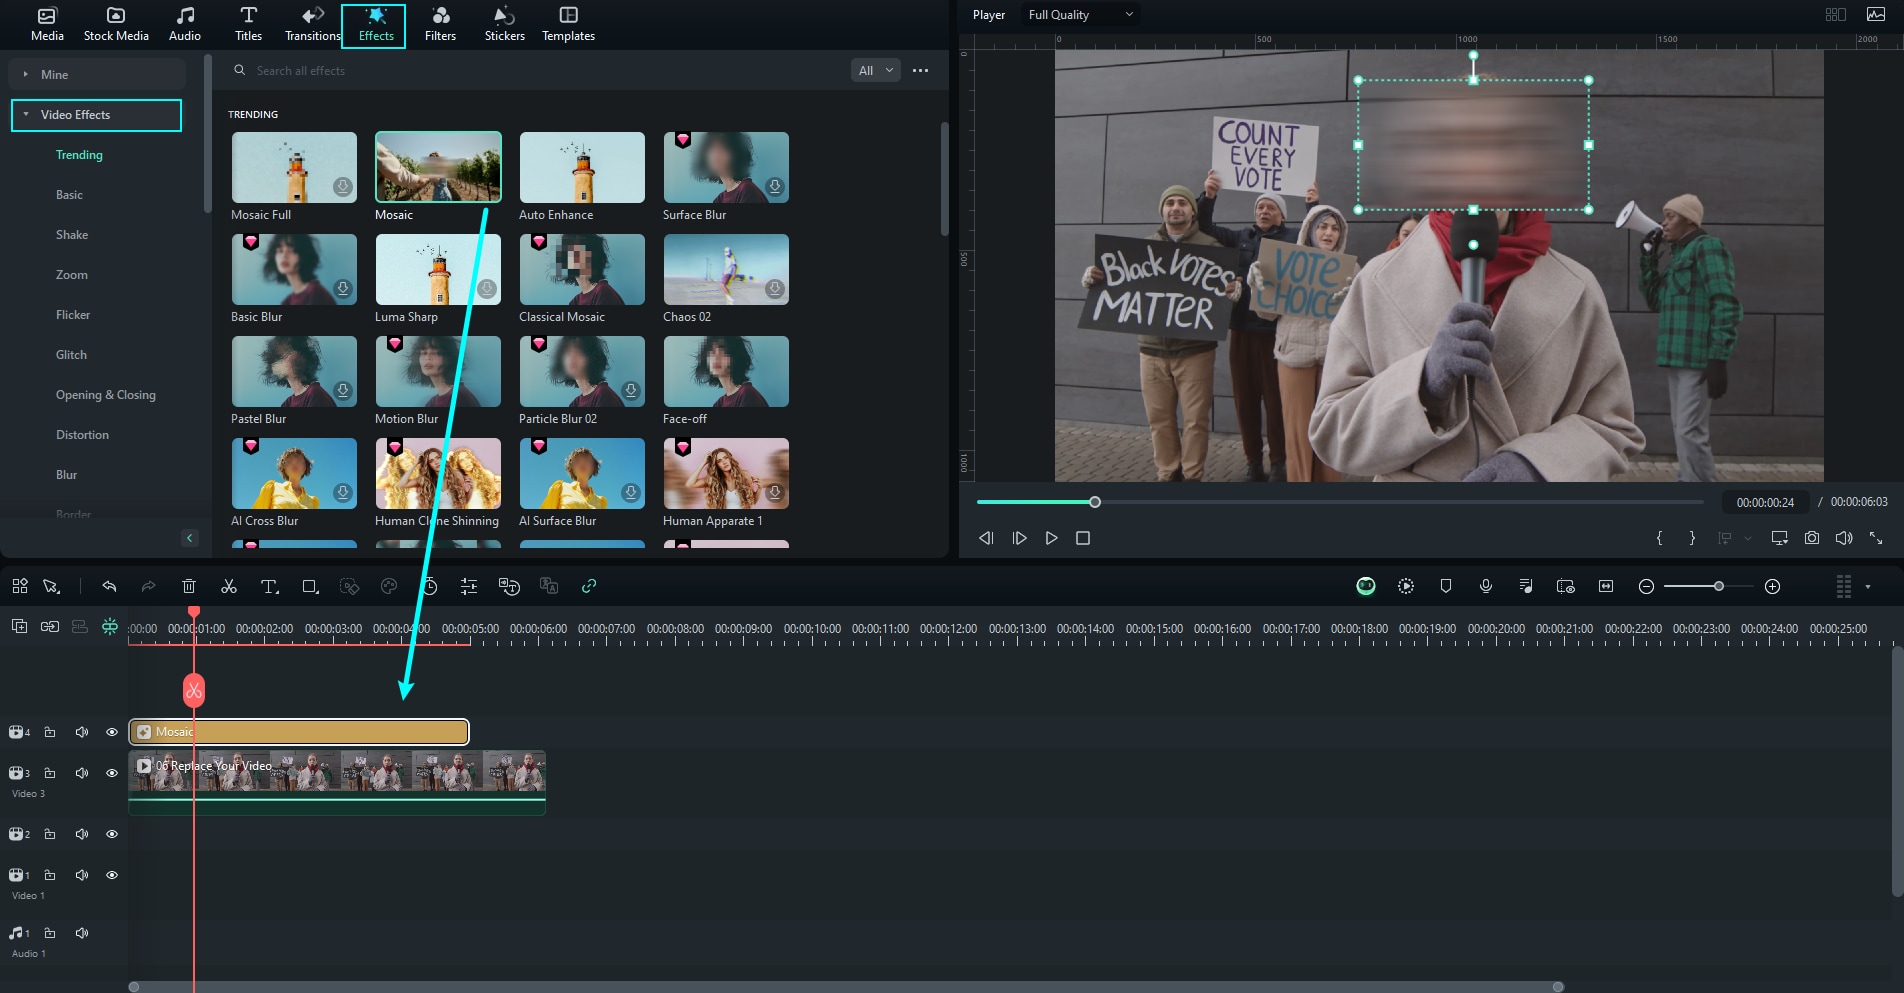
Step 1: Adding Mosaic Effect to Blur Objects in Video
Click the Effects tab at the top, find Video Effects, and click Trending. Find and drag the Mosaic effect to the track above the video.
You can move it to the required timing in the timeline and adjust its duration. In the Preview window, drag the handles of the mosaic effect to adjust its size and position to get the results you want.
Step 2: Adjust Mosaic Effect
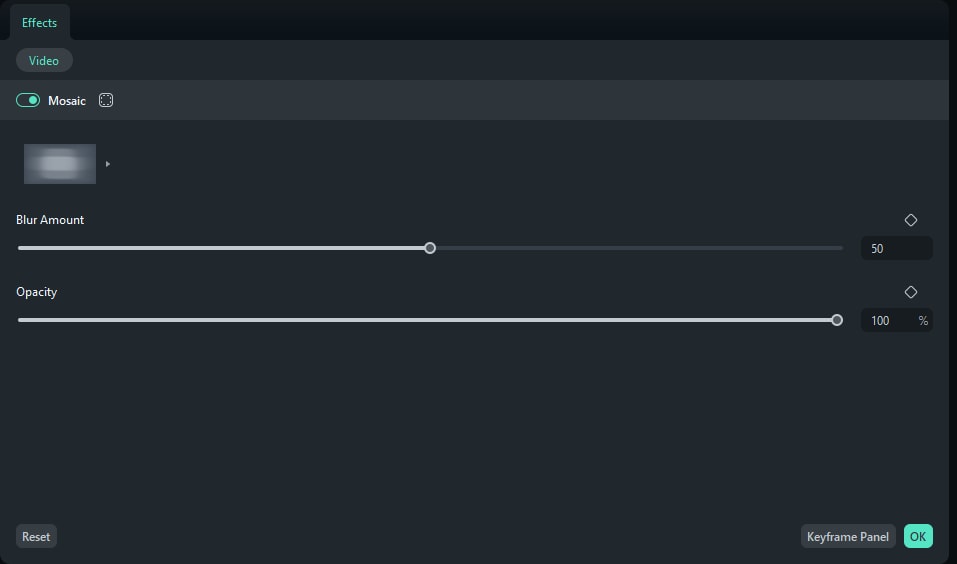
Click on the mosaic effect in the timeline to enter the Effects editing panel. You can choose the blur type from the presets, drag the slider to adjust the Blur Amount and Opacity.
Step 3: Adding Mosaic Effect to Whole Video
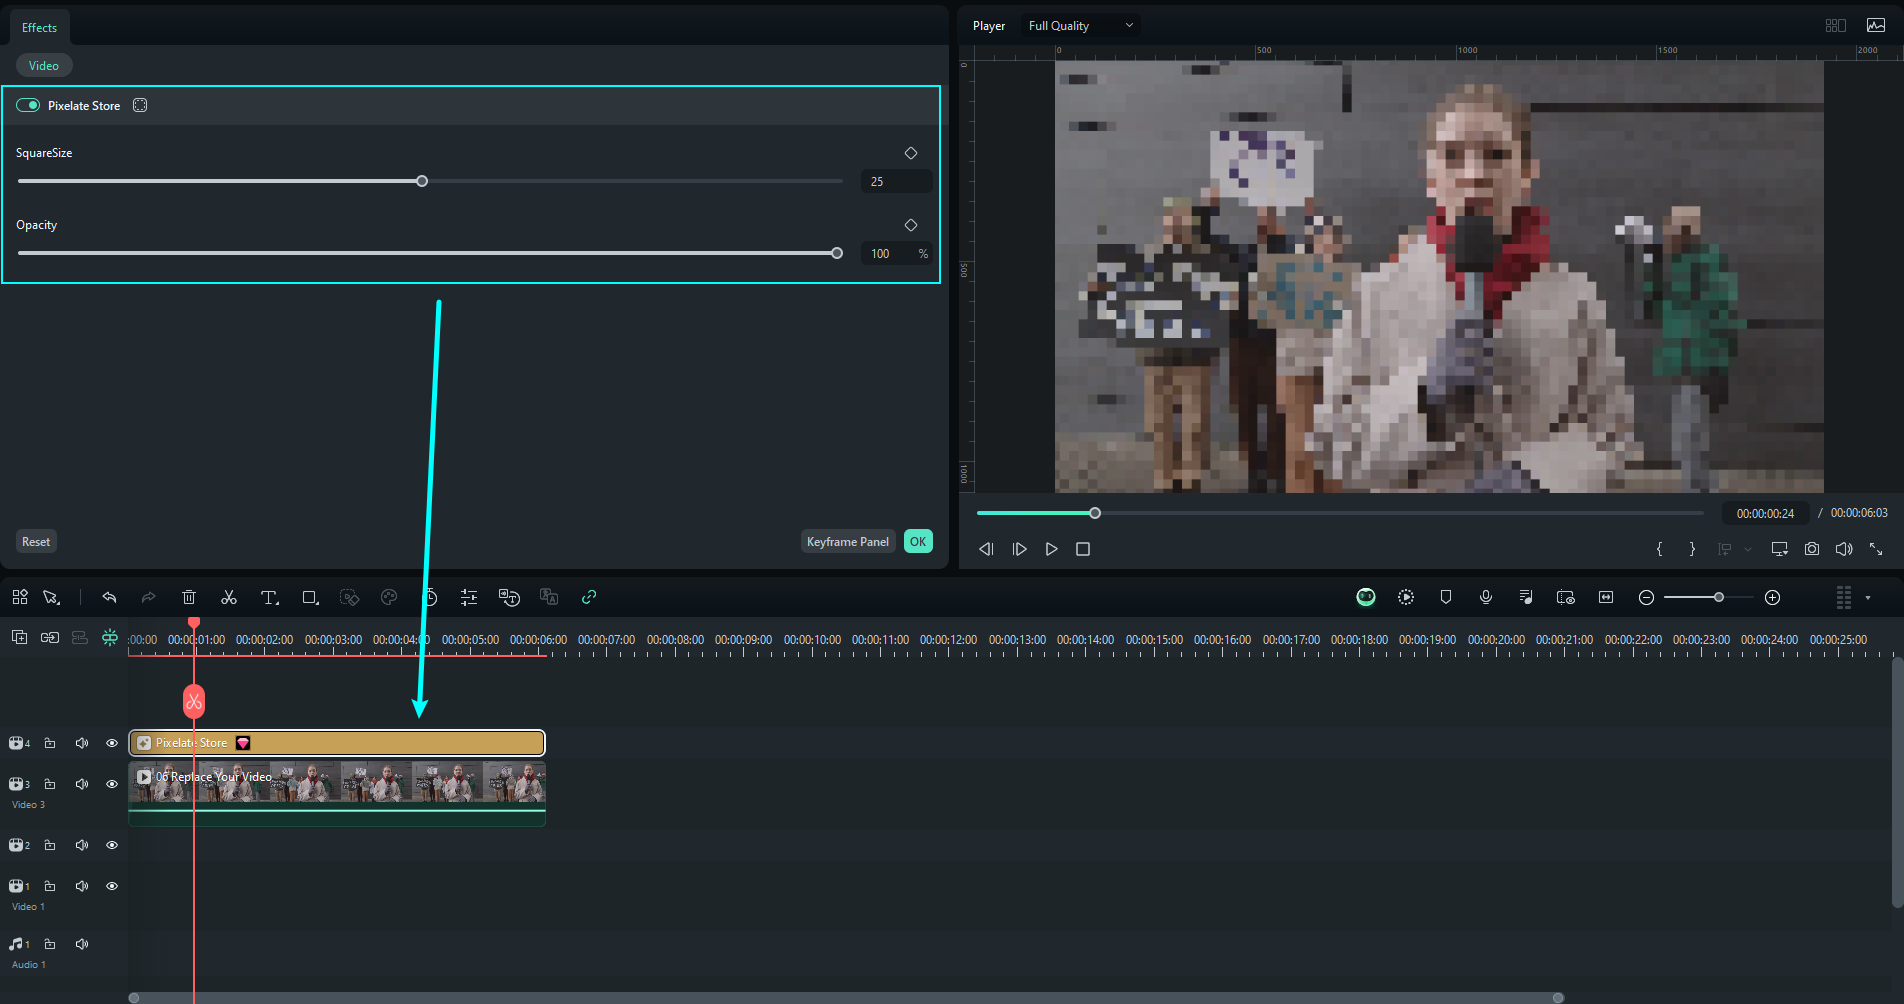
In the Effects tab, scroll down to the Video Effects category, and type "Mosaic" in the search box. Then a bunch of related effects will appear. Choose the "Pixelate Store" or the "Pixelate 2" effect.

Step 4: Adjust Pixelate Mosaic Effect
Drag one of the pixelate effects to the track above the video. Click the pixelate effect in the timeline to adjust its SquareSize and Opacity.
Face-Off Effects
The difference between Mosaic effect and Face-off effect is that, with Mosaic, you can blur any area in the video and the area won't move around while your video plays, whereas, with Face-off, you can cover moving faces.
Step 1: Find Face-Off Effect
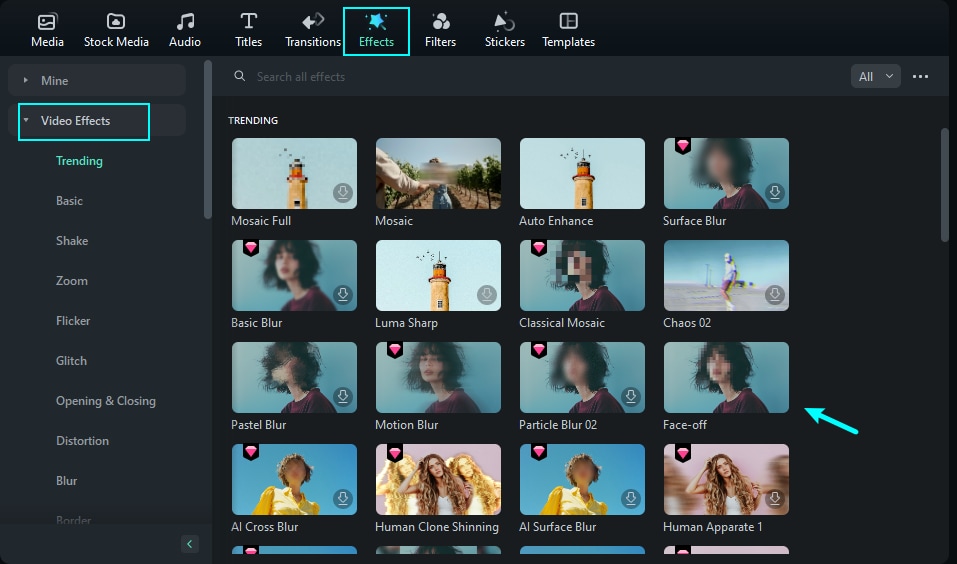
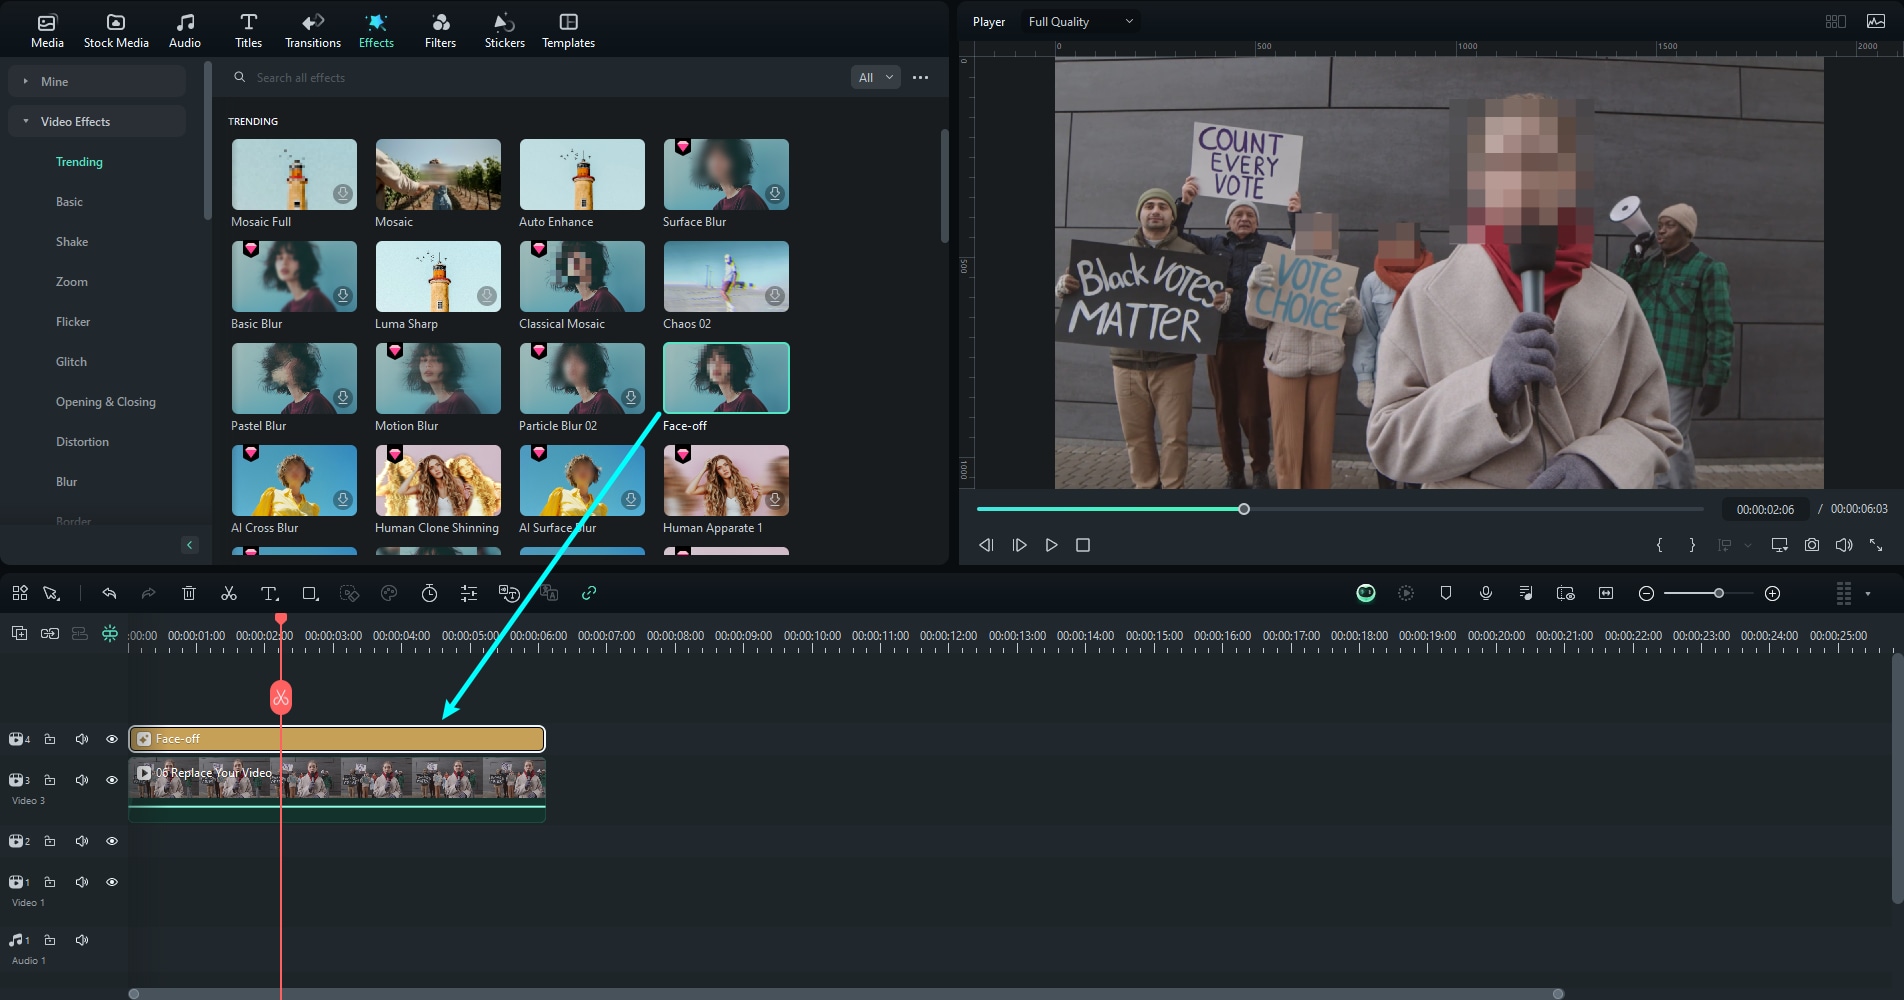
Go to the Effects tab at the top and scroll down to the Video Effects. You can find the Face-Off Effects here.
Step 2: Apply Face-off Effect
Select Face-off effect and drag it to the track above the video. By default, the face will be blurred with mosaic.
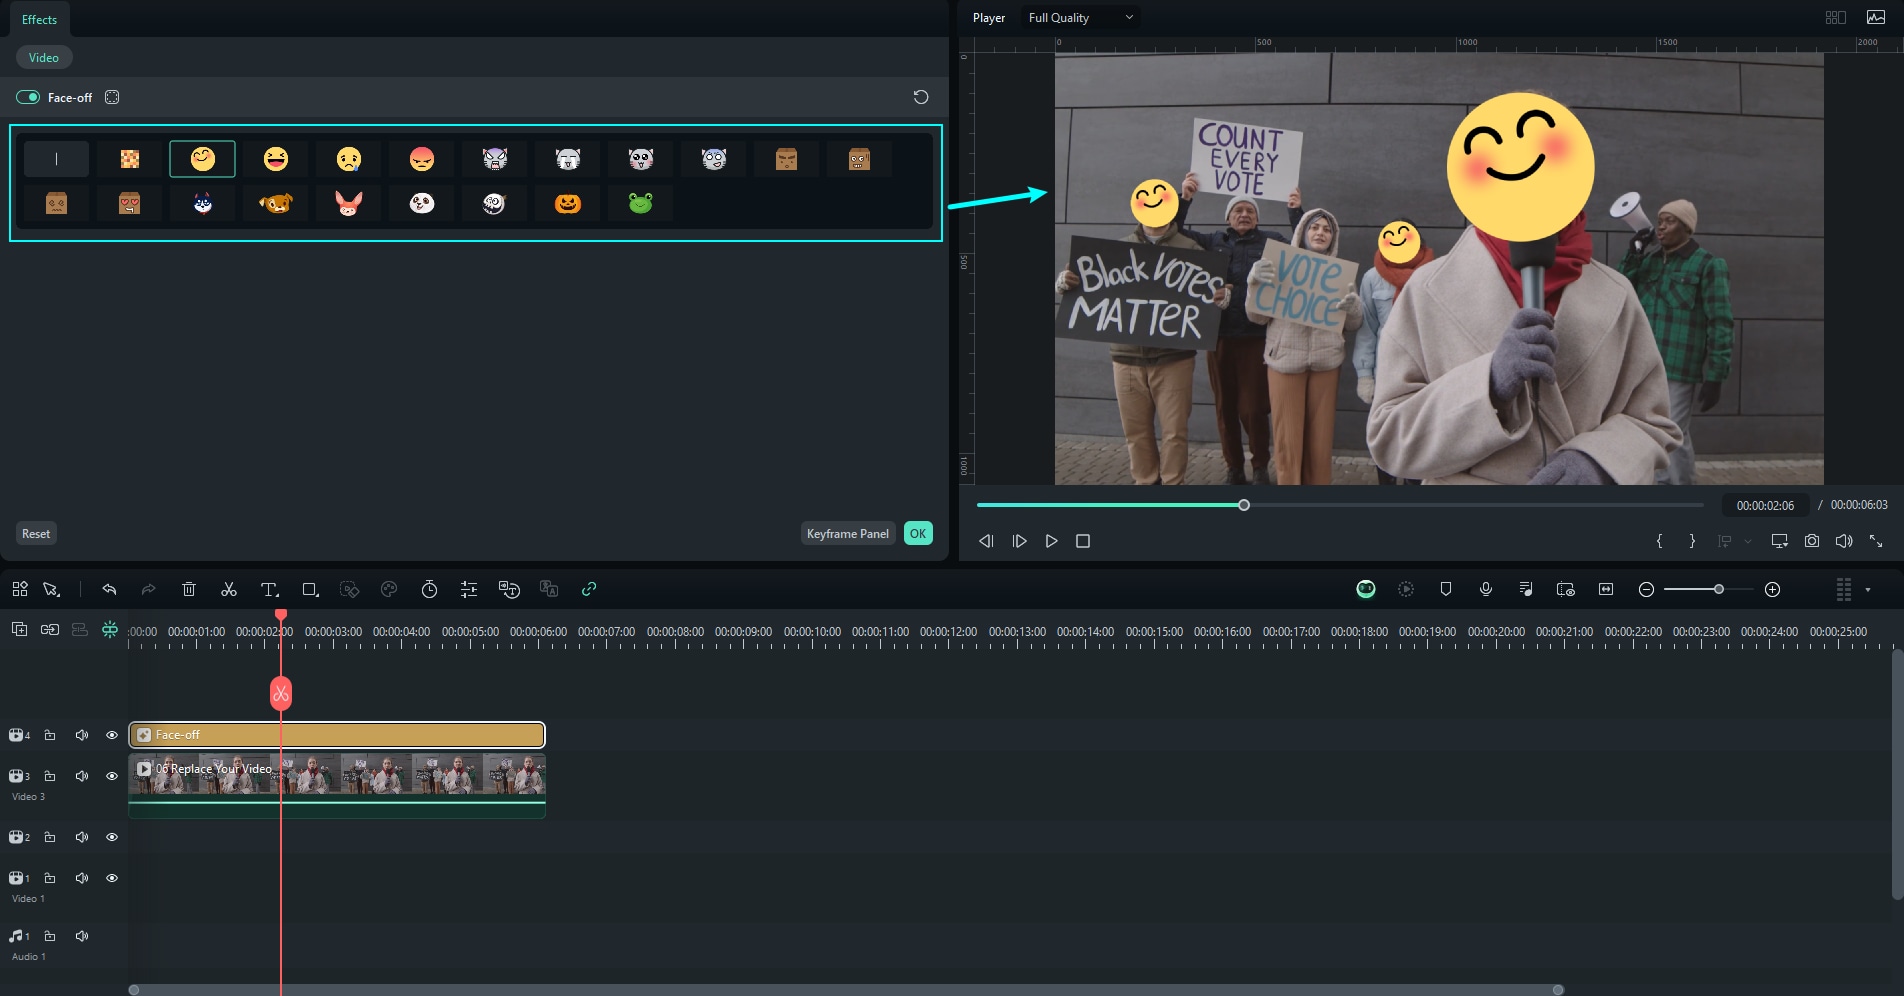
Step 3: Change Face-off Preset
Double-click the face-off effect in the timeline to enter the Effects editing panel. There are many face presets you can use for fun, choose one and click OK to save changes.
Mask Effects
Filmora's masking feature is a professional-grade and efficient technique to hide an object while editing the other. Users can apply different effects, transitions, and much more on a single object in a video through it. However, sometimes, you need more time for the precision masking.
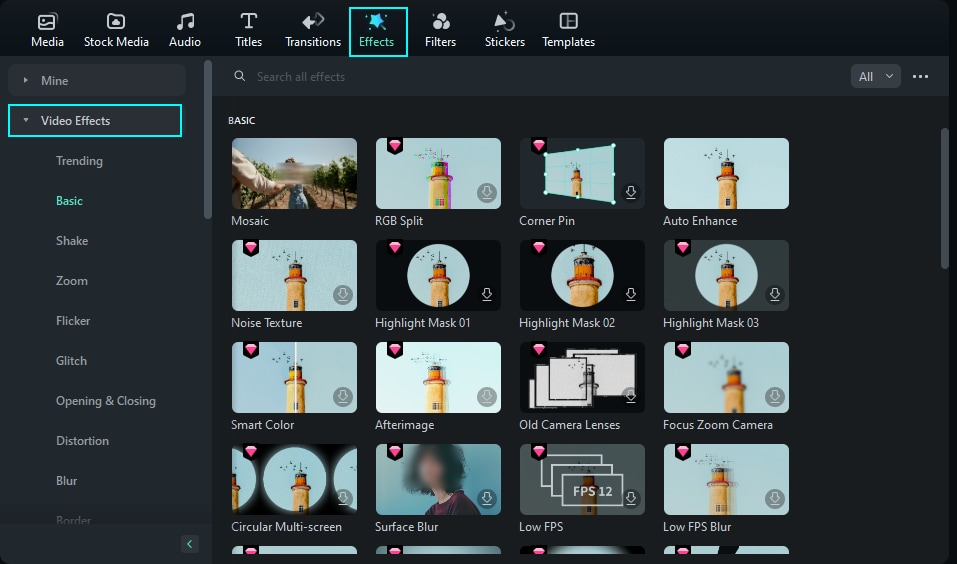
Step 1: Access the Mask Effects
Click the clip in the timeline and navigate towards the "Effects" tab, and go the "Basic" category under "Video Effects".
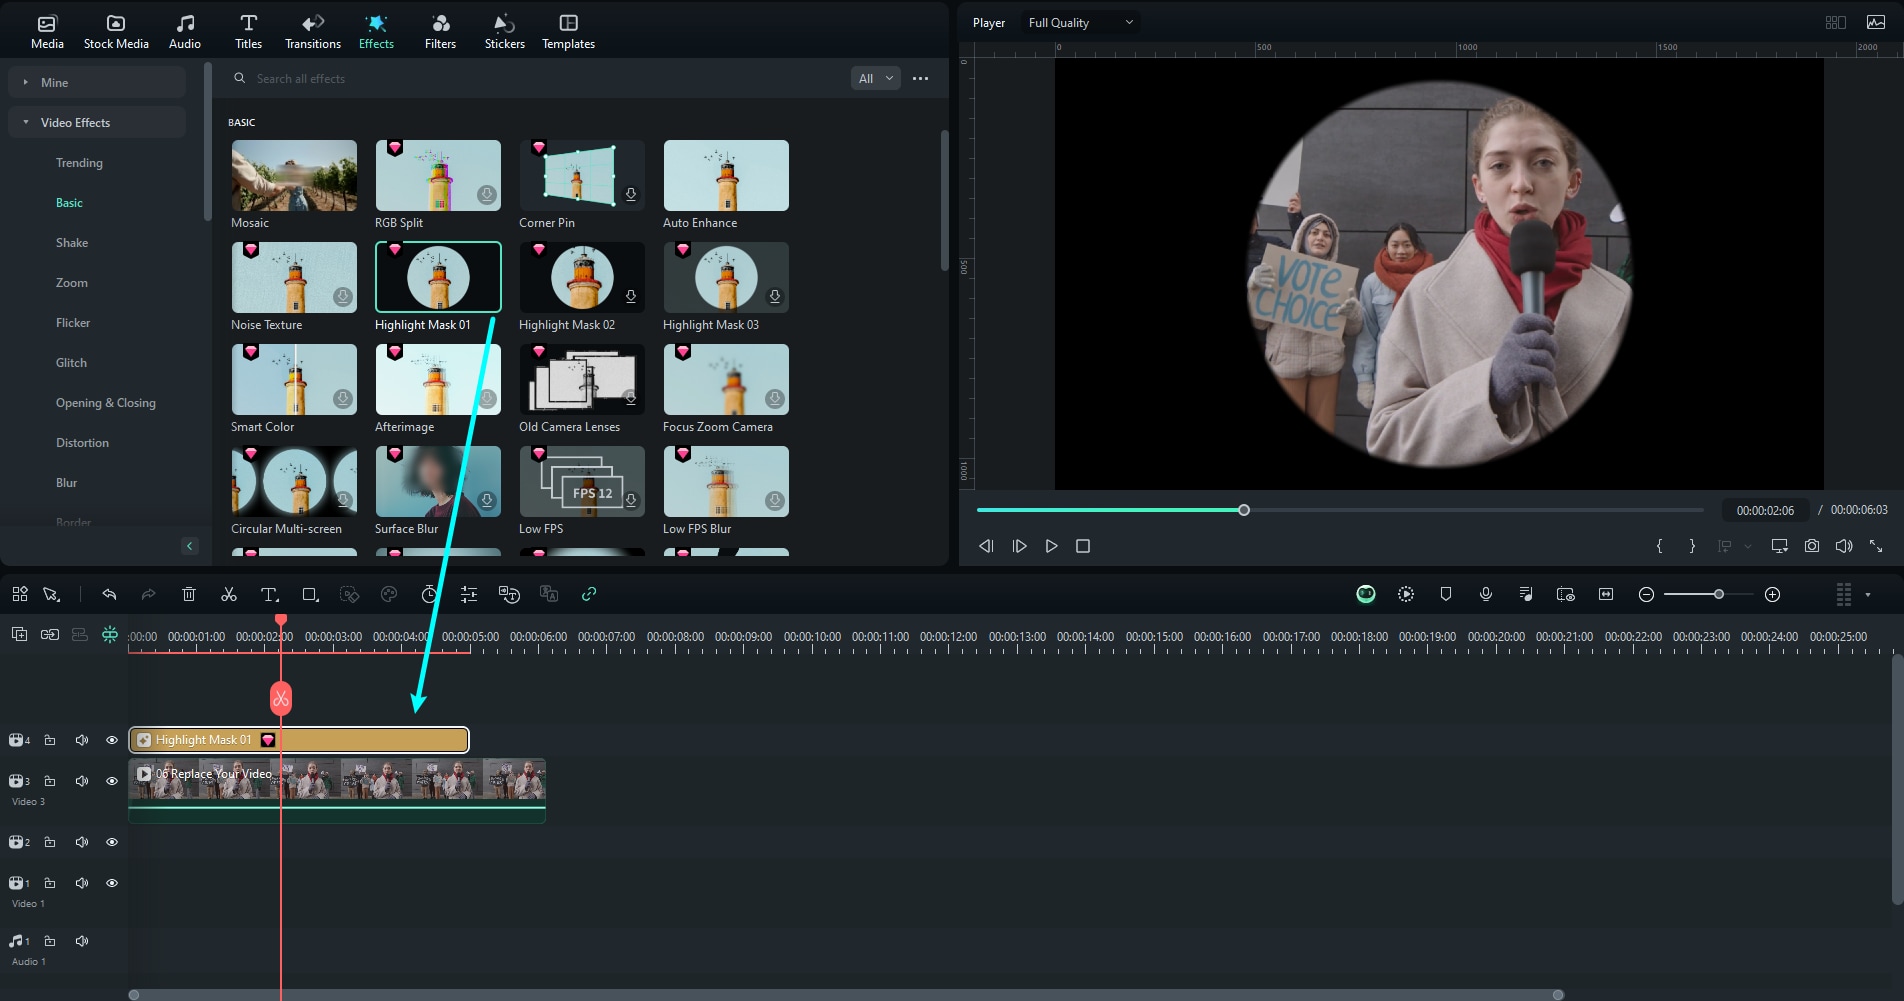
Step 2: Drag and Drop the Desired Mask Effects
Once you have selected a desired mask, use the drag-and-drop functionality to bring this mask to the timeline track above the media clip. On clicking the "Play" button on the preview window, check the results of the application.
Timer Effects
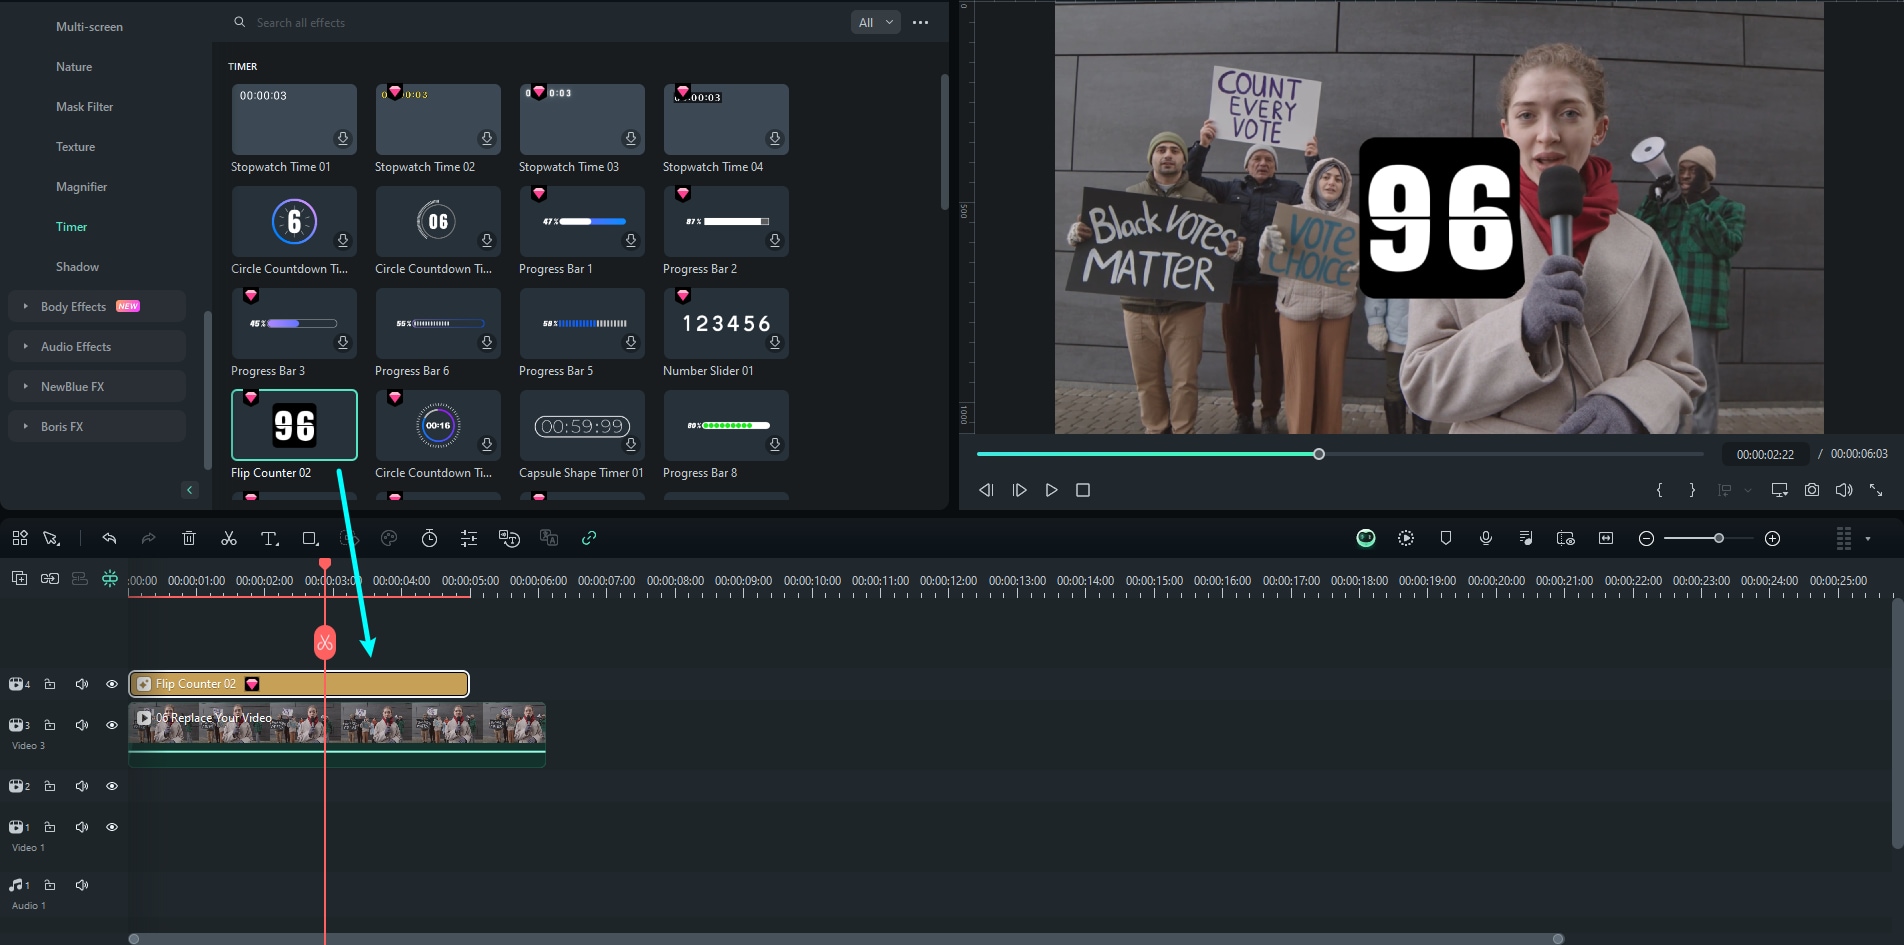
Timer effects are widely used in exercise videos, ecommerce videos and travel vlogs. Filmora now provides you with various dynamic Timer effects that will help you make the video more impressive.
Run Filmora and then go to "Effects" from the navigation bar and find the category "Timer" under Video Effects. You'll see s list of Timer effects.
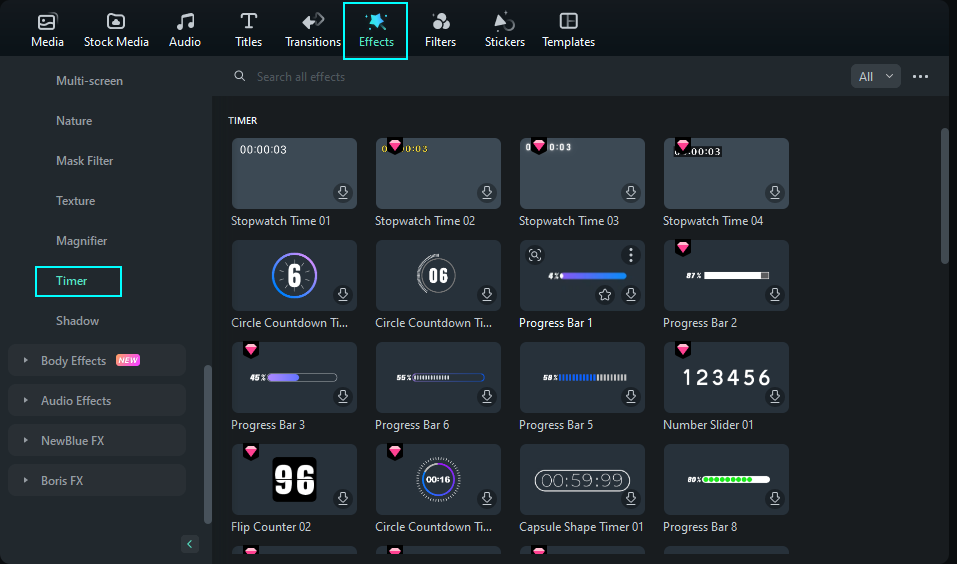
Drag your desired one and add it to your videos in a suitable position.
Overlay Effects
Step 1: Add Overlays Effects
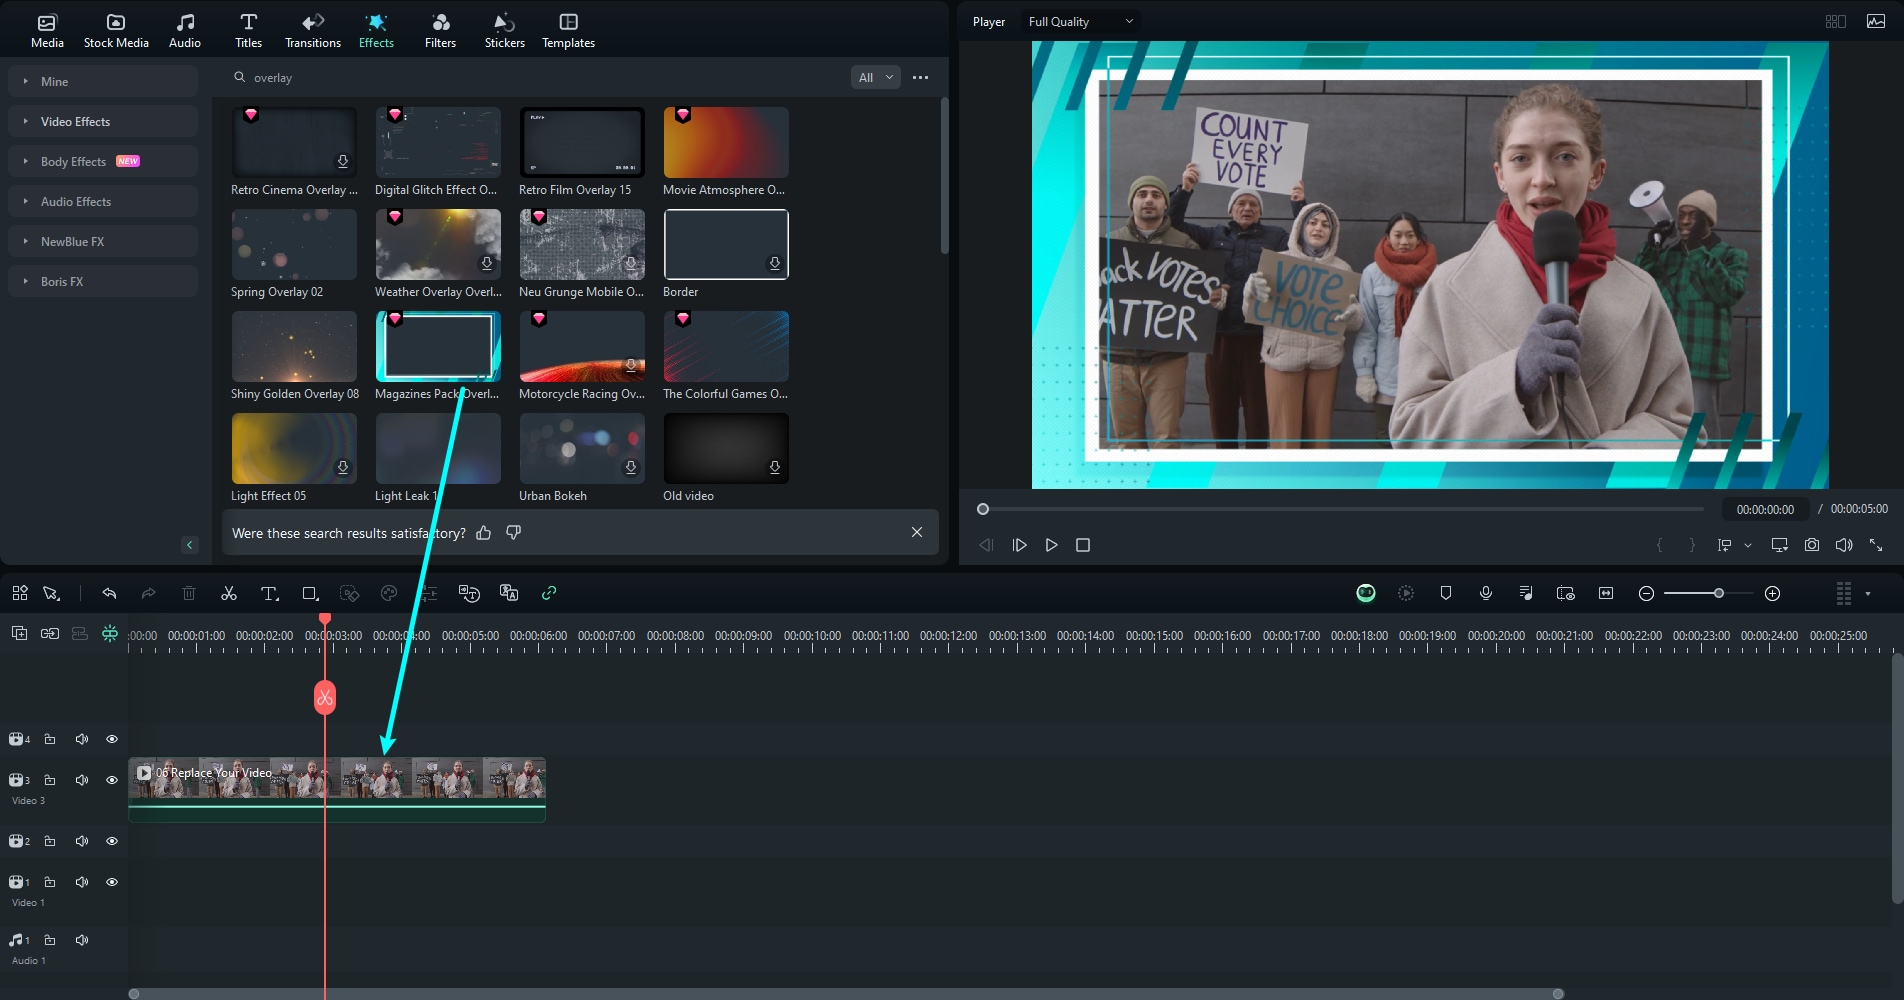
Wondershare Filmora enables you to add as many overlays as you want. There are two ways to add overlays to a video.
Method 1: Open your project, go to the Effects tab, and then select the overlay you want and drag it to the timeline. The overlay will be applied to the whole video clip this way.
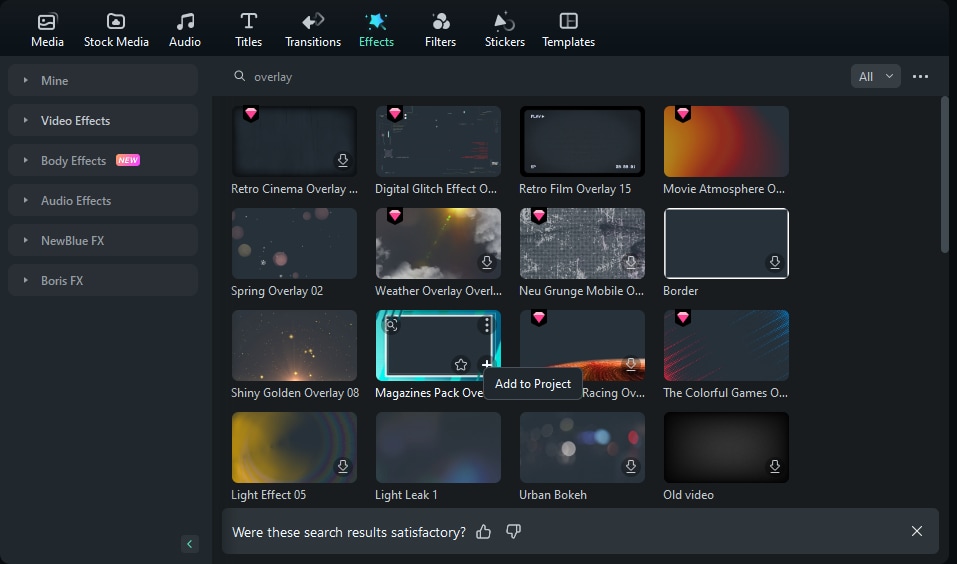
Method 2: Hover your mouse over the overlay effect you want. Click the plus icon. Then the overlay will be added to the timeline.
Note:
If you are editing a "portrait" (9:16) clip in a 16:9 video, you can add background blur filters to replace the black bars.Step 2: Customize Overlays Effects
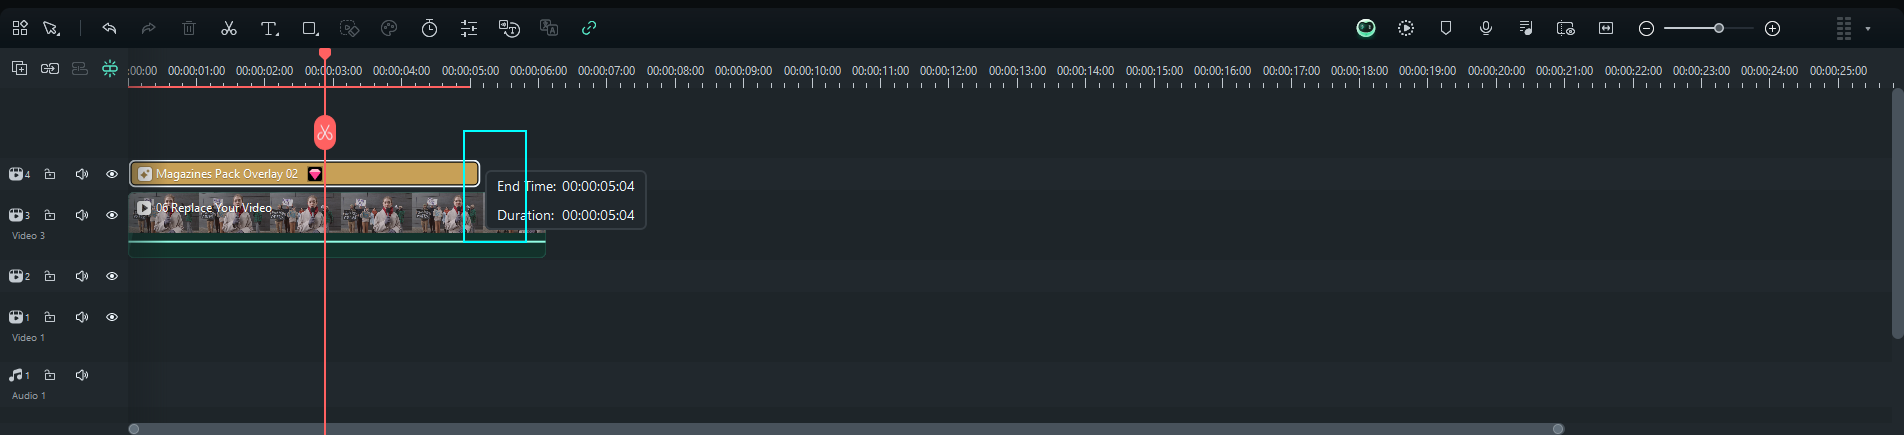
To change the duration, the default length is five seconds, but you can drag the edge of the overlay effect in your timeline to change its duration.
Step 3: Change the Opacity of Overlay Effects
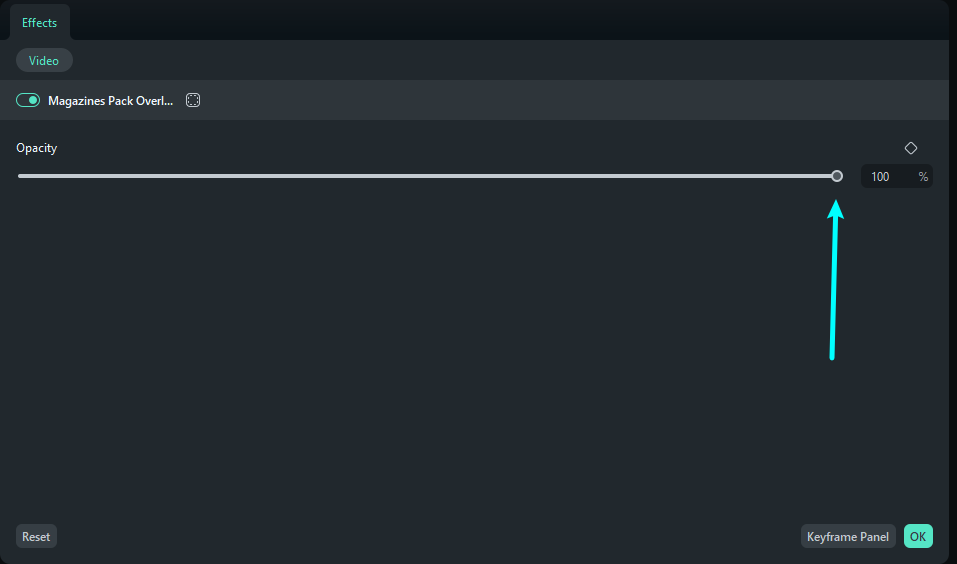
The opacity (transparency) property can have a value of 0-100. A lower value makes the overlay effect more transparent.
Double click on the filter in the timeline to customize its opacity. Then, you preview how your clip looks with the overlay effect applied to it in the Preview Window.
Step 4: Remove Overlay Effects
There are two ways to remove overlays from your project.
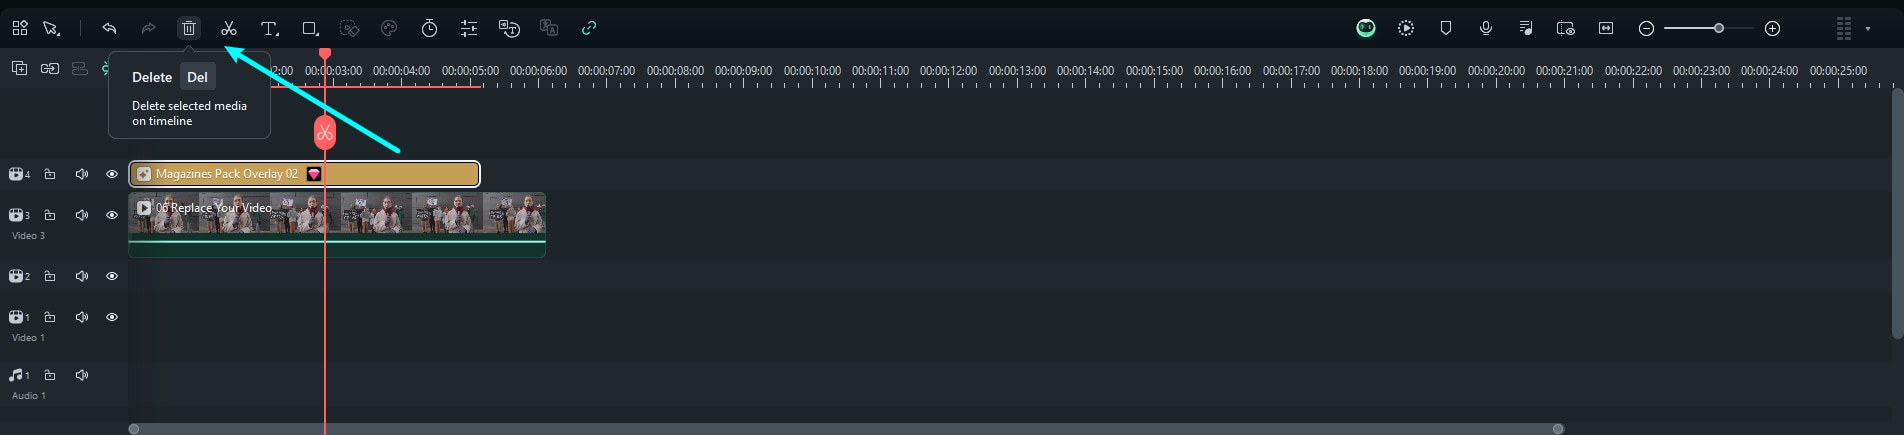
Method 1: Select the overlay in the timeline and hit Delete on toolbar.
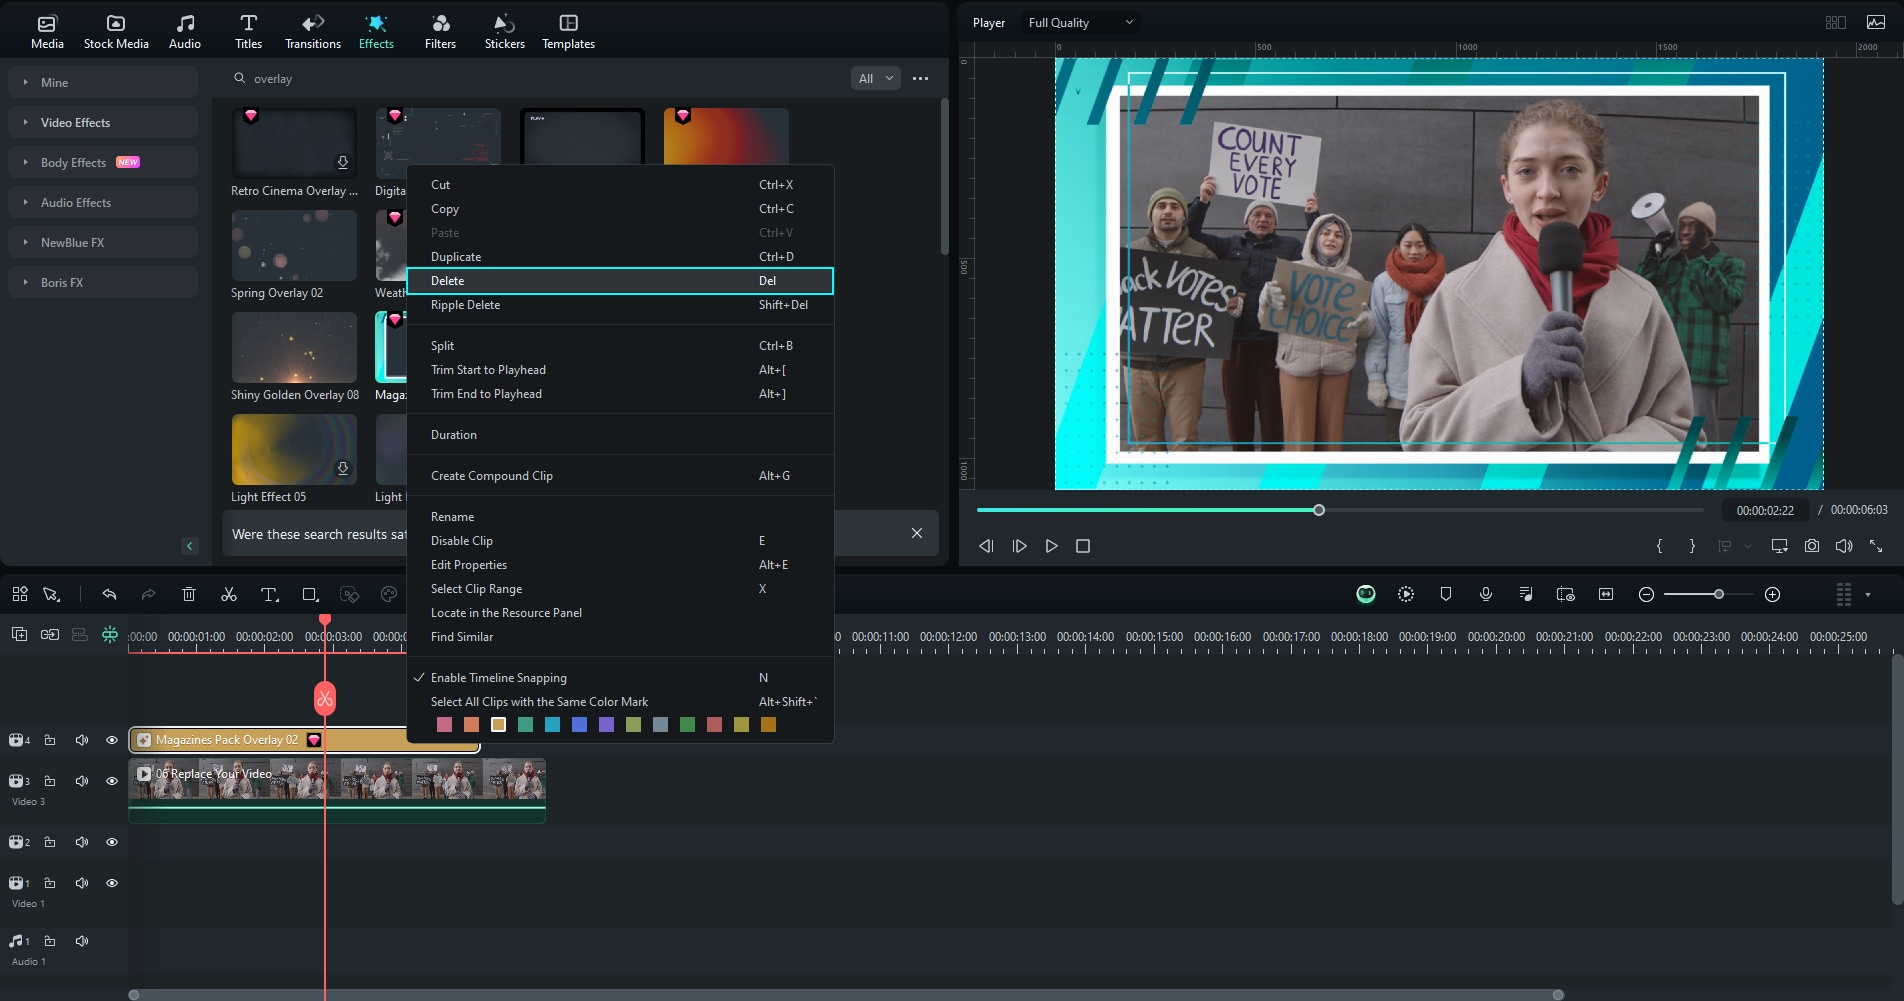
Method 2: Right click on the overlay in the timeline and select Delete from the menu.
Step 5: Favorite Overlay Effects
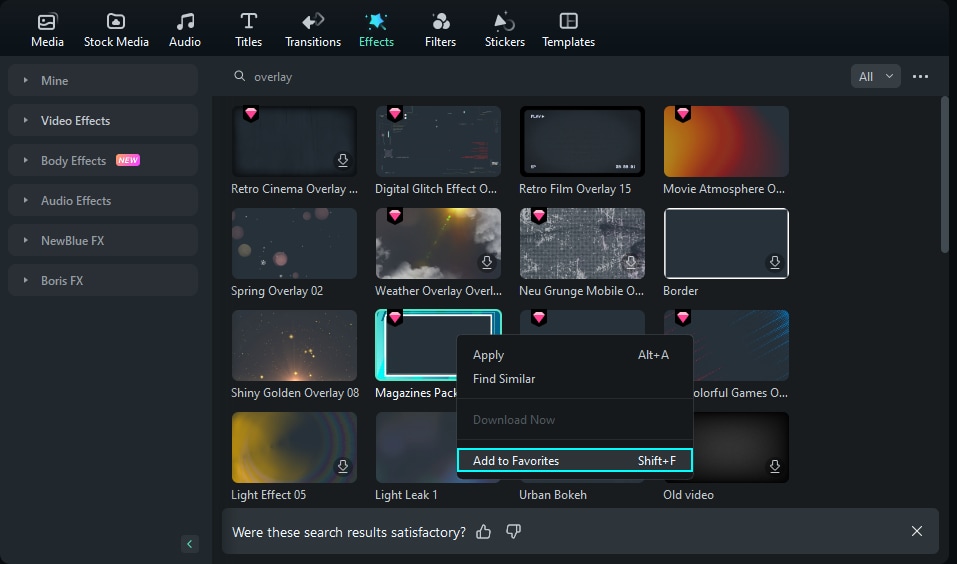
Right click on a overlay effect in the Effects menu and select Add to Favorites. Or you can click the Star icon on the Effect cover. Then, go to the Favorite category to find it again quickly.
Related Posts
Featured Articles
B2B Video Marketing: Strategies, Tools, and Examples
B2B video marketing helps businesses educate prospects, increase engagement, and drive conversions. Learn strategies, tools, and real examples to optimize your campaigns.
AI Age Filter: Change Your Age to Old Look with AI
Are you curious about how you'll look as you age? Discover the best AI age filter that transforms photos with realistic aging effects. Try it now and see your future self!
Easy Steps to Convert Twitch Clips to TikTok Videos
Do you want to attract a large Twitch audience using your TikTok account? If the answer is yes, check out this guide to maximize your efficiency and easily create TikTok shorts.
Recommended User Guide
Body Effects for Windows
Learn how to apply Body Effects in Filmora for Windows and adjust basic controls and mask settings for tracked visual effects.
NewBlue FX effects
Learn how to add and modify NewBlue FX Effects in Filmora for Windows.
Filmora OpenFX Plugins for Windows
Learn how to install and use the Filmora OpenFX Plugin on Windows to enhance videos with professional visual effects easily.
